According to KITPLANES columnist Mel Asberry, improperly deburred edges rate as the most common problem he sees on homebuilt aircraft [“Ask the DAR,” February 2015]. This caught my eye because I have a long and sorry history of bad encounters with sharp edges. The usual result is a nasty cut, followed by blood, followed further by some loud and colorful statements about the parentage (or lack thereof) of the person or company responsible. For some reason, my knuckles especially are drawn like a magnet to burrs. I got my first taste of this type of defect-gineering when I was a teenager. I was changing the clutch in a 1972 Toyota when the wrench slipped and my knuckle bashed against the sharp edge of the bell housing. That was one nasty gash. Today I can count no less than six permanent scars on my knuckles and fingers from 40-some years of wrench slips and sharp-edge mishaps. I can’t even count the dozens, or maybe hundreds of minor gashes and paper-cut-like slices that burrs and flashing have inflicted on my fingers over the years.
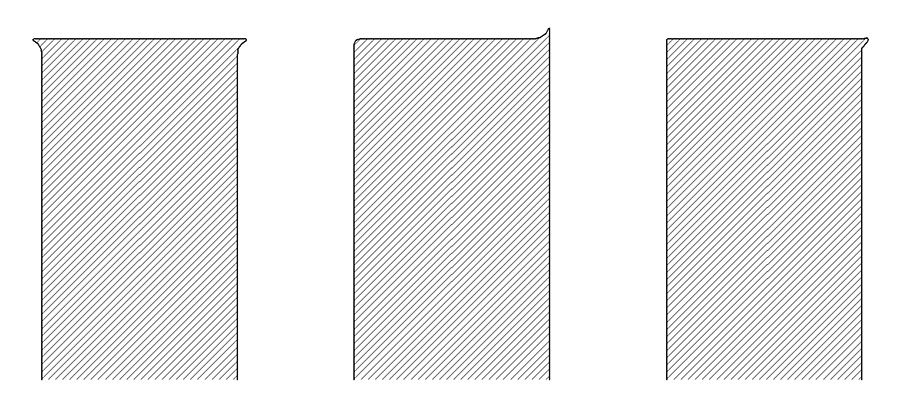
The top edges of these cross sections depict typical burrs that might occur by milling, stamping, or drilling.
Edge treatment, or deburring, is supposed to be standard operating procedure (SOP) for manufacturers. Parts must be deburred, not just for the safety of the assembler and repairman, but to assure safety in service. Aviation history is full of accidents where some untreated (or improperly treated) edge eventually sawed through a wire or chafed a hose. You’d think by now the problem would have gone away or at least be infrequent. If only!
Burrs are the jagged protrusions left over from various types of cutting operations. They are most prevalent on the exit side of a cutting operation, such as when drilling a hole. Milling often leaves a burr on edges—if not a burr, then a hard-edge corner that should be touched up the same as if a burr were present. Stamping, plasma-, laser- and water-jet cutting also leave burrs and/or hard edges that must be addressed one way or another.
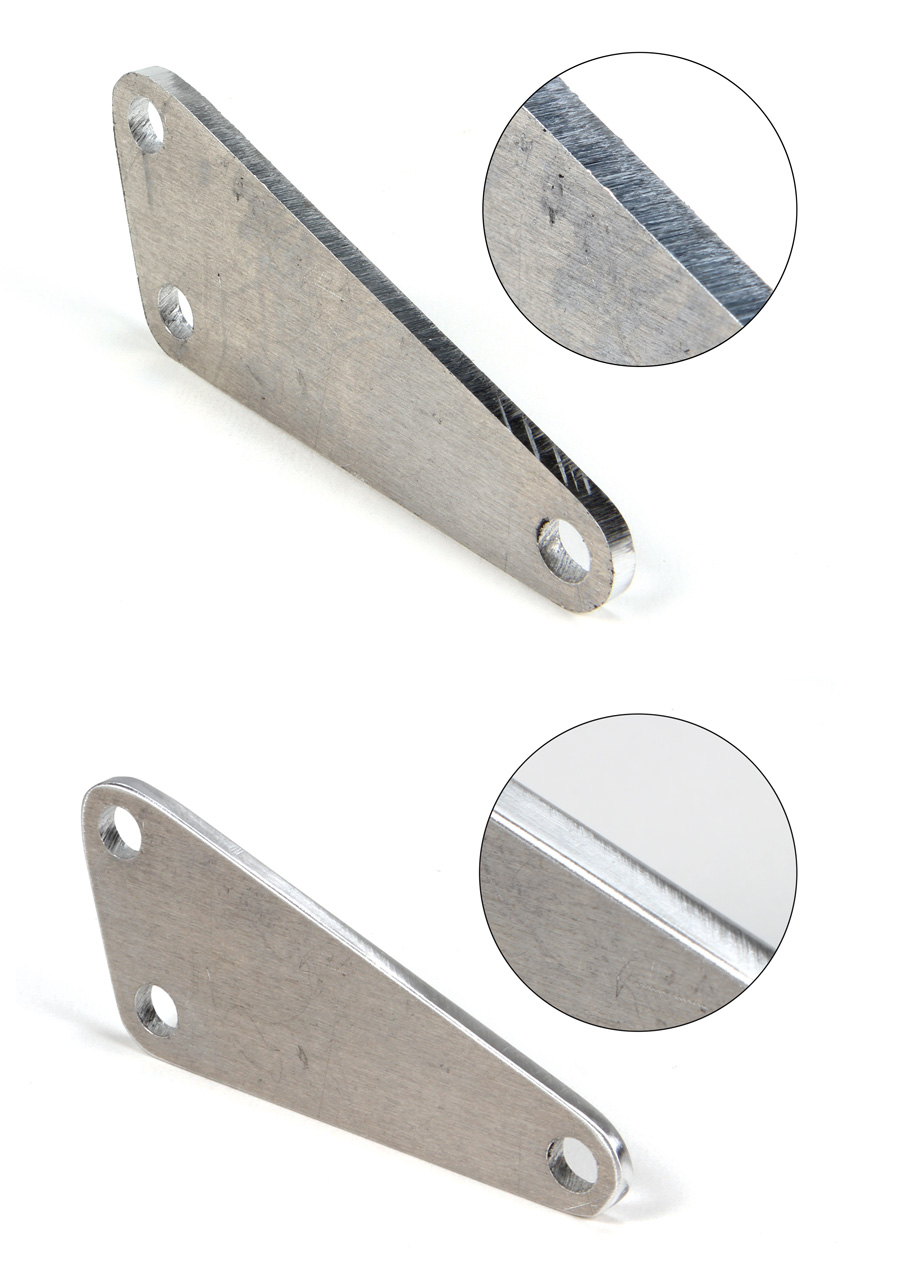
The part and inset on the left show a clean but “hard” edge on this aluminum bracket. On the bottom, the same part after being treated with a fine-grit non-woven abrasive wheel.
Deburring Tools
Burrs and hard edges can be filed, scraped, sanded, tumbled or burnished. The best method depends on the part shape, the material, and what formed the burr in the first place. A tube parted off on a lathe can be deburred quickly with a file (outside edge) and hook tool (inside edge, see photos).
Plasma and flame (oxy-acetylene torch) cutting can leave slag-like burrs on the exit side of the flame. On steel parts you can simply chip them off, but with aluminum and stainless steel, they tend to be welded more tenaciously than not. I usually attack these with whatever combination of tools is needed to get to each edge: a disk sander or mill file for square edges, and a die grinder, spindle sander, or round file for curves.
Filing and sanding can eat material pretty aggressively, so be careful not to accidently redimension your part into something useless. Carefully work the edges until the burr is gone and the edge is clean and smooth. You can deflash and deburr in one operation. But it may also be necessary to smooth out any residual grinding, sanding, or filing marks.
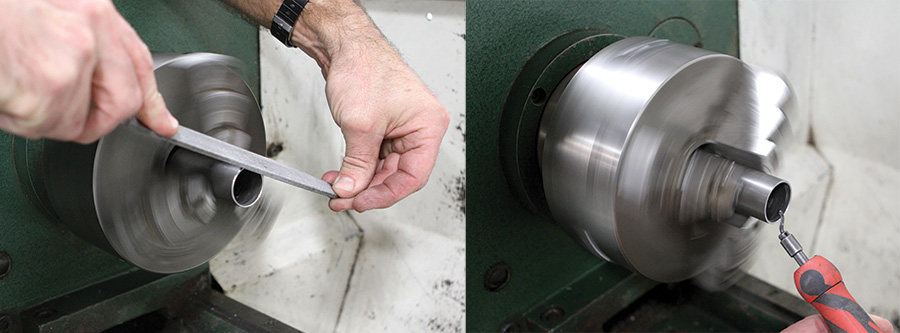
Cleaning up the edges on lathe work is fast and easy using a file for the OD (the left hand is steadied on the headstock of the lathe) and a hook-style deburring tool for the ID.
My favorite tools for final edge treatment are the hook tool and nonwoven abrasive wheels. A hook tool is a simple peeler/scraper that you drag by hand over an edge. Three common brands are Shaviv, Noga, and Vargus. They come in various styles for steel and aluminum, and you can choose from different blade shapes, handles, and extensions. Used properly, the hook tool produces a continuous and curly chip. The resulting edge is a soft chamfer. Multiple passes can enlarge the chamfer or can be used to adjust the profile.
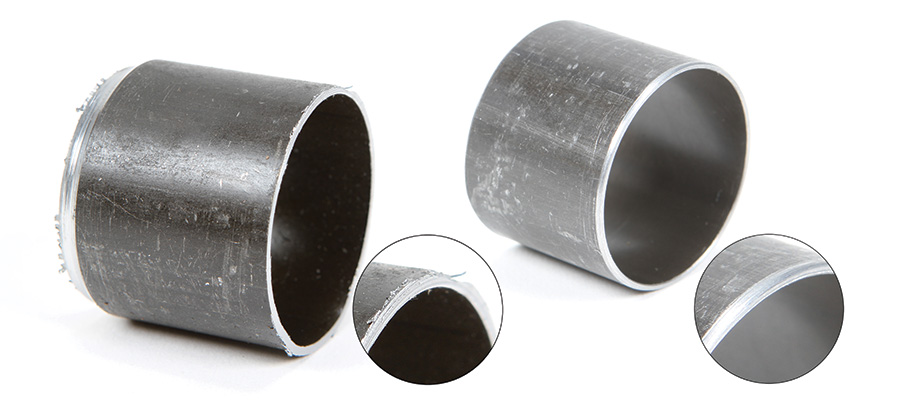
The image and inset on the left show the edge after parting off on the lathe. On the right, the edge after deburring.
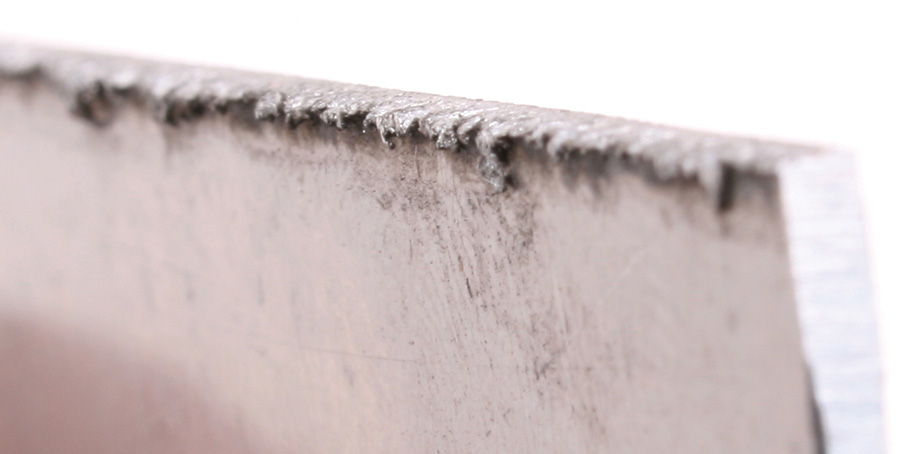
The edge shown here is the result of plasma cutting a sheet 0.065 stainless steel. This flashing can be removed with a disc sander and the edge polished with a fine-grit finishing wheel.
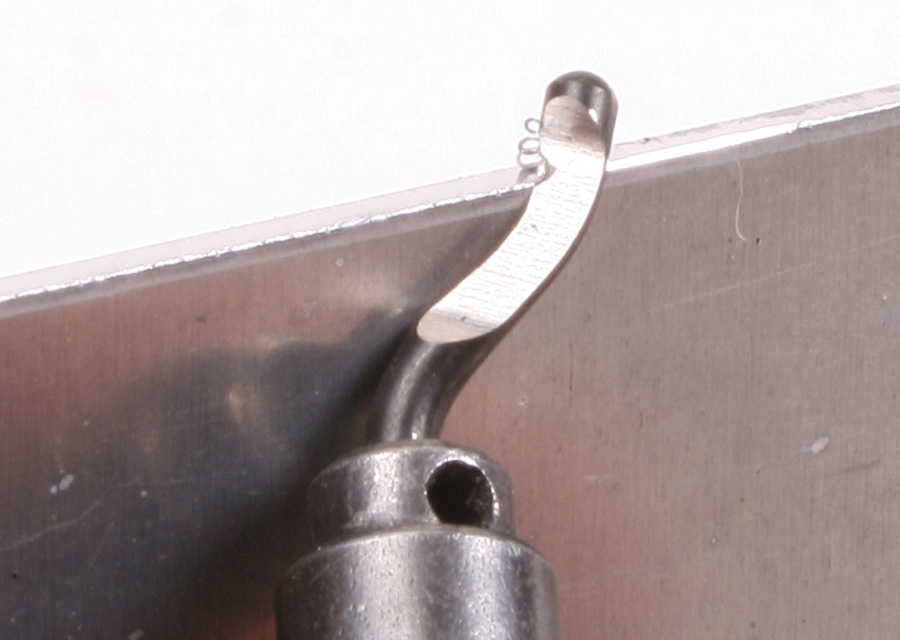
The hook tool for deburring. Note the chamfered edge behind the tool.
If you need or want to polish or soften edges to the nth degree, an investment in a couple of nonwoven abrasive deburring wheels is in order. In our shop at work, we have an inexpensive 6-inch grinder set-up with a coarse wheel on one side and a fine wheel on the other. The course wheel is fairly aggressive and can take the edge off of the hardest steels. It leaves a matte/brushed finish with visible scratch marks. The fine-grit wheel is for softer material like aluminum and can be used to remove scratches left by the coarse wheel.
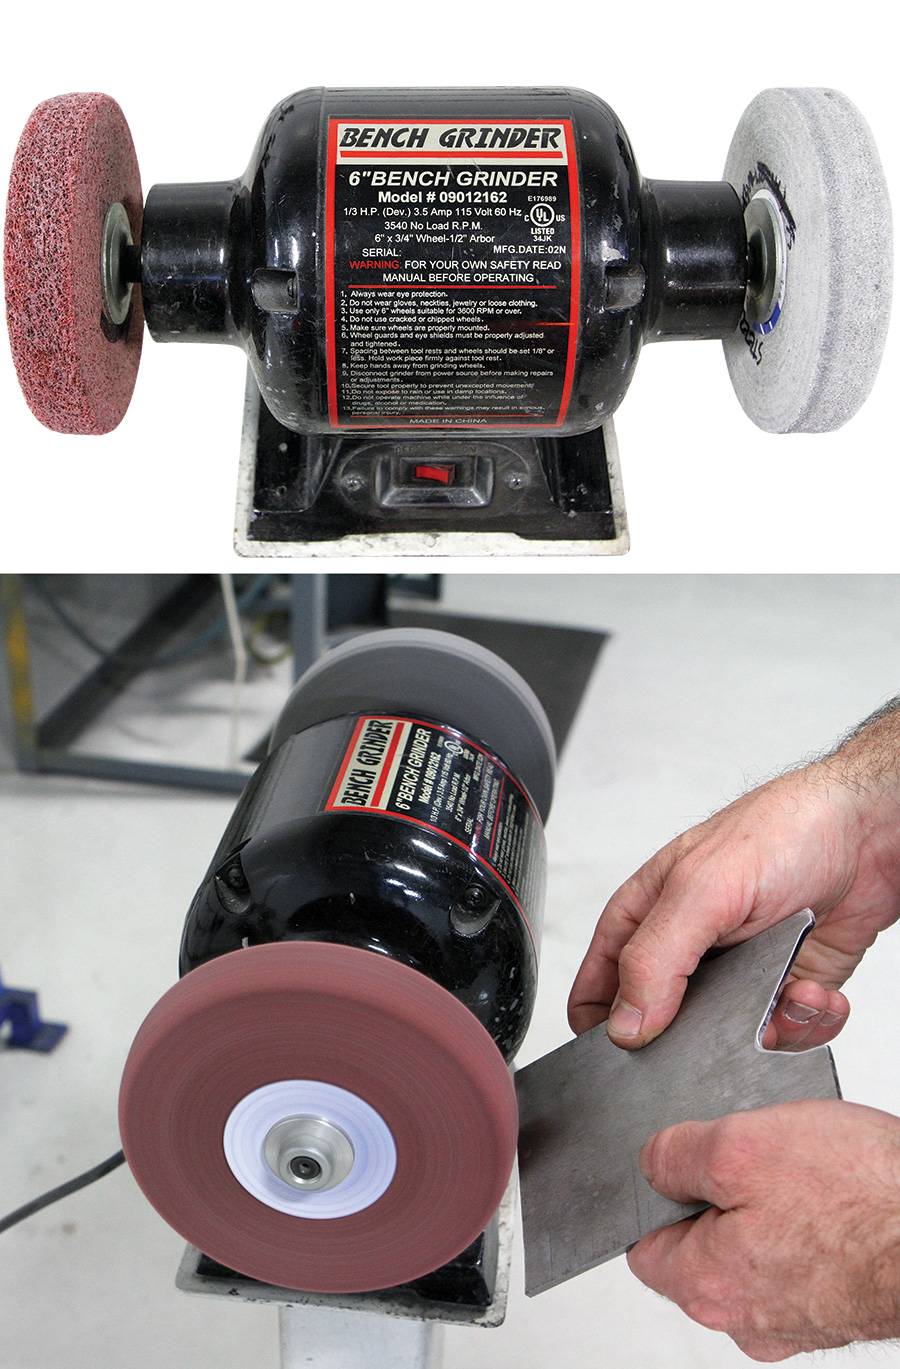
A grinder with non-woven abrasive wheels. The coarse-grit wheel is readily discernable as the one on the left. The proper technique is to always present the edge to be deburred at a trailing angle, as shown (bottom).
Although there was only a minimal burr created when milling this 4130 plate, the hard edge was still very sharp and dangerous. On the right, the result after deburring and polishing the edges with the nonwoven abrasive wheels.
Hemmed Edges
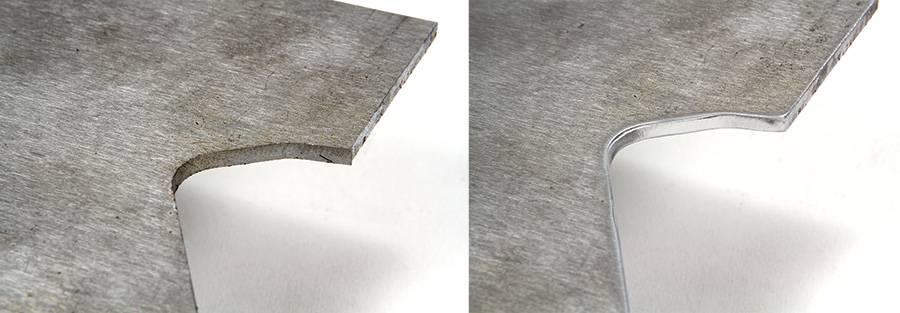
Airplanes are apt to have some very thin sheet metal parts where deburring or polishing doesn’t make the edge any safer and may, in fact, render it even sharper! Often sheet metal edges are folded over (called a hemmed edge) to eliminate direct exposure to the edge. In some cases the edge may be double-folded.
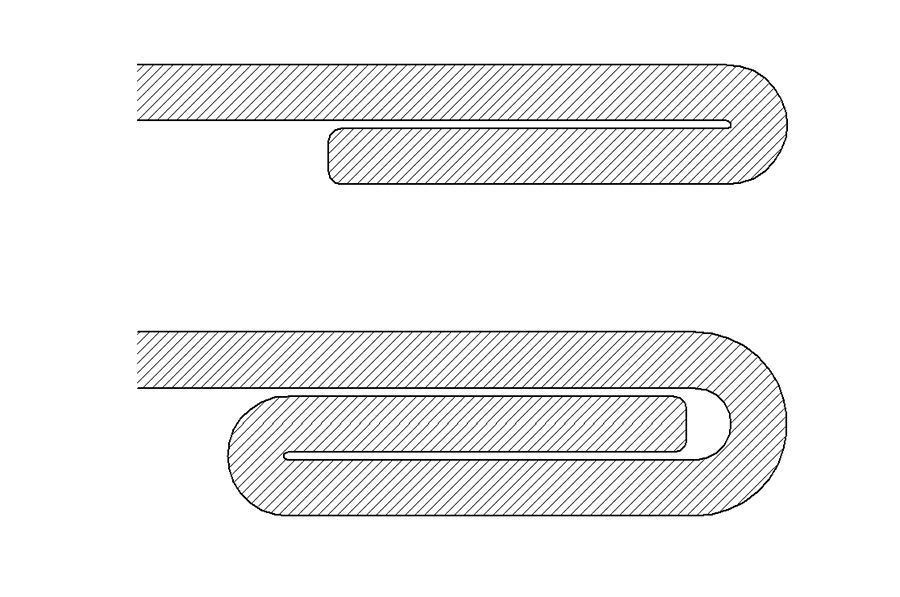
Sheet metal is often “hemmed” with a single or double fold to eliminate sharp edge exposure.
Hemming an edge on sheet metal is not all that difficult and can be accomplished using a bending brake or English wheel. If your kit or plans call for this type of edge treatment, it should include the procedures and a list of recommended equipment.
A reasonable alternative to hemming thin sheet metal is to use a plastic or rubber edge cover. These are fairly common on aircraft. On my little single-seat airplane, the wingroots are grommeted with rubber edge trim. Inside the cockpit, the sheet metal is reinforced with flanges and the exposed edges would be akin to long paper-cutter edges were it not for liberal use of plastic edge trim to cover them.
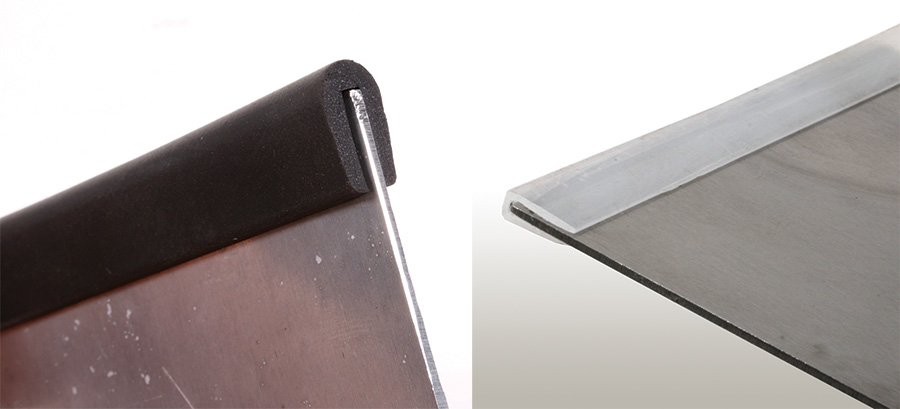
Examples of edge trim: rubber (L) and plastic (R).
Builders of wood-framed aircraft are not off the hook when it comes to deburring. Routers, table saws, and planers leave very keen edges, especially on hardwoods. A quick pass with medium-grit sandpaper (180 grit) should be enough to soften most edges. Things like ribs will have detailed instructions regarding the edge treatment, especially on fabric-covered aircraft. Following the instructions to the T is the best advice.

Edge treatment can take any number of forms, including (L to R) rounded, bull-nose, chamfered or any combination. Symmetry is optional. In all cases, the objective is to eliminate sharp corners.
Whether it’s parts you make, items supplied with the kit, or purchased after, get into the habit of checking for burrs and sharp edges and eliminating them. If nothing else, do it for the sake of DARs like Mel!


Good, detailed stuff! Thanks!