
Projects often take longer than expected, sometimes years longer. Using a Cogswell attachment to coat the inside of the cylinder with a fine mist of preservative oil will help your new engine survive long-term storage.
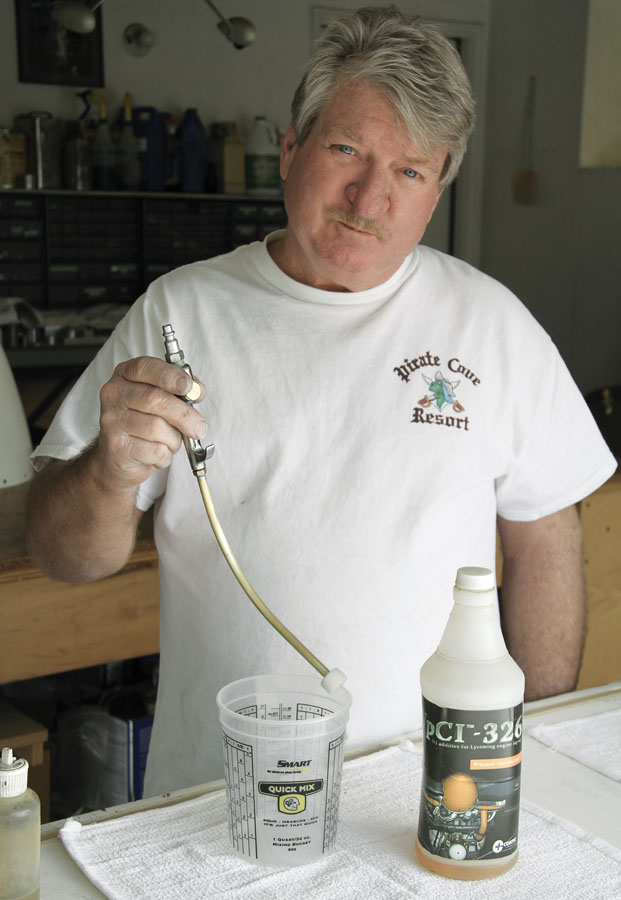
This month’s project may be the simplest ever. Cost wise, it may be the lowest ever, too. It may set you back about $10, but its value may, in fact, be immeasurable because it could save your engine.
Every powerplant maker, from certified Continental to experimental Aero-Vee, recommends treating engines that are out of service or “inactive” with a rust inhibitor or engine preservative. The exact procedure varies from one manufacturer to the next, but Lycoming’s Service Letter L180B is typical of the goals and guidelines for preserving an engine. The common objective is to make sure the engine, including the cylinders, is coated with “just enough” preservative oil to inhibit rust. The question then becomes, what’s just enough? The magic words used by Lycoming (and others) are “fog” and “mist” when describing the application.

Inventor Steve Cogswell demonstrates the simplicity of his creation: With the nozzle end capped, fill with the proper mix of engine oil to preservative. Tighten the fitting to a standard air gun, remove the cap, and you’re ready to fog.
Inventor Steve Cogswell demonstrates the simplicity of his creation: With the nozzle end capped, fill with the proper mix of engine oil to preservative. Tighten the fitting to a standard air gun, remove the cap, and you’re ready to fog.

Enter Steve Cogswell of Corona, California. Steve is a master machinist and engineer who has done pretty much A to Z in aerospace, including working for industry giants, consulting, inventing, and manufacturing on his own. If that wasn’t enough, Steve’s an experimental aviation enthusiast, having built a KR and currently finishing up an RV.

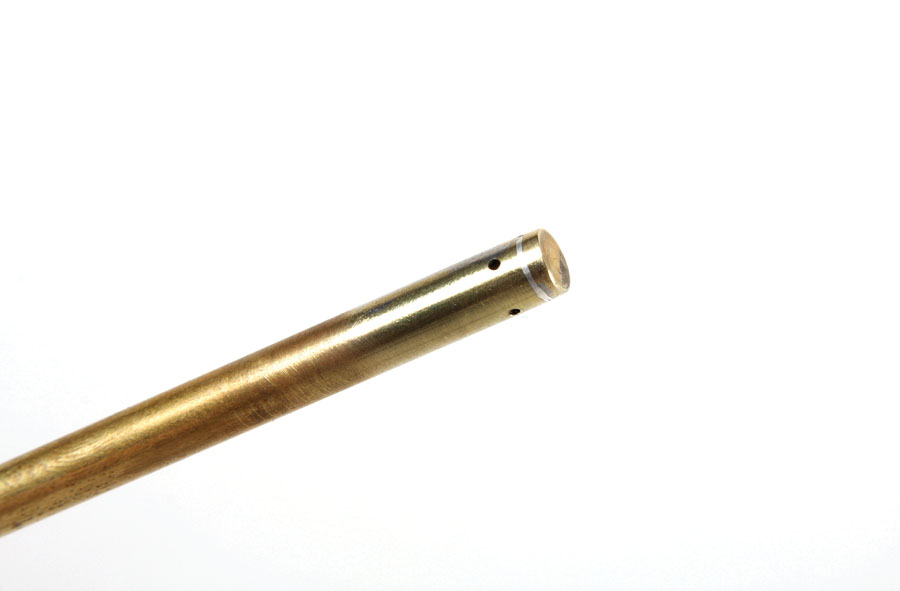
The Cogswell preservative fogger is about 8 inches long and made of 5/16-inch thin-wall brass tubing. Brass solders easily and will never rust.

The four nozzles in the dispensing tip assure an even coating of all exposed surfaces.
Like a lot of builders, Steve was concerned about what could be happening inside his Lycoming engine as it sat in the corner of the shop, waiting to be bolted to the front of his RV. The last thing he wanted was to have to rebuild a new engine because it sat around too long between buy and fly. Unlike a lot of builders, when Steve read the Lycoming service bulletin and got to the part where it suggests using an airless spray gun or Airjet blowgun (a $60 item) to fog the inside of the cylinder, he had a better idea: a shop-built fogger.
Steve gave us the OK to do a home-shop version of his fogger. It’s so simple that, as long as you have the materials and tools, making one should take no more than an hour.
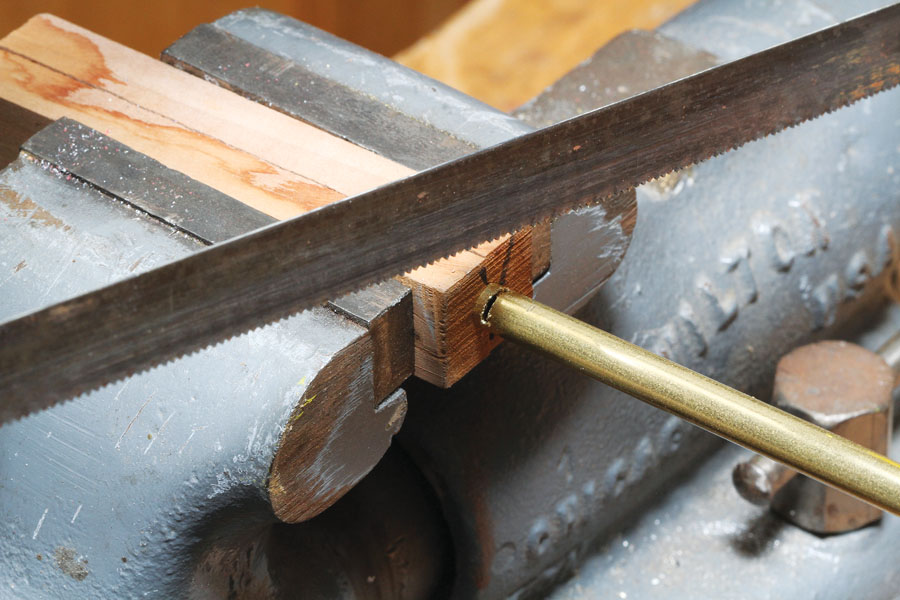
Even with a fine-tooth hacksaw, sawing 0.014-wall brass tubing requires a very light touch. Note the wood clamping block in the vise. It started as a solid block, was sawed in half lengthwise, then clamped and drilled on center.
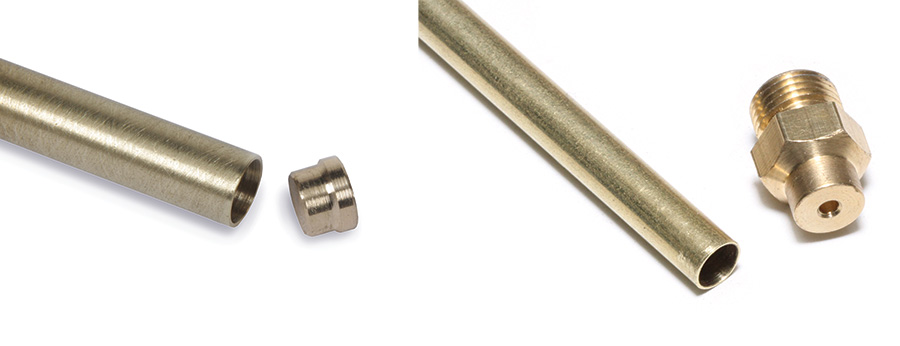
The end cap was turned from solid brass. The threaded fitting was made from a blow gun tip (right) that was drilled out for the 1/4-inch tubing. Just about any brass fitting with a 1/8-27 (NTP) pipe thread will work, including a hose barb or bushing.
Steve’s fogger is about 8 inches long, made out of 5/16-inch-diameter thin-wall (0.014) brass tubing, and holds about 1/4 ounce of oil (8cc). The diameter of the tubing isn’t all that critical, other than it needs to be big enough or long enough to hold about 1/4 ounce of oil. To fog the crankcase interior of my infrequently-run VW engines (one mounted and one on a stand), I needed a 1/4-inch-diameter fogger to fit down the dipstick pipe. To hold the prerequisite 1/4 ounce of oil, the tubing length was extended to 12 inches.

The fitting was chucked in the lathe and drilled out for the -inch brass pipe.
Depending on the application, a little curve to the fogger might be needed. The thin-wall brass tubing used for this project is bendable, but easily kinked if not handled carefully. The safest way to get a smooth bend is to fill the tube with water and freeze it (with the nozzle capped, of course). Once frozen, the ice inside the tube will prevent it from collapsing. You’ll have about one minute to make the bend before the heat from your hands starts to melt the ice.
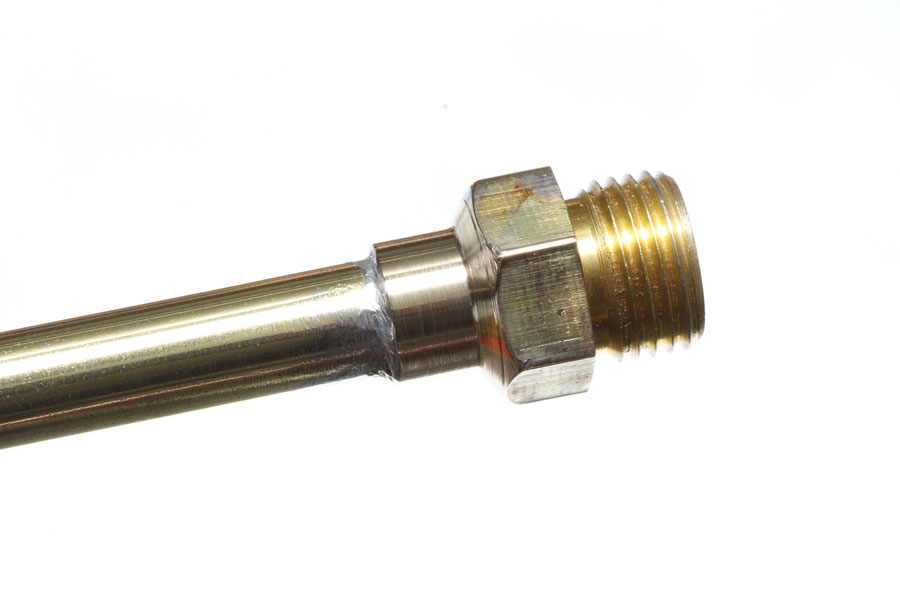
The tubing was inserted about inch into the fitting and then soldered using common electrical (lead-free) solder and a propane torch. Even with the flame set as low as possible, the parts got hot enough to solder in about 5 seconds. Use flux to assure the solder completely penetrates the joint.

After soldering the end cap, the four nozzle ports were made by through-drilling with a safety-wire drill guide (Aircraft Spruce part #12-16600). A shop-made aluminum drill bushing (sized for a #60/0.040-inch diameter twist bit) kept the alignment precise. The drill size was too small for the chucks on my hand drills, so I used a Dremel tool (see “DIY Safety Wire Drilling,” May 2014).
The business end of the preservative fogger. The solder joint was (carefully) turned smooth and polished with a fine Scotch-Brite pad on the lathe prior to drilling.

The final detail was to make some sort of cap to prevent the oil from dribbling out during filling. Steve Cogswell turned a snug-fitting nylon end cap for his fogger. A thick rubber faucet washer (drilled to fit) worked for my fogger.
That’s all from the home shop for now. Until next month, get out there and make some chips (in this case, some really small ones).
Advice from Shell
When winter comes, bringing shorter days and worse weather than is enjoyed during the summer months, many owners decide to hangar their aircraft and not fly until spring. An integral part of the process of preparing an aircraft for storage should be to use a preservation oil to give protection against corrosion, which greatly accelerates the rate of wear in an engine; when an engine stands idle for long periods, the oil absorbs water from the atmosphere and, combined with condensation on the internal engine components, causes rust to form. Once rust has formed, it remains in the oil and acts as a grinding paste, causing increased wear, reduced engine life, and potentially higher maintenance bills.
If an aircraft is flown frequently (at least once every two weeks), this water evaporates as the engine temperature rises and therefore does not cause a problem. However, if the aircraft is not flown as often as this, the owner should consider using a preservation oil.
—Excerpted from Shell.com


