Painting—what a deceptive term. Simple logic would tell you that painting is about putting paint onto something, but nothing could be further from the truth. Painting is really about getting ready to put paint on something. That’s where all the work is. The application of paint is almost an afterthought in the whole process.
As you may have sensed from my opening, I am not a painter, nor am I a lover of the process of getting ready to and finally applying paint. I like a good paint job as much as the next guy, but the demands painting make on my patience are excessive. Be that as it may, painting is an essential part of building a fabric-covered airplane like a Cub. Furthermore, a poor paint job on my new pride and joy would exact a larger toll on my psyche than bearing down and doing the work required. Luckily, my good friend and building buddy, Ed Zaleski, likes to paint, so I knew I could get through this.
Building the Booth
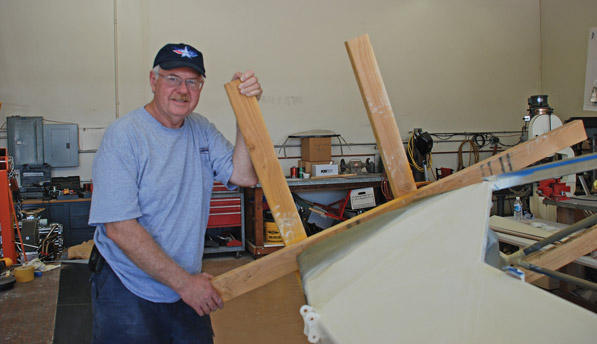
Before we could paint anything, we needed a spray booth. The best thing is to have a friend nearby who already has one. Failing that, you will need to build one yourself. We made ours a little too small at 8 x 22 feet; 10 x 24 would have been much better. You really need more maneuvering room than you might think; 2.5 feet clear around the largest object to paint is about the minimum. Framing the booth walls out of 2x2s and plastic sheeting should not be too big a chore for someone who is building an airplane. Just remember to put in a few diagonal braces to give it some stability. We put in a 6-foot-wide door in one end, and we wish we had made it wider. The wing rotator I ordered from Wag Aero hadn’t come yet, so we ended up not having quite enough room to get it in and out easily when it finally showed up.
The author places the wing on the rotator into the spray booth. Painting the wings without the rotator would have been difficult.
Ventilation becomes a big concern in a spray booth. Without good ventilation, the air quickly fills with overspray and fumes, and seeing becomes almost impossible. We put two 16×25-inch heater filters in one end and a 12-inch explosion-proof fan with another 16×25 filter in front of it in the other. This allows clean air to come in and protects the fan from getting completely encrusted with paint as it pulls air out. Safety concerns drove us to the explosion-proof fan. Unfortunately, they are really expensive ($488 from Grainger). Ouch! Once we started using the booth we wished we had used a bigger fan, but that would have cost even more.
Getting clean air to the guy with the spray gun becomes a major issue with urethane and epoxy paints. These require a fresh-air respirator and a bunny suit with a hood to be really safe. That is cumbersome, but then so is having a bunch of your brain cells permanently fried. These are not the enamel or lacquer paints you used to use on cars, which require only a charcoal-filter respirator. These paints, especially the urethanes, require fresh air to be pumped in from outside. I ordered a two-person rig with a turbine HVLP spray gun from Aircraft Technical Support. They were really nice to deal with and the equipment was first class, but honestly it was more than we needed. I expected to be in the booth, helping Zaleski as he painted, but it didn’t turn out that way. For one thing there wasn’t enough room. Also, he was not crazy about the turbine spray gun. It worked well, but he preferred his inexpensive Harbor Freight HVLP gun. Go figure!
Surface Tension
In building a Cub there are a number of different surface types to deal with: steel, aluminum, fiberglass and fabric. Each requires a different approach, even though they all end up with the same paint as the final finished surface. I’ll deal with the less used materials first and focus on fabric last, as it is the bulk of the work. There is a bit of wood involved, too, in the form of two plywood floorboards, but I’ll skip over them and just advise you to sand them smooth and apply some good epoxy varnish.
Steel comes first. The cage of the Cub is chrome-moly tubing. It comes from the factory primed with epoxy in a lovely shade of green. If it had come unpainted, a thorough sandblasting would have been done prior to priming. Green primer looks very airplane-ish, but it does not make a good base for a yellow color coat. Luckily, much of the cage does not show once the plane is covered and interior items are installed, but the part that will show needs to get a coat of white primer. We primed the cage with Air-Tech fabric primer, because they said it would work and it was white, but a good epoxy primer like PPG’s DP48 would have been a better choice. We switched to that later. We first taped off the limits of where we wanted white primer, and then we went over those areas with a Scotch-Brite. The dust was cleaned off with compressed air, followed by a wipe with Prepclean, a general purpose pre-paint cleaner/degreaser.

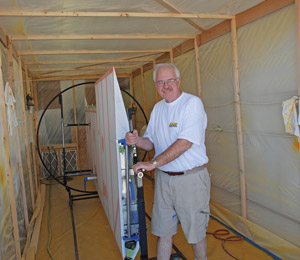
Prizio and Zaleski sand the primer coat on a wing in preparation for the color coat.
The cage presented us with a special painting problem because there are so many nooks and crannies to get paint into. There are two secrets: Be prepared to rotate the cage as you go, and paint from the inside out. This gets you the coverage you need and minimizes overspraying surfaces that have already been painted. One coat of white and two coats of yellow later we had a fuselage cage that was ready for parts to go on it.
Aluminum paints in a manner similar to steel, but special surface preparation makes additional demands on the painter. You can’t just shoot paint onto aluminum and expect it to turn out well. Aluminum parts need to be cleaned with Scotch-Brite and Alumiprep. This etches the surface and gets it really clean. Next comes Alodine, which prepares the surface for paint and helps inhibit corrosion. Ideally, you take the part out of the Alumiprep, rinse it off, and put it right into the Alodine bath. Even waiting an hour or two allows corrosion to begin. After a few minutes in the Alodine, take the part out and hang it up to dry. Both of these chemicals should only be used with rubber gloves and safety glasses. They are readily available from Aircraft Spruce or other aircraft-supply retailers.
Final Prep
Once the aluminum parts have been properly prepared, all that’s left is a final cleaning. Prepclean or another similar pre-painting cleaner/degreaser should be used right before painting along with a tack cloth to remove that last little bit of dust or lint. Then the primer goes on per the manufacturer’s recommendations. We used DP48 for this, but a number of epoxy or zinc chromate primers may be used. Again, with a “thin” color such as yellow, you are better off using a white primer than the traditional green. Sand and spot or repaint the primer as required. A good final paint job depends on a good primer base.
Once all the preliminaries are dispensed with, we get to the final color coats. A quick hit with the Scotch-Brite pad and Prepclean, and the color can go on. There must be some surface roughness for the urethane color to bond to the epoxy primer, because there is no chemical linking between these dissimilar paints. For the Cub we used Air-Tech’s urethane in Legend Cub Yellow. Once it dries it is really shiny and really tough. It ought to be for more than $400 per gallon.
Fiberglass Considerations
Painting fiberglass is pretty much the same as the other parts, but the preparation is different. Fiberglass needs to be blocked out, filled and sanded. For some reason, fiberglass parts are always screwed up, and these were no exception. I could write an entire article on fiberglass work, but I won’t. However, I will share a few tips with you.
Sanding or blocking out makes all the difference in how the painted fiberglass part will look. Of course this comes after dealing with any larger issues such as the part not fitting quite right. We used 80-grit sticky-back sandpaper on a sanding block for most of the work. For best results, you should sand at a 45 angle to ridges, and then come back and sand the same area at a 45 angle the other way (in other words at 90 to the first pass). Be careful not to sand into the fiberglass cloth. If sanding alone won’t get the surface smooth, you will need to fill the low spots and sand it again. We like West System 410 Microlite filler for this, mixed with West System epoxy resin. It is easy to use and comes out nice. Avoid automotive fillers such as Bondo, because they are much heavier and shrink more. Final touch-up can be done with automotive glazing putty, but keep it to a minimum.
Once the fiberglass is in good rough shape you will want to finish-sand it with 300 to 400 grit paper to make it really smooth. With fiberglass it is vitally important that all of the mold release from the manufacturing process is removed. This means every inch of the surface must be well sanded. For primer we used DP48 again, but we did not have good results. In retrospect we should have used the Air-Tech fabric primer, which we later confirmed with Air-Tech’s technical support people. The fabric filler bonds with the urethane color better, and fills the tiny holes and imperfections in the fiberglass. The final color coats go on after that, just as with the steel and aluminum. Be sure to have the surface nice and clean before applying the paint. By the way, breathing fiberglass dust is not good for you, so you should wear a particle mask at all times when sanding or cutting fiberglass.
Demands of the Job
Painting fabric makes special demands on the builder, not onerous ones, but different from those of other materials. With the Air-Tech system we could dispense with the sealer coat (PolyBrush) that PolyFiber recommends, but on the parts we did with PolyFiber products we went ahead and applied PolyBrush. Air-Tech says its primer will go over raw fabric or PolyBrush equally well. The PolyBrush does save on primer by sealing the fabric, but it is an extra step. Primer weight is a big concern on a really light plane like the Cub, so there is an argument for using the PolyBrush even with the Air-Tech primer. On the other hand, the PolyBrush has weight of its own, so they probably offset each other.
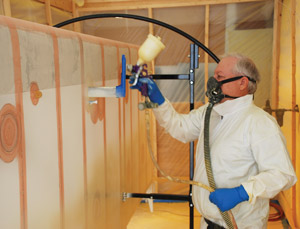
Zaleski sprays the wing with primer, beginning with the pitot mast. The bunny suit hood was discarded when it became too hard to see with it on.
Before priming, the fabric needs to be cleaned. Both PolyFiber and Air-Tech make cleaners for this process. Primer has a lot of body, so it needs a pretty good sized nozzle in the spray gun to make it work. It may also need to be thinned out to get it to go on smoothly. You will be sanding it anyway, but believe me, you will be happier in the long run if you go to the trouble to apply it smoothly from the beginning. Make some test shots on cardboard to adjust your gun and get the amount of reducer right. We used a heavy cross-coat for each coat (apply paint in a lengthwise pattern, then again at 90 to the first while the first one is still wet). Don’t worry too much about runs. Just make sure you cover everything well.
The first coat needs to be sanded smooth before the second one goes on. The larger open areas can be handled with a 5- or 6-inch orbital sander using 220-grit paper. That’s the easy part. The real work is in sanding all the little corners and around rivets and rib stitching. This must be done with patience and care so as to not break through the fabric over these protrusions. Sanding the first coat can be done somewhat casually, as it will get painted again, but not too casually. The more rough stuff you leave behind, the more work you will have to do later.
The second coat goes on just like the first—a good cross-coat over everything. Then sand it smooth. The decision now comes about the third coat of primer. If we were working on a certified airplane, we would have no choice but to follow the STC and apply the third coat, but we aren’t, so we got to decide for ourselves. With weight an overriding consideration, I must admit a bias for skipping the third coat. That extra layer of paint on both wings is worth something like 5 or 6 pounds. That was all it took to push us over the edge. The third coat of paint would be color, not primer. This is not an endorsement of disregarding the manufacturer’s recommendation, but the benefit of Experimental/Amateur-Built aviation is the ability to make your own decisions based on your own ideas and circumstances. This plane should be hangared for as long as I own it, so saving some weight at the expense of extra UV protection seemed right to me.
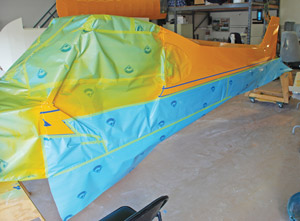
The finished fuselage, complete with the Cub lightning bolt.
Color Commentary
When it came to the color coats, I chose the Air-Tech high-gloss urethane. It is not exactly authentic, but it looks sharp. Knowing that the urethane is particularly unforgiving, I decided to enlist the help of Ron Lusher, the finishing supervisor at American Legend/Texas Sport. He came out to California for a long Memorial Day weekend and worked with us to get two or three coats of color on everything. It was worth the expense. He taught us a lot about painting, and he really made the Cub look great.
Lusher looked at our primer work and said, “Not enough reducer. See how rough the texture is?” Sure enough, it was a bit rough and ended up costing more than a few hours of extra sanding. Next he said, “That masking paper will bleed through when we paint the black lightning bolt. Better switch to the slick, coated paper.” The guy at the paint store agreed, so the green stuff we got at Home Depot went in the trash can. “By the way,” Lusher added, “better get an inline water trap to supplement the one you have, just to be sure.” So we did. Little things can make a big difference.
We did do some things right. The spray booth could have been better, but having one with some reasonable, if not great, ventilation was a good move, as was the fresh-air respirator. Having a large enough compressor so that we never wanted for air was also a good move. This is not a good place to try and save money. Using the Air-Tech primer, which is white, rather than the PolyFiber silver, paid off, too. It saved us the extra white coat that we would have needed with the PolyFiber. It was also easy to work with. Doing the priming ourselves and getting professional help with the color also proved beneficial. We could have done the color without him, but I am convinced that it wouldn’t have turned out as well. Lastly, getting the wing rotator from Wag Aero, even at $400, was a good move. It made handling and painting the wings much simpler. We added wheels to ours to make it easier to move around, which was also a great idea. Now we just have to decide if we should sell it or keep it for a future project. (Do not tell my wife I said that!)
What could we have done better? The spray booth should have been bigger, about 10 x 24 feet, with an 8-foot door and a bigger fan. That would have made working conditions in the booth much better. We should have bought a one-person fresh air respirator and skipped the turbine spray gun, which would have saved several hundred dollars. Other than that, I feel pretty good about the process and the results. The FAA created the Experimental/Amateur-Built category to provide education and recreation to homebuilders. Half of the point of homebuilding is education, and we got a lot of it. But I must admit to being eager to get to the recreation part. It shouldn’t be long now. All we have to do is finish putting it together. What’s that they say? “90% done; 90% to go.”
For more information, call 866/746-6159 or visit www.txsport.aero.


