Fabric has covered scores of light aircraft—and important pieces of heavy ones—since the very beginning for one simple reason: It’s a good, durable, light and workable system. OK, granted, that’s four reasons. But the more direct truth is that fabric-covered aircraft remain in production despite the decades-old prediction that metals or composites or extruded hoo-ha would eventually replace the material.
It’s not as though fabric technology has stood still. An example is the Stewart Systems process, underpinned by an interesting idea: All of its cements, fillers, primers and coatings are non-hazardous and non-flammable. What’s more, the final coating system, the paint itself, does not have a high degree of volatile organic compounds (VOC), which means it can be applied with basic personal protection. It’s helpful to understand that the Stewart Systems product is not water based. Instead, the process is “water borne,” meaning that it uses water as a viscosity improver; the company proudly proclaims it has the only system whose thinner you can drink.
Stewart Systems started as Aircraft Finishing Systems more than 20 years ago, and was purchased by the Stewart brothers, Dan and Doug, five years ago. The brothers have continued to refine the product and, through their own experience doing fabric work, have created several sub products in the line for specific needs. For example, its primers are available in four colors to best match what would be used for a period-correct restoration—or if you want your new Cub-alike homebuilt to be a good match for a popular liaison aircraft, as one example.
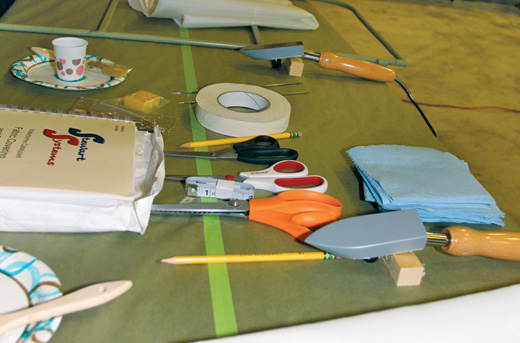
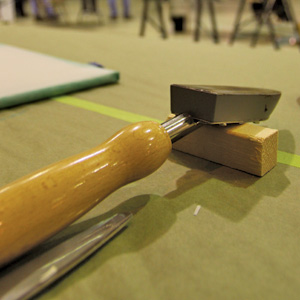
Here are the tools for the next three days: Small iron, various scissors, a manual and a practice piece.
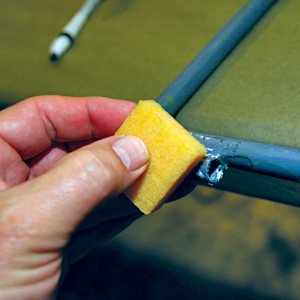
EkoBond can be removed without chemicals. This eraser will work the material into little balls, which can then be picked off.
Back to School
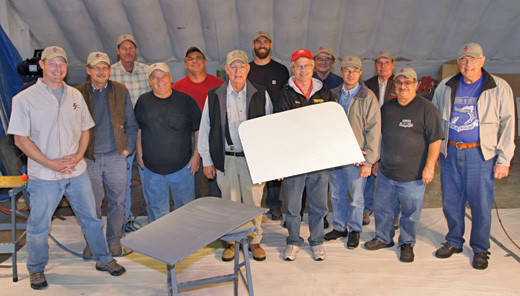
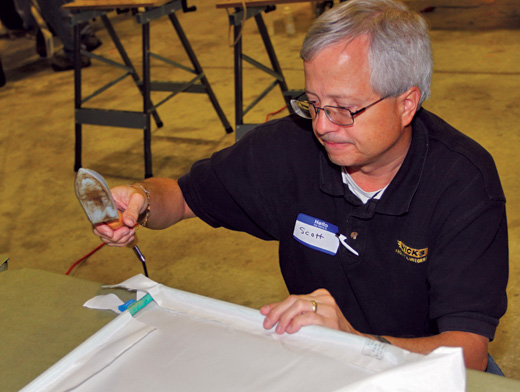
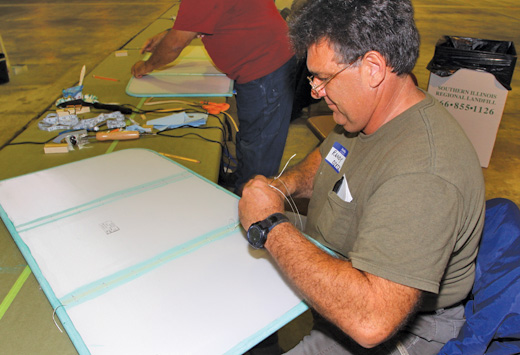
Those experienced in fabric processes can debate all they want on the pros and cons of a waterborne system, but those of us newbies will do better to attend one of Stewart Systems’ workshops. I attended the Midwest version of the program, held at SRT Aviation in Mount Vernon, Illinois, and sponsored by Wicks Aircraft. What’s more, Scott Wick himself was there trying his hand at fabric; nothing like having firsthand experience with a product that’s in your own catalog. It was interesting to have Wick working next to me, meticulously administering to his practice set as though it was going into space, while I and most of the other 10 students were happy just to understand the process and come away without too much EkoBond in our eyebrows. His finished product looked good enough to go right onto an airplane. Wicks Aircraft was further represented by a table full of useful product available at the course, and several of the attendees went home with shiny new pinking shears and miniature irons.
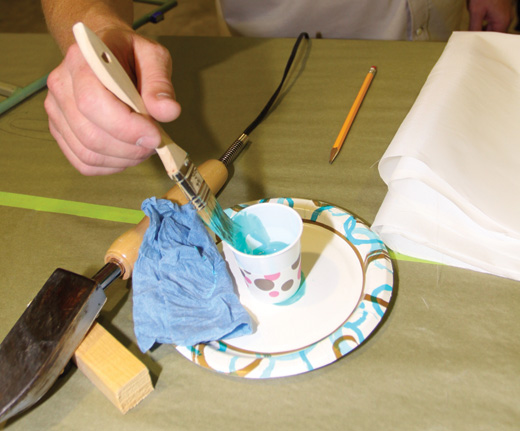
EkoBond is easy to work with and doesn’t smell. This cement underpins just about every part of the fabric system from Stewart Systems. A wetted towel placed over the cup extends pot life.
Whatcha Makin’?
As with most fabric classes, the Stewart course is centered on a practice piece, a steel-tube framework roughly 2×3 feet, with a pair of square-section reinforcements crossing the short span (to simulate wingribs and other structures), two 4-inch-radius corners (diabolically tight) and two mock hinge points for practice. In a general sense, these practice pieces are elevator analogs, but by the end of the course, you can’t see anything but your own mistakes.
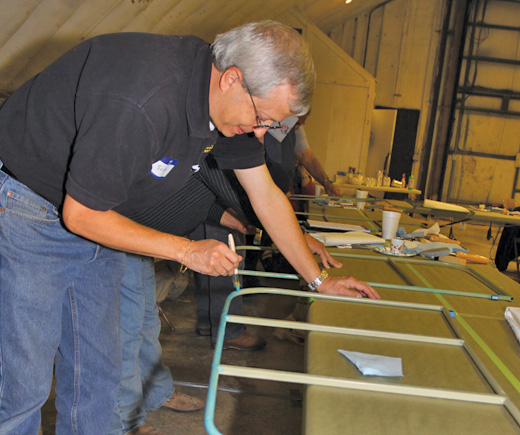
Scott Wick—yes, that Scott Wick, of Wicks Aircraft—prepares his workpiece frame with the EkoBond.
Stewart Systems runs the school over the course of three days, though you’ll only use two and a half of them. It has excellent pacing throughout—starting easy, but ramping up to just shy of the drinking-from-a-firehose stage by the end of the first day. Day two is a heady sustained push before lunch, with the pace easing near the completion of primer on your work piece. The pace superbly represents the typical builder’s tolerance. Or at least mine.
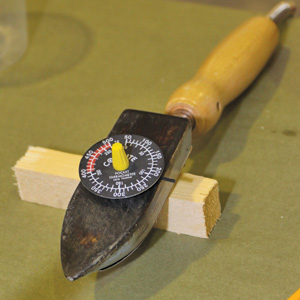
Calibrating the iron, large or small, is critical to success in fabric work. Fabric reacts differently to various levels of heat.
The course takes you through every major step in the application of fabric and includes several asides designed to give you some perspective on the process of reclaiming structure from old fabric. At any time, students were able to ask questions of instructor Jason Gerard (whose resemblance to NASCAR’s Dale Earnhardt, Jr., was distracting for the first half hour or so) and Dan Stewart.
Fabric 101
This is not the place to rehash the complete fabric process, but, for me, it was an interesting journey with plenty of “Oh, that’s how they do it” moments interspersed with “Well, that was easy.” Our course started by prepping the steel frame of our practice pieces. These had been through many classes before and weren’t exactly pristine. Had you been starting from scratch, you’d be expected to prep the metal and aluminum with the appropriate product. We started by cleaning the frames with EkoClean. The company also offers EkoEtch for aluminum surfaces, EkoCoat clear wood sealer, and EkoPrime primer/sealer. (For breakfast we had EkoRolls and lunch was a hearty EkoBuffet. Kidding.)
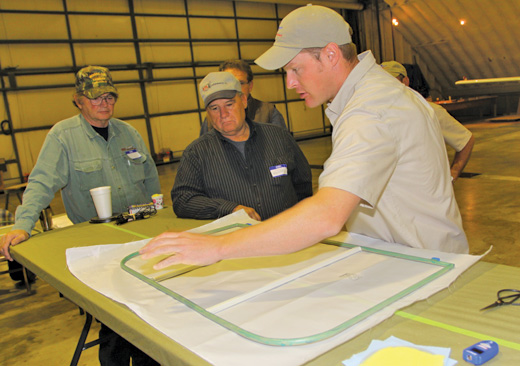
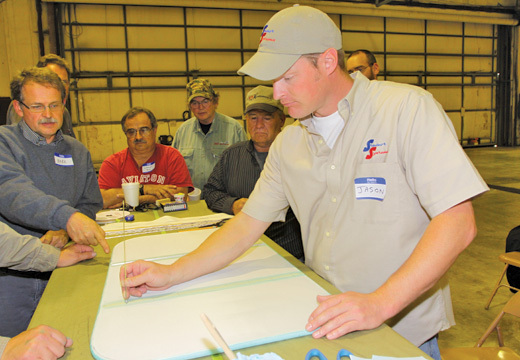
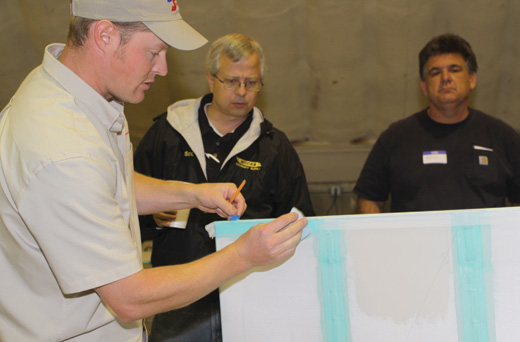
Instructor Jason Gerard shows the class how to estimate the amount of fabric to use on a particular component.
I’ve worked with plenty of nasty chemicals before, so it was a pleasant surprise to see that the EkoClean was both effective and inoffensive. We wiped the piece down with the stuff and took a ScotchBrite pad to any high spots or glue residue.
Heat cures many ills. It helps form the fabric, but also activates the EkoBond so that the main fabric can be shrunk later without pulling free.
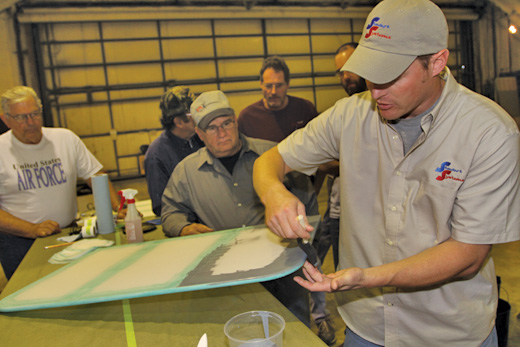
For each new topic, Jason Gerard and Dan Stewart would gather the class around a raised table and show us the next phase of the process. This technique worked well, with the students getting to see the process up close and without the concern of working on their own pieces. Gerard, despite having a lot of experience working with fabric on a variety of aircraft, admirably kept to the script and diverted only when it was clear a student wasn’t “getting it” or when a bit of extra information would make a later part of the process more clear.
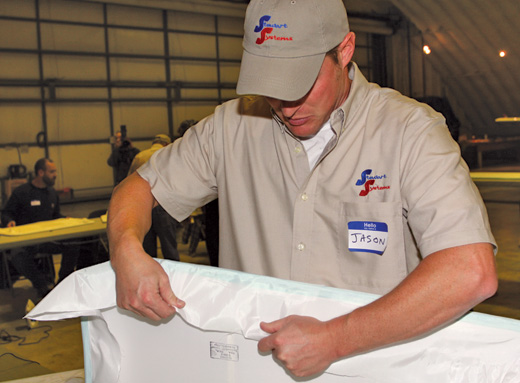
After we saw the step take place, we would return to our seats and try it ourselves. I’d always thought that fabric gained its strength from being bonded to the supporting frame, a leftover from my previous composite experience. But that’s not quite true. The strength comes from the fabric-to-fabric bond of the material that surrounds the framework. It’s not critical to have the fabric 100% perfectly joined to the subsurface, but it is critical that at least a 1-inch overlap is maintained between layers. For the most part, we exceeded this 1-inch rule and, for that matter, Stewart says that the system is full strength even at thinner margins. But you have to have standards, and the 1-inch rule applies throughout.
Scott Wick works on bonding the first sheet of fabric to the frame prior to the main shrinking.
Cuts and Bruises
Our first big job was to take a precut section of fabric and lay it over the frame. The idea here, when working with whole sheet (as opposed to presewn and prefitted fabric envelopes) is that you want to have about a palm’s width of extra material around the edges. This standard gives you a chance to grip and manipulate the material easily.
Getting the fabric to shrink around the 4-inch-radius curve takes practice and patience. You must work from the long edges and gradually shrink the fabric inside the corner to get it pulled taut.
In the Stewart Systems process, your first gluing uses the EkoBond adhesive to tack the first layer of fabric to the frame. EkoBond can be thinned with water and will remain workable in an open container for several hours. Gerard taught us a couple of nice tricks for maintaining the glue in a usable state. First, if you wet a paper towel and place it over the small cup you’re working from, the EkoBond will last much longer. Second, you’ll work much more neatly if you make an effort to remove the excess glue from the brush on one side of the cup and rest it on the other side; this technique keeps the brush and handle much cleaner.

Now moving onto the opposing sheet. Here, workshop participant Randy Dietz, applies EkoBond to the periphery of the frame.
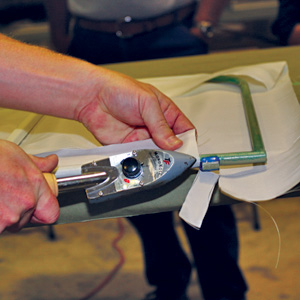
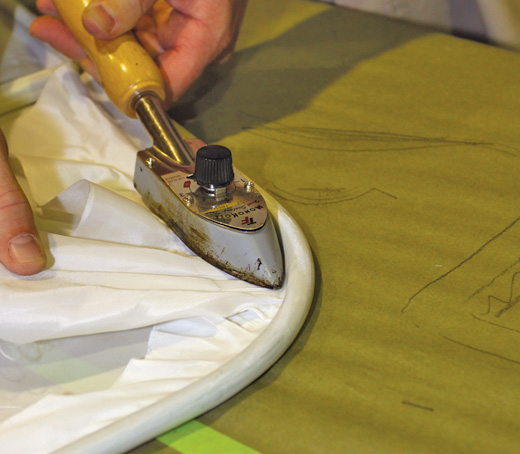
EkoBond reacts to heat, so once the frame has been given a tack coat (and allowed to dry to a slight tack), the fabric goes over the top. Then you can move it slightly so that it rests loosely on top of the frame; you’re not stretching yet, but will need to get any big wrinkles out. At this point, grab your little shoe-shaped iron, which you will have already calibrated to 275 to 300 F.
Gerard shows the class how to heat the EkoBond and mechanically tauten the fabric before completing the bonding process. You want the fabric as smooth and even as you can get it before final tautening.
In fabric work, various iron types and temperatures perform different jobs. Heating to 275 helps set the glue and will cause the polyester fabric to shrink slightly. The next stage is 300 and the final stage takes place at 350. What’s interesting is that the fabric reacts to the actual temperature of the iron, not how long you hold it there. At a certain temperature, the fabric will shrink only so much and do it once. To shrink it more, you need more heat, not additional duration. Finally, bear in mind that the fabric crystallizes at 425. All through our course, we were reminded to calibrate the irons and be especially aware that a small iron will lose heat quickly, so it can be worked only so much.
With both surfaces bonded onto the frame and shrunk to size, it’s time for rib stitching.
Back to gluing. Applying the EkoBond to the frame and allowing it to cure gives the fabric something to grab onto. Heating this bond will help further set it. Notice that we haven’t applied any additional EkoBond over the fabric at this point. Heat and pressure on the foot of the iron is enough to push the now-viscous EkoBond up through the fabric. Immediately, a darkened bond line will appear. Allow the fabric to cool again and that bond will be surprisingly strong. At this point, you will apply another layer of EkoBond over the frame, using a towel to wipe away the excess. It’s imperative that you wipe this excess away before it becomes tacky. EkoBond responds readily to a well-placed iron, and will allow you to smooth out small ripples with ease, even after the glue has tacked up.
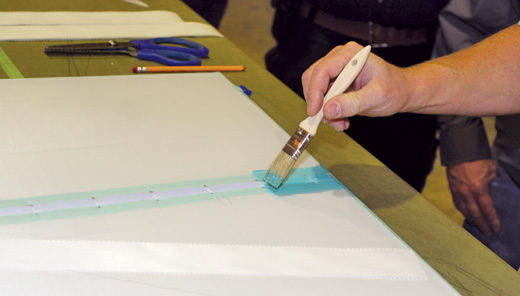
Rib stitching mechanically ties the fabric to aircraft structure and prevents it from fluttering or chafing. A layer of EkoBond and reinforcing tape is used to strengthen the fabric where it will be pierced.
Your little iron. A best friend when bonding and light-forming the fabric. Calibrate early and often.
Iron Supplements
Now you’re about to use the small iron to partly shrink the single fabric panel so that the free edge conforms to the inside of the frame. The idea here is that you’re going to form a 270 bond of the first layer of fabric to the frame, allowing the free edge to come back toward the inside of the first layer without touching it. Ah, but how to get the fabric to wrap around the inside of that notorious 4-inch-radius curve? Easy: heat. We took the irons and carefully shrunk the inside edges of the fabric to follow the frame. The hardest part was that corner, but Gerard showed us the right way to work up about 4 inches from the corner, carefully gripping the fabric and applying heat so that the fabric near the frame would shrink less than the fabric that would form the inside of the turn. It’s harder to explain than to do, though Gerard and Dan Stewart both made it look incredibly easy. Once you’ve seen the fabric respond to various amounts of heat, the concept becomes clear. One benefit of this work piece is that the corner is far sharper than anything you’d likely run into on a real project.
Once the rib stitching is complete, it’s time to brush on another coat of EkoBond and then apply the finishing tapes.
Once the EkoBond has dried, you trim off the excess fabric inside the frame and give the large outer surface a first “tautening” at 250; this tightens the fabric but doesn’t set it. Then you cut and apply the fabric for the back side of the work in much the same way as the first, only working to be aware of edge overlap. Neatness is now really starting to count, because the second sheet of fabric will be trimmed off just inboard of the frame by ⅜-inch. This edge will minutely show through later stages, so it best be neat and straight. This is where you’ll be happy to have purchased expensive scissors.

Gerard offers a really cool tip for finding the centerline on finishing tapes. Fold the tape over until the edges match and then run it down the edge of the table. A faint fold right at the centerline will remain.
Got That on Tape?
After allowing all the EkoBonded edges to dry and committing a final shrinking at 350 using a large laundry iron, your work piece will have two clean, flat, featureless surfaces of fabric but is still nowhere near done. The next stages involve various types of tape and reinforcements. In the Stewart class, we next tackled rib stitching, but first you have to apply a reinforcing tape above any ribs. The square-section tubes running across our work pieces would fill in for ribs and other structures. The reinforcing tape is sticky backed and easily applied, followed by marking and punching holes for the rib lacing. To reinforce the fabric, we applied a thin layer of EkoBond and allowed it to dry. Marking the lacing holes is determined by a few factors including the speed of the aircraft, the size of the panel and other factors including aesthetics. The manual that comes with the fabric covering system or your airplane kit will provide guidance here, but it’s important to remember that the stitches will be visible in the final job so consistency, neatness, symmetry and other factors should be taken into account.
An important thing to remember when working with EkoBond is to remove any excess before it becomes tacky. A paper towel does the trick.
Rib stitching is actually a lot of fun, especially using the so-called Staggerwing Knot recommended by Stewart Systems. (Staggerwing refers to the iconic Beech biplane.) At first, rib stitching feels like you’re trying to tie your shoes with a shovel and a length of barge rope, but it gets easier with practice. Once you get into a rhythm, it’s actually easy and allows your mind to wander. Until, of course, you stick yourself with the lacing needle.
Two cross-coats of EkoFill help seal the weave and provide ultraviolet protection.
Finished Yet?
Next up are finishing tapes, which cover the rib lacing (and the now captured reinforcing tapes). These are used to go around corners and otherwise provide another layer of material in high-stress areas. Gerard showed us a wonderful technique for finding the center of a strip of finishing tape. Take the tape in hand and fold it over until the pinked edges meet. Then run the tape over the edge of the table; a fine, straight line will form right down the center. You can use this line to align the tape to the perimeter of the piece, which will then make the edges go straight. As with the other parts of the process, EkoBond is used to adhere the finishing tape to the fabric, and heat will make the inside edges of the tape cut inside that corner.
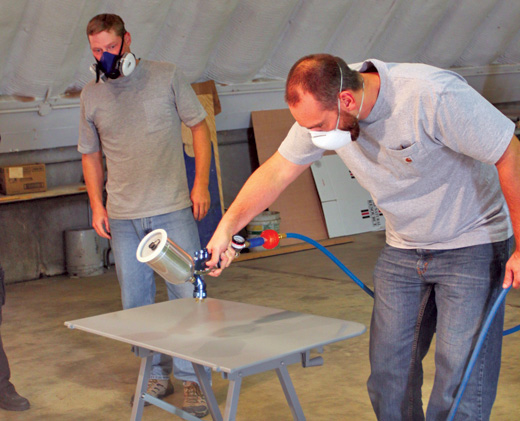
Subsequent coats of EkoFill go on with an HVLP (high volume, low pressure) gun.
I would have been happy to know how to make the fabric stay on the airplane, but the Stewart Systems class takes you much further, all the way to the final coat of base paint. To get there, the next stage is to carefully clean the fabric and apply two cross coats of EkoFill. True to its name, EkoFill is used to fill in the weave of the fabric and provide the first bit of ultraviolet protection. It’s applied with a foam brush, and is best applied to a slightly damp finish. Remember that the Stewart Systems products are waterborne, so this moisture will help the EkoFill wick into the fabric. Stewart recommends sanding with a red ScotchBrite pad or open-coat 320-grit sandpaper. Never wet-sand this product; everything is done dry.
The third and subsequent coats will be applied with an air gun, and sanding between coats will help you remove imperfections and see where the EkoFill is blending into the part. This section of the course was familiar to me, as I spent at least 100 hours filling and sanding the fiberglass on my first airplane. It’s a part of the job that rewards patience and cleanliness—at least as much as is possible with so much sandpaper and removed material floating around.
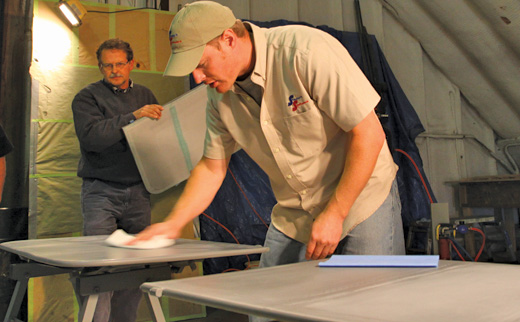
Before the final color coats are applied, the thoroughly primed and filled (with EkoFill) pieces are surfaced with red ScotchBrite pads and 320-grit dry paper. You never wet sand EkoFill because it’s thinned with water.
You, Too, Can Paint!
The last part of the school takes you through application of the EkoPoxy final paint. Up to this point, none of the Stewart Systems products has smelled like anything, nor have we needed elaborate protective measures for our health. We spent most of one day discussing spray guns, paint prep, mixing techniques and a dozen other aspects that you must have under control to get a good finish. We talked at length about spray-gun setup and made sure that the gun was set and tested on a panel after each new batch of paint was mixed. Where you and I might pour it in the gun and go, Gerard and Dan Stewart spent a lot of time setting up the tools before getting near the work piece.
Each of us applied four coats of EkoPoxy to our projects and a few of them looked ready for the showroom. I never had much luck with painting, but using some on-the-fly advice from Gerard, my technique improved dramatically, and the final product was much better than I expected. This despite working in a cold, open hangar with plenty of junk floating in the air.
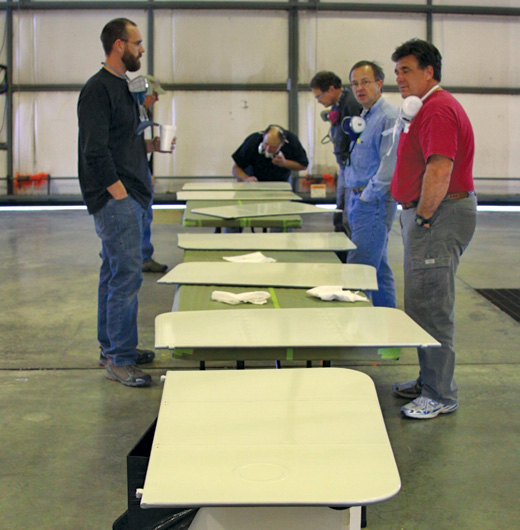
The final assembly line. The test pieces air dry before the final coat of finish paint.
So the bottom line is this: I couldn’t go to work for, say, CubCrafters tomorrow applying fabric, but the Stewart Systems course has dramatically demystified the process for me, as it did for all of my fellow students who offered an opinion. Considering that breakfast and lunch were supplied, and that the value of the pure experience is at least four digits, the $300 cost of the three-day course is an inexpensive, crucial bit of education.
For more information, contact Stewart Systems at 888/356-7659 or visit www.stewartsystems.aero. To book future courses, call Wicks Aircraft at 800/221-9425 or visit www.wicksaircraft.com.


