I learned to build airplanes by first learning to rebuild airplanes. As a young teen, I was given the opportunity to help with the restoration of a couple J-3 Cubs of WW-II vintage. Rebuilding like this required a skill set heavy on repair. Many parts simply were not available new, and you had to make do with what you had, fixing problems and mistakes as you found them, using raw materials and good techniques as shown in the maintenance bible, AC43.13. (I was given my first copy at age 13 and treated it with great respect!) This experience gave me a mindset, I suppose, that almost anything can be fixed if you know how to go about it. Rarely were we given the opportunity/luxury to simply throw a bad part away and pick up a new one.
Building Philosophy
This introduction to airplane by repair, or maintenance, colors the way I think about aircraft-kit building. So many times we read on the various Internet forums of a new builder’s angst and frustration over a misshaped rivet, a poorly drilled hole or a dimple placed squarely in the middle of the sheet where it was never intended to go. And so many times, we hear other builders respond, “Throw it away and send for a new one!” The implication is that nothing but perfect will do, and if you mess up, you have to start over. For those who came into aircraft building from non-aviation fields, and without a maintenance background, this might seem like a reasonable approach to the process. After all, don’t airplanes need to be perfect in order to fly?
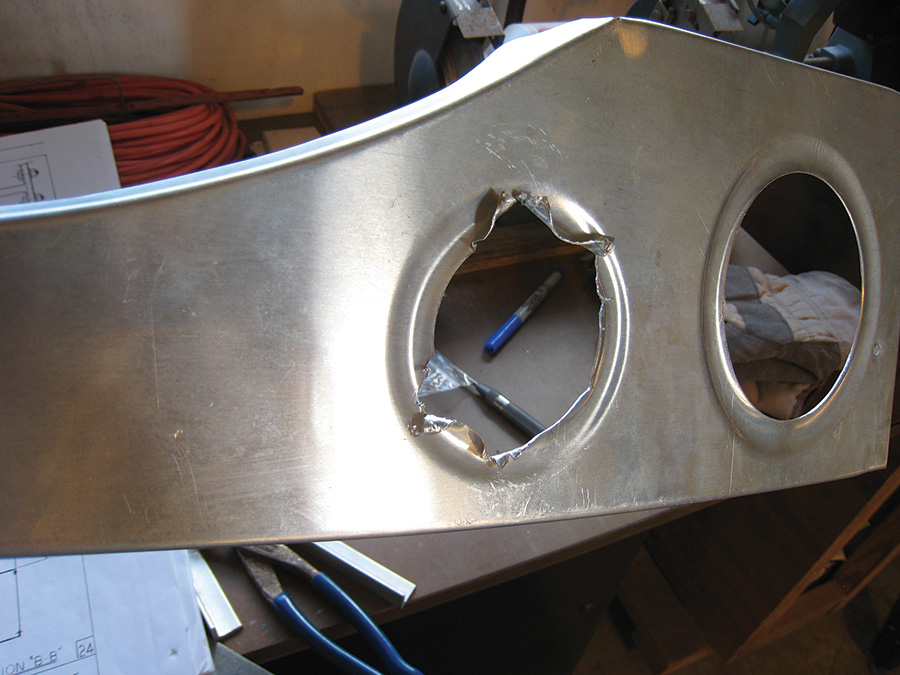
This seat rib was mangled by a fly cutter. The first thought was to replace it, but a careful look showed that it was repairable with a doubler plate. It was already carefully fit to the structure, so it paid to save it.
Actually, no. There are few perfect airplanes out there, and the few that may exist are sitting in a hangar with a Gold Lindy award from Oshkosh. They might or might not fly very often to maintain their perfect condition. Most aircraft, homebuilt and production, sport little repairs here and there, many of them installed before they flew for the first time, and this is just fine. In fact, I would argue that the true art of building is not about making perfect parts but about understanding how to bring less-than-perfect parts up to the necessary standards for flight. I doubt that I have ever built a perfect part. Everything made by humans will have a tolerance from perfection, even though it might be a small one. The width of the lines drawn with a Sharpie represents some variation, at the very least. I still remember my mentor, when we were working on those J-3s, telling us, “We are going to work to the tolerance of 1/64 of an inch.” He told us this to emphasize just how accurately we were going to build, but he probably didn’t realize that he was also letting us in on a secret: Nothing would ever be perfect.
Not Striving for Perfection
I thought about this—perfect building versus knowing how to fix small errors—as my wife and I were involved in an RV-3 project that we recently finished. I have been building for years and make the occasional mistake, and she is still a beginner (we are both constantly learning), so she makes mistakes as well. At first, she was disappointed when a part didn’t turn out exactly as she intended, believing that nothing but perfection would do. My teaching was spent helping her understand the techniques used to bring the part up to allowable tolerances, and in so doing, improving her fabrication skills. Eventually she learned not to be too disappointed by a first effort, and to give herself some margin in cutting a line so that she could refine the shape with finer tools later. If she made a mistake with a hole, well, we opened up the book and looked for guidance on how it could be fixed.
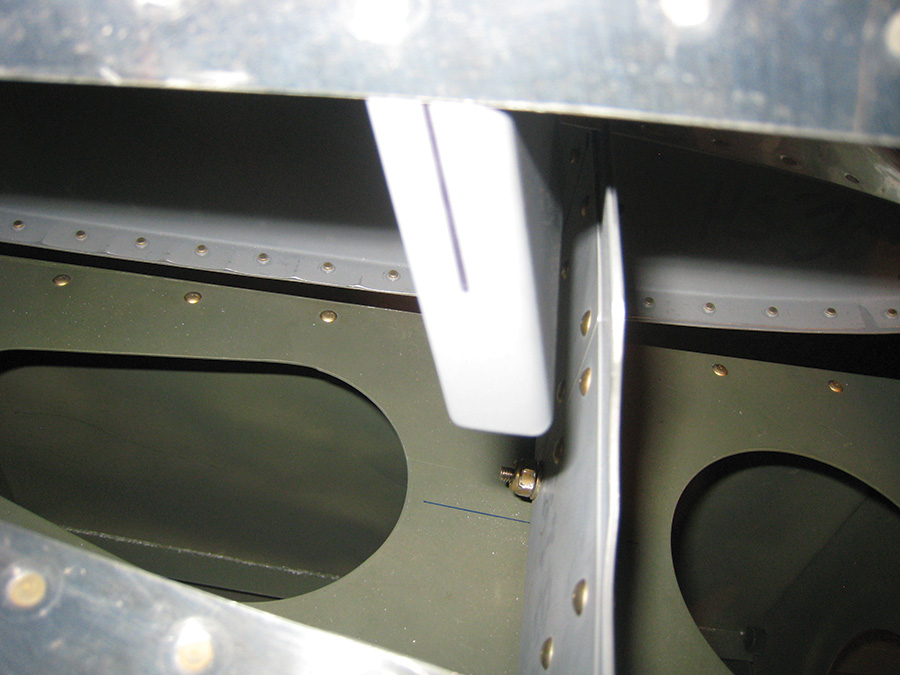
This RV-3 was built to plans, but the plans are inconsistent, and the forward vertical-stabilizer spar didn’t line up to the mounting point. Rebuilding would have involved scrapping 100 hours of work, and the new one might not have been any better.
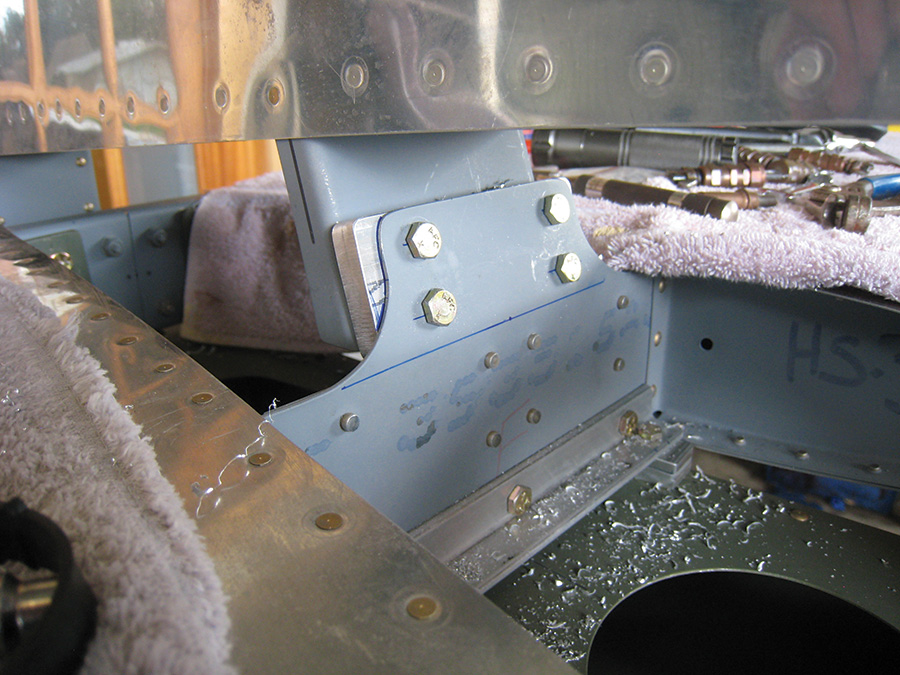
The factory-approved fix was to use a spacer to join the two pieces and thus save the work put into the stabilizer.
In the production-airplane world, it is not uncommon to see errors corrected on the shop floor. Think about the fact that during the construction of a wing, for instance, the assembly accumulates more and more “resources spent.” By the time it is almost finished, the factory has invested a great deal of labor and material in that wing. Now let’s say that a drill bit slips just as the final inspection panels are going into place. The wing is no longer perfect. Do they throw it away, scrapping the total investment in time and parts? Of course not! They institute a patch to fix the problem and salvage the wing. Sometimes, it is simply a matter of using a technique already outlined in AC43.13. Other times, a new configuration needs to be designed and approved by engineering personnel. This is why aircraft companies continue to employ design and production engineers well after the airplane has been put into production, to help design and analyze fixes needed during fabrication, making sure that the repaired components meet the intended design strengths and reliability needed for the overall assembly.
Useful Skills
So, if it is important for a builder to know how to fix mistakes, what kind of mistakes are we talking about? What skills should new builders learn that will help them work through their own errors and minor catastrophes?
How about skillfully drilling out bad rivets? This is something every metal-airplane builder has to learn early on. In fact, they will make the most use of it in the early stages. (Glass, wood and fabric builders might only set the occasional rivet. The best will simply barter their skills to an experienced metal builder and let them drill out the mistakes.) No one sets perfect rivets every time, and it takes more skill to properly drill them out than to set them in the first place. It’s not a bad idea to put some rivets in a practice scrap and then drill them out before you ever try it on a real piece of the airplane; scrap is cheaper than parts. (My rule is to never do anything for the first time on an actual airplane part. This cuts way down on the number of kit parts that need to be replaced.)
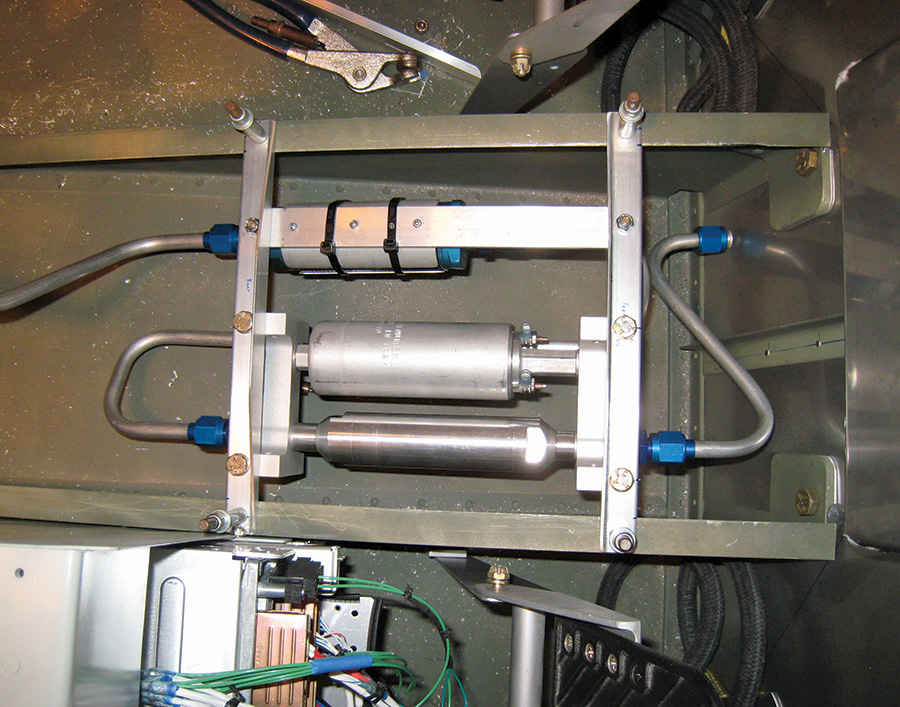
The S-shaped fuel line in this installation was partially collapsed in the first bend after the fuel pump. Fuel lines are critical, so this part had to be scrapped and rebuilt.
Another metal fix is patching an inadvertent hole. In fact, this skill is shared with builders of all types of aircraft, for holes appear in fabric, wood and composites, and sometimes just as mysteriously. AC43.13 is a good guide for patching, as this technique is often used by field mechanics to keep an aircraft airworthy. Rules for the types of material to use, overlap, rivet spacing and bond types are all covered. Hole patching is a good place to find an experienced builder or mechanic to teach you the ropes in your material of choice (many techniques are better learned by watching than by reading, and seeing things done takes a lot of the mystery out of them).
Up-sizing a hole to the next allowable size is another common technique when two holes don’t align properly, or you end up with an oval instead of a circle. As long as you maintain minimum edge-distance requirements, there is little problem with substituting the next-size-larger bolt for the one that was intended. Of course, this means a good builder will need a stock of aircraft nuts and bolts beyond what is included in the kit.
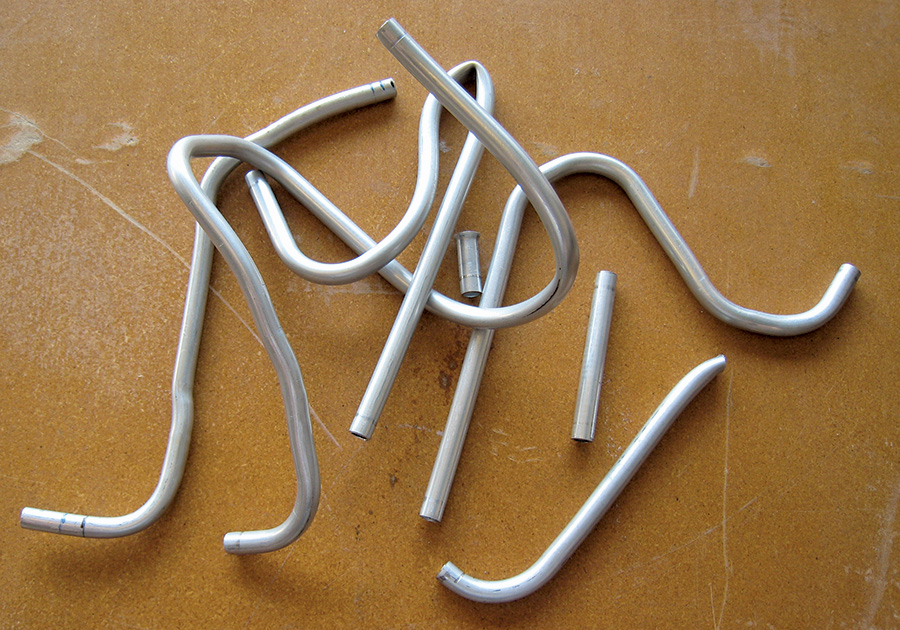
When building fuel lines, it is not uncommon to end up with a pile of scrap tubing. They really need to be done right, and it’s cheaper to start over than to try and salvage a bad part.
Replacing a flange on a bulkhead or rib is not only a way to fix a mistake, it is sometimes necessary just to get a good fit. Depending on the sophistication of the kit you are building, everything might have been designed on a computer and match within microns, or you could be left wondering just what airplane the manufacturer thought those bulkheads were for. I have often had to trim a poorly fitting bulkhead flange and make a new one to get a proper fit to the skin, and it’s a useful skill to have if you want to make a kit work.
Creating doublers for antennas, support fittings and inspection covers is a task that is well covered in the advisory circular, and almost every builder needs to do it. Plans rarely cover all of the little items like this, so get used to laying out rivet patterns with proper spacing and the necessary edge distance to do them “to code.” Think of AC43.13 as your in-house engineer—free advice when you need it, even in the middle of the night and on weekends. By the way, this is also a good place to point out that having a shelf with scraps of your building material will greatly facilitate both repairs and customization.
Standards
Removing and refabricating a part of the airframe is only one aspect of making things work and bringing them up to standards. The same philosophy applies to systems installation. Let’s take wiring, for example. Sometimes it is necessary to “lengthen” a wire. It might be a case of miscalculation, or you may have made a few mistakes trying to crimp on an end, and now the wire is too short for its intended function. Splicing wire is not difficult, and you’ll spend less time learning the proper techniques and just doing it than you will stewing over the problem in the first place.
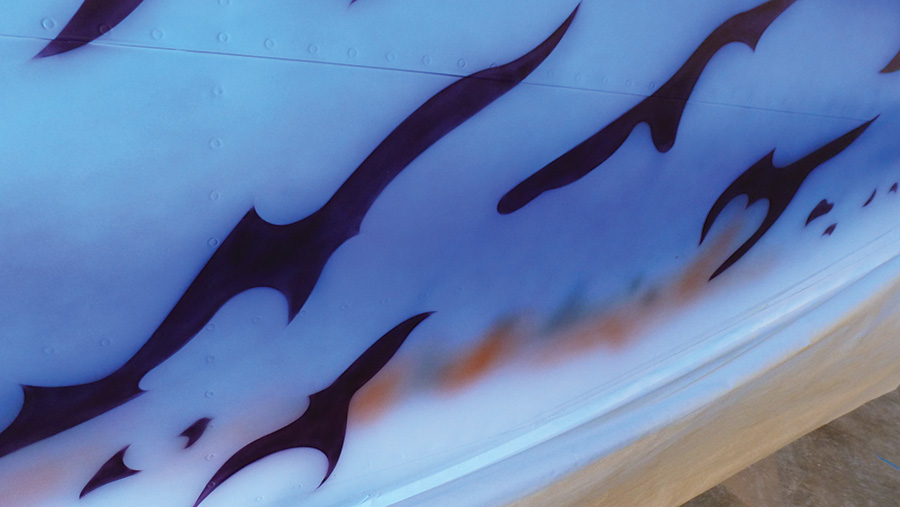
If you end up with a misplaced hole or dimple in an expanse of skin, fill it with a rivet and use a little filler to make it disappear. A busy paint scheme will finish the disguise. Can you spot the errant rivet on the skin of this RV?
Adding wires to existing bundles is another common task. No one gets their full electrical design right the first time, and I know of almost no builders who didn’t have to add wires to a bundle once it had been installed in the airplane. You might add a radio, or change your headset wiring from mono to stereo, and every little change means you have to add a wire. As long as you have left access, it is not hard to do. I generally use temporary wire ties while laying out the bundles and wait until as late in the build as possible to do my final tying up with lacing cord. That way, I have much neater bundles in the end. Later on, when I decided to upgrade my ignition, I ended up adding wires after the airplane was flying. Sometimes I’ll add extra wires through the firewall during construction, in case I want to use them later. I usually do, as this is the nature of tinkering.
Perhaps you understand now why I say the art of building is the art of repair. Just like Boeing, you can’t afford to throw away work, unless you simply have no other choice. And, yes, sometimes, you’ll have no choice, so you’ll need to learn to understand the difference. Set realistic standards and live up to them. That’s the best way to finish your kit without buying two of everything along the way.


