If you’ve spent much time around general aviation, you’ve no doubt heard about the owner assisted annual. That’s where the owner teams up with a professional mechanic to perform the required maintenance and inspection on the owner’s aircraft. It’s often seen as a good way for an owner to learn more about the aircraft and gain valuable hands-on experience.
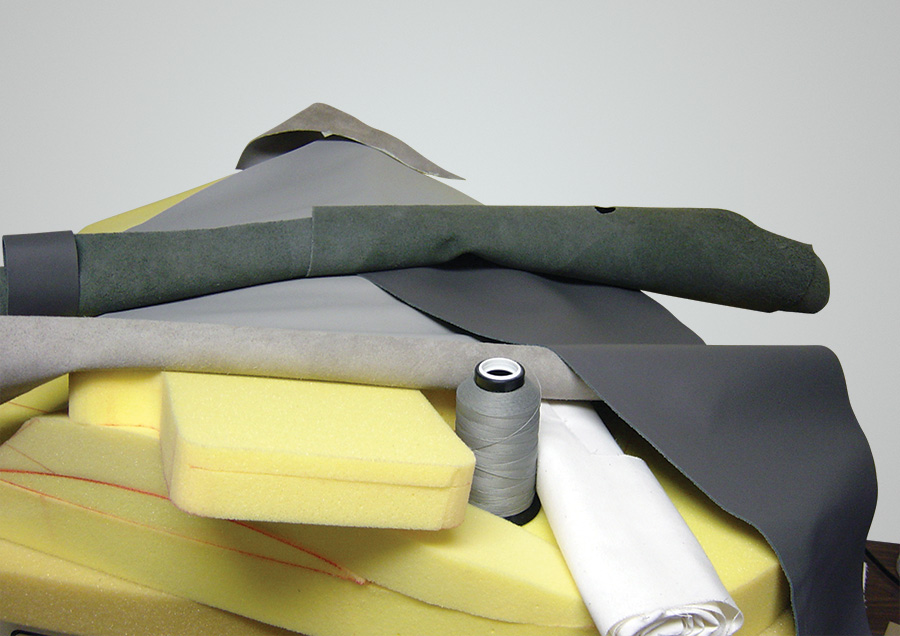
Seat foam was crafted to include all necessary contours, lumbar support and side bolsters. It was then covered with light- and dark-gray leather.
At the same time, the owner can save some money. Instead of having the professional do all the work, the owner performs labor-intensive tasks that don’t require specialized skills.

Owner’s concept of front seat.
We took that same general concept and applied it to an aircraft interior. Axel Alvarez, the aircraft’s owner, wanted to have hands-on involvement in as many aspects of his project as possible. He knew what he wanted his interior to look like, but he wasn’t sure he had the skills to get professional results. The more he thought about it, the more he realized he would save time and end up with a higher quality interior if he had an experienced professional provide assistance.
That’s where I came in. I handled tasks specific to leatherwork and upholstery, while Axel made the metal backing plates, complete with attachment hardware. Having some help allowed Axel to have an interior he’s proud of, and also saved him time that could be spent on other aircraft construction tasks.
What Axel Wanted
Axel wanted his interior to be as unique as his aircraft, an RV-4 fastback. He had already designed the seats, picked the colors, and decided to go with leather. He also had ideas for other items like armrests, headset holders and pockets, but didn’t have all of the details worked out.
Other design considerations included an emphasis on function; engineers are funny that way. He didn’t want any saggy-baggy components. Everything that went in needed to come out easily, because someday this airplane would race. And race planes don’t have luxury leather interiors.
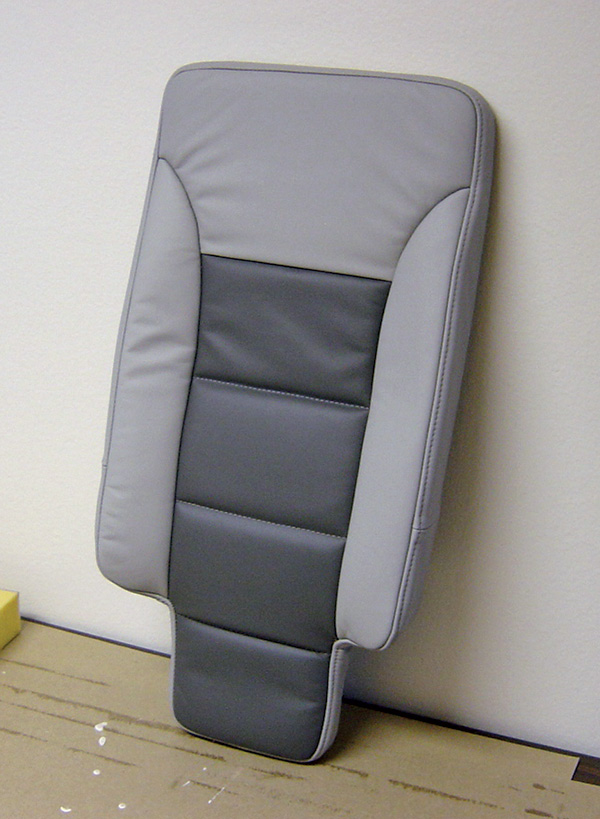
Notice that the finished front seat backrest has cutouts for the safety harness; the concept sketch did not. Designs often have to be modified to fit the real airplane, not a conceptual drawing.
Design to Fit
We started with the seats, since Axel had already created design concept sketches. He wanted a two-tone, light- and dark-gray color scheme, preferably in leather, rather than cloth. The sketches provided an excellent conceptual guide, but the actual seats still needed to be fit to the aircraft and its owner. The finished seats would resemble the sketches, but would vary in some of the details and proportions.
The next step was to bring the pencil and paper sketches to a foam and leather reality, tailored specifically for Axel. To get a perfect custom fit, we made a couple of mock-up cushions that had all of the necessary contours, lumbar support and side bolsters, but were very thin. The thin cushions were then shimmed with sheets of foam, until the seating positions were just right. This required the pilot and passenger to get in and out of the aircraft (and open and close the canopy) several times—but the final results were worth it.
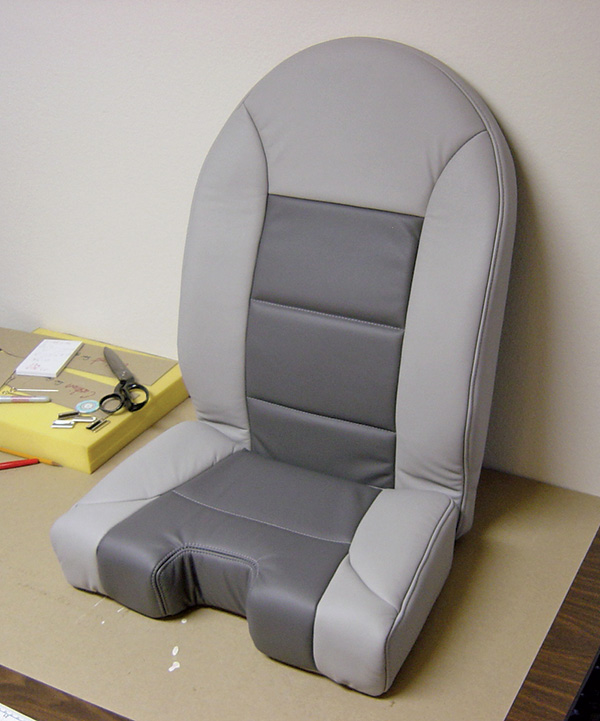
The basic design of the finished rear seat cushion and backrest is similar to the concept sketch, but the proportions needed to be altered for passenger comfort and clearance.
Seats and Arms
The seat components were crafted to match the contours of the thin mock-up cushions and the added foam of the shims. This created the right combination of comfortable contours and seating position.
Of course, not every aspect of the seats was foreseen at the sketch stage. Several minor adjustments were made during construction. Details such as clearance for seat belts did not appear in the concept sketches, but did make it into the finished seats. The completed seat proportions did not match the sketches exactly, but were similar. Minor alterations were needed to make the completed seats fit the aircraft and its occupants.
The armrests were next. They didn’t present too many challenges. Since they mounted on a flat, horizontal surface, and the force placed upon them would be directly down on the mounting surfaces, the only consideration was to keep them from sliding out of place. A couple of pieces of hook-and-loop fastener provided a quick and easy way to hold them in place, and would allow for easy removal.
Upholstering the armrests was also not much of a challenge. A thin piece of high-density foam provided a nice cushion, and a cut-to-size piece of leather with a sewn-on boxing resulted in a good-looking cover. The cover was attached to the armrest backing plate with contact adhesive. Axel made the metal backing plate, then I installed the foam and fasteners, and made and installed the leather cover.
The Pocket Problem
Making the pockets turned out to be a bit more difficult than you might expect; we had a lot of parameters to consider. The pockets couldn’t look like saggy old bags or be too large for the confined space, but they had to be large enough to hold standard pieces of paper and charts.
Once we had decided on the size, our conversation went something like this:
Axel: Let’s just sew a couple of pieces of leather together. That should make a nice pocket.
Mike: That sounds good, but we still have to deal with finishing the raw edges of the leather and attaching it to the aircraft.
Axel: OK then, let’s make a pocket by sewing the leather face-to-face, then turn it inside out. That way the edges are finished.
Mike: The problem with that is we have to deal with several thicknesses of leather and the pocket will get too fat at the edges. Besides, how will we attach it to the aircraft? We can’t just nail it to the side.
Axel: How about hook-and-loop fastener, like we did on the armrests?
Mike: We’ll have two problems with that; the lesser problem is that the hook-and-loop fastener adds bulk to an already bulky pocket. The bigger problem is that the pocket probably will not be secure enough. It will be attached on a vertical surface and will be subjected to stress from multiple directions. This could cause the hook-and-loop to separate from time to time. Furthermore, we won’t be able to avoid the saggy-baggy look.
Axel: Could we cover the entire side panel with leather and sew the pocket to that?
Mike: Well, that would add more weight, and wrapping the leather around the edges of the panels would create other clearance issues. The panels fit snugly already, and there isn’t a good way to create more clearance.
That’s the way the conversation continued, for way longer than you might expect. Eventually, we revisited our design criteria, the available construction techniques and other considerations. Finally, we came to a decision: We decided to cut a piece of sheet metal to the size of the pocket, cover that part with overlapping pieces of leather to create an envelope, and attach that to the aircraft’s side panel.

Small machine screws are countersunk into the pocket backing plate to attach the finished pocket to the side panel.
But we still had other issues. Should we use rounded or square corners? How would we attach the pocket?
In the rounded- versus square-corner debate, each side has pros and cons. The square corner option provides the most area for the dimensions, but square corners of sheet metal are more prone to being tweaked. When square corners are tweaked, it’s almost impossible to return them to their original shape. Also, square corners are more difficult to cover with leather. Rounded corners are less susceptible to tweaking, are much easier to cover with leather, but allow for less usable pocket area.
We decided to go with rounded corners. To compensate for the reduced usable pocket area, we increased the overall dimensions as much as possible. Once again, we considered attaching the pocket with hook-and-loop fastener. The rigidity of the metal backing plate would prevent the saggy-baggy problem. However, with the pocket likely to be pushed and pulled from a variety of directions, the hook-and-loop option did not seem to be secure enough. Other attachment considerations included parallel J channels, snaps, sheet metal screws, panel clips, and a variety of bent-metal tab designs.

Here is the finished pocket, ready for a chart.
It looked like the best way to attach the metal backing plate to the aircraft would be to use small machine screws. That would be secure, but how would it look? Not good if the heads of the screws were too obvious. So the question became, how could we use machine screws and not spoil the lean and clean look of the pockets?
The answer was to countersink the machine screws into the metal backing panel and secure them in place with a weld or chemical bonding agent. Rather than use a traditional countersink, where the metal is cut away to accept the screw head, we dimpled the metal. That way, the head of the screw would be recessed enough that it wouldn’t protrude above the surface and spoil the smooth look of the leather. Also, to keep the leather looking good,
when we glued the leather to the backing plate, we avoided putting glue on the area of the screws. This allowed the leather to bridge over the screw head and kept the surface of the leather nice and smooth.
Mockup seat components were shimmed to obtain the optimum seating position.
Under Construction
Finally, the hard part—the decisions—were done. All we had to do now was put those decisions into action and build the pockets.
We decided to divide and conquer. Axel would make the metal backing plates, complete with attachment hardware. I would do the leatherwork.
The metal backing plates needed to be mocked up; we wanted to make sure that we had proper clearance for the leather and that our attachment method worked properly. The leather installation was simple, just glue leather to metal. Nevertheless, there was still an important detail to attend to: We needed to avoid bulky buildups of leather.
Bulky buildups of leather would push the pocket away from the side panel and prevent the pocket from fitting flush all the way around. Therefore, where the leather wrapped around to the back of the metal plate, the leather was trimmed so there was never more than one thickness wrapped to the back.
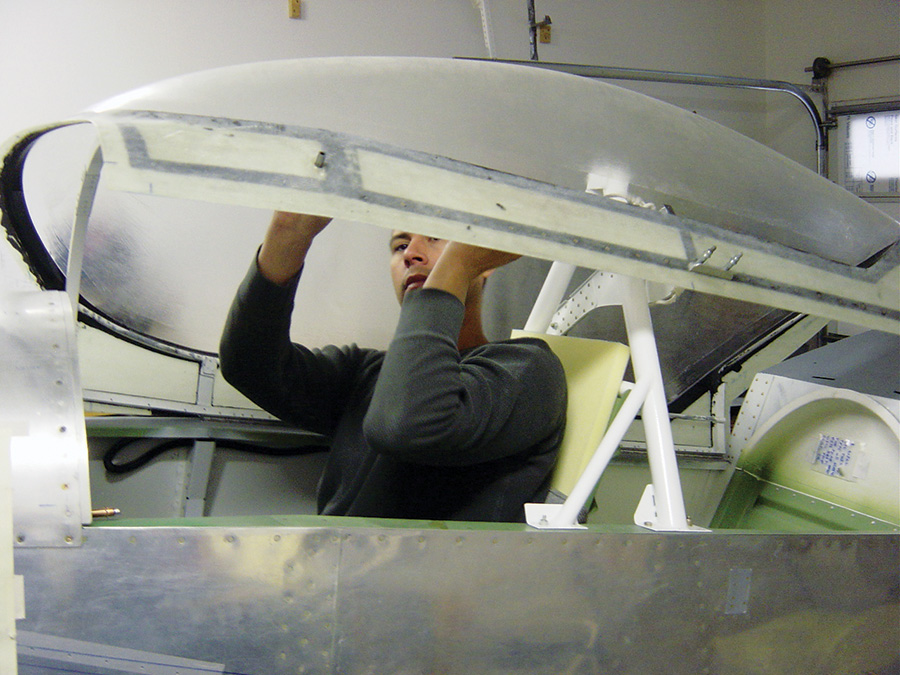
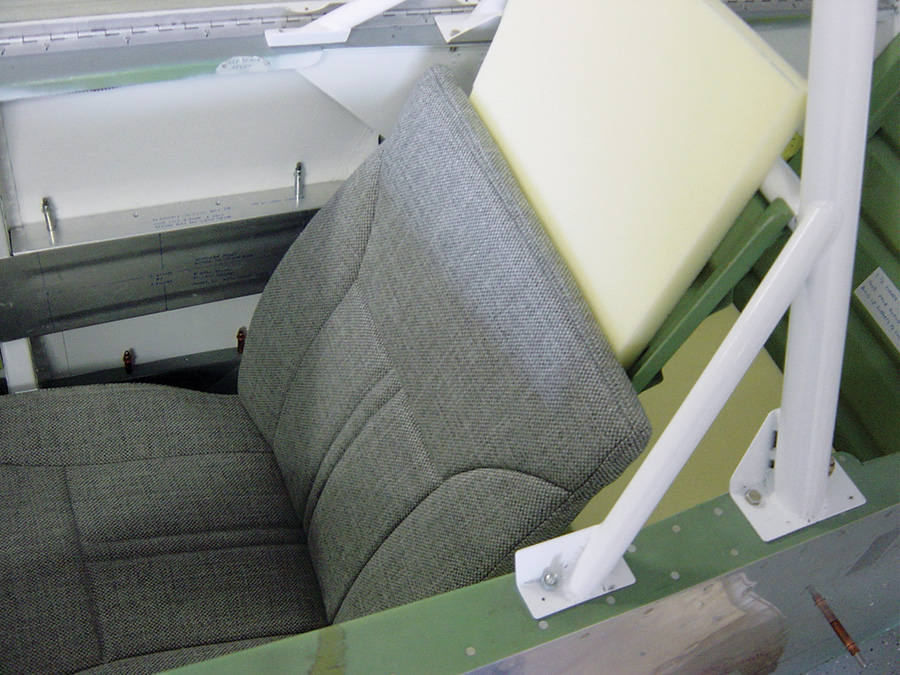
Close the canopy to make sure the seating position is correct. Don’t forget to wear a headset; if your head hits the canopy, the seating position is too high.
Details to the Finish
Another detail that needed attention was to finish the leather’s exposed edge at the pocket’s opening. That edge was turned under and glued into place, which was adequate from a construction standpoint because leather glues well. We also decided to add a line of stitching for visual appeal.
The finished pockets appear so simple, you’d never guess we struggled with their design as we did. But they were worth the effort.
Designing solutions to specific problems in a space as confined as an aircraft interior is both challenging and rewarding. The teamwork applied to this project not only made it more fun, but also improved the final result. Assistance is a good thing. Give it a try.

![]()
Mike Manning has been doing upholstery work for more than 30 years. He’s a private pilot, SEL and glider, and he’s instrument rated with all three launch endorsements for his glider ticket.


