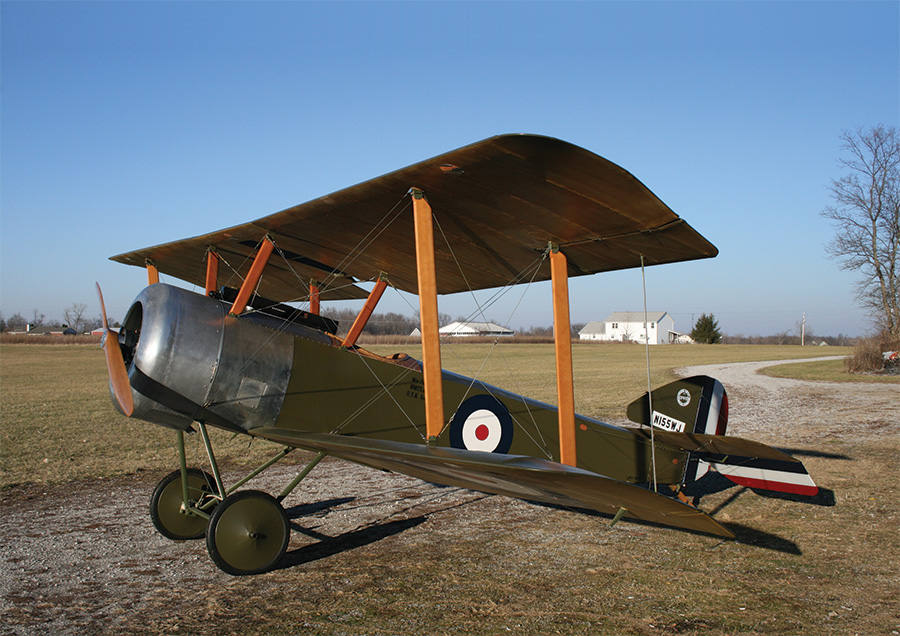
It’s funny how a rendezvous with old friends can inspire acts of either derring-do or works of complete insanity. Sometimes you just can’t help yourself.
I attended the Dawn Patrol Rendezvous in 2005, flying a Dennis Wiley-designed Jenny and came away with a terrible resolve after talking with Robert Baslee during the dedication dinner. We were sitting there discussing the feasibility of building a full-scale Sopwith Pup. At the risk of being clich, we drew the major components on a dinner napkin, which was pretty appropriate, considering my drawing ability. Such an innocent moment can quickly get out of hand. The upshot was that after acquiring a set of drawings from Replicraft, the fun began.
Earnest construction began shortly after December, 2005. I had in mind to build a Pup that for all outward appearances would look like an original Pup. Although there were some mandatory considerations, being mostly the size of my bank account, I settled on a VW engine, instead of the engine I had been salivating over, a Rotec Radial. I used the Replicraft plans for placement of all uprights and longerons, so the dimensions would match the originals, but the materials are more modern and fit my bank account better. I used lots of ideas from past projects to make this whole design work, and with the help of Evans Lightplane Designer’s Handbook, the nuts and bolts took shape.

The basic structure of the fuselage and center section is apparent in this picture, with cowling work in progress.
I decided to use three-quarter-inch chrome-moly for the forward section of the fuse and transitioned to five-eighth-inch aft of the cockpit for the longerons. I TIG welded the basic fuse in about a month, but my next-door neighbor, Larry Lindsay, got to sit in it and make vroom-vroom sounds before I did—probably because he is one of those wiry guys who moves a lot quicker than an age-challenged, gravity-encumbered guy like me.
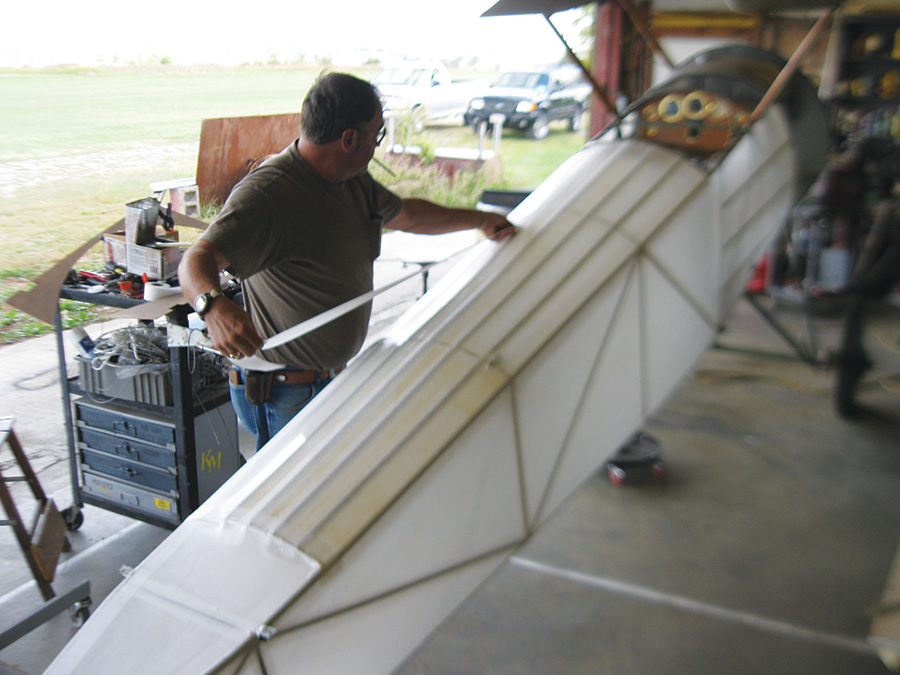
The wing struts and cabanes were fashioned to the original dimensions out of straight-grain Douglas fir to fit welded fittings la Dennis Wiley’s Early Bird Jenny. The landing gear legs were fashioned from streamline tubing to exact specifications from the original 1916 prints.
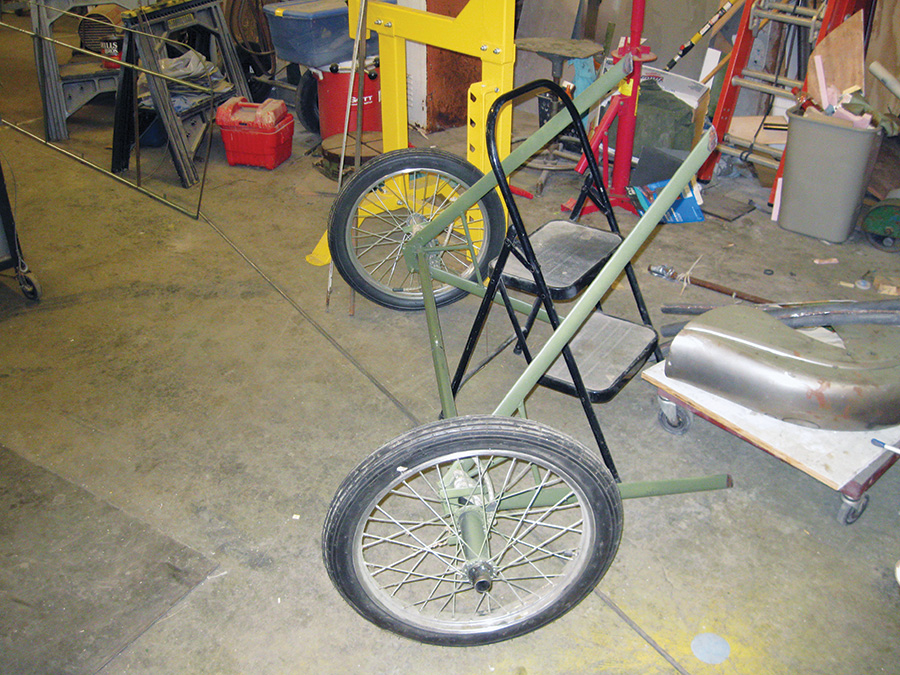
Being ever vigilant for good, inexpensive (cheap) parts, I used a set of horse racing cart wheels for my rims and inner spoke attachments, and made a set of hubs on the lathe. The hubs gave me 8 inches between the spokes at the axle. By using longer spokes on the outside and shorter spokes on the inside, I lucked out and got the dished look of the original wheels.
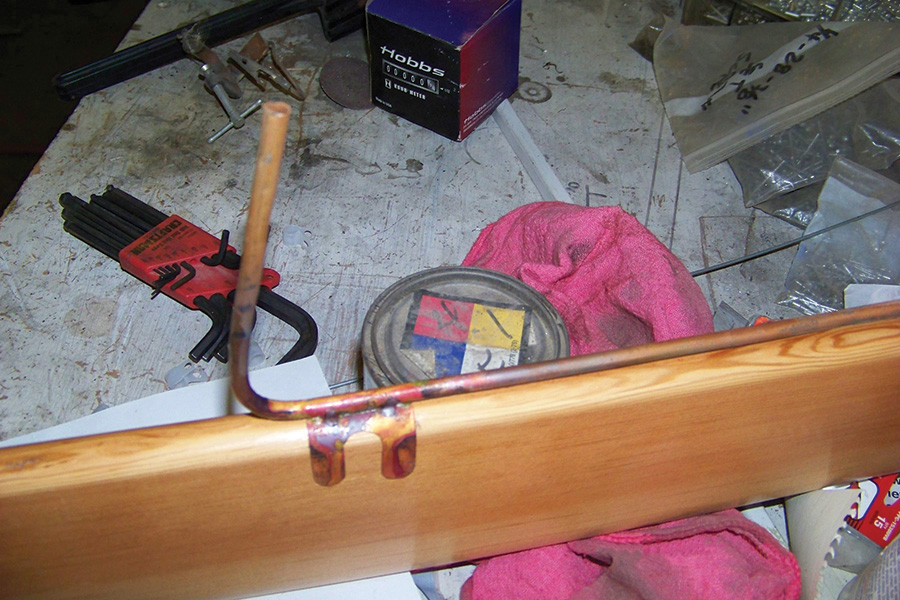
The pitot tube shows what it’s like to build the old-fashioned way—a little bent tubing, metal, and some brazing get the job done.
The steerable tailskid was built exactly following the plans of the original, since it was going to be out there for everyone to see. Another reason I was sticking with the original skid is that, just like the original, the mains do not have brakes. This helps keep the Pup going straight down a grass field.
If you have never tried a skid instead of a tailwheel, you should. I wouldn’t try it on a paved runway though; even the Early Bird Jenny I built years ago with a tailskid and mainwheel brakes will take you for a quick 360 view of the field on rollout. (I was lucky no one at the airport had a camera at the time.)
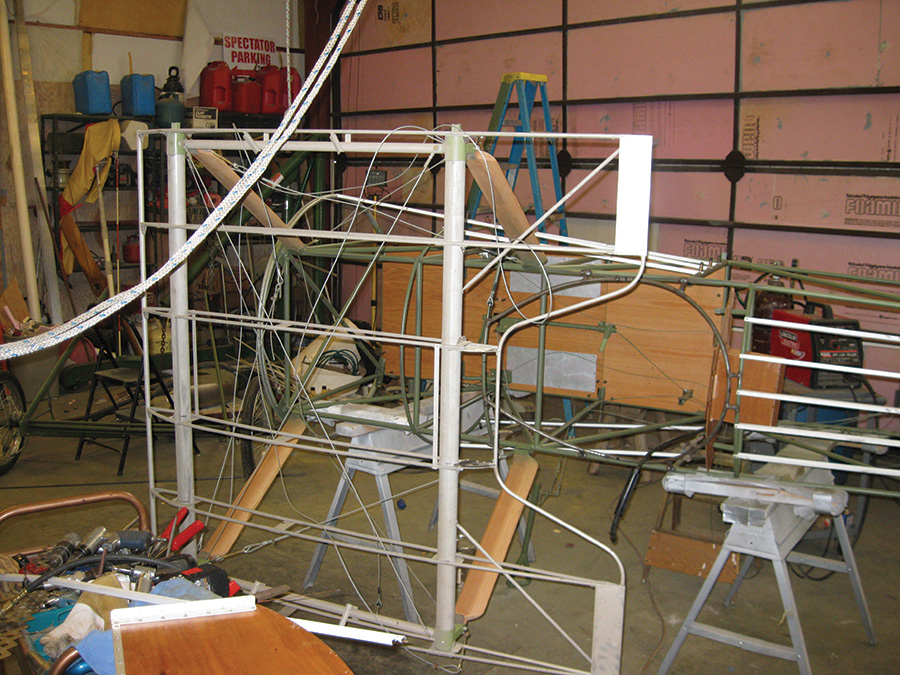
The fuselage and upper wing center section were built of tubular steel and aluminum, respectively.
In retrospect, I would advise anyone building one of these to install a set of brakes; it will spare you from tons of embarrassment.
Wingspars were fashioned from 2-inch .065-wall 6061 tubing. Trying to get the same airfoil shape as the original, the rear spar gave me fits because of clearance with the ribs. I used three-eighth-inch aluminum tubing to fashion the ribs la a Graham Lee design. I did vary the looks in the leading edge, opting to use aluminum sheet metal to cover this area, instead of using nose ribs. Wingroot fittings were copies of the Early Bird Jenny’s root fittings, scaled up for the extra weight. I received some expert assistance on rib stitching from Dallas Shaw, Randy O’Conner and Brad Strohm. We had a party for a couple of days when that was done; beer seems to sooth arthritis after a long day of rib stitching.
The authentic landing gear didn’t include brakes—something that the author would recommend next time.

The author used different-length spokes inside and out to get an authentic dished look.
The covering was lightweight Dacron using rhe Stits process from Aircraft Technical Support, since Jim Miller is a good friend and neighbor. I made many trips to his place to bother him about how to get the right look for the finish on the bottoms of the wings. Since the WW-I originals were just doped on the undersides of the wings and fuse, I decided to finish those areas in a very unconventional way: I only used clear Poly-Brush fabric sealer, then added some tint (supplied by Jim) to the last coat to get an approximate look of old varnish brushed over doped fabric. The markings were done by hand with a brush to approximate what was done in the field back then—although I have a feeling those old guys had steadier hands. It was painstaking for me and I don’t recommend it, especially if you are a coffee drinker.
The steel tube fuselage was covered using Dacron and the Stits process.
I built a 2180cc VW engine from scratch, using parts obtained from several VW suppliers. I used 94mm cylinders, an 82mm stroker crank, and set up the compression for 6.67:1 for reliability. Valley Engineering supplied the 2.5:1 propeller speed reduction unit (PSRU), as well as the 96×65-inch prop. Due to some leaning problems with the progressive Weber carb, I soon came to the conclusion that a single-barrel 34 ICT carb fit the bill better.

The author climbs through the typical tangle of flying wires and struts for the first flight.
I was fortunate that a good friend and Dawn Patrol cohort, Rick Bennett, was able to turn me on to a correct-size cowling and arrange to have one delivered to me. He was a great cheerleader by the way, coaxing me to complete this project from beginning to end. Dick Starks—that steely-eyed killer of the heavens—was another inspiration, chiding me to keep moving on the project from afar and inspiring me to do this article. He probably figured he would get a good laugh at my attempt to arrange words into coherent sentences.
I had some help with the full scale Vickers machine gun replica on the cowl from Willie Hill, a local expert on getting them to look realistic. We have a crowd here at WesMar Field that varies greatly in expertise; you can always find someone who can get it done or knows someone who can.
We got the OK to test-fly it from the local FAA representative, John Walsh, back in October of 2011. I only had time for six or seven test flights before winter hit hard; I am a wimp when it comes to open-cockpit flying in the winter, so the rest of the time had to be flown off in the spring.
The first flight left an indelible mark in the upholstery, as well as ruining a perfectly clean pair of underwear. Of course with a crowd watching, I promptly did a groundloop on landing, narrowly missing some trees on a neighbor’s land. I recommend this technique (dancing on the rudder pedals) to learn the jitterbug. Some small trim adjustments and engine tweaking made subsequent initial flights enjoyable and uneventful.
Spring brought some pretty nasty weather, but fortunately there were enough good days to continue with the test flights through the summer.
In the air, I can’t say the Pup flies like a Cub because it’s even better. It’s very stable in normal flight. The four ailerons give her a solid feel in roll. Initial timing of the climb rate showed approximately 1200 feet per minute. The climb angle is like a space shuttle launch, although I have never actually measured it, due to the amount of bugs I was eating on climbout with my wide-open mouth.
On takeoff, the tail comes up almost immediately (50 feet) and it gets off the ground in about 150 feet. Stall is around 30 mph and cruise is around 60. I plan to obtain another prop with a 73-inch pitch as soon as funds allow, in order to (hopefully) get the cruise up to around 75-80 mph.

The original tailskid worked well until it broke on landing. It was replaced with a piece of wood with conveniently-curved grain.
About July, on a (by now) normally un-eventful landing, the tailskid wood split at about the halfway mark, leaving me with no steering and sending the plane into another groundloop. This time, the left upper wing got a slight ding in it due to the hair-raising trip into the woods that immediately followed. Fortunately, two days worth of metal, fabric and painting work sufficed to repair the damage.
I found a piece of ash with the grain conveniently running along the curve of the new skid and replaced it; there have been no problems since.
To date, I have not been able to keep the cylinder heads at an acceptable temperature (350 F). I normally get about 15 minutes of flight time and temps start to creep up to around 375, so I bring her in. I am currently playing with the cooling fins—making extensions to direct the air more smoothly over the heads —and have purchased a larger oil cooler with a thermostatically controlled fan in order to get the temps where I can be comfortable with them.
That old British 10/10 airfoil makes the Pup handle amazingly well. I guess the old guys really did know what they were doing. WW-I designs are known for quirky handling, especially on the ground, but there are certain rewards for truly building an airplane like this from scratch. I’ll keep tinkering with this one, but there is always a new project down the line to keep things interesting in the shop. Recently a set of Super Cub blueprints caught my eye, and the game is on—but that’s another story.


