Rivet holders seem to be like mousetraps—someone’s always got an idea for a better one. Well, I guess I’ll contribute to the genre.
I’ve always liked the concept of the DIY organizer made by nailing baby food jar lids to the underside of a shelf, and then screwing the jar in as your holder. It’s a great space saver (how else are you going to use the underside of a shelf?), and the glass jar lets you see what’s inside. On the downside, they’re a bit fiddly to screw in and out, and let’s face it, if your shop has a concrete floor, a glass jar is a disaster waiting to happen.
So here’s a variation on the theme. This rivet (or whatever) holder uses 8-ounce polyethylene jars that you can buy in bulk from companies like Uline or Grainger. The jars mount lid out, so you can label the lid with the contents. Change contents? Just rub clean with alcohol and re-label. Being plastic, no worries if you drop one. Use a slightly undersize hole saw and the jars will stay securely in place. I wrapped some adhesive sandpaper around the hole saw to get just the right diameter and a smooth hole.
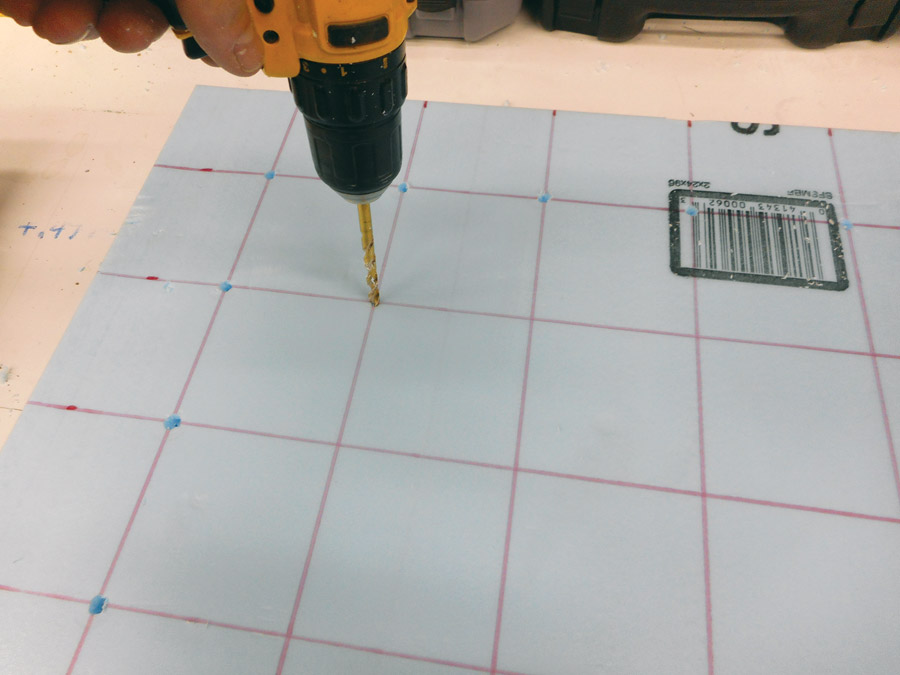
Mark a 2-inch thick piece of blue foam with a grid pattern for your bottle spacing and drill pilot holes at the intersections.
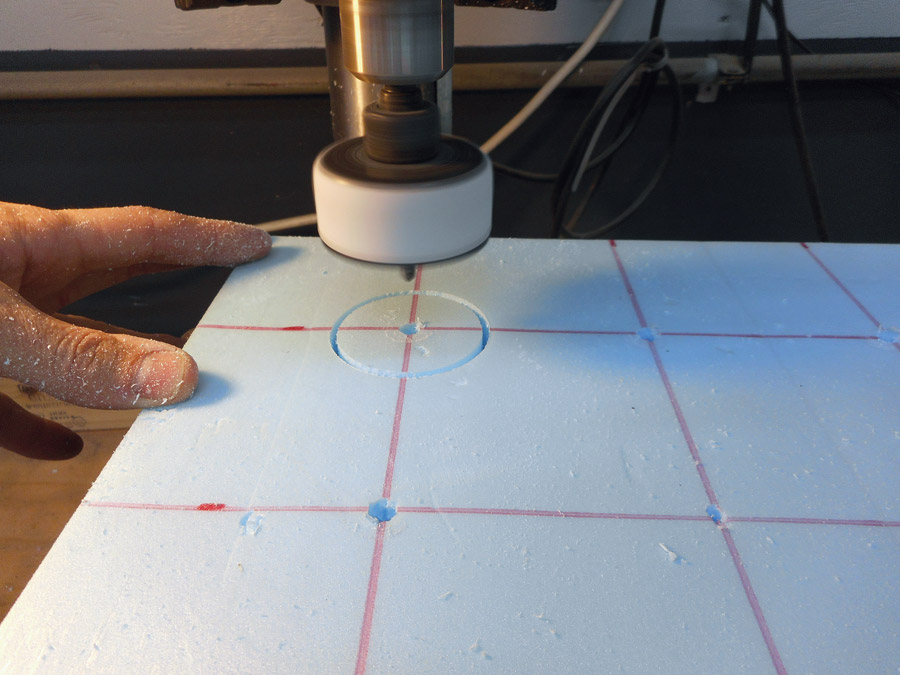
Use a hole cutter to cut the foam. I used a drill press for the perimeter holes, but had to use a hand drill for the interior holes. The band of white around the hole cutter is adhesive-backed sandpaper.
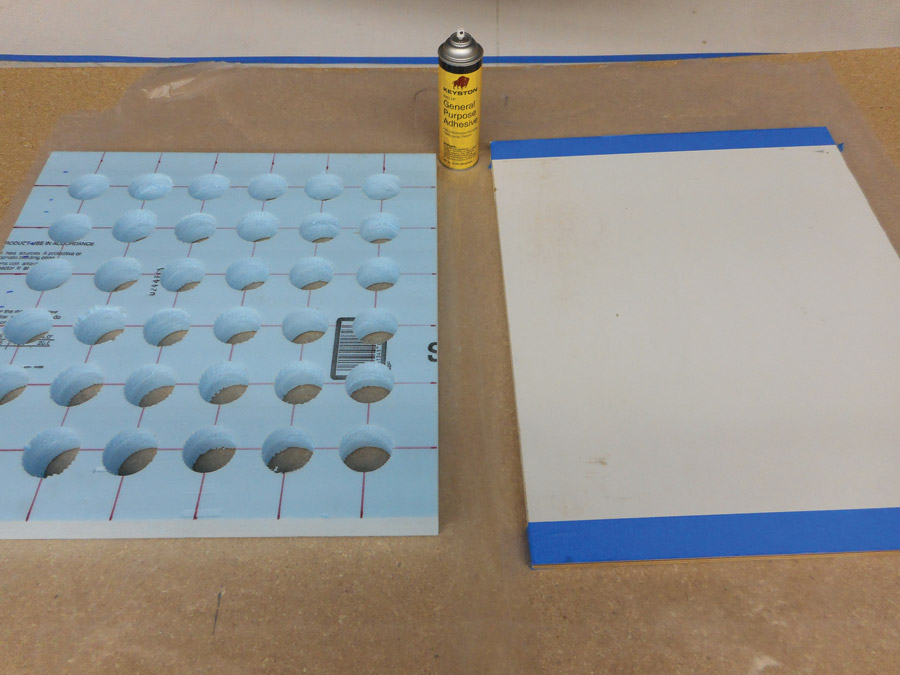
Use epoxy or a foam-friendly contact adhesive to mount the foam to a baseboard. Extend the baseboard a couple of inches beyond the foam for mounting, or you can also screw in through a hole to ensure lining up with a wall stud.

The finished rivet holder mounted to the wall. Not bad! About $30 for the jars and foam, and an hour of time to build.


