Having taught aerobatics in a Pitts S-2B for several years, I often felt the need for a two-place aerobatic airplane of my own. My wife, on the other hand, felt no such need in light of the potential demands to my time and the family budget an airplane represents. No basic aerobatic machine would suit me, either. Lightweight, low-powered “aerobatic” airplanes of dubious ability weren’t at all interesting. I craved power like a politician. Unfortunately, I had the budget of a flight instructor and no real hope of building, let alone buying, the plane of my dreams.
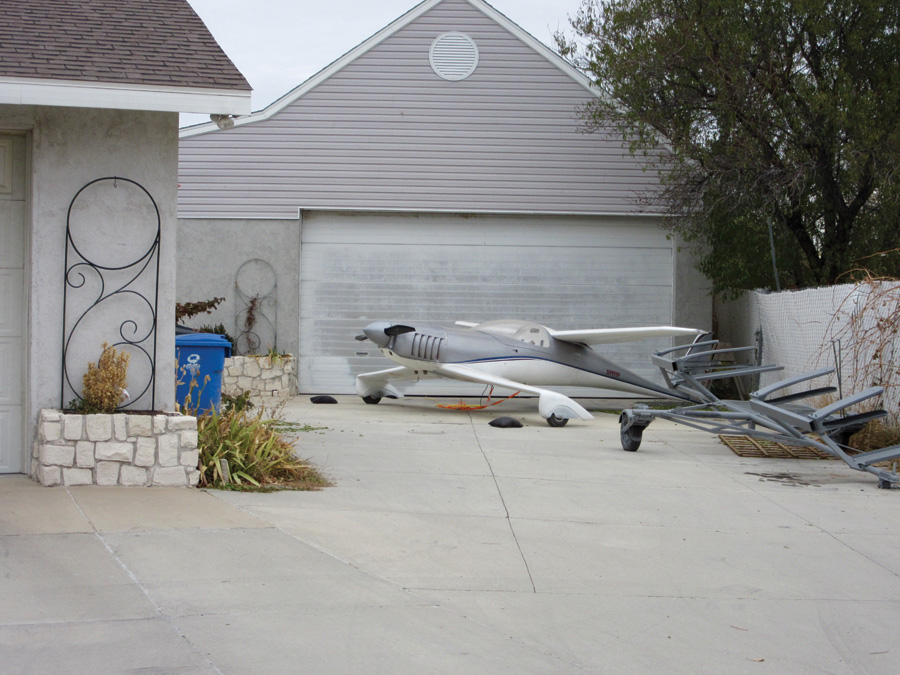
Plane and trailer occupy more space at home than cars or a boat.
In lieu of an actual airplane, I reasoned a good set of plans would at least keep the hope alive. I could build the occasional part, keep within tight budgetary limits, scavenge parts for years, and maybe, given enough time and persistence, see my dream take flight. I made the pitch to my wife while she lay, half asleep, in bed. You’ll have to guess her replies, because she mumbled and I couldn’t make sense of it, either:
“Can I just buy a set of plans? Only $300.”
I’m pretty sure she nodded, and said something like “Mmmokay,” or maybe, “Goway.” But I wrote the check and mailed it before she woke up.
When I showed the plans to my friend who owned a real Pitts, he offered to pay for the materials, if I’d agree to build it. He contributed the money, I put in the time, and we now share a plane that’s done. It took seven years, but the result is a beautiful and very powerful Pitts Model 12. That’s when I truly faced the high cost of flying—purchase and construction costs are just the beginning.
First trailer test splattered debris on the plane, revealing a need for mud flaps on the truck.
Insurance for a Pitts Model 12 is very expensive. We chose to pay just liability coverage to keep the cost down. Maintenance costs are surprisingly low. With a repairman certificate, I can do all the labor and after 12 years, the plane has needed only a few spark plugs and fresh tires. Fuel cost, especially the last 10 years, seems breathtaking, but it is easily managed by not flying as often. Indeed, all these costs can be brought to near zero by simply not using the plane much. Granted, a sitting airplane might quickly need repairs, but flying it twice a month keeps it in perfect condition at relatively low cost.
The hangar rent, on the other hand, is relentless. You can’t stop the rent by not flying the plane. We rent a hangar at the local municipal airport. The airport authority applies a complicated formula to determine rental costs—a formula that has raised the rent every year we have been there. A cherished airplane born of vast quantities of money and time could not in good conscience be parked outside, so the despised rent payments must continue. After 12 years, hangar rent has been the single largest expenditure in keeping the plane, about $45,000 to date. In addition, a tax inspector reviews the hangar contents once a year with the fire marshal inspection, resulting in assessments and fees to the personal property inside.
I began to scheme ways of not paying for a hangar. Building a hangar at the local airport is a raw deal—they want full ownership of the building after 25 years. The closest privately owned airport is embroiled in a lawsuit between the owners, and the next available field is over an hour away by car. I considered moving. Indeed, I’ve tried mightily to convince my wife that living on a private airpark would be much better than she thinks…No luck so far. So a different approach to flying comes to mind.
Alternatives
Start with a budget—a nice round number of zero. Is it possible to build a plane that costs nothing to own? Gas, oil, and parts bring an expense, of course, but they are user costs for the most part. I’m focusing on the fixed ownership costs: hangar, insurance and inspections. Choosing a simple, low-cost airplane mitigates two of these. Cheap enough, and you won’t care to insure it at all. Simple enough, and the inspection becomes an easy affair that requires relatively little time. So, how cheap and simple does it get?
A friend of mine keeps a paraglider in his closet. No insurance, inspection, fuel, or oil costs. To fly, he crumples it into the trunk of a car, drives to a local hillside and manipulates favorable weather into a few hours of fun. Cheapest flying I know of. Another friend keeps a Quicksilver ultralight. He found it in a barn and paid $2,000 for it. He’s since paid many times more keeping it hangared at the airport for several years, at $3,800 per year.
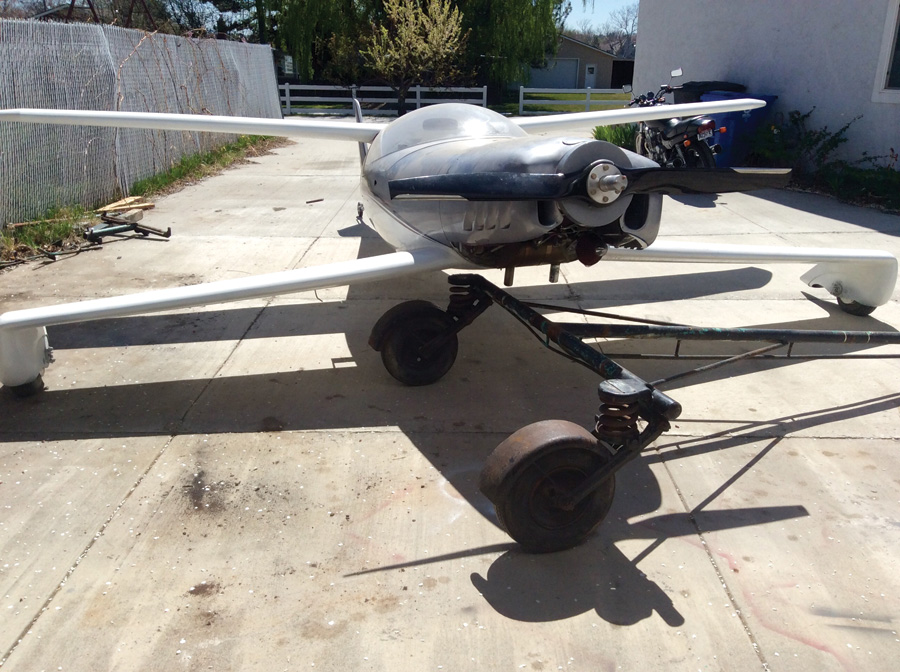
Maybe I could find a plane that fits in my closet? Perhaps my garage? Looking for a cheap, but also practical flying machine, I settled on a Quickie Q200 project several years ago. Now complete, the plane costs nothing to own because it still resides in my garage, the tax man does not know about it, it’s not insured, and not flying.
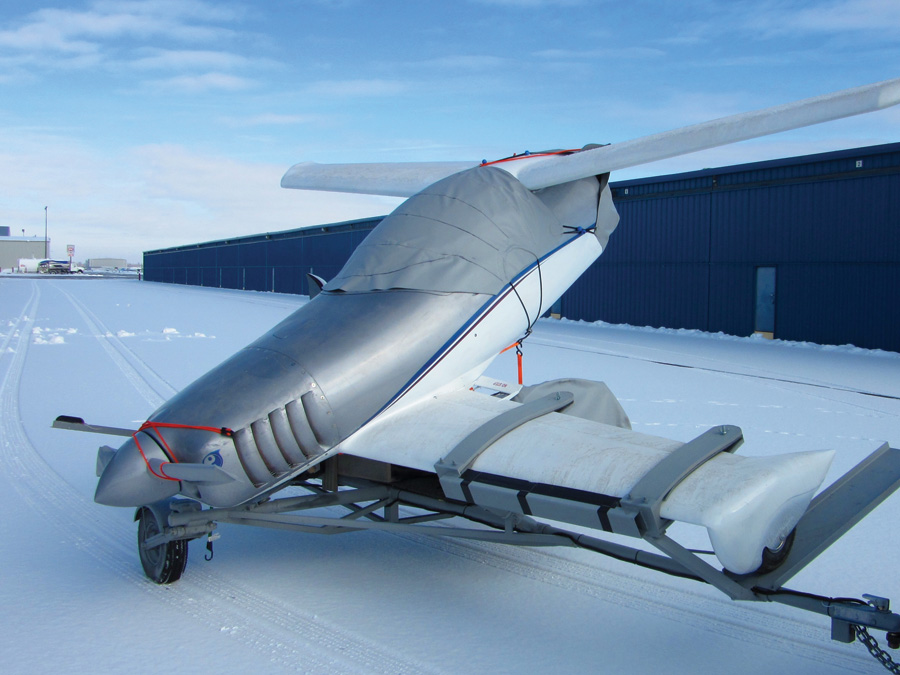
Much of the allure of the Q200 design, in addition to its efficiency, is the claimed “trailerability.” Simply remove the aft fuselage and the plane goes on a trailer sideways. This seemed simple enough in concept. In practice, however, some difficulties emerge. Without the tail cone, there is no tailwheel. The fuselage flops and drags on its backside. Worse, it might also rest on its nose, breaking a prop or crushing the spinner. Without the tail, it becomes awkward and difficult to move, requiring help. Even broken in half, the fuselage is too long for the road and must be propped at an angle, nose down, to meet lane width restrictions. The tail cone and vertical fin, while not particularly heavy, are unwieldy to handle, as well. “Trailerable,” in this case, suggests a difficult possibility—in the same sense a high mountain is “climbable.”
From a zero-cost standpoint, the trailerable concept must be quick, simple, and convenient to be of much financial value. Too difficult and the plane will eventually remain at the airport, drawing rent and the appraising gaze of the tax collector. Suddenly, aircraft sporting real trailerability, like the Kolb series, Kitfox, GlaStar, Europa, Dyke Delta, et al. look very interesting. Nevertheless, the Q200 project needed a trailer built to its unique configuration. Hopefully something convenient for day-to-day use.
On a Roll
I imagined a basic tubular frame with wheel ramps to one side. A cradle might catch the plane as it rolls in place, then pivot the whole shebang onto its nose. The wheels and axle must be quite short to fit under the low fuselage. A quick perusal of used trailer ads revealed this one—an ancient boat trailer with a tubular frame—really just rust clinging together with several layers of paint. One hundred dollars brought it home, where I hacked away everything that looked like a boat, leaving just the main chassis. This proved too tall to fit under the plane. Rewelding the axle to the center frame at a different angle dropped a few inches of height, then it got serious.
Two hundred dollars and a few days’ welding doubled the length, increased the width, reinforced the axle and support structure, and produced a deck from a salvaged window well cover. Another $27 bought a little winch to pull the plane aboard.
Sizing the trailer to fit.
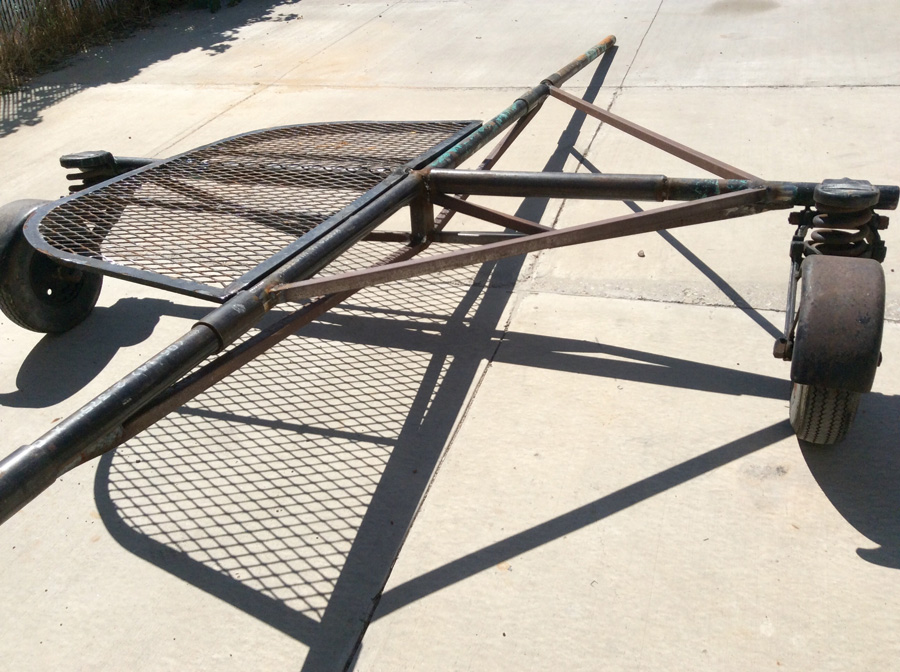
Basic trailer lowered, stretched, widened, and braced for the load.
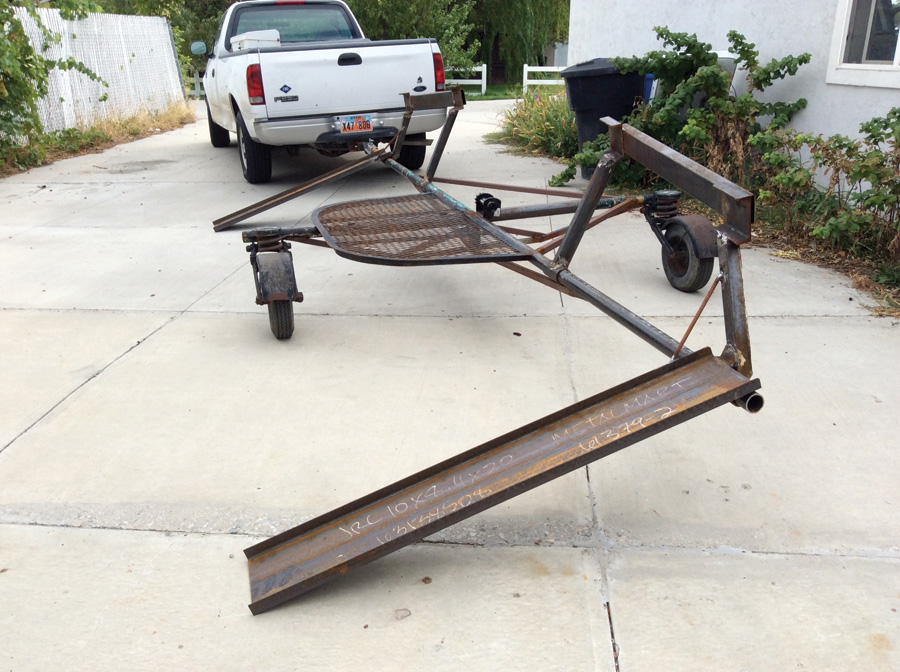
Ramps in position for loading.
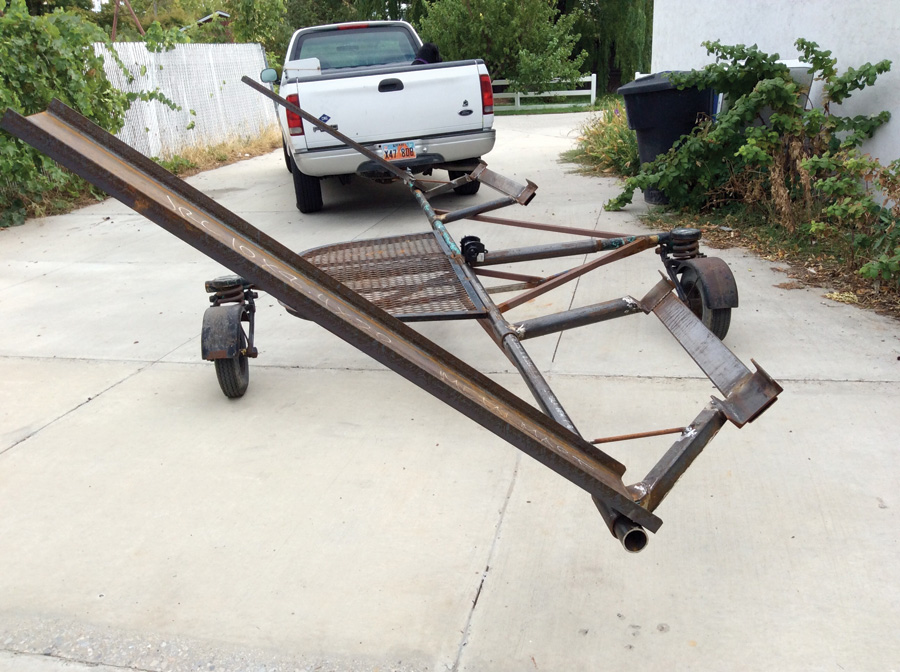
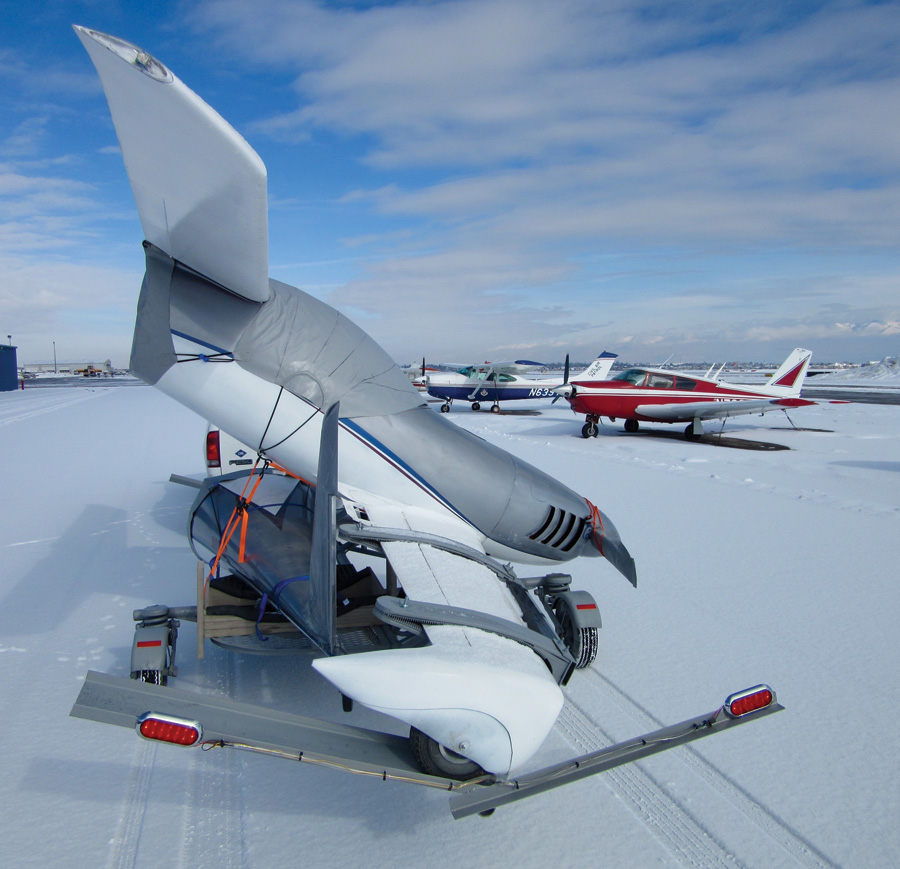
Approximate position for travel.
Mating an airplane to a trailer is a little like building a bird’s nest in a bear trap. The plane, fragile and light, tries to sit delicately in a twisted pile of heavy rusted metal. Almost immediately, the aircraft belly gouged a bit where it contacted the trailer. Worse, with the plane perched precariously on its ramp, a subtle shift sent it rolling, almost in slow motion over the edge, coming to rest on the wheelpants. The sound of crushing fiberglass still makes my hair stand up. Fortunately, the damage did not go to the structure and was easily repaired. With the trailer braced from shifting around, the plane held steady in place by a host of tie-down strapping. Welding up a catch mechanism and cradle for the wing boiled down to simple cut and paste.
From there, a little ingenuity with composite decking material and a rubber floor mat cut in broad strips produced suitable wing cradles. They are flexible and waterproof, impervious to extended weather exposure. Padding for the wing leading edge is simple foam, made from stacked pieces of floor mat, cut and glued together.
The small winch gave way to a more convenient and expensive variety that cost $120. It functions electrically, but I prefer to simply turn the crank. With everything in place and straps hooked to the winch, I turned the crank to observe the plane roll lightly up its loading ramp. I delighted at the ease of loading until a crunching sound gave me pause. Looking left and right, I could see no obstruction to the progress of the tires. Another half turn of the crank crunched again—louder. I looked carefully around, seeing nothing, then gingerly turned the crank a third time before locating the source of the noise, just as the pitot tube ripped away from the wing, catching on one of the wing cradles. Yet another repair and adjustment to the cradle followed. I relate this to illustrate the risk of trailering the project. A trailer is much tighter than a hangar and brings many opportunities for “trailer rash.” After sandblasting, paint, and lights, the trailer cost approached $900—less than three month’s rent.
The tail cone presents a problem of its own. Unwieldy, it is very difficult to hold in place to connect the rudder cables without help. Some creativity with more decking produced a fixture that holds the tail cone on the trailer, as well as supports it on the ground, in position for mating with the fuselage. This process is still (perhaps always) under development. I’d like the on and off loading of the airplane to be simple, quick, and safe—something convenient enough to do before and after every flight. If it sounds complicated, look at the steps involved when compared to using a hangar.
- Drive to the hangar.
- Open the hangar doors.
- Remove the plane.
- Park car in the hangar (required at the local airport).
- Shut the hangar doors.
- Preflight the plane.
Here’s the trailer concept in action:
- Drive to the airport towing the trailer.
- Assemble the airplane.
- Unload the plane.
- Park the car.
- Preflight the plane.
There’s fewer practical steps to the trailering process, assuming each takes a similar amount of time and effort, and discounting the potential complexity of aircraft assembly. Whether or not this is truly convenient can only be verified by use over time. Either way, the plane has to ride a trailer to the airport at least once anyway, and it’s almost ready to fly.

The plane is at considerable risk from other traffic while enroute to the airport.
Going Undercover
I’d like to keep the plane on the trailer outside to free up shop space for future projects. This requires weatherproof covers for the canopy and the open ends of the fuselage when separated. A quick search of ready-made canopy covers finds several near $400 each. Three covers by themselves would cost more than the trailer.
In an effort to save cost, I set out making my own covers out of material commonly used for rubber rafts and hovercraft skirts. This worked out better than I’d hoped. Unable to sew, I selected PVC vinyl for a medium, bonded with HH-66 vinyl cement. I bought five yards of material and a quart of cement for $100. Another $50 paid for chamois to protect the canopy. I had no real idea of the best way to pattern a suitable cover, so I simply placed the fabric over the canopy and cut gingerly until it lay flat. A few marks to align the seams and gluing went quickly. The cement was very easy to use. I worked in small sections, spreading glue on both surfaces, waiting a moment for it to get tacky, then pressing the parts together. It sticks immediately and forms a very strong bond. Refer to the photos for a better understanding of the process. In the end, the covers are strong, waterproof, and cheap. The fuselage covers will stay with the trailer, and the canopy cover is light enough to go with the plane on its future travels.
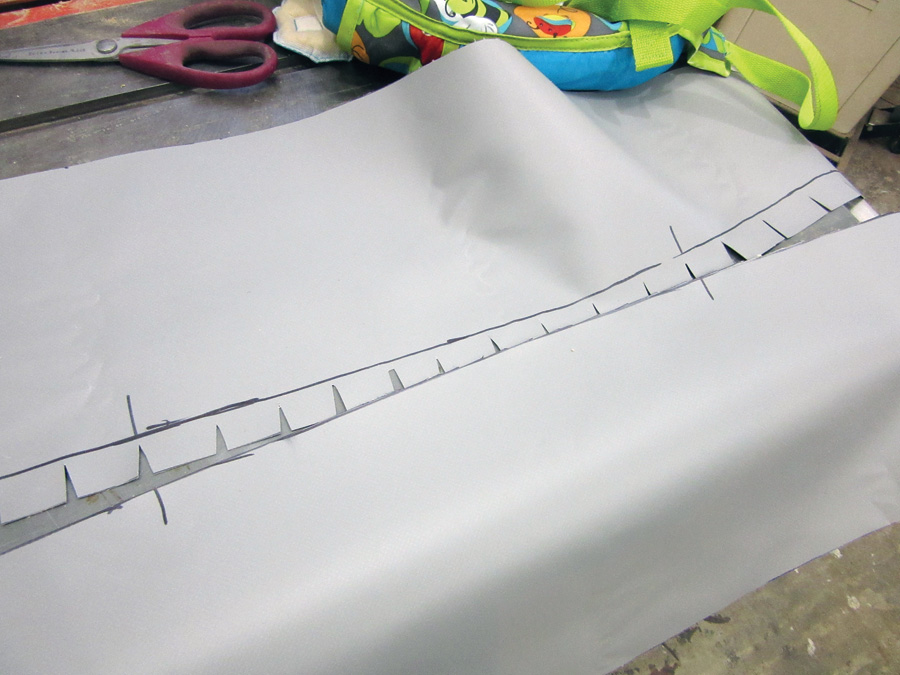
PVC vinyl is easy to cut and paste together.
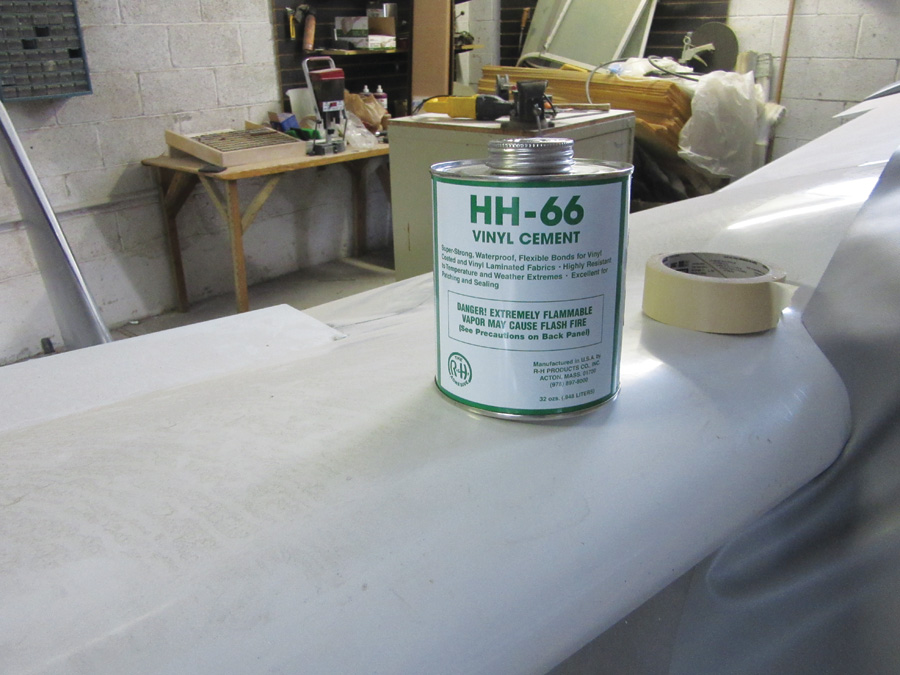
This is excellent contact adhesive—very effective and easy to use.
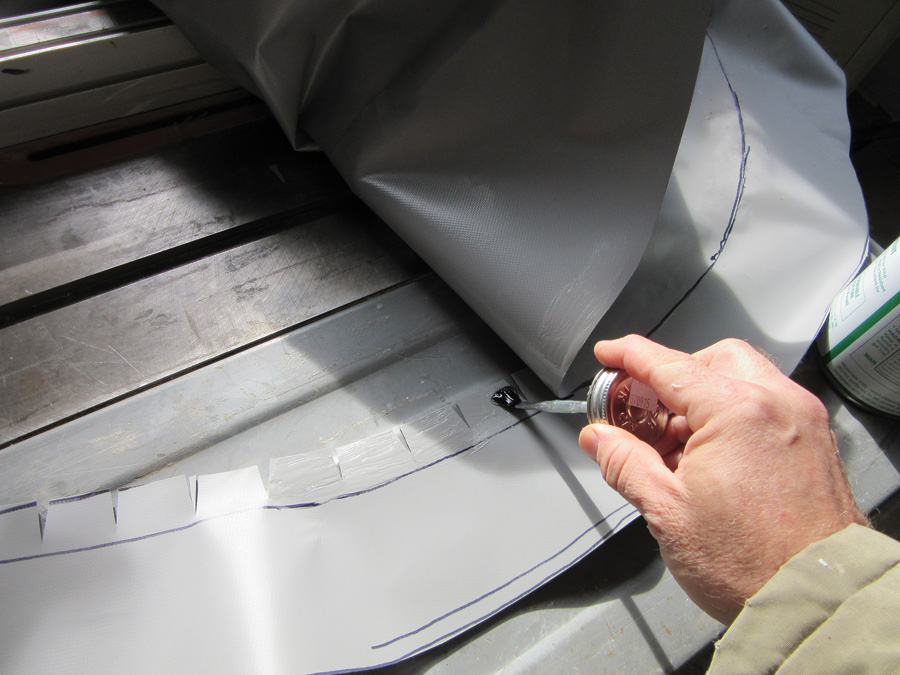
It’s best to bond short sections at a time.
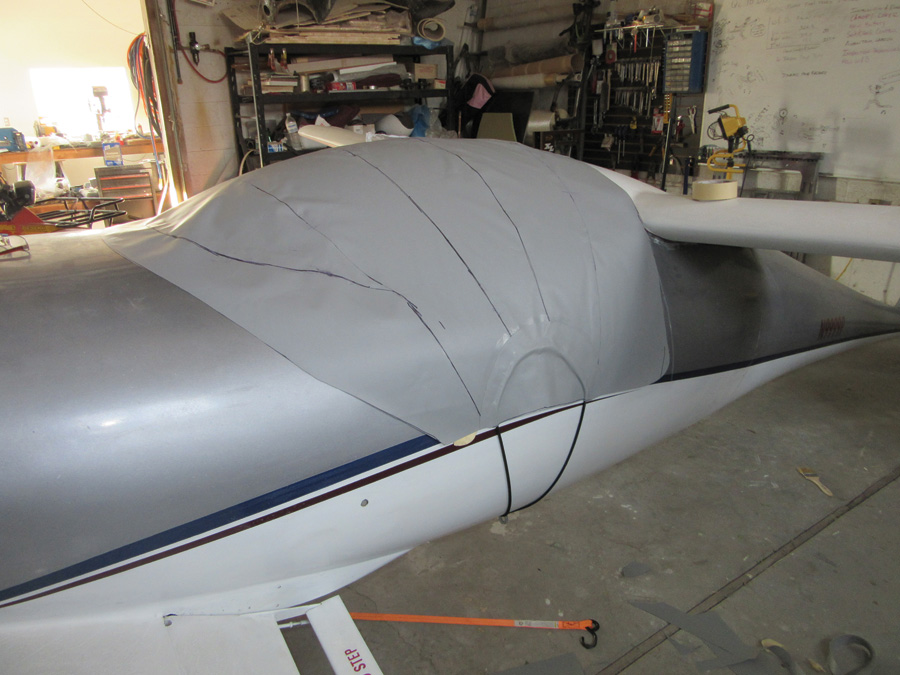
A completed DIY canopy cover. No experience required.
The trailer introduces a new set of testing requirements. It must be roadworthy in the same way the plane is suited for the air. It’s easy enough to build a trailer—good parts are commonly available, and it just requires a welder and a little imagination. But it’s a challenge to build a trailer with the right center of gravity, road handling, and safety features. A very difficult aspect of the trailer concept is the road environment itself. I wonder at the risk exposure while dragging a fragile airplane down the road. This leans heavily to the hangar’s favor. Other drivers pose the greatest risk to the plane, just going to and from the airport. For the moment, this is an exercise in the possible. In practical use, driving to the airport on quiet streets at 3 a.m. might get old fast. However, I will test the plane, on its trailer, in the coming weeks. Hopefully, I can develop a suitable operational method that saves the expense of hangar rent and approaches our ideal “round” budget plan.
Look for a detailed cost analysis on this project in the months to come.

![]()
Lewis Bjork has constructed many airplanes, authored a few books and numerous articles. He enjoyed flying for SkyWest Airlines the last twenty years, and is married to Linda, a very patient wife. They are the parents of five children.


