My good friend and longtime building buddy, Ed Zaleski, and I have been looking for something to do; it’s been eight years since we finished our last project, my dear departed Legend Cub. Since then, we have been keeping busy helping friends with their projects and flying a bit, but we wanted to build another plane ourselves. The question was, what plane?
We spent a lot of time considering various Super Cub-type kits, mainly looking at replacing the Cub with something more capable. However, when we really looked at the type of flying we do, as opposed to the type of flying we think about doing, it became clear that a true bush plane would not exactly match our most likely flying mission. If we lived closer to someplace where we could do a lot of bush-type flying that might be different, but we don’t. That led us to think about a plane with better cross-country capabilities but still has some reasonable short-field performance. Of course, we also had to consider the budget, which is not unlimited (whose is?). What we ended up with was a partly completed GlaStar kit. This wasn’t a random decision, since our first project had been a GlaStar. We were very familiar with the strengths and weaknesses of the plane and liked the tradeoffs that were involved.
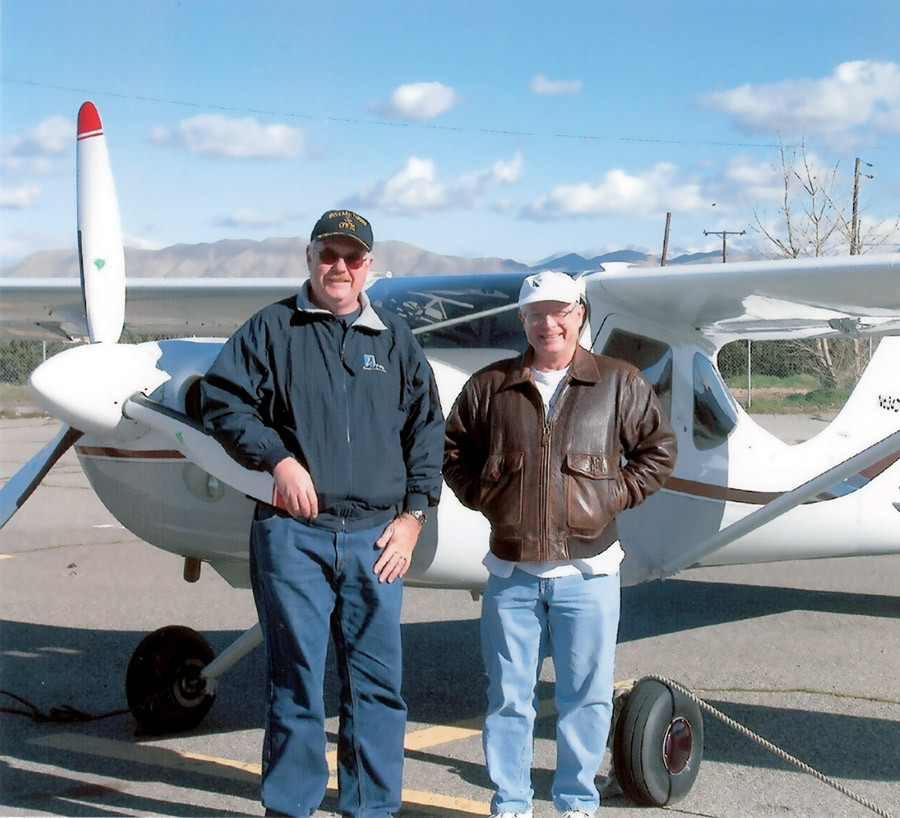
Dave Prizio and Ed Zaleski with their first GlaStar after converting it to conventional gear. The photo was taken at Hesperia (L26) in Southern California. Their new project will have the same basic engine, a Lycoming O-360, and conventional gear, but after that it will be quite different.
The decision to buy a project that was partway though construction presented some opportunities and some challenges. In my upcoming articles, I will examine these and share our experiences with you. I am sure we will all learn a few things that will be of interest to others who are considering this option. It will be interesting to see if the things we think are challenges really turn out to be problems, and if the things we think are advantages really turn out to be beneficial.
Finding a Project
Before buying any kit, partly completed or otherwise, you want to be sure that its performance will fit with your skills and typical flying. In the case of the GlaStar we were very comfortable on both counts. I was also reasonably sure I could find a kit that would allow me to stay within my budget of about $75-80,000 for a completed plane. The plan then was to look for a good deal on a GlaStar project that someone no longer wanted to complete.
I used the Glasair Aircraft Owners Association online forum as my primary search tool. Certainly, Barnstormers and Trade-A-Plane are other good sources, but I thought the GlaStar owners’ group would be the most likely place to find a good deal before it became available to the rest of the world. Similarly, if I had been looking for an RV kit, I would have first checked out Van’s Air Force.
My search turned up two possibilities. The first kit was closer to me but more expensive. On the other hand, it also included a new-in-the-box engine, a Superior IO-360. I was not planning to go with a fuel-injected engine, but it would certainly work. The other kit was less expensive and owned by someone I knew, but it was twice as far away, all the way across the country in Florida. This would add to the cost of checking it out and the cost of shipping if I decided to buy it. As it turned out, the first kit was sold by the time I called to inquire about it, so after some negotiations over the phone, I was off to Florida to check out our next possible project.

Our seller, Herb Karkheck, spent many years working on the GlaStar when he could, but eventually time just caught up with him. This created an opportunity for us. Here he is working to install the shear plate that will go under the horizontal stabilizer.
Evaluating a Potential Purchase
Once you have decided on the type of plane you want to build and found a potential project to buy, you will need to figure out whether that particular example is worth buying. Fortunately, I was very familiar with the type of plane I was considering and how it goes together. If you are not, go find someone who is. You will need to do a pre-purchase inspection just as if you were buying a flying airplane.
The work done on this plane had been checked out several times by a skilled builder that I also knew, so I was less concerned about workmanship than I would normally be. A good conversation with him made me comfortable with the idea of buying a plane ticket without first getting a lot of photos from the current owner. Had I not had this unique resource to tap, I would have insisted on many photos showing what parts were there and how they were put together before I invested in a trip to Florida. Also, had I not been very familiar with the type of airplane I was considering, I would have sought out someone with the relevant expertise to help me with my evaluation.
When buying a partly completed kit, there are two big concerns. One, are all the parts there, and if not, what will it cost to acquire them? This can get rather sticky if the original manufacturer is no longer in business. If necessary, go through the complete kit parts list to be sure you know what you are getting. A good deal can go sour quickly if you are missing some expensive parts. In this case, the more work that is finished, the easier it is to see what you are buying.
Herb had quite a bit of the basic structure completed by the time he decided to sell the project. This made it much easier to evaluate what parts were there and what was missing.
The flip side of a lot of work being already done is evaluating the work. Poor work that needs to be redone may be no bargain. Some of this is pretty easy to figure out, but some of it may need some specific knowledge of the type to be properly evaluated. Work well done will save you building time and usually adds little to the price.
If you do the pre-purchase inspection yourself, be sure to take lots of photos of the parts that are included and what work has been done. If you hire someone else to do it, be sure they get those photos and send them to you. If you have the project shipped to you, those photos could be very valuable in case things are missing or damaged.
As you work on sorting and storing, it is time to start making a list of what you will need to complete the project.
The Paperwork
Once you have come to terms, and before money has changed hands, you will need to get a few things. You will need an FAA bill of sale form filled out by the seller. This is Form 8050-2. Be sure the form you use has not expired by checking the date in the upper right corner. Cross out the word AIRCRAFT at the top of the form and write in KIT. Be sure to include the serial number, and be sure to have the seller sign the form.
If the seller is the original owner, try to get the invoice or bill of sale from the kit manufacturer. Luckily, I was able to find this in my seller’s box of papers. If it was built from parts and plans, try to get receipts for major components. If the seller is not the original owner, you should try to get the bill of sale from when he or she bought the project from any previous owner. If this is not possible, have the seller write a letter to you explaining the chain of ownership from the beginning to his current ownership as well as it can be recalled. If parts of the story seem shady, you may want to pass on the deal. You need to be able to make the case to the FAA registration division that you are the rightful owner of the aircraft when it comes time to register it.
Besides the bill of sale and support for your clear title to the project, you will need to get evidence that the work that has already been done is the result of amateur effort and not commercial assistance. The builder’s log and photos work best for this. If this is not available, you should get a letter from the seller attesting to its amateur-built status and at least a rough estimate of when key elements of the work were done. This can get difficult if a project has been passed to several builders over a number of years. There is no clear standard for what is sufficient evidence, so you will just have to evaluate it as well as you can. Once you are satisfied with all the paperwork, you can write the big check and become the owner of an airplane project.
My seller was a little weak in this area, but he did have some photos. I also found a photo album from the first builder that will be very helpful.
Getting Your Project Home
You have decided to buy a project and made your deal with the seller. Now what? There are commercial carriers who can transport your project for you, or you can rent a truck one way from someone like Penske and haul it home yourself. There are pros and cons to both approaches.
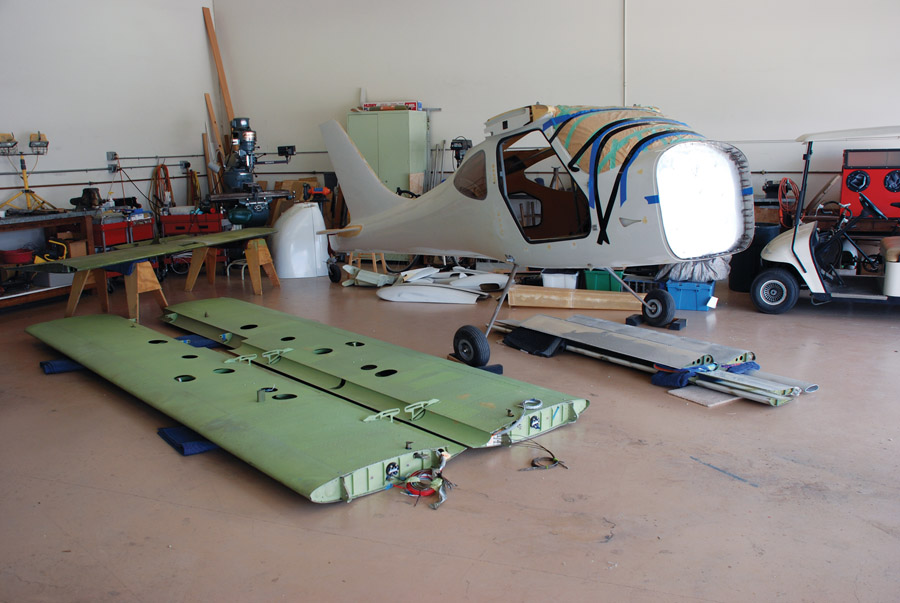
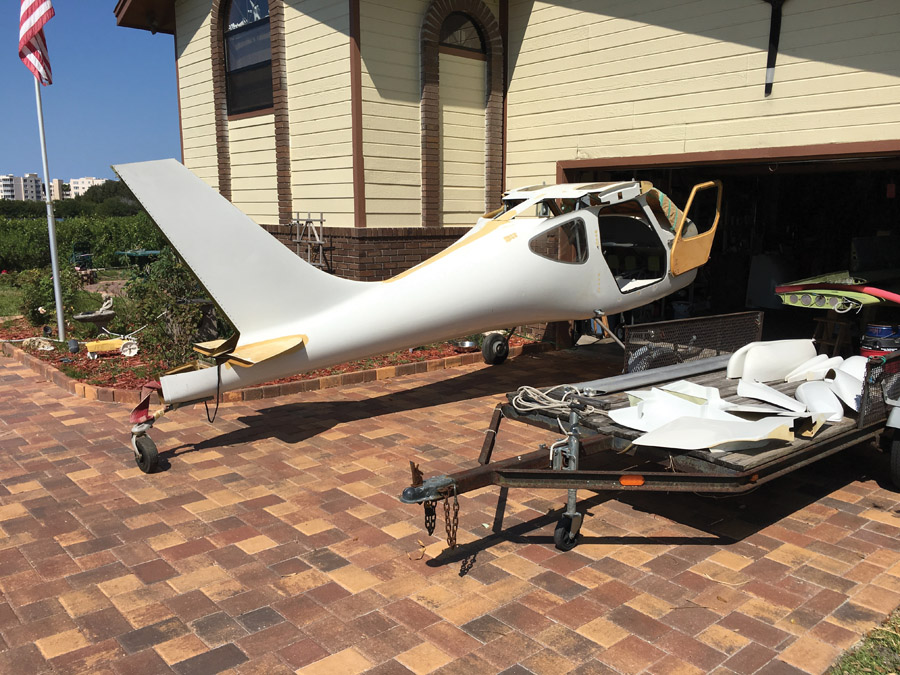
Here is our new GlaStar project out of the truck and on the hangar floor. A lot of sorting and storing come next, so we can find what we need when we need it, decide what we need that isn’t there, and avoid damaging what we have.
Using a commercial shipper may seem expensive, but don’t forget to figure in the cost of airfare to get to the seller, truck rental, fuel, and hotels on the way home, and any packing supplies you may need to secure your load. The savings start shrinking quicker than you think. The biggest advantage of doing it yourself is your ability to control when you pick it up and get it home. With a commercial shipper, your shipment is a partial load, so it must be matched up with another partial load going to and from roughly the same places. It could take a month or more in some cases to get your project picked up and delivered to you. At least that was my experience.
Once your project arrives at its new home, it is time to check and see if everything got there in one piece. If you hauled it yourself you should have a pretty good idea of how it faired, but it would still be a good idea to look everything over to be sure. Sometimes things rub against each other or against the vehicle in route and damage things. If your kit was damaged by a commercial hauler, the time to complain is when things are getting unloaded. After that it is your word against his, plus he has your money. Once the truck has pulled away, whatever is left is yours.
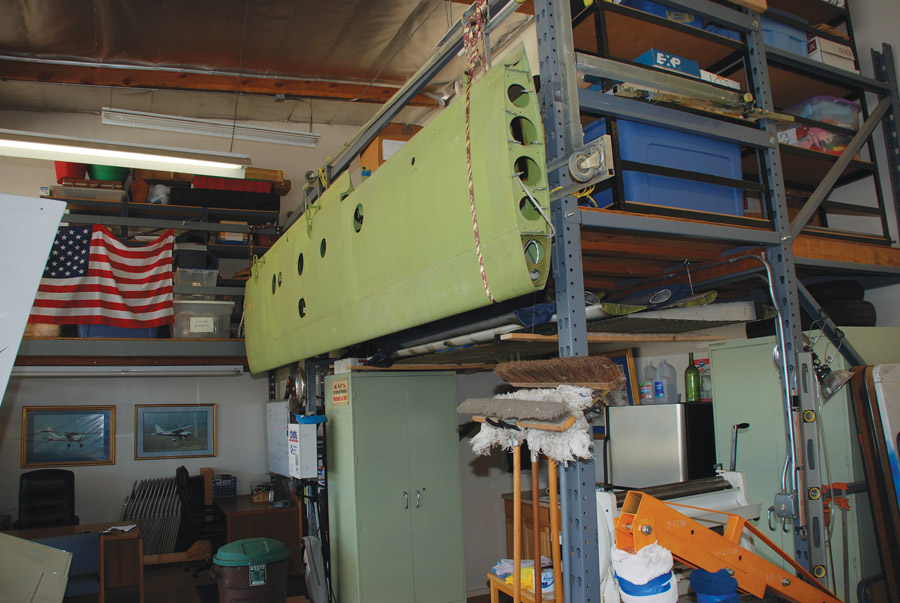
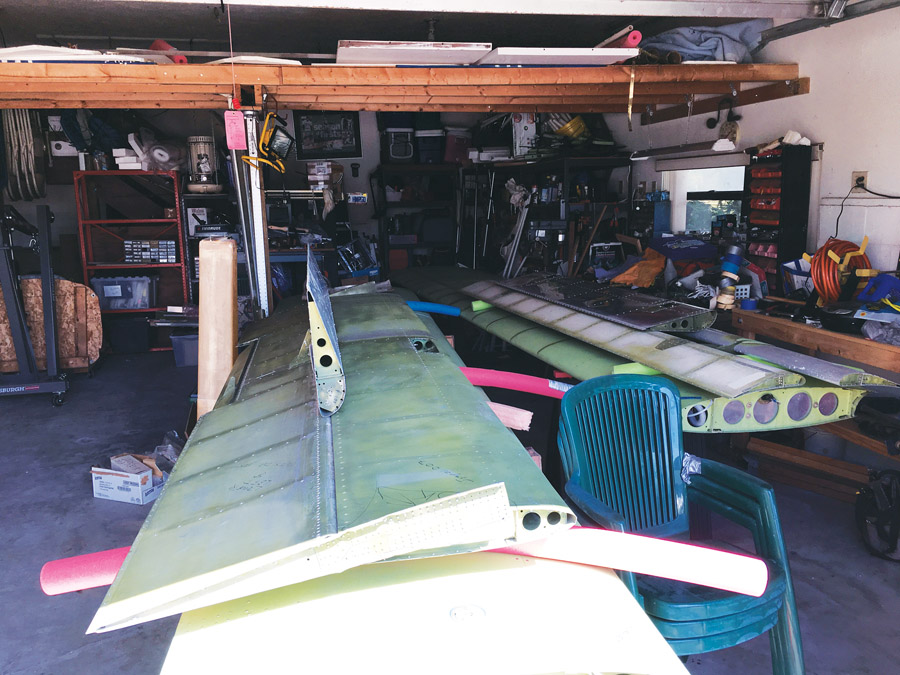
A wing with the fuel cells removed gets hoisted up out of the way to wait for parts while we work on the other wing.
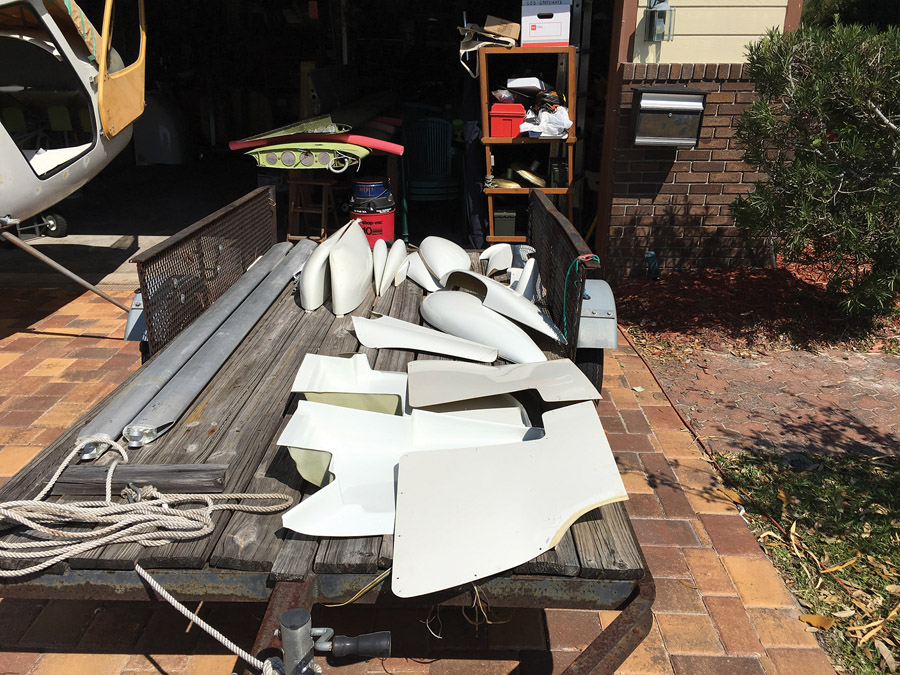
Assuming the shipping went well, you now have a big pile of parts to sort out and store until they are needed. It is important to secure items that will not be worked on immediately so they won’t get damaged. In my case I decided to hoist the wings up off the floor where they would be out of the way. Same for the horizontal stabilizer, flaps, and ailerons. Then fiberglass parts went onto shelves and small parts got sorted and stored away.
As you work on sorting and storing, it is time to start making a list of what you will need to complete the project. In my case I knew I had a few damaged parts and some missing brake parts. There was also the matter of some 17-year-old fuel bladders that needed to be carefully checked before use. In addition, I want to replace the standard GlaStar flaps with Sportsman flaps to improve short field performance and make working the flaps easier. That will require me to order some Sportsman parts from Glasair, plus a few GlaStar parts at the same time. Of course, your list will vary depending on your desired end results. And, needless to say, you will find little things missing as you go that you did not take into account initially. That is pretty much a given, so plan for a little contingency fund to cover such things.
As you start totaling up the cost of the missing and damaged parts you will need, you begin to develop an appreciation for how important it is to get a good deal on the project initially. It is pretty easy to run up a tab of $1000 or more filling in the holes in your parts list. It is also important to store parts in a way that they will not become damaged, lost, or accidentally discarded. Take the time to get organized in the beginning, and save yourself trouble and money later.

Ed pulls a fuel cell bladder out of a wing, so it can be sent in for inspection and possible replacement. There are four of these, including two main tanks and two auxiliary tanks. They were not much fun to get out since the root ribs had to come out first.
At this point the GlaStar is sitting in our hangar waiting for parts to arrive from Glasair. The fuel cells are out of the wings and on the way to Eagle Fuel Cells for inspection. Everything else is stored away where we can find it. Next time we will be working on the flaps and the aileron anti-servo tab retrofit. The fuel cells should also be back by then, so the wings will be the center of our attention. After that, it will be time to start looking for an engine and some avionics.


