The Experimental aircraft community is blessed with a plethora of designs that captivate the interest of builders regardless of mission requirements. My first two projects were designs that reflected a love of relaxed aviation at low altitudes and airspeeds. Subsequently, the restoration of a 1940 J-3 reinforced the love of vintage-style aviation, but my third homebuilt, an RV-6, was an excursion into a very different corner of the performance envelope. Since 1999, the RV-6 has served admirably as a transport to far-flung areas of the country and, even more impressively, a portal into the wonderful and vast community of RV owners.
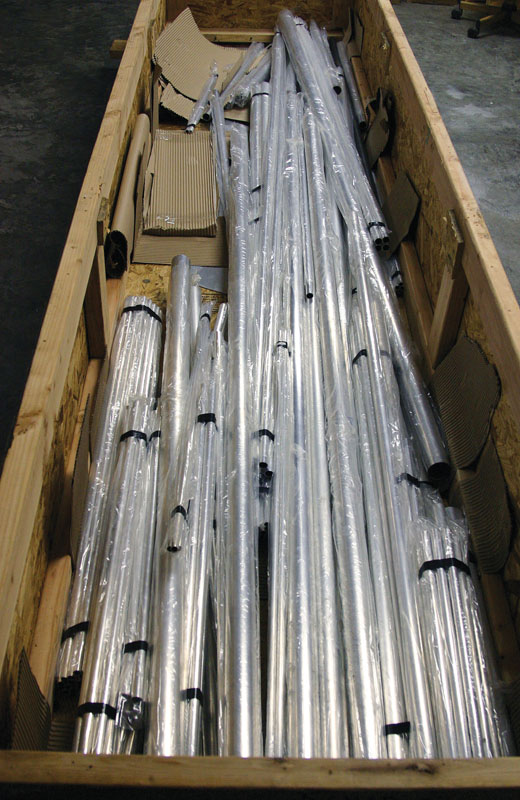
Fokker D.VII in a box. The kit falls somewhere between a complete kit and a pure materials kit.
But the low ‘n slow urge is difficult to suppress, and a few years ago a plansbuilt Legal Eagle XL emerged from my shop [see “Legal Eagle XL,” January 2013]. The Eagle, an ideal complement to the RV-6, was enjoyed over the course of four summers before passing on to a new owner. However, building fever is a difficult affliction to shake, so the search was undertaken for a new project to occupy the shop. This series of articles is about how I selected a new project based on my priorities, proceeded to build the aircraft in a relatively short period of time, commenced flight tests, overcame serious issues with the airframe, but ultimately achieved my goal of a unique, enjoyable Light Sport Aircraft.
What aircraft would be a good companion for the RV-6 that resides in my hangar and would possibly close the loop on my building journey and leave me with an LSA-eligible aircraft? Low ‘n slow, yes, but this project could be something a bit different from what is customarily seen on the local airport ramp. A craft suitable for traveling isn’t needed, and I am content to enjoy late evening flights while flying solo. A highly fabricated or quickbuild kit was not necessary to find a place on my list of prospective projects because I have built two aircraft from plans and enjoy the challenge of solving construction details that often occur when building from plans.

The tube-and-gusset method of assembly only requires simple tools and results in a light, rigid structure. The turtledeck is one example of an area of the airframe that is undocumented in the plans and left to builder discretion. I added plywood formers to support the stringers.
My decision tree for this project was not unlike scores of other builders who have flipped magazine pages, surfed websites, and roamed airshow grounds. Tire kicking is fun and low risk, but at some point branches on the tree need to be finalized if a project is to become reality. I hope the exploration of my priorities during this process will offer assistance to those considering entry into the wonderful community of Amateur-Built aircraft. Informed decisions are the key to an enjoyable project that results in an aircraft that meets anticipated needs. But an enlightened builder should also realize unexpected hurdles can appear in even the best thought-out plans.
Few projects are considered without calculation of cost verses available budget. Even though budget ceiling was not a major consideration for this project, I still wanted to hold total expenditure to an amount where I would be comfortable, considering it more as a “toy” than a significant investment. I realize this is a relative number and dependent on a builder’s station in life, but most aircraft builders are looking for a magic carpet that can be incorporated into a family budget without creating domestic tension. This is a critical aspect of project selection—lack of family support can not only lead to less enjoyment of the build, but possibly more serious relational repercussions.
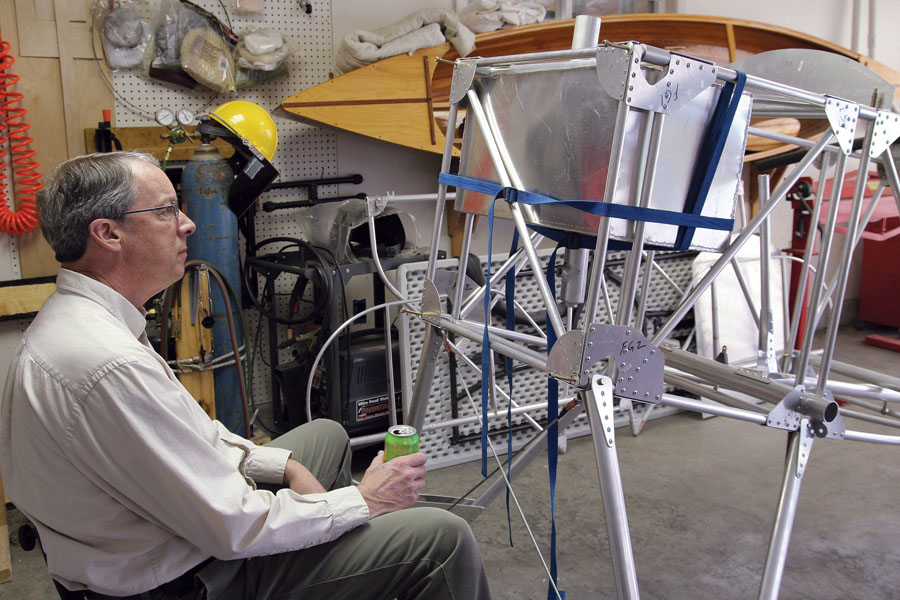
Plans builders spend much time visualizing possible solutions to construction details. Here the mental gears are slowly grinding while searching for a means to secure the fuel tank within the fuselage while still allowing it to be removed from a finished aircraft.
Finding the Fokker
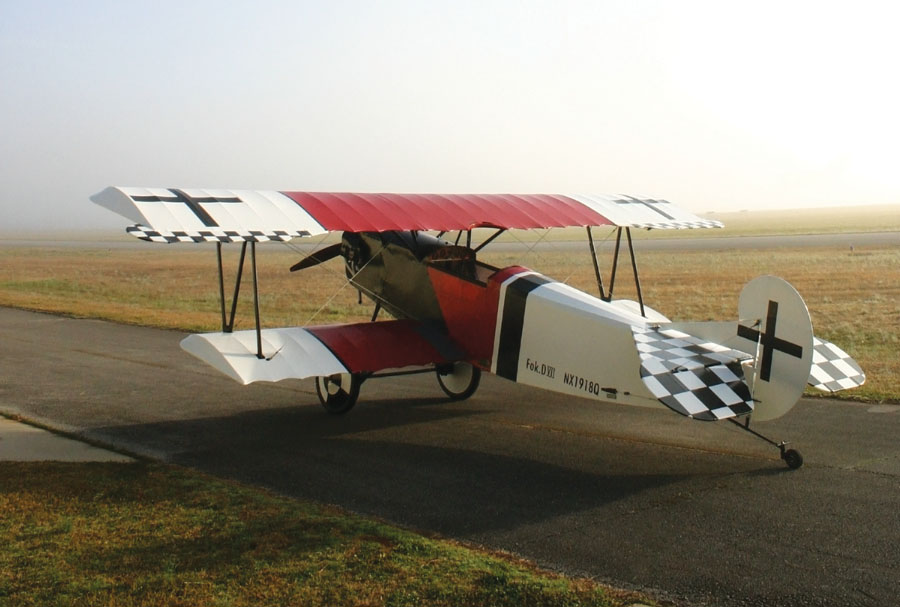
A kit vendor in rural Missouri turned out to be the key that unlocked this new door and also resonated with my past as a history teacher. What better way to celebrate low ‘n slow and historical provenance than a WW-I replica, especially since we are in the midst of the WW-I centennial? I’ve been an avid reader of Dick Starks and the antics of his merry band of misfits for many years [see “The Dawn Patrol—Take Time to Peel a Banana” on page 56] and am fascinated with the technical and physiological challenges encountered by WW-I aviation. Robert Baslee, owner and mastermind of Airdrome Aeroplanes in Holden, Missouri, has supported the WW-I replica community for many years, and the more I explored building an AA aircraft, the more it became evident this was the path that would fit my mission. And… I needed to add a biplane to my aviation experience.
However, this path was not taken without reservations. My previous kit aircraft projects have introduced me to airframe skills using wood, welded steel, riveted aluminum and fabric techniques, along with the painting process. But the AA aircraft are a slightly different breed in that they are constructed with aluminum tubing and gussets fastened with pulled rivets. Traditionalists will likely not be impressed with this means of construction that has its roots in the very-light-aircraft arena. Concerns about pulled rivets working loose and fretting will be expressed, but the builder who approaches the project with an open mind will recognize how this technique yields a light, stiff structure in a relatively short time frame. Not having owned an aircraft with a riveted tube airframe leaves me somewhat in the dark as to how it will fare long term. But light aircraft with this method of construction have been in service for many years, so I embarked on this journey confident of a good outcome.
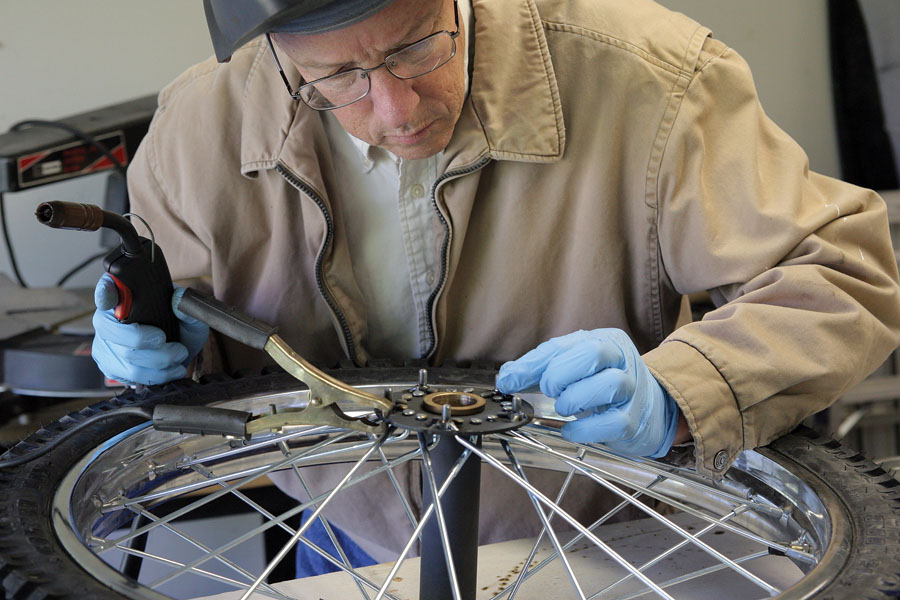
A distinctive feature of WW-I aircraft is their large, spoked wheels. The D.VII has 21-inch wheels with custom heavy-duty hubs. Bolts were welded to the hubs so the spun aluminum covers can be easily removed in the field for tire maintenance.
It is interesting to note that the latest models introduced by Airdrome Aeroplanes offer the option of a welded-steel fuselage. This speeds construction of the aircraft even more and reduces concerns among traditionalists about structural integrity. This is also a prudent move as the model lineup appears to be moving quickly into the realm of full-size aircraft verses scaled-down replicas. The steel fuselages will be able to easily accommodate larger aircraft engines demanded by full-scale airframes. It is a sign of our modern culture that some of the early AA aircraft, designed 20 years ago when pilots tended to be sub-Bubba in girth, are no longer the best fit for many current builders.
A survey of the Airdrome Aeroplanes web site reveals a multitude of different WW-I aircraft with new versions added annually. The builder must decide whether to join the air forces of the Allies or jump over to the Germanic side of the conflict, but my priorities were directed more toward finding an airframe I liked, instead of making a firm choice of national allegiance. I also examined which AA airframes appeared to be designed with a minimum of complications such as numerous flying wires, swept wings, etc. My decision to be a Fokker D.VII pilot was influenced by the simple airframe design and research that revealed the D.VII’s reputation as the most advanced fighter of the conflict. The Airdrome Aeroplanes’ version of the D.VII is 80% scale, which is large enough for a modern-sized pilot, but not as difficult to hangar as a full-size D.VII. The 80% airframe yields a low wing loading that feels familiar to a pilot with experience in vintage aircraft such as a J-3 or Champ. An interesting option for the D.VII kit is the “Fat Fokker” version, which adds a few inches of width to the fuselage. However, I prefer the appearance of the standard D.VII, and it provides a comfortable place to reside as I stalk the skies in search of…sunsets.

Aluminum 6061 tubing is bundled according to which area of the airframe it belongs.

Each tube is marked so it can be associated with the proper drawing.
Kit Details
In scope the AA kit falls somewhere between a complete kit and a pure materials kit. A materials kit includes raw stock needed, but no machined, cut, or formed components. At the other end of the spectrum are complete airframe kits with pre-punched holes, machined and pre-formed components, accurate hardware assortments, and comprehensive documentation. Obviously, the builder pays for the fabrication present in the full kits. I consider the D.VII kit to be a hybrid, with tubing necessary for the airframe included in the kit, along with many precut gussets. Also included are rivets, wheels, fuel tank, cable stock, turnbuckles and hardware. The tubing must be cut to finished length but is labeled so it can be associated with the proper sub-kit. The AA kits can be purchased as sub-kits if a builder wants to be on a pay-as-you-go track, but I ordered the complete kit minus engine mount and covering supplies. I anticipated needing to source these items myself because of the unique characteristics of my build.
The kit is reasonably priced due to the limited pre-fabrication provided. However, I found areas of the AA kit experience that could be improved. One is the absence of a packing list, which makes it nearly impossible to completely inventory the kit when it is received. I found various hardware shortages that didn’t become apparent until I reached a particular point in construction. While AA was prompt to make good on most of the shortages, it would have been much better to find them as the shipping crate was unpacked so they could be addressed early and all at the same time.
Another shortcoming of the AA kit compared to mainstream kits is documentation. A generic build manual is included along with many pages of basic dimensions, but there are components of the airframe that are not covered in the plans or manual. Some of these areas receive attention via a photo CD and DVD of a build that occurred in the AA shop. But a first-time builder is going to be seeking guidance from someone who has prior experience with scratch-building aircraft. Even though Robert Baslee will readily discuss issues during a phone call, more specific documentation would be helpful for all builders, especially those with limited shop experience. Firewall forward is left totally to the creativity of the builder, along with interior appointments and some of the control surface attachments.
I found it more difficult to achieve precision with the tube/gusset construction when compared to welded, wood, and monocoque aircraft I have previously built. This probably isn’t the best material for a builder obsessed with tight tolerances and cabinet-quality joints. But what it lacks in preciseness it compensates with speed of assembly and eventually results in a sound airframe. Once the knack of drilling scores of holes into round stock is mastered, the build proceeds quickly.
Choosing an Engine
No builder enters deep consideration of a kit without looking at engine options. The AA D.VIIs are a small fleet of completed aircraft, all powered by non-aviation engines. Some fly behind big-bore redrive VW engines, others with automotive-derived powerplants. A prime consideration for me was an engine that required minimal fresh engineering and maintenance with a proven field history. This pointed me toward Lycoming, Continental, or Rotax four-stroke engines. Rotax would be a fine choice but too high-dollar for this project. A Lycoming appeared to be more power and weight than the airframe could readily accommodate. The little Continentals rose to the top of the list because size, power, history, and availability fit my mission template for the D.VII.
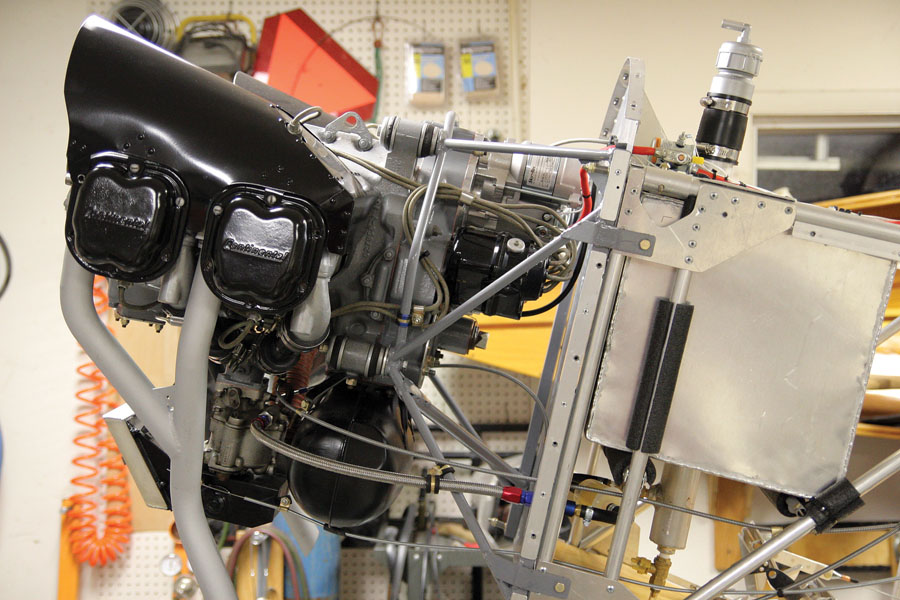
The Continental O-200 from a 1968 C-150 was stripped, cleaned, and painted after all gaskets and seals were replaced. A Sky-Tec starter, B&C alternator (not shown) and Aeronca Champ exhaust completed the engine package. The Cessna engine mount was modified to fit the Fokker firewall.
However, the Continental was not a slam-dunk choice. A complicating factor is the D.VII’s cowl. The original Fokker D.VII had an inline six-cylinder Mercedes, which resided in a long, narrow enclosure. VW heads protrude slightly from the standard-width D.VII cowl but not an excessive amount. The Suzuki conversion can be completely enclosed, as can the Hirth two-stroke that powered the AA prototype. So the engine decision had to be made as to whether authenticity could be compromised for the sake of powerplant selection. I decided to place highest priority on an engine in which I had maximum confidence that reliable service would be delivered. This took me in the direction of the conventional aircraft engine in spite of aesthetic compromises that are needed.
There isn’t a more conventional choice than a small Continental. These engines have powered thousands of small aircraft for 75 years, and most pilots have flown behind one during primary training. A conversation with Robert Baslee explored how the Conti weight compared with the big VW. We determined that a non-electric O-200 would have similar flying weight to a VW that had a full complement of electrics and ignitions, and would yield excellent performance. Robert also assured me the D.VII structure could be easily adapted to the Continental. Yes, the O-200 cylinders will protrude from the D.VII’s cowl slightly more than the VW heads, but I deferred that solution until it was time to construct the cowl…which turned out to be an interesting journey.
New Continentals are expensive, far beyond the scope of this low-budget project. A used engine was the only option I seriously considered, so an online search was undertaken. It became apparent a used O-200 or one of its smaller cousins could be purchased for about the same amount as a new VW with redrive. The hurdle that must be jumped is finding the right one, an engine with a good chance of having serviceable parts and history. My D.VII is powered by an O-200 that began life in a 1968 C-150. The logs only went back 25 years, but the engine had been flown and undergone an annual inspection in recent years. The engine needed cosmetic work but appeared to be a solid powerplant. Removing the heavy starter, alternator, vacuum pump, and associated baffling and plumbing reduced the engine’s weight considerably and made it feasible to install a lightweight starter and small permanent magnet alternator. I also pulled the cylinders and replaced all gaskets and seals to ensure an oil-tight engine. A new Aeronca Champ exhaust system completed the package and fits beautifully without modification. After considerable homework on desired engine rpm and airframe speeds, I ordered a propeller from Culver Props, a family business in Missouri. Alaina Lewis carved a beautiful maple prop and stained it with an antique finish that looks fantastic on the D.VII.

Eight weeks into the project produced a rigid, lightweight Fokker D.VII fuselage. The 21-inch wheels are part of the kit and use custom-built spoked hubs.
All the pieces of the planning puzzle had fallen into place. Orders were placed, tools were readied, and new building tables constructed. I was confident good decisions had been made that would result in a unique, economical Light Sport Aircraft that would be interesting to build in a relatively short period of time, and ramp presence would be impressive. The project did indeed prove to be enjoyable and very quick to build, but there were unexpected twists and turns down the road that required careful navigation. We will explore that journey during installments to come.


