You have the dream. Now gain the skills, techniques, and, most importantly, the confidence to take you all the way to that first fabulous flight in your own homebuilt or restored aircraft.
—EAA SportAir Workshops web site
Before I got started on my first airplane project, a GlaStar, I attended a SportAir Workshop. It was probably the best investment of time I could have made at that point. Recently I attended four EAA SportAir Workshops in Corona, California, to see what has changed in the ensuing 18 years. These workshops were held at the headquarters of one of the EAA’s major sponsors, Aircraft Spruce & Specialty. Although the facilities there are not exactly optimized for training courses, the ambiance created by being surrounded by airplane parts and the discounts they gave participants more than made up for any shortcomings.
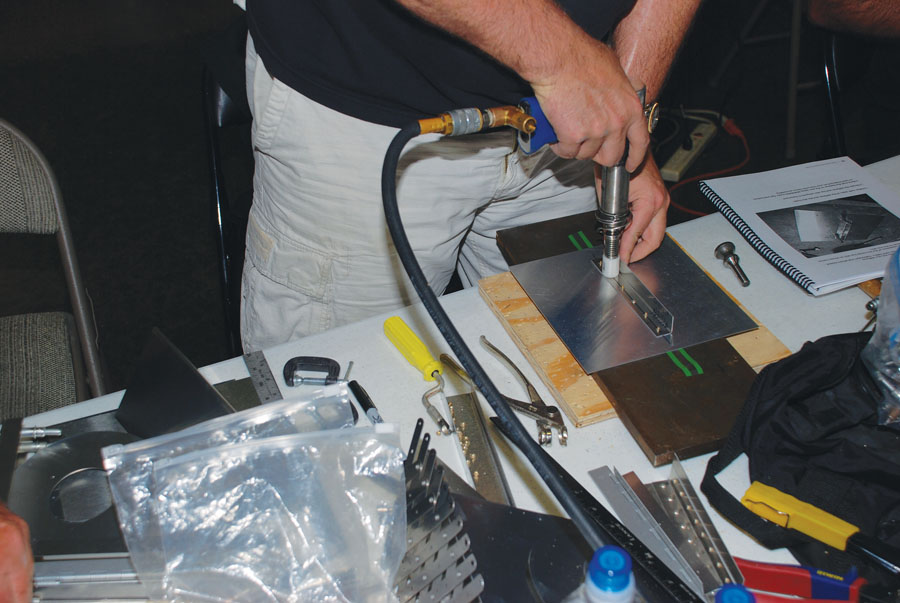
Back riveting, a process very popular with RV builders, is used to attach this stiffener to one side of the sheet-metal project. This could have been done with more conventional riveting techniques, but the exercise worked well to provide an introduction into back riveting.
There were four two-day courses presented simultaneously—sheet-metal basics, fabric covering, composites, and electrical. Since they were all given at the same time, each participant had to choose only one, but I got to jump around to cover all four. Sessions ran from 8 a.m. to 5 p.m. on Saturday and 8 a.m. to 3 p.m. on Sunday, but most people had finished by 1:30 or 2:00 p.m. on Sunday. Class sizes were small, ranging from 13 in the fabric class to six in the composite class. The EAA limits the courses to 20 per class, which would be plenty of people considering the limitations of this venue. A facility dedicated to training would certainly make it easier to handle a larger class size.
The EAA also presents courses in gas welding, TIG welding, RV assembly, and more at various times and places around the country. A visit to the SportAir Workshop web site will give you access to complete course descriptions and a schedule of classes for the year.
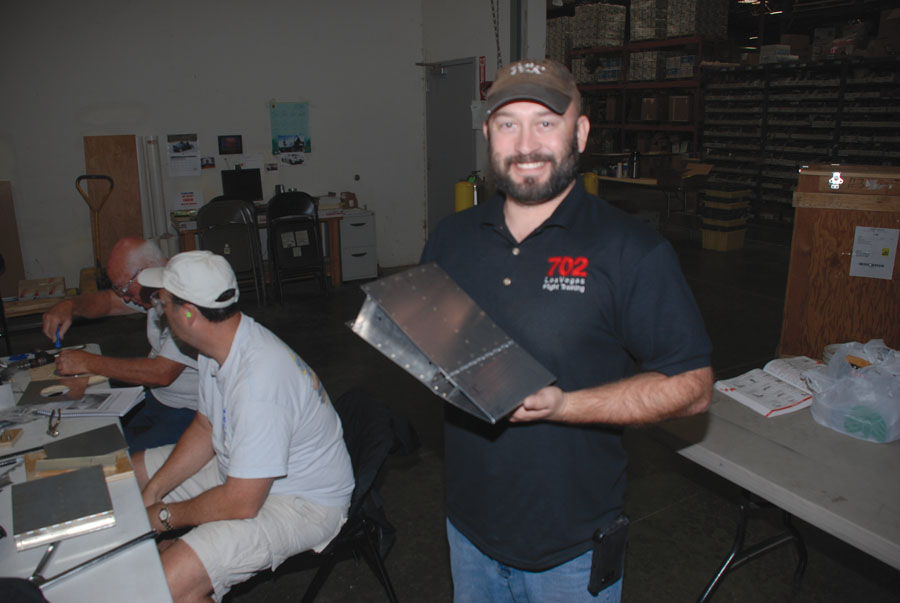
A happy student displays his completed sheet-metal project on Sunday afternoon. This project required just about every common sheet-metal process to complete it, including layout, drilling, deburring, dimpling, bending, squeezing rivets, driving rivets, back riveting, and nut plate installation.
Sheet-Metal Basics
Jim Scott led the sheet-metal course. He challenged the class with a project that resembled a wing section with an inspection hole and an aileron attached with a piano hinge. This exposed participants to layout and drilling, deburring, dimpling, bending, and several types of riveting. Everyone got to squeeze rivets, drive and buck rivets, and even back rivet. Both flush- and universal-head rivets were employed in the exercise. At the end of two days, each person had learned about and performed most typical riveting tasks. This did not exactly make them expert sheet-metal workers, but it gave them the basic experience they need to proceed with a typical RV-type or other sheet-metal airplane kit.

A sheet-metal student squeezes a rivet with a hand squeezer as he works to complete his project. The class included 10 soon-to-be airplane builders.
As you might imagine, not everyone got things right on their first attempt, but mistakes in the classroom are never a waste. They simply provide new learning opportunities. After all, even after taking this course, it is unlikely that any airplane builder will go through an entire project without a few errors. This course cannot prevent a builder from making mistakes, but it can show how to recover from those mistakes and move on. The confidence that this brings is an important part of the course.
This course included some lecture time to lay out the basic guidelines of proper riveting, but it was predominantly hands-on. There is just no better way to teach a physical skill than to do it, and in some cases, undo and redo it. It is that process of struggling and finally completing the class project that develops the skills and confidence needed to take on an airplane project.
Helpful Hint: Do not use a pencil or a scribe to lay out bends, cuts, or holes on sheet metal. These are likely to produce future cracks. Use a Sharpie or similar marker for sheet-metal layout.
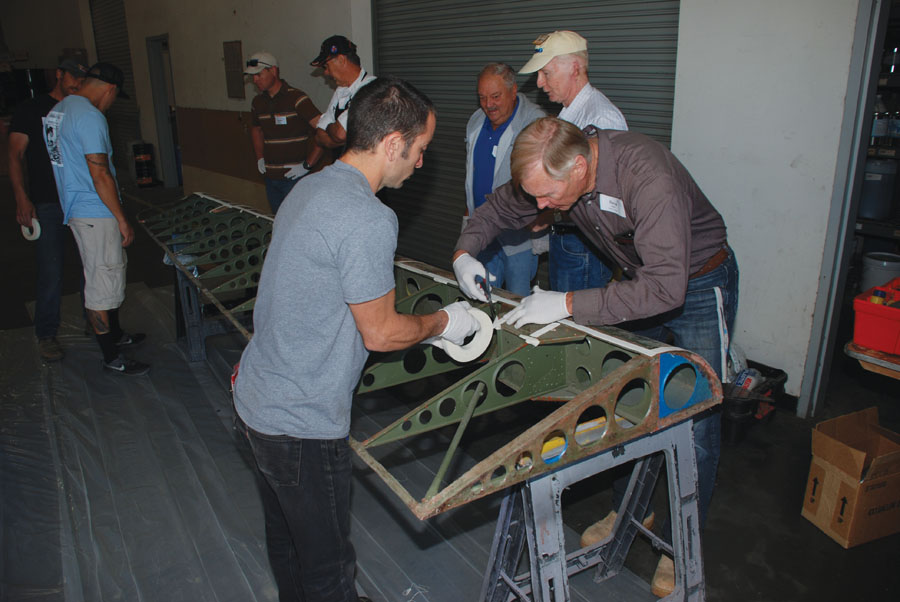
Students tape over projections and sharp corners to begin the fabric covering process on this DC-3 aileron.
Fabric Covering
Even experienced airplane builders may get a blank look on their faces when confronted with the prospects of covering an airplane structure with fabric. Every RV builder will have dealt with basic sheet metal, electrical, and even a bit of composites, but fabric is a totally new and unfamiliar medium for most people. While there are good books and videos produced by Poly-Fiber and others on how to do fabric covering, there is no substitute for hands-on training, which is exactly what the EAA SportAir Workshop provides.

Excess fabric is trimmed off after attaching the fabric to the top of the aileron structure. They use regular scissors to make these cuts. In other cases, they will use pinking shears.
For those who are interested in recovering or restoring older airplanes, removing the old fabric carefully begins the process. It is important to note where inspection holes, penetrations, and reinforcements were previously placed, so they can be duplicated in the new covering. New airplane builders obviously skip this step but should still make note of where they are likely to need access into the structure of the soon-to-be-covered airplane. Take measurements and make notes now to avoid confusion later.
The Poly-Fiber people sponsor this workshop, so it is no surprise that they teach their system. Since their system is quite popular, most builders will be using it anyway, but even those who use another system will gain valuable basic knowledge about the fabric covering process. In most cases, it is just the chemicals that vary from one process to another. Hualdo “Waldo” Mendoza ably handled the instructing for this class. With Poly-Fiber being based in nearby Riverside, California, he had the pleasure of driving home after the day’s class.
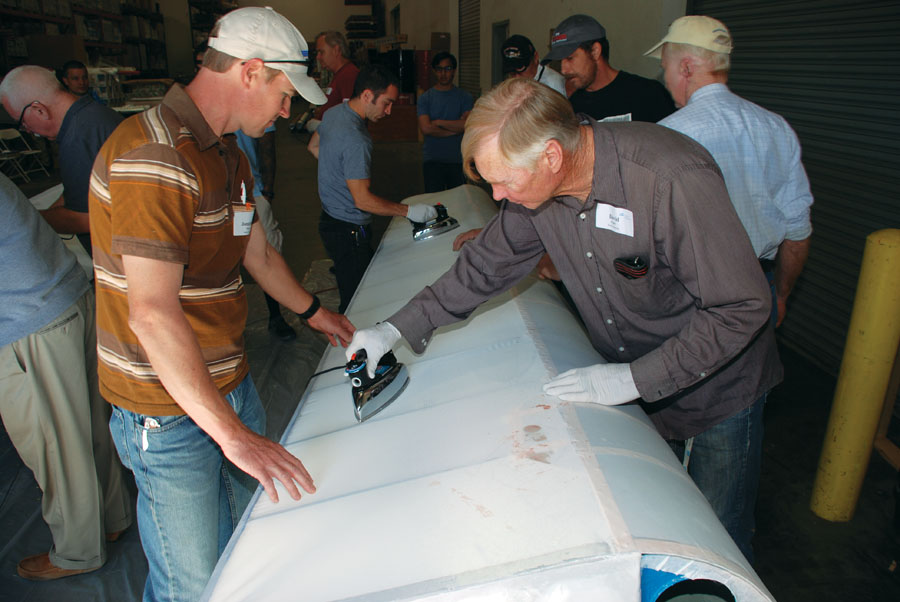
The fabric is shrunk to fit in three steps with a household iron. The first pass is made at 250F. The final pass at 350F is where the most care must be taken to avoid melting through the fabric.
Briefly, the process is first cover the sharp edges of the structure with tape; then cut out a suitable piece of fabric of the appropriate weight; glue the fabric to the structure, making sure to provide adequate laps at seams and edges; shrink the fabric to make it tight; seal areas to be stitched; lay out stitching and stitch the fabric to the structure where needed; install finish tapes over laps and stitching; and finally seal the entire surface being covered. Some reinforcements should be installed in key areas, and rings for access holes must be glued and taped into place. After that, priming and painting are all that remain to be done. There are, of course, some tips and techniques that make this result in a good-looking finished product, which is what this course is all about.
Rib stitching is probably the most challenging task for most first-timers to master, but it just takes some good instruction and a little practice to stitch like a pro. Everyone seemed to enjoy the challenge and the satisfaction of mastering a new skill.

Instructor Waldo Mendoza demonstrates rib stitching to the class. He employs a modified seine knot as the basic rib stitch and uses flat thread. Poly-Fiber has a good video for those who are doing this work for the first time. You can play it on your laptop right next to your work until you get the process memorized.
Helpful Hint: Do not mix fabric covering systems on the same airplane, and list the system used in the aircraft logbook. If you use more than one system, how will anyone in the future know which part of the airplane was covered with which system if something needs to be repaired?
Composites
Most metal-airplane builders see composite construction as the thing they would most like to hire someone else to do. But it isn’t any harder to learn than any other technique; it is just different. With composite kits and plans projects making up a smaller portion of the homebuilt market than they once did, it is no wonder that this was the smallest class. However, even RVs have composite cowls and fairings, so this is a subject that can be of use to almost all builders. Scott VanderVeen of Pro Composites taught this class, mixing lecture, demonstration, and hands-on work together into a busy two days of learning and doing.
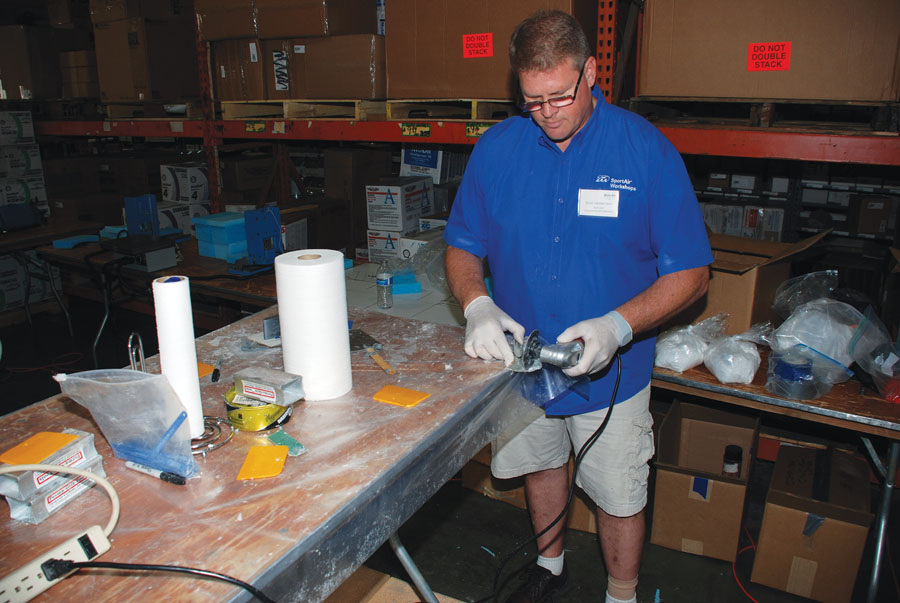
Instructor Scott VanderVeen demonstrates the use of the oscillating multitool for cutting fiberglass. He prefers a bimetal blade for this application. Diamond blades also work well, but not necessarily any better than the bimetal blades.
After a discussion about types of cloth and resins, the class tackled their first project by making a fiberglass panel with a foam core. This was vacuum cured to demonstrate that process. Vacuum curing is easier than you might think, requiring only a minimal amount of special equipment, all of which is readily available at a reasonable cost. After curing, the panels were cut and then rejoined at a right angle with a hard point added. This introduced edge filling, fillet making, hard point installation, and layout in one exercise.

Hot wire cutting polystyrene foam is a great way to create wing shapes. The trick is to work together at the same speed on both sides. By numbering stations along the cutting path, this becomes fairly easy.
The second composite exercise was to make a fairing like the typical wing strut or gear leg fairing that is common on Experimental airplanes. It looked easy in the class, and hopefully gave people the confidence to go home and try it on their own projects. Interspersed with these exercises were several short lectures on resins and cloth, including carbon fiber and Kevlar. The lecture/demonstration/participation format is typical of all the workshops and has proven to be very effective.
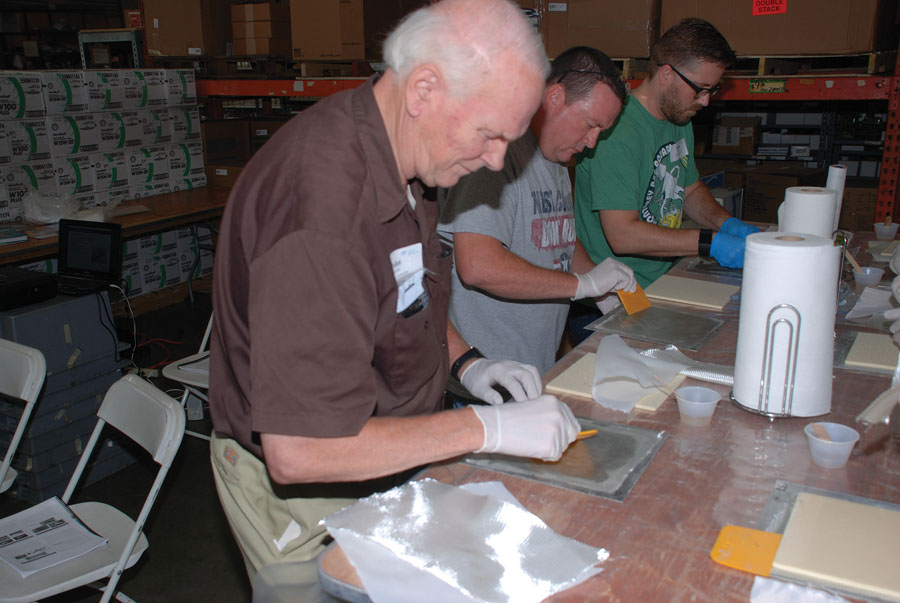
A composite student applies resin to fiberglass cloth as the first step of assembling a rigid panel with a foam core. The part will be vacuum cured as part of the class as soon as he has finished his work.
As it turns out, working with composites isn’t that difficult if you follow a few basic procedures. This workshop will give someone the knowledge and confidence to tackle this construction method in two short days.
Helpful Hint: One ounce of resin should be sufficient for one square foot of eight-ounce fiberglass cloth. With West epoxy that means one squirt of resin and one of hardener. Too little resin is not good, but neither is too much.
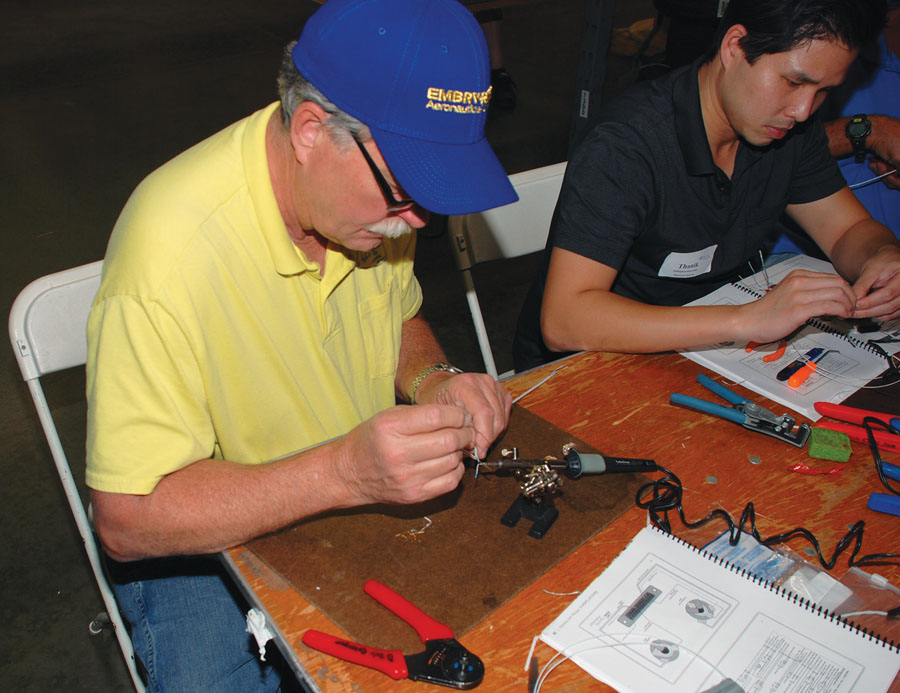
The hands-on electrical projects began with soldering. This isn’t difficult to do if you have been well taught in the basics, but there are enough ways to do it wrong that many people struggle with it until they have been shown the right way.
Electrical
People who come back for a second helping of quality training after starting their project will often choose the electrical workshop. Many builders, who feel very comfortable working with various structural materials, become uneasy when it comes time to start pulling wires and hooking up avionics. This class explored the topic of airplane electrical from starters and alternators to antennas and radios, with wiring and circuit protection in between. This is a lot of ground to cover in two days, but Dick Koehler did a very good job of doing just that. He does 15 to 20 of these courses every year, plus AirVenture, flying around the country in his trusty Mooney. We really should press him to build his own plane, but then he wouldn’t have time to teach all these courses.
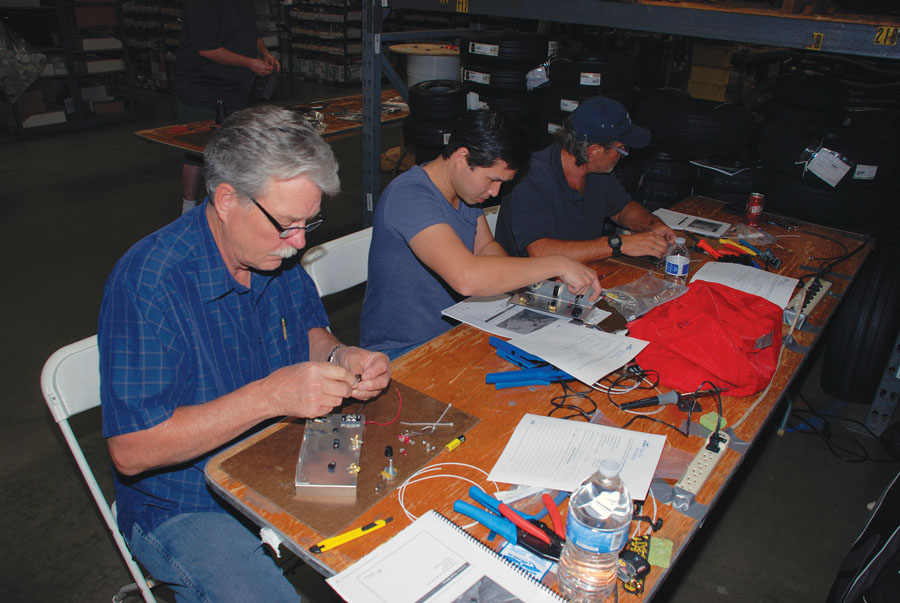
The last electrical class project combines the basic skills learned earlier with some schematic reading to produce a dimmer circuit.
Dick has seven steps for installing an airplane electrical system.
- Determine what equipment you are going to use.
- Locate each piece of equipment.
- Protect components by running the correct size and type of wire, and using the correct circuit breakers or fuses.
- Make wiring connections.
- Ground and bond components properly.
- Install instruments to monitor systems.
- Complete a detailed wiring diagram.
That sounds simple enough, and it is when you break it down into its parts and go one step at a time. The process of doing that is what this course is all about. The hands-on portions included soldering, crimping standard AMP connectors, crimping those tiny D-sub pins, and making up a coaxial cable for an antenna. The class also covered grounding circuits and antenna ground planes. You certainly won’t be an electrical expert after two days, but you will have a pretty good idea of how to wire your plane.
Helpful Hint: Ground shielded wires at the power source end and not at both ends, unless the component’s wiring diagram specifically calls for it.

A student concentrates intently as he works to properly strip a coaxial cable and install a BNC connector. Aviation enthusiasts come to these workshops to learn, and their efforts are amply rewarded.
Getting Started
It is hard to see how you could make a better investment of your time and money if you are serious about building an airplane than to take one or more of these courses. At $349 for EAA members and $389 for non-members, the price is right. Travel costs could add to that, but it is still a good deal for what you learn. Getting started in the right direction is the only way to begin such an important endeavor as building an airplane. These courses are a very good place to do just that. Visit the EAA web site for more information or call EAA at 1-800-967-5746.


