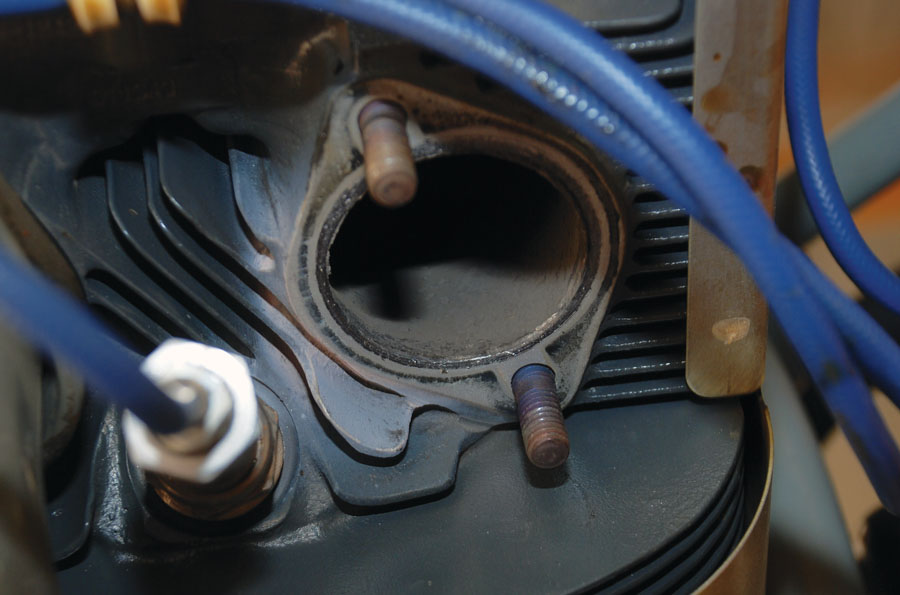
The light colored residue around the exhaust port indicated some leakage past the exhaust gasket. Luckily there is no damage to the cylinder head, but this leak needs to be fixed right away.
Your exhaust system works hard and asks for little in return, but there are a few things you do need to look at from time to time to keep everything in good shape. Exhaust system temperatures can run up over 1500F, which means that they are placed under a lot of stress, even though they don’t move around much or carry any loads. Most systems are made out of stainless steel, 321 being the preferred alloy, but some Experimental systems are made of mild steel where corrosion is a major concern. In all cases cracking and loosening or freezing of joints can be a problem that gives little sign of developing until damage is done. For this reason, a thorough inspection of your exhaust system should be an item on your yearly condition inspection checklist and something that gets at least a quick review every time the cowl comes off.
Besides taking care of getting hot exhaust gasses out of the engine bay, the exhaust system is the primary heat source for warming the cabin, defrosting the windscreen, and preventing carburetor ice.
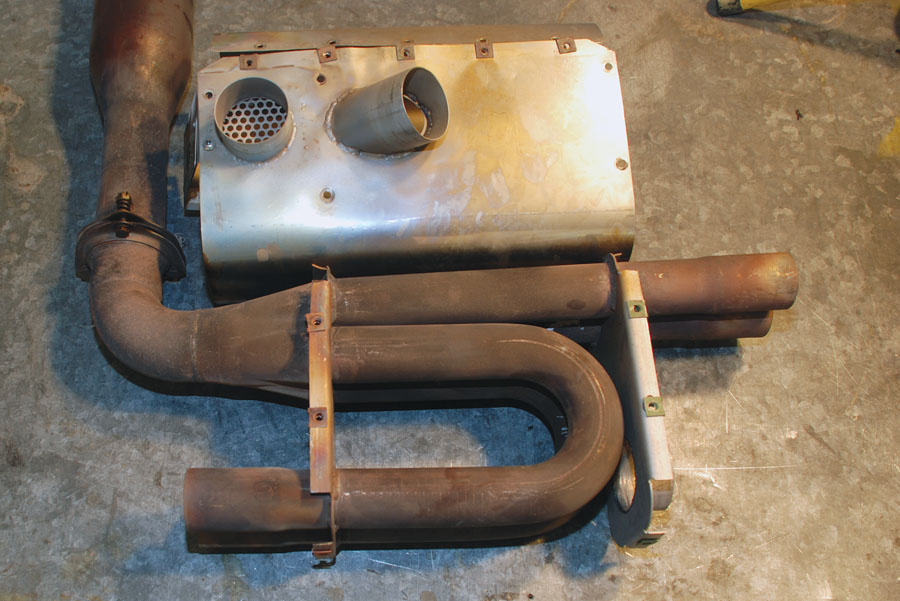
This Power Flow exhaust system is overdue for some maintenance. Note the missing screw, frayed SCAT on one side, and heat damage on the other. The heat muff needs to be removed and disassembled to see if there is any damage inside.
Exhaust System Support
Exhaust systems are mainly supported by the engine, but the tailpipe end is usually suspended by a flexible hanger arrangement of some sort. Since the exhaust system moves with the engine, it is vitally important that any support connected to the airframe be flexible enough to allow free movement of the exhaust, while still holding it in position.
A support system that allows too much movement might permit the hot exhaust pipe to scorch or even burn the cowl or damage fluid lines or wiring. A support system that allows too little movement will cause cracks to develop in the exhaust system, leading to leaks and eventual failure. If you suspect your system supports are not getting the job done, look at what others have used successfully and let that guide you. Never be reluctant to borrow a good idea.
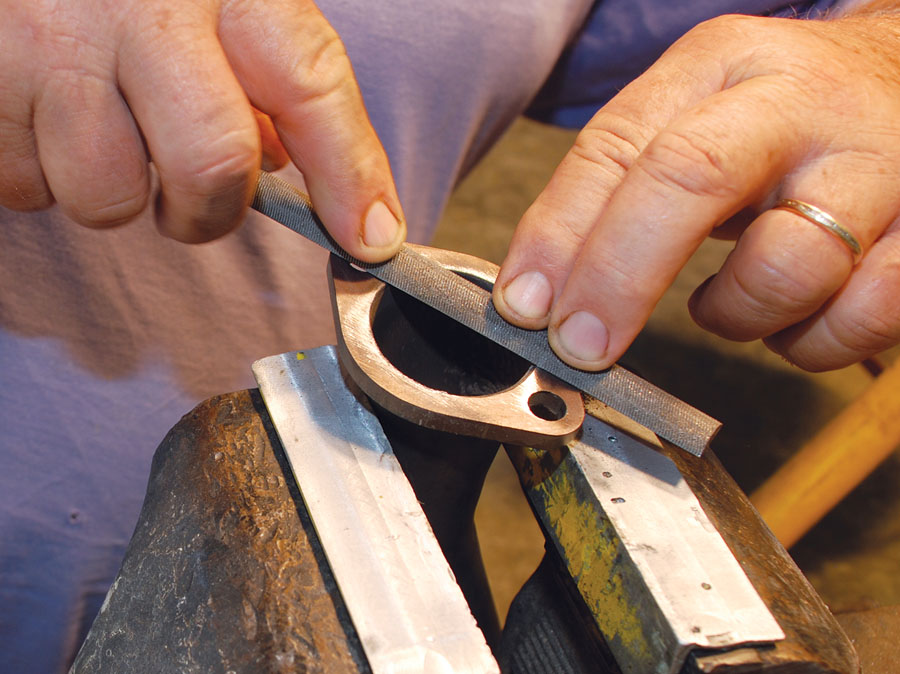
Most minor exhaust leaks can be cured with a careful dressing of the exhaust flanges with a flat file and new gaskets. Be sure to use new lock washers and the proper torque setting when reinstalling the exhaust system.
When inspecting your system, look for cracks in metal parts and any loose nuts and bolts. Nylon insert lock nuts have no place in exhaust system supports. Stainless steel nuts and bolts are preferred because they are more corrosion resistant. However, the factory recommended nuts and washers should be used to attach the exhaust system to the engine. Your inspection should also include observing the condition of any rubber parts and replacing them if they show any signs of cracking or overheating.
Lastly, an inspection of the support system should include a good look at the inside surface of the engine cowl. If the system is too close to the cowl or the supports are allowing too much movement, there will likely be evidence of this on the cowl in the form of discoloration or even scorching. It is also common for paint to bubble or crack on the outside of an overheated cowl. If more clearance cannot be maintained, it will be necessary to install some sort of heat shield or heat-resistant material.

This ball joint on a Power Flow exhaust system can be disassembled, cleaned, and reassembled with anti-seize. Power Flow recommends a metal-based high-temperature anti-seize compound. Do not use standard spark plug anti-seize on exhaust components.
Check Engine Attachment Points
The exhaust system bolts to the engine typically at four or six points. Each flange must make a good seal with the cylinder head to prevent leaks. Check the area around each flange to see if there are any light-colored deposits that may indicate exhaust leakage. If there are, it will be necessary to remove that part of the exhaust system and take corrective action. That may consist of simply replacing the gasket and lock washers and reinstalling the exhaust pipe, or the flange may need to be straightened and/or filed flat before reinstalling. In extreme cases the mating surface of the cylinder head may need to be repaired or resurfaced. The longer a leak goes undetected, the more likely it is that erosion of the aluminum cylinder will occur.
When you are satisfied that the mating surfaces of the exhaust flange and the cylinder head are in good shape, install a new gasket and lock washers and torque the nuts as per factory recommendations. For Lycoming engines with 5/16-18 exhaust studs, the proper torque is 204 inch-pounds. Please note that a new gasket and a new lock washer should be used each time the exhaust system is removed and reinstalled. It is also worth mentioning that hot exhaust gasses will make short work of any red RTV used in a vain attempt to seal up the exhaust flanges.
Ball joints such as the one on this RV-9A should be lubed with high-temperature anti-seize compound from time to time to prevent them from locking up. Note the heat shield installed to the right to protect a fuel line.
Exhaust System Joints
Some exhaust systems have slip joints or ball joints to allow movement of the system during heating and cooling cycles or to provide for more flexibility during installation. These joints need to be disassembled from time to time, depending on conditions, and lubricated with anti-seize compound. Compounds that are rated for high temperatures and are metal based work best, such as Loctite C5-A or Kopr-Kote #10055. Power Flow Exhaust recommends and sells a nickel-based product called SAF-T-EZE. Spark plug anti-seize or any carbon-based compound is not a good choice for these joints. With the relatively low number of hours most people fly, applying anti-seize every other year at the time of your condition inspection should be sufficient. This can be part of a general inspection of the whole exhaust system.
After disassembly the enclosed exhaust tubes can be inspected for leaks. Different systems will have different configurations, but in every case a periodic inspection of the internal parts is necessary to catch any leaks before they develop into dangerous sources of CO.
Inspect Your System
While we are on the subject of inspections, the entire system needs to be inspected for leaks and cracks annually or whenever a problem is suspected. Exhaust leaks can be lethal, both by letting carbon monoxide into the cabin and by starting a fire in the engine compartment. Cracks can occur anywhere but they are most likely at joints and seams. If you have a system with a can-type muffler, you should remove the shroud during inspection to see if anything is out of order beneath the shroud. Since the cabin heat system is often served by passing air through this area, a leak can be quite dangerous. Most Vetterman systems place the shroud around a straight piece of exhaust pipe with no seams or joints, so this concern is minimized with those systems, but even they should be disassembled and inspected every once in a while.
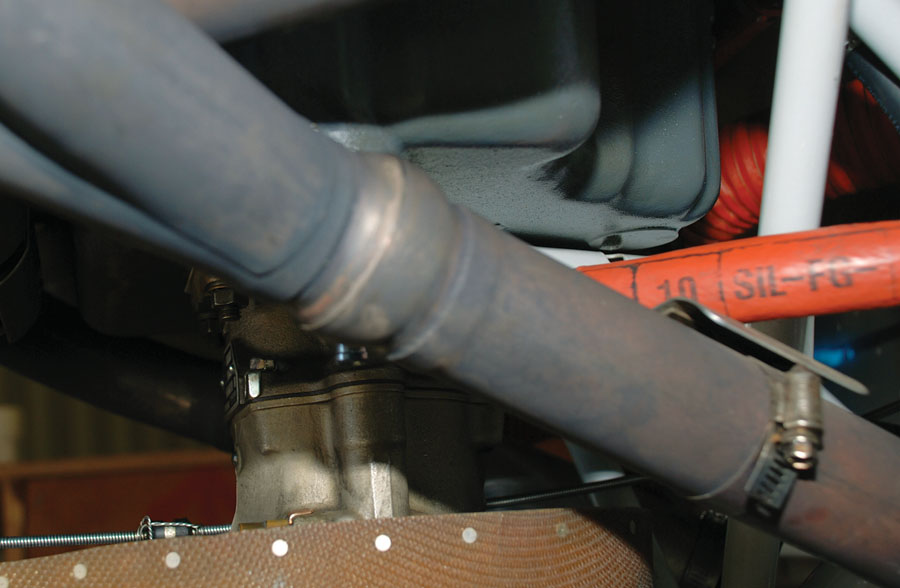
Cabin heat and carburetor heat systems typically use some type of flexible ducts such as SCAT to move air from one place to another. This ducting is vulnerable to chafing and heat damage from the exhaust system. Any complete inspection should include a careful examination of all flexible ducts, and replacement where necessary. Silicone repair tape can be used for a temporary patch, but replacement is a better long-term solution for damaged ducts.
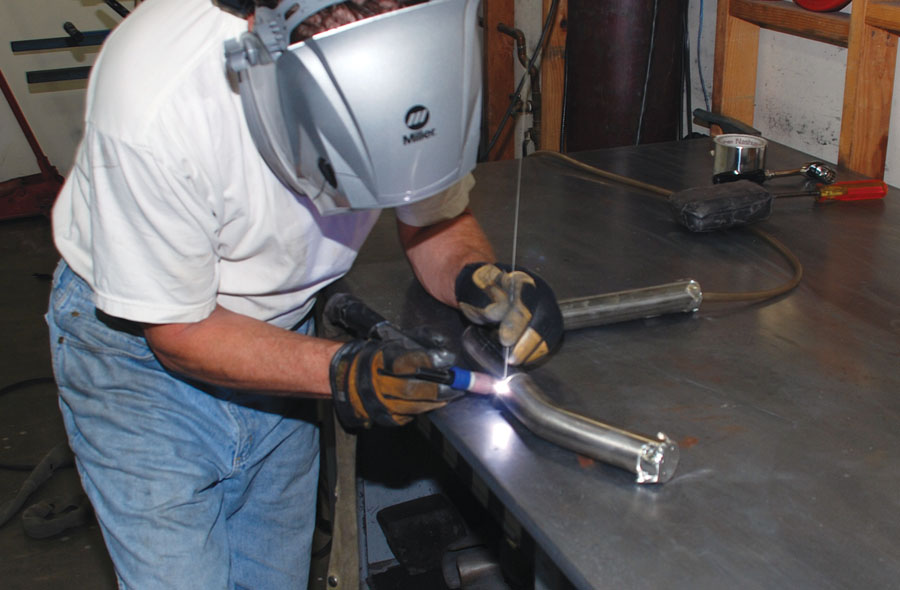
Cracked stainless steel exhaust pipes should be TIG welded for best results using a purge technique in which the interior of the tube is flooded with argon during the welding process. Of course, the exhaust pipe needs to be very thoroughly cleaned before any welding is attempted.
When replacing ducts be sure to secure them well away from hot exhaust pipes. Maintain a minimum clearance of 1.5 inches wherever possible. Also, try to avoid using zip ties to secure ducts that are near exhaust pipes. The heat will make them brittle and likely to break.
A test with a carbon monoxide tester makes a lot of sense at least annually to be sure you don’t have any exhaust leaks. Continuous monitoring is even better. Aircraft Spruce has some models to consider at reasonable prices. Especially if you are a frequent user of cabin heat, one of these would be a wise investment. The October 2016 issue of our sister publication, Aviation Consumer, has a good article comparing popular portable CO detectors. It is worth checking out.

A complete inspection of any exhaust system should include a check for carbon monoxide in the airplane’s cabin while taxiing and in flight. These portable CO testers are valuable tools to accomplish that task.
Broken Baffles
Systems without mufflers seldom experience failures that would lead to partial power loss, but those that use a big can (Cessna-type) with baffles inside can have their internal baffle break loose and severely restrict exhaust flow, thereby diminishing the power output of the engine. This can be a real head scratcher for someone trying to figure out why an engine that looks perfectly fine suddenly makes much less power. A borescope up the tailpipe may reveal the problem, or it may be necessary to remove the muffler and give it a good shake to detect loose baffles. The solution is usually a complete replacement of the muffler system.

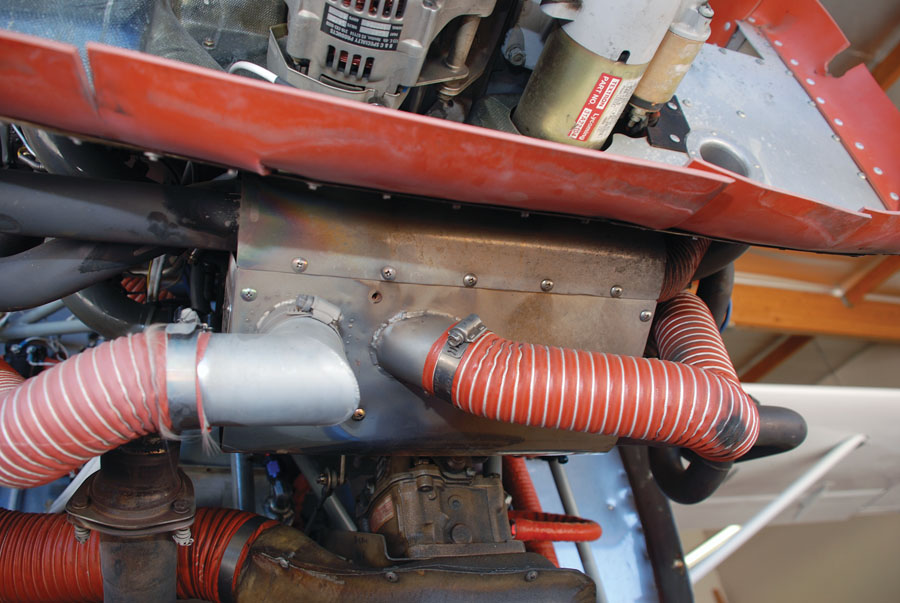
Cabin heat muffs need to be carefully checked and disassembled to be sure there are no leaks in the underlying exhaust pipe. SCAT ducts should also be checked as part of the exhaust system inspection to look for worn spots and heat damage.
Minimize Stress
Many cracks in exhaust systems can be traced to faulty installation. Perhaps the biggest source of trouble comes from placing stress in the system’s parts by failing to maintain sufficient flexibility between the exhaust system and the airframe, or by forcing exhaust pipes into position when they are installed. We have already looked at supports, so let’s consider other installation problems.
As with just about everything else in airplane construction, forcing something into position is not a good way to go. If something doesn’t go together with a gentle push, then what you are doing probably needs to be reconsidered to find a better approach. Exhaust systems are no exception to this rule. If you must exert significant force to make something fit, it is time to take a step back and see why. If you used force to install the system the first time, you will likely pay for that transgression later with cracks in your exhaust. Even tightening things in the wrong order can induce stress, so follow this basic rule unless you have a very good reason not to. Loosely bolt everything together and then tighten beginning at the cylinder heads, moving away from the engine as you tighten. The last things to get tightened are the bolts on the tailpipe hanger.
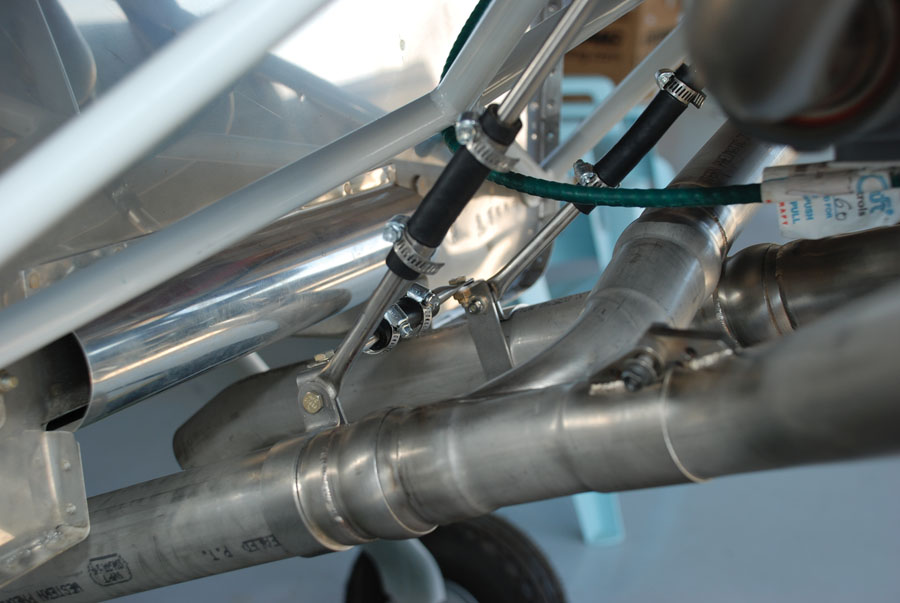
Exhaust systems need to be suspended from the airframe with flexible mounts such as this installation in an RV-8. As these mounts age, they will need to be inspected and the flexible parts replaced to keep them working properly.
When you are finished, go back and check clearances between ducts and wires to be sure nothing has moved too close to the exhaust. Try to maintain 1.5 inches clear, or provide heat shielding if you can’t.
If you get a crack in an exhaust pipe, be sure to clean the area around the crack very thoroughly. Then TIG weld the crack, or have it done by someone who knows how to do the job properly. That should include purging the inside of the pipe with inert gas as the outside is repaired. If you have a recurring crack, it is probably best to replace the part rather than try to repair it again and again. In any case, try to isolate the cause of the cracking. A properly made and properly installed exhaust system should give you many years of problem-free service.

![]()
Dave Prizio is a Southern California native who has been plying the skies of the L.A. basin and beyond since 1973. Born into a family of builders, it was only natural that he would make his living as a contractor and spend his leisure time building airplanes. He has so far completed three—a GlaStar, a Glasair Sportsman, and a Texas Sport Cub—and he is helping a friend build a fourth, an RV-8. When he isn’t building something, he likes to share his love of aviation with others by flying Young Eagles or volunteering as an EAA Technical Counselor. He is also a licensed A&P mechanic and a member of the EAA Homebuilt Aircraft Council.


