Like most homebuilders, I like to be resourceful and come up with solutions to problems I face on my own. Prior to the start of a project, I set out on a scavenger hunt throughout the hangar, my house, and my scrap boxes, taking stock of what I have, what may work, and what I may need.

Parts and Tools Needed for One Control Lock
As I started to leave my local operating area with my new plane, I noticed that I needed support equipment—things I took for granted with my previous airplane until it was sold. The problem at hand was locking my control surfaces while parked outside the hangar, in a manner that was simple, with a device that was as lightweight and small as possible. I don’t like using the seat belts unless it is the last resort, as it always places the elevator full up and the ailerons full left or right.
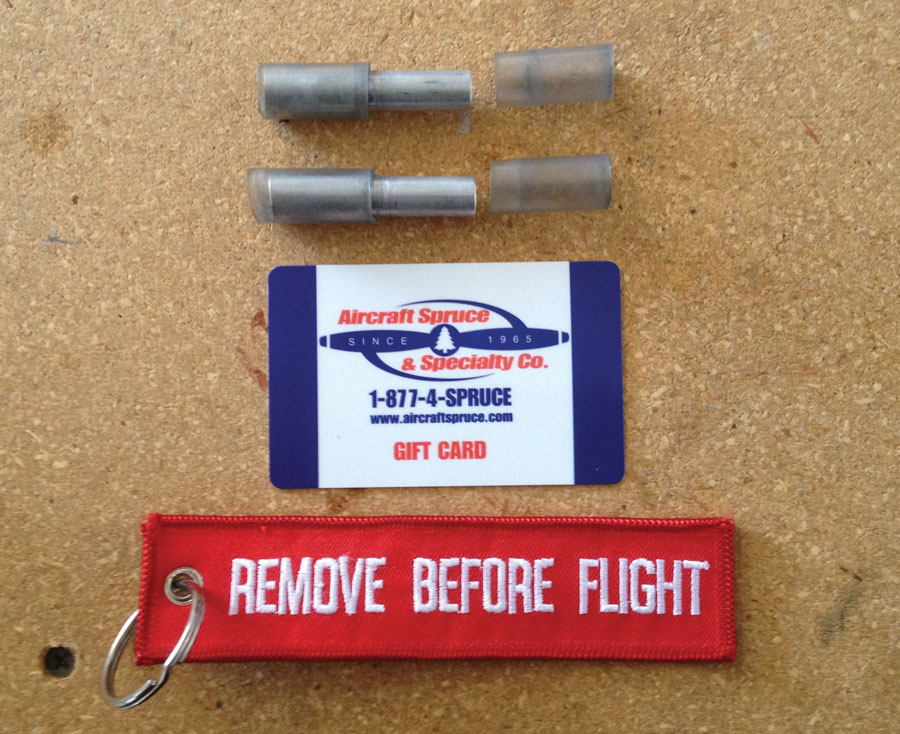
Figure 1: Required parts for one control lock.
Rolling your own control locks can be a simple and fun project. I was able to make four of these in less than an hour. You will need parts and tools from around your shop, as shown in the table. I was able to make these for “no cost.” The table shows the quantity and parts needed to complete one control lock. Adjust those as needed to complete your set.
1. Start the project by cutting two 2-inch pieces of #4 fuel line (or whatever size you prefer). Take the time now to deburr and round the edges.
2. Cut four approximately 1.1-inch pieces of vinyl hose that have a corresponding inner diameter (ID) to the fuel line’s outer diameter (OD). Once assembled, you want the vinyl hoses to be longer than the fuel line piece, in order to protect your paint and surfaces.
3. Grab the gift card and measure 1 inch from the long edge (or wide/narrow enough if you choose a different size fuel line). As shown in Figure 2, mark a line on the gift card, and use the scissors to cut along the line. Next, use a file to smooth the cut and round the edges of the 1-inch wide plastic strip.

Figure 2: Cut a strip from the gift card that is 1 inch wide.
4. Once you are happy with the plastic strip, place a mark 1/2 inch from the long edge and far enough from the short edge to give you an evenly spaced edge distance (once the fuel line is installed), as shown in Figure 3. Use the #30 drill bit to drill a pilot hole in the plastic strip. Then use the Unibit to enlarge the hole to final size, matching the OD of the fuel line. Use caution and a little patience while enlarging the hole to final size. The plastic strip is thin and the Unibit can ruin it if it catches the cutting surface wrong (ask me how I know).
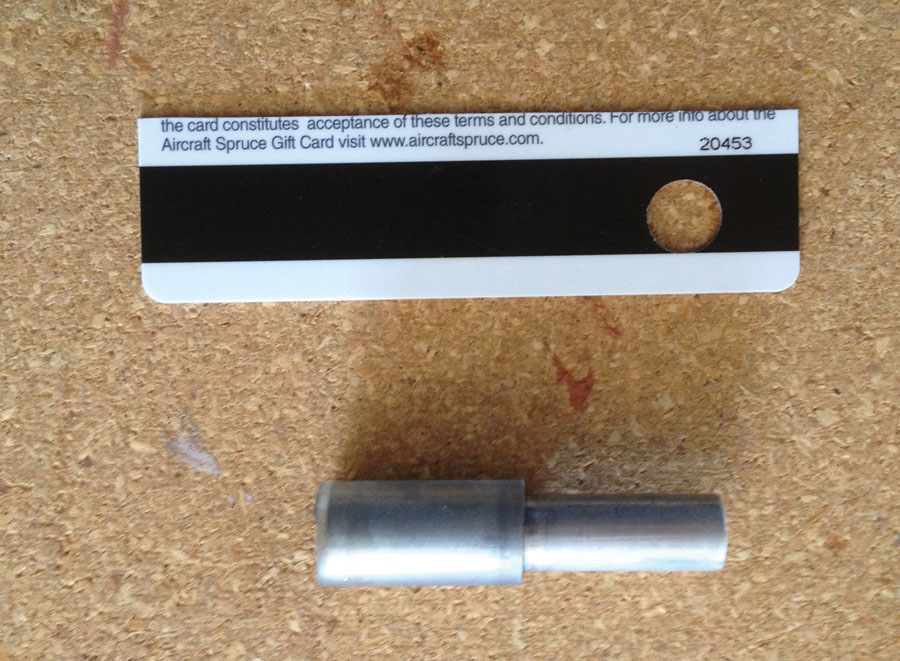
Figure 3: Drill a hole through the 1-inch-wide plastic strip for the fuel line.
5. Flip the plastic strip over and clean the back side of the hole you just enlarged with the Unibit.
6. Grab one of the 2-inch long fuel line pieces and two of the 1.1-inch long vinyl hose pieces. Mark the center of the fuel line, then slide one of the vinyl hoses onto the fuel line, stopping at the mark in the center, as shown on Figure 3. Leave a small portion of the vinyl hose hanging past the outer edge of the fuel line. This will keep the edge of the fuel line from damaging your paint/surfaces.
7. Next slide the fuel line/vinyl hose assembly inside the hole on the plastic strip, as shown in Figure 4. Lock the fuel line in place by sliding a second vinyl hose on the opposite side.
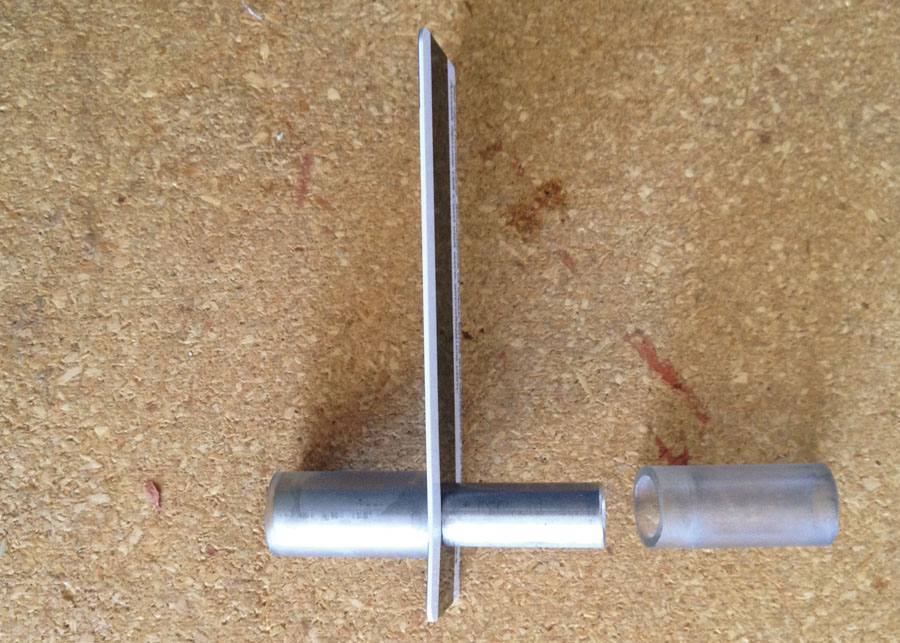
Figure 4: Push the fuel line through the 1-inch-wide plastic strip and add the second piece of vinyl hose.
8. Go to the airplane and place the half-assembled control lock on the location you would like the control lock to rest during normal use.
9. Grab the second 2-inch fuel line and place it flush on the opposite side of the control surface. This will give you an idea on where you will need to drill the second hole for the second fuel line piece. Place a mark on the plastic strip identifying where you need to drill the pilot hole for the second fuel line piece.
10. Remove the half-assembled control lock and drill the second pilot hole, followed by enlarging it to the final size.
11. Deburr the back side of the hole with the Unibit, then slide the second fuel line/vinyl hose assembly through the second hole in the gift card.
12. Take the control lock and slide it into the final location on the airplane for a trial fit, as shown in Figure 5. If you are happy with how the control lock fits, move on to the last step.
13. Cut the excess off the plastic strip, leaving enough room at the bottom to drill a #30 hole at the corner of the plastic strip. Drilling the last hole on the corner will allow you to easily slide the key chain ring onto the plastic strip without causing damage.

Figure 5: Trial fit of the control lock.
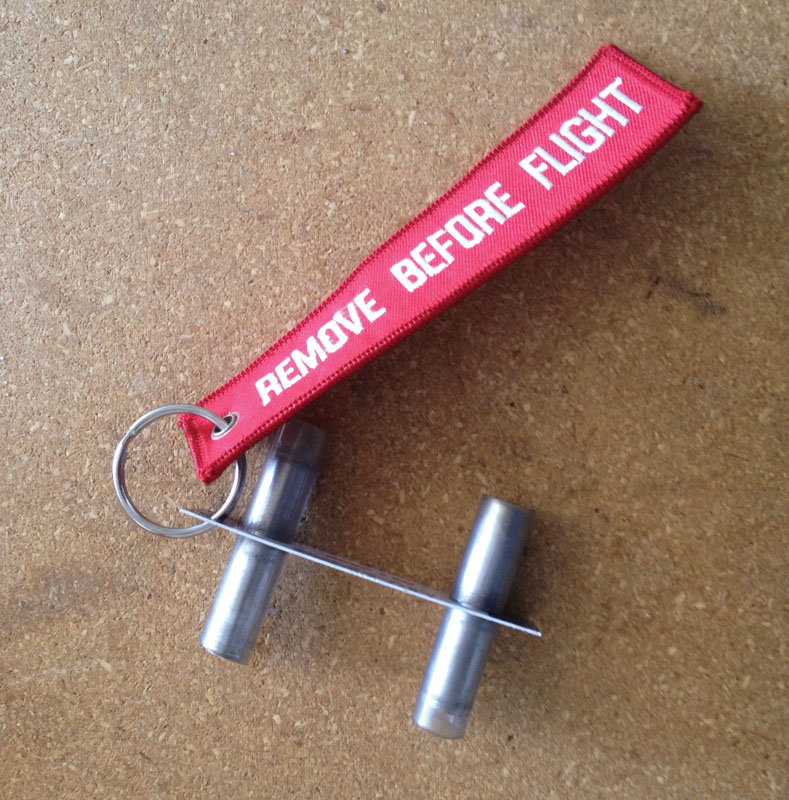
The final product should look similar to the photo at the top of this article. This kind of control lock can be used on the ailerons, elevators, and some rudders, depending on their configuration.
Congrats; you just saved money, made something custom for your airplane, minimized the weight of the support gear, and earned a few bragging points.


