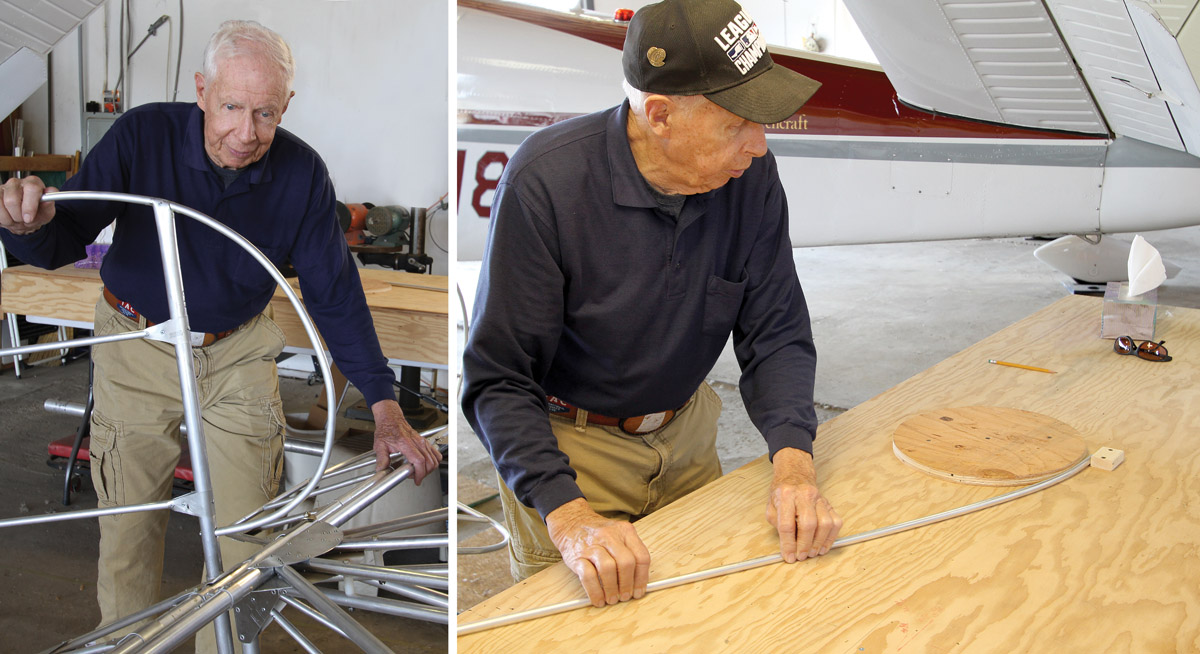
Conrad Norquist shows how the 6061 tubes supplied with Airdrome Aeroplanes kits are easily bent using wood templates
Mechanics from aviation’s golden age did a lot of DIY tube bending. To be qualified for field repairs on factory-built “ships,” one had to know how to lay out patterns, make custom forms, and torch heat tubes red hot so they could be pulled around a bending form by hand. Today, when you encounter a bent or formed tube as part of a design, it’s often supplied pre-formed, or, if not, the bending is kept as simple as possible so the builder can get the job done with basic tools and techniques.
The WW-I replica kits from Airdrome Aeroplanes are a good example. The aluminum fuselage and tail feather tubes are easily bent by hand using plywood templates.
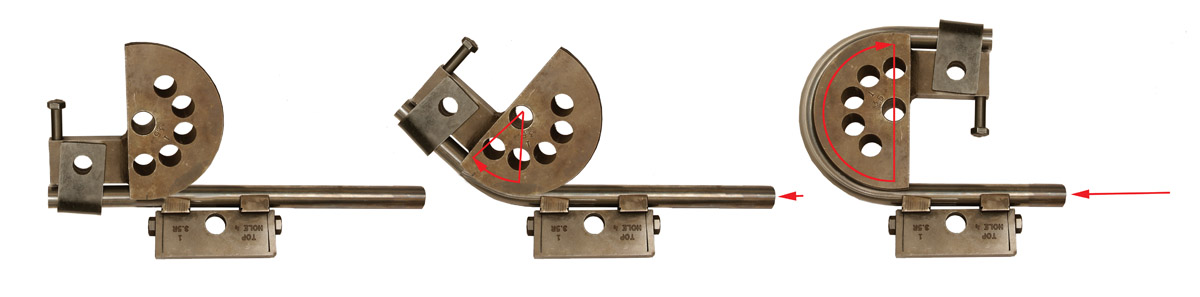
This stripped-down sequence shows how the forming die is driven clockwise against the pressure die to create the desired bend, in this case a 180.
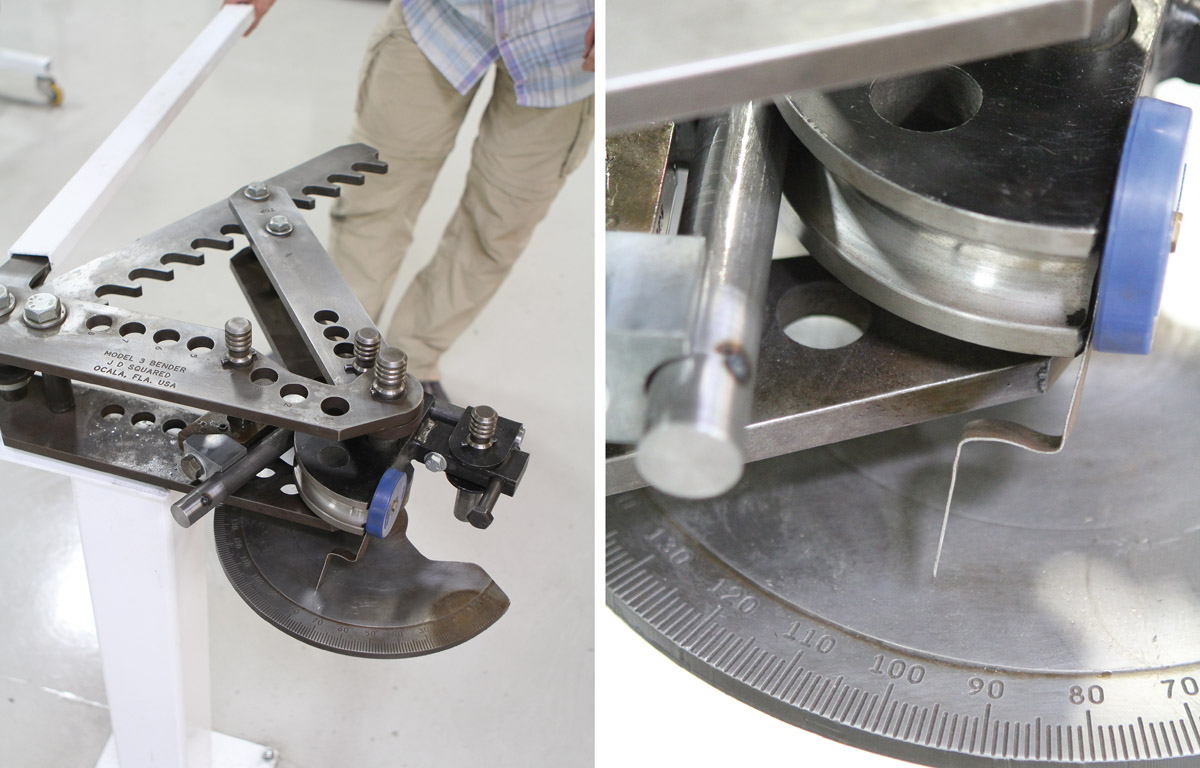
The wood block method is not so hot when it comes to tighter bends and steel tubing, particularly 4130 chrome-moly. For that, you need a die-form bender like the Model 3 tube bender made by JD Squared of Tennessee. The Model 3 has been around for years and has proven to be superior to hydraulic pipe benders or roller-type tubing benders. The JD Model 3 sells for around $300, minus dies. It is a manual version of the hydraulic-powered tube bender that is used in countless race car and custom welding shops. It does not include a stand, but if you’re bending tubes, you can probably weld your own. The die sets run between $130 to $400 depending on the size tubing and radius you want. Each set includes a forming die, a pressure die, and a holding strap. You can pick and choose the ones you need and add to your collection as you go.
The lever and ratchet drive on the Model 3 bender makes it easy to account for springback. To get a 90-degree bend in this section of 7/8-inch diameter x 0.049-wall 4130 required going to 98 degrees.
The Model 3 uses a lever and ratcheting system to generate the torque to drive the forming die around the pressure die and bend the tube. Each throw of the lever adds only a few degrees of bend, so it’s easy to achieve a precise angle. Every tube has some amount of springback, which means the elastic properties of the tube won’t allow it to exactly match the die or the degree wheel. To compensate for springback, you have to slightly overshoot the target angle. How much depends on the size, strength, and thickness of the tubing you’re trying to bend. According to JD, 4130 will spring back twice as much as the same thickness mild steel tubing.
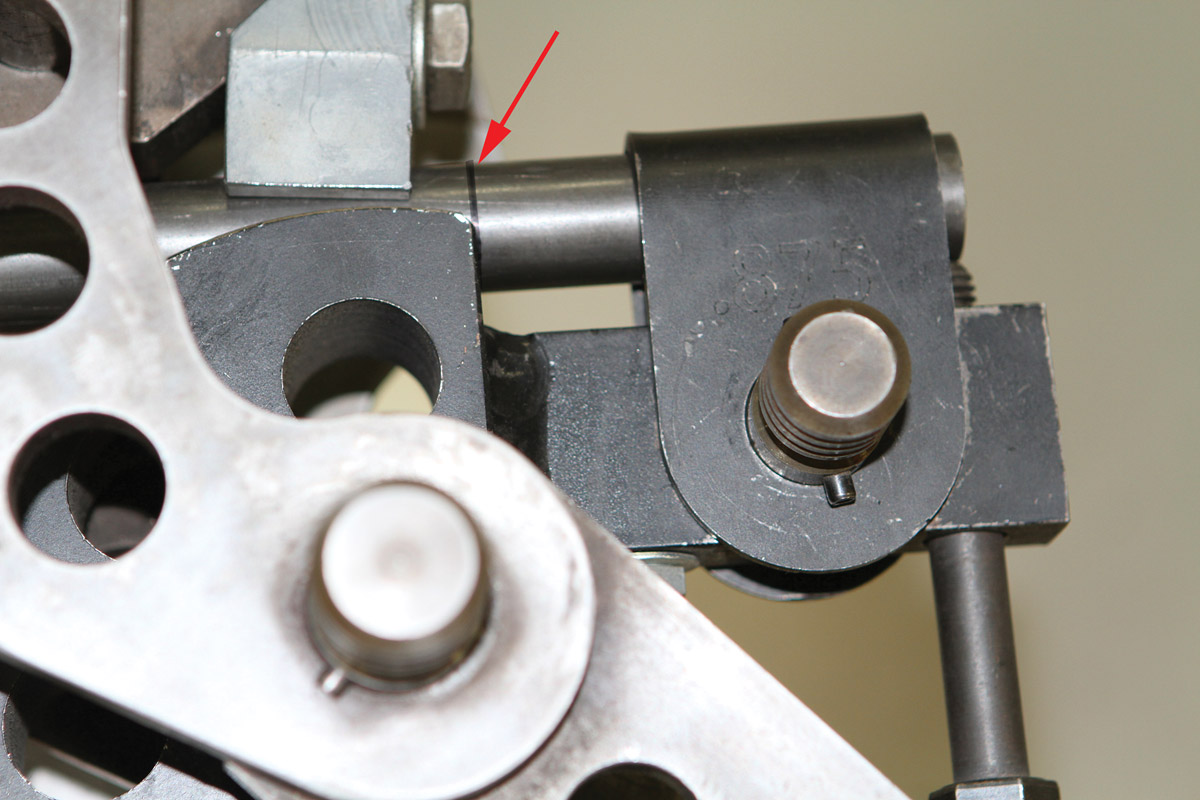
By marking where the tube lines up with the forming die, you can accurately gauge where your bends will form for any particular tube size and wall thickness.
Template and pattern bending can be a challenge, but using the Model 3 simplifies the task because it’s easy to gauge where each bend starts. By working from the center out, per the tutorial provided by JD (see their website), you can make highly accurate runs.
The biggest challenge to tube bending is preventing kinks and wrinkles. These can occur when the bend radius is too small, the tube is too thin, the material is too soft, or any combination of these factors. You can eliminate, or at least minimize, these distortions by providing some sort of internal support. Production shops use a ball or bullet-shaped mandrel tethered inside the tube between the forming die and the pressure die. The home shop method is to pack the inside of the tube with something that will provide enough support to resist the forces trying to squish the tube. Horn makers have been known to fill tubes with water and freeze them. Another method is to use a low-temperature solder-like metal called Cerrobend. The obvious drawback to freezing is the time and space required to plug and freeze large or long pieces of tubing. Cerrobend is only slightly more practical. Although it melts at a low temperature (about 160 F), that’s still hot enough to really burn (don’t ask), and you need a decent ladle and funnel to get it in the tube. A more practical solution is to simply pack the tube with sand. As the photos show, sand packing significantly improved the results when making a 3-inch radius, 90-degree bend in 7/8-OD x 0.049-inch wall 4130 tubing.
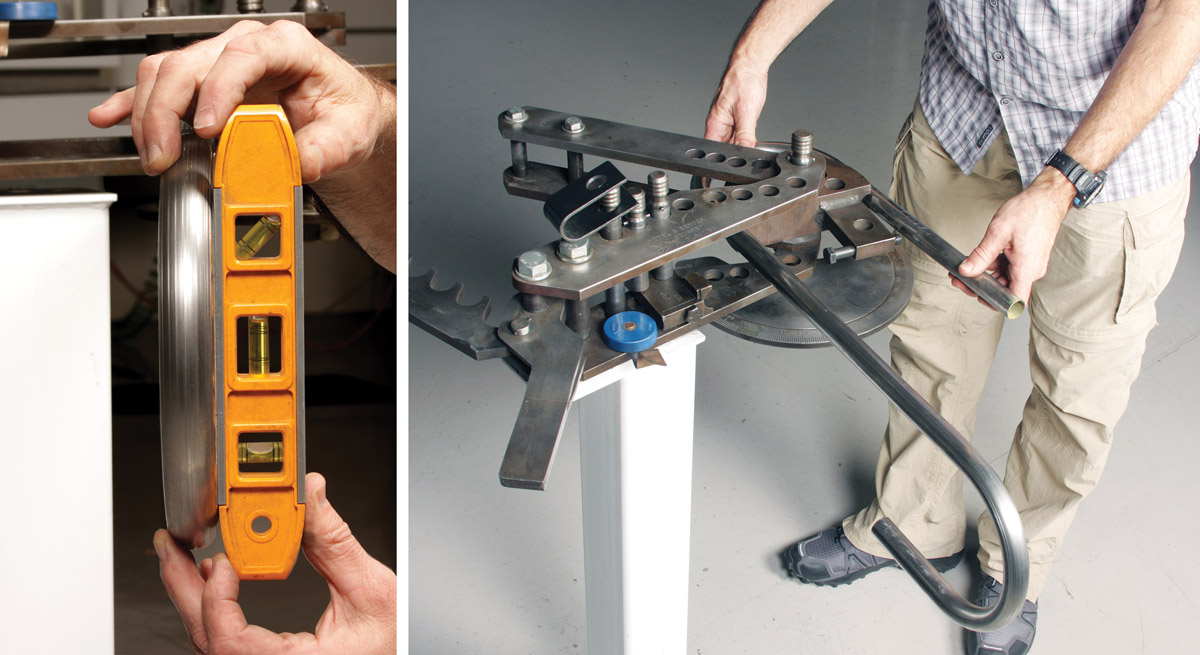
Using a torpedo level simplifies the orientation of the second bend perpendicular to the first.
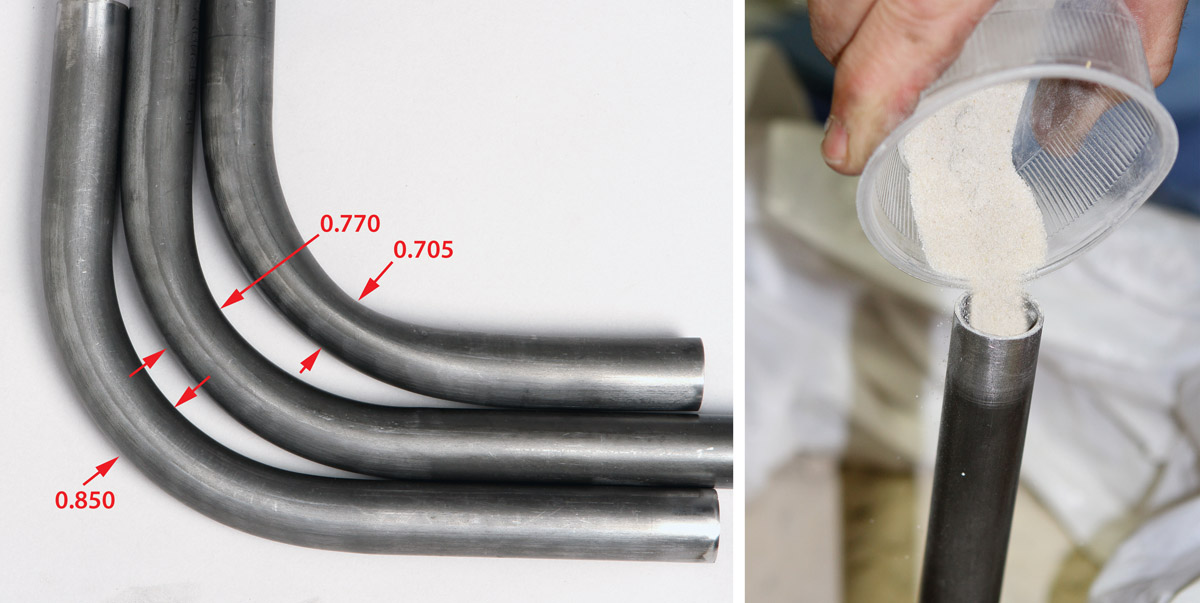
(Left) Dry bending a 90-degree, 3-inch radius in 7/8 x 0.049-inch 4130 resulted in significant squishing (from 0.875 to 0.705 inch). Lubricating the pressure die helped a little, but the tube still deformed significantly (0.770). Only after filling with sand (right) did I finally achieve a decent result.
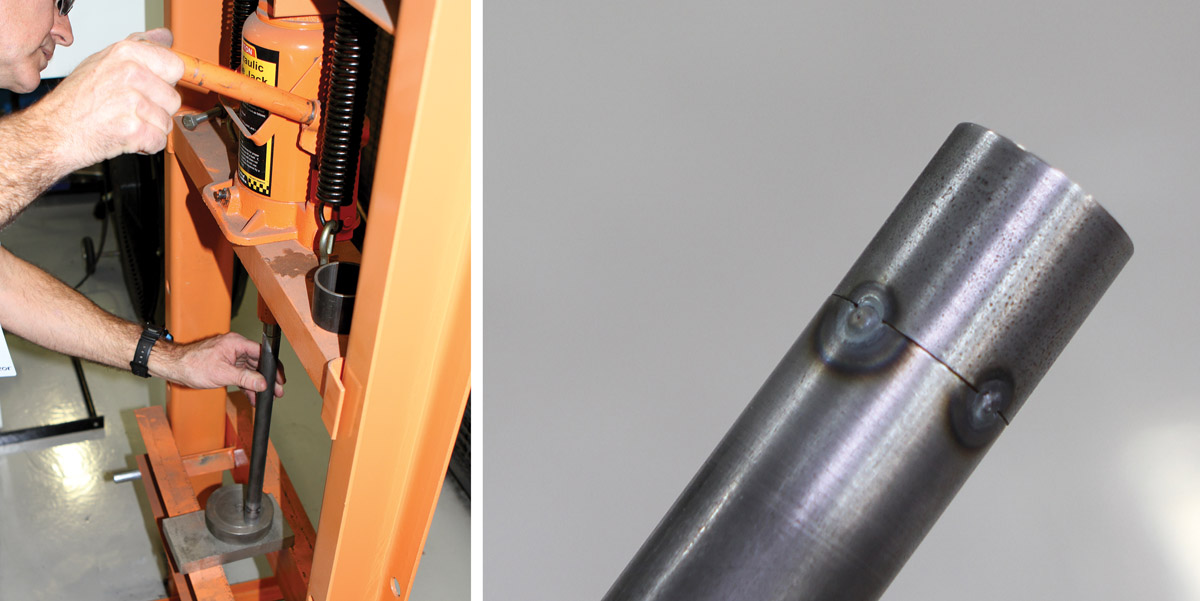
(Left) With the bottom end capped with a steel plug tack-welded in place, the sand is packed as tightly as possible using a ram and a dead blow hammer or, even better, a 10-ton hydraulic press. (Right) Once the sand is compacted, tack weld a plug on the open end.
The Model 3 tube bender is a solid addition to any shop that plans to do even a modest amount of tube bending. I find that having one changes the way I design parts because tube bending is fast and easy, and usually looks more elegant than a cut and welded joint.
To be sure, the Model 3 is not the only way to bend a tube. Heating and bending around a custom form (along with sand packing) might turn out to be the only way to get a bend that doesn’t conform to an off-the-shelf bending die.
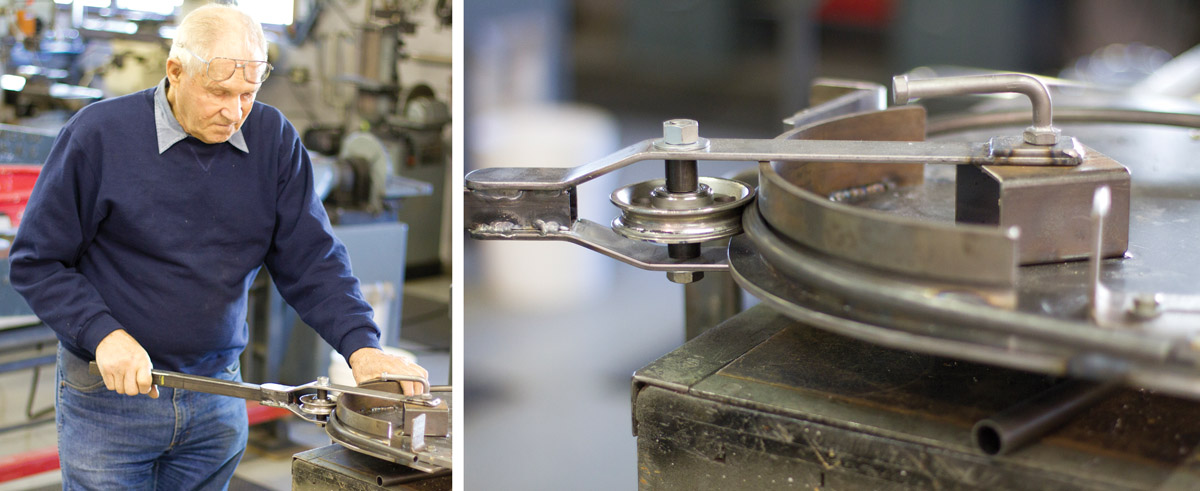
EAA master fabricator Bauken Noack shows off his custom tubing bender for fabricating Ford Tri-Motor seat frames. (Photos: Lori Farenholtz)
Regular and long-time readers might recall the March 2014 issue, which featured my visit to the EAA Kermit Weeks hangar. Master machinist and fabricator Bauken Noack was faced with recreating seat frames for a group of 1920-era Ford Tri-Motors that are still in service. His solution was a shop-built tube bender using a cable pulley as a pressure die/follower die. As you can see from the photos, it’s ingeniously simple and it works. You can’t beat that!

![]()
Bob Hadley is the R&D manager for a California-based consumer products company. He holds a Sport Pilot certificate and a Light-Sport Repairman certificate with inspection authorization for his Jabiru J250-SP.


