
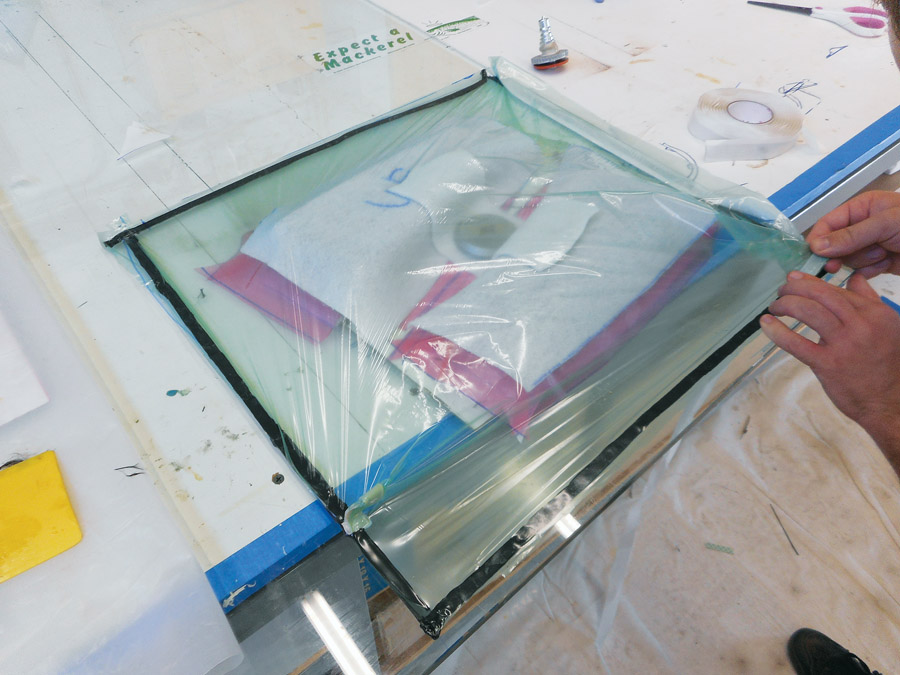
Wing skin being wet out on transfer plastic. The mold is in the background.
In the previous article of this series, we expanded our discussion of sandwich panel fabrication to include panels made in molds. Although the technique is essentially the same as that outlined in Part 1 [“How to Fabricate Sandwich Panels,” September 2017], molded panels have a few special requirements. Here we continue the discussion from last time.
Mold Prep
Mold prep depends on which type of mold you are working with. For the double-bagging method, parts release easily from polyethylene plastic (Lowe’s 4-mil sheeting), so no waxing or other release is necessary. You can even draw on the plastic beforehand to indicate ply orientation, core location, etc. (although beware that some inks may transfer into the part and may then bleed into future primer/paint layers).
For foam molds of deeper curvature, bagging with Stretchlon works well, but parts do not release easily. When using it as a release layer, the plastic needs to be waxed with a good mold release wax (or sprayed with a release like Frekote or PVA [polyvinyl alcohol]) before laying up parts on it.
Stretchlon conforms nicely, even over severe shapes.

We have also successfully experimented with sealing low-density tooling foam with epoxy. Because the foam is relatively fragile, coating the surface of the mold with a skim coat of pure epoxy helps to densify the first few hundredths of an inch, which makes the mold slightly more resistant to dings. This is followed up by several coats of wax and an insurance layer of PVA. This is an alternative to double bagging.
HDF (high density fiberboard) molds should be sealed with several coats of nitrocellulose dope, with light sanding between each coat. This is followed by applying a mold release. Several coats of wax should do the job, with PVA for extra insurance. Specialized coatings are also available specifically aimed at mold prep. For example, Chem-Trend makes a line of sealers and release agents called Chemlease that work well.
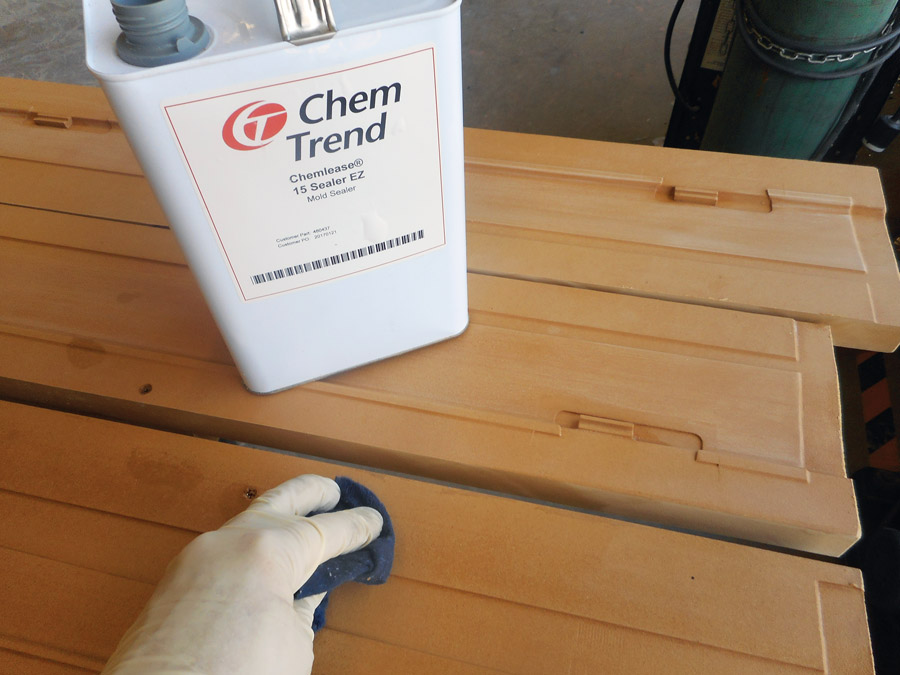
Wood-based molds can also be sealed with dope, water-based wood sealer, epoxy (infusion resin is extremely thin and penetrates well), or a specialty sealer like the Chemlease shown here, which dries much faster than traditional dope sealers. Release can be wax, PVA, or any specialty release treatment. Wax can be used without PVA, but PVA needs a wax base beneath it for good release.
Composite molds are typically waxed (three or four times for a new mold, once or twice for a seasoned mold) and do not need further work, unless a primer or gel coat is desired. For complex mold shapes or molds with minimal draft, shooting the mold with PVA after wax is extra insurance for a good release. Because PVA tends to bead up over wax, shoot two very light mist coats and let dry to establish a good base, followed by a medium weight coat, and finally one or two heavy coats. As a final note, although PVA is a nice “insurance policy” for good release, never use PVA alone without wax—you are likely to have release problems. On the other hand, if you do a good wax job, PVA is nice but not always necessary.

Mixmaster Hal Provo premeasures the first of about a dozen 100-gram cups of resin before a layup party.
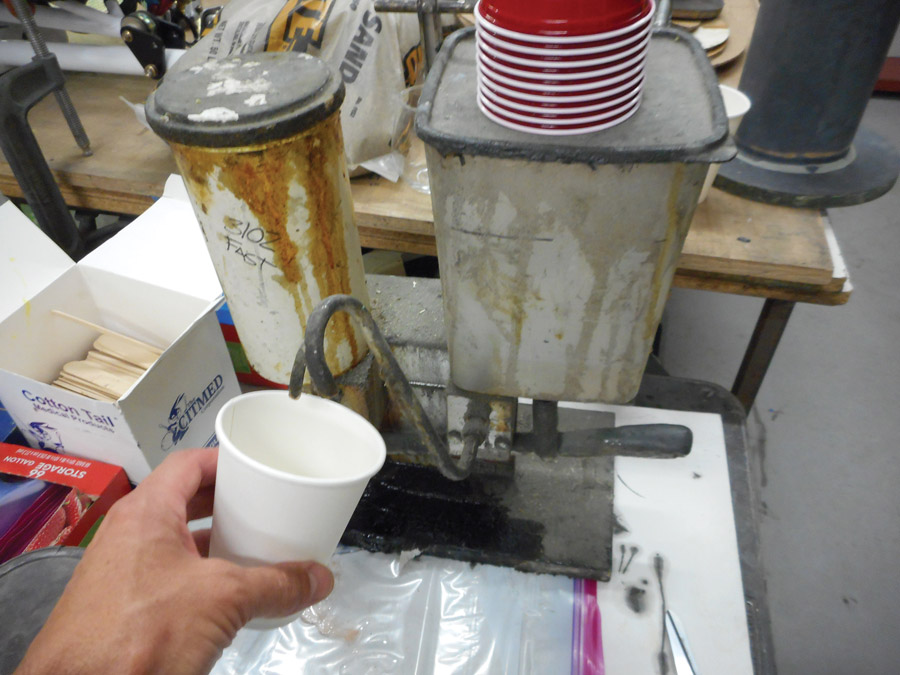
atio pumps are great when you have to work quickly and don’t have a helper.
Layup
The layup procedure is essentially identical to that used for bagging flat panels (see previous article, September 2017), with some additional considerations noted below.
For large molds (say, anything more than 10 square feet), you will be using a lot of resin quickly. In this case it helps to have a helper whose sole job is to measure and mix resin. If you use ratio pumps (pumps that dispense both the resin and hardener simultaneously in the correct ratio), this can be done on an as-needed basis. But if you use a gram scale to determine your ratios, it’s helpful to measure out your resin beforehand, so that all the mixer needs to do is add hardener. I use pumps to measure out the bulk of the resin or hardener, then use a ketchup bottle from the dollar store to meter out the last few grams precisely. Be sure to clearly label your topping bottles if using different epoxy systems. If using ratio pumps, I suggest checking the ratio (using a gram scale) on a regular basis to ensure they are putting out the correct ratio. And don’t forget to fill the dispensers before a big job—it stinks to pump out a big cup of epoxy and have one of the dispensers run dry, essentially ruining the entire cup because the ratio is now incorrect.

Professor of aeronautical engineering Paulo Iscold (left) and a student making the left rear fuselage panel for the Anequim record setter.
I generally prefer to do wet out on large pieces of transfer plastic. This allows me to lay out all of my fabric on tables in the shop and have multiple helpers all wetting out at the same time. We can then quickly transfer each piece of saturated fabric to the mold and align it precisely without distorting the fabric (since the transfer plastic provides stability until peeled away). Another method is to lay fabric in the mold dry (either straight off the roll or precut to size) and then do the wet out on the mold. This tends to result in a bit more waste and wavy fiber alignment, which may or may not be of concern.
Even if you are doing large molds, with good preparation you can minimize the amount of time actually spent on the layup; this is nice if you are dependent on friends for help. For example, the wing skins for the SR-1 took about 60 minutes each to bag, from start to finish. This was possible because all of the materials were precut to size, vacuum bags were pre-taped and pre-positioned, resin pre-weighed, etc. Prep work took about two days, but it was all work I could easily do by myself.
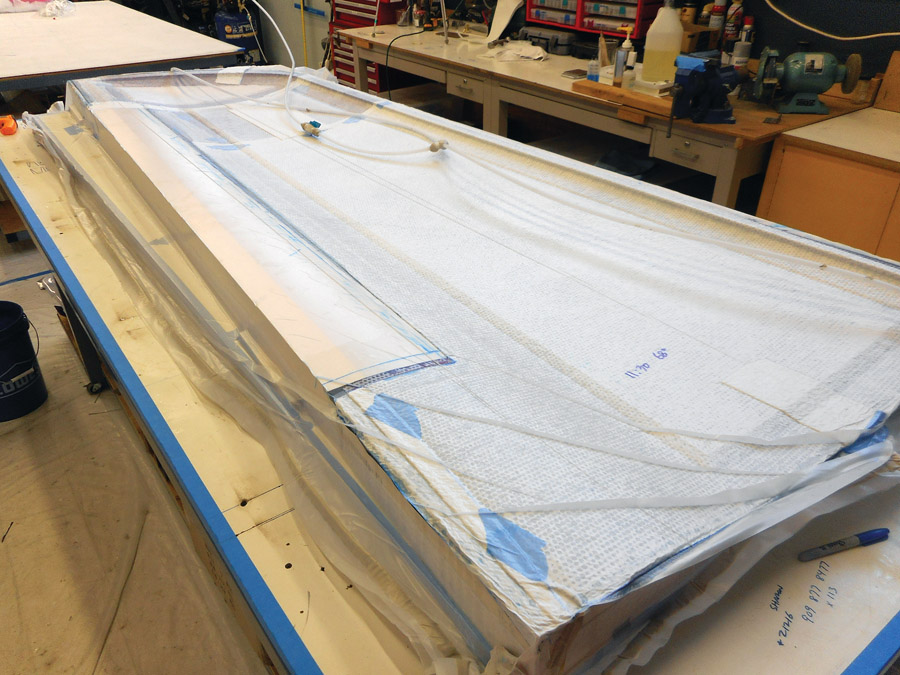
Wing skin laid up and vacuum bagged.
As noted above, the layup order of operations is not much different than outlined in the previous article:
1. Prep all materials and molds as necessary. Check checklists and brief helpers on duties. Operations from this point forward should be as clean and sanitary as possible.
2. Position surface peel ply on mold, add resin, squeegee. Peel ply absorbs resin slowly, so be patient. Squeegee from the center of the mold to the edges, removing wrinkles and bubbles as you work. This layer is optional. Skip this step if you want a glossy surface or will spray the mold with primer or gel coat.
3. Wet out carbon plies on transfer plastic. Give epoxy time to completely absorb; avoid excessive squeegeeing. Initially squeegee parallel to weave to avoid distorting dry fabric. Look at fabric from an oblique angle to check for dry spots. It is better to pour too much epoxy on the fabric and squeegee out the excess than to have too little and try to work the epoxy around. The latter takes longer, results in dry spots, and damages fiber.
4. Wet out foam core(s) upper surface if desired. Hard squeegee foam to remove excess resin. (Wet out of lower surface unnecessary—see previous articles on coupon testing).
5. Orient and place down first layer of fabric. Smooth wrinkles and lightly squeegee down from center to edges. Repeat until all layers of outer fabric are in place.
6. Place foam core(s) using jig or alignment marks.
7. Repeat step 5 for inner layers of fabric.
8. Position and place down peel ply. Add relief cuts as necessary.
9. Position and place perf ply. Add relief cuts as necessary.
10. Position and place breather and vacuum quick connects.
11. Close bag and seal with mastic. Screw in through-bag vacuum connectors.
12. Pull vacuum slowly, making sure to avoid shifting of core or bunching of fabric.
13. Check for vacuum leaks. The larger the mold, the greater the possibility of having a leak somewhere. The best leak detectors are…anyone younger than you! I had an intern who could hear leaks from 20 feet away that I couldn’t hear from 20 inches.
14. For a good layup, you will see an even pattern of resin dots in the bleeder. No dots mean that either the resin ratio was too lean or the resin has already gelled and is too viscous to flow through the perf. Saturation indicates the resin was too rich. Local areas of saturation are not a problem, but widespread saturation prevents even distribution of vacuum pressure.
Hopefully this article, and maybe a few days spent “apprenticing” in someone’s shop, will be everything you need to try bagging some parts of your own. Next month we’ll finish up with a final construction article on bagging flanged items like ribs and bulkheads using a combination of the techniques described here and in previous articles. In the meantime, you can check out a time-lapse video of a wing layup here: facebook.com/TheSR1Project.
![]()
Eric Stewart is designing and building the SR-1, a speed plane for setting records in the FAI c-1a/0 category (takeoff weight less than 661 pounds, including pilot and fuel). You can see more at facebook.com/TheSR1Project, including additional photos and videos of the subjects in this series of articles.


