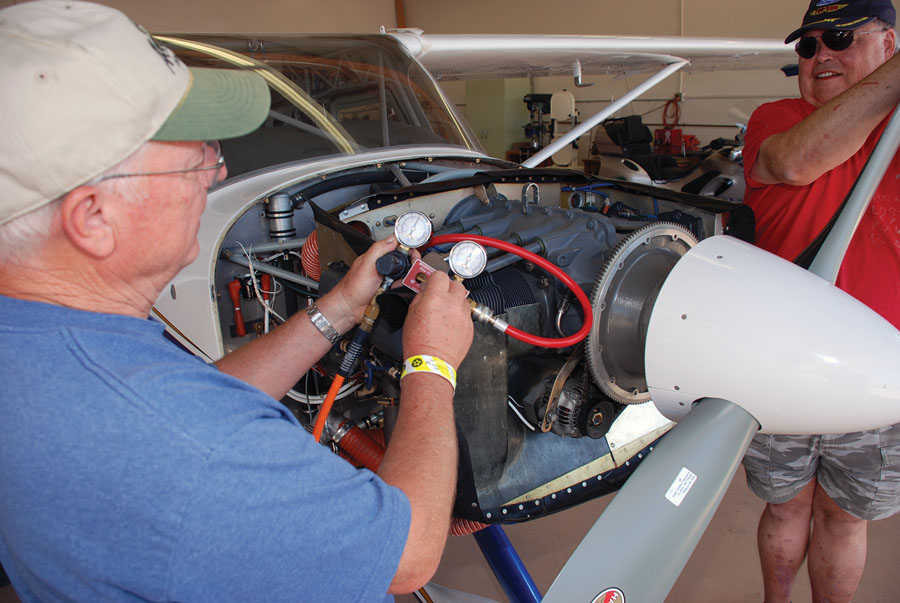
Longtime building buddy Ed Zaleski (left) performs a differential compression test on cylinder #1 while a friend hangs onto the prop to keep it from turning and injuring someone. The reference pressure will be on the left gauge, and the pressure in the cylinder will be on the right gauge.
The differential compression test is a timer-honored tradition in aviation. Because of this, we sometimes do it by rote and forget why we perform this test, its benefits, and shortcomings. The compression test measures the ability of an aircraft engine cylinder to hold air pressure at top dead center (TDC). The name differential compression test comes from the act of comparing the pressure a cylinder will hold to a reference pressure—typically 80 psi—thus allowing us to see the differential between the two pressures. Ideally the differential is small—10 psi or less. The results of the test are shown by placing the pressure the cylinder will hold on the top of the fraction (numerator) and the reference pressure on the bottom (denominator).
A typical result would be shown as “#1-76/80” for an engine where the number one cylinder will hold 76 psi against a reference pressure of 80 psi. The results of this test for each cylinder should be recorded in the engine logbook at least yearly.
How to Perform the Test
Lycoming Service Instruction 1191A describes the test for their engines and how to interpret the results. A proper test should be conducted on a warm engine. Cold test results may be erroneous and without merit. Be sure to use a tester with a .040-inch orifice for all Lycoming and Rotax engines. Some testers designed for larger engines have an orifice size of .060 inch. They are not approved for use on Lycoming or Rotax engines.
Immediately after shutdown, remove a spark plug from each cylinder, using care to not burn yourself or drop a spark plug. A spark plug dropped on concrete should be considered unusable due to possible internal damage. Then rotate the prop until the number one cylinder is at TDC (not the 20- to 25-degree timing mark). The cylinder is at TDC when the TC mark on the starter ring gear (often called the flywheel) lines up with the split in the engine cases or when a similar mark lines up with the indicator hole in the starter motor. You can test to be sure that cylinder is in the firing position by placing your finger over the open spark plug hole and feeling for the pressure in the cylinder. It is important to do this because each cylinder only fires every other time it passes TDC.
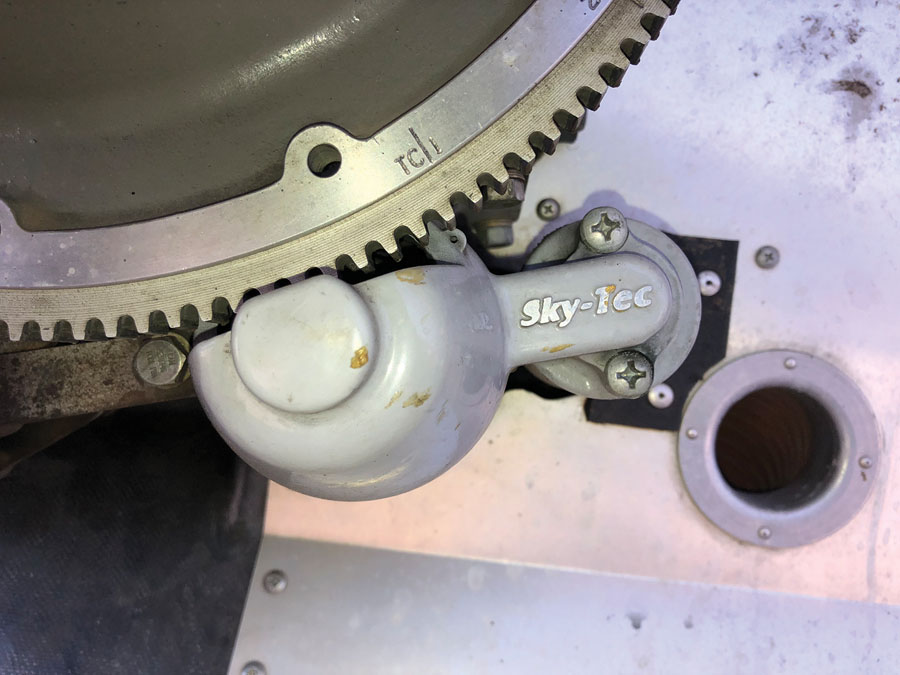
Align the TC mark on the starter ring gear with the small hole in the starter to get the number one cylinder to TDC. Be sure that you are on the compression stroke by feeling for pressure at the spark plug hole. There is a similar mark on the backside of the ring gear that can be aligned with the split in the crankcase if that is easier to see.
With the cylinder in the firing position, insert the compression tester fitting into the spark plug hole and screw it down hand tight. Next attach the hose to the tester (regulator and gauges). The air valve should be shut when you are doing this. In theory, if the cylinder is at TDC, the prop will not move when you open the air valve, but in practice it is much safer to have a buddy hang on to the prop to be sure it doesn’t come around and injure you.

You can use a soda straw to feel for TDC if no marks are visible, as is the case with Rotax engines. The straw has the advantages of being too large to fall into the cylinder and isn’t a threat to engine parts if it were to get jammed in a cylinder somehow.
With the air valve open, verify that the reference pressure is exactly 80 psi. Adjust the regulator as needed to achieve this. Then look at the pressure on the other gauge. It will read the air pressure that the cylinder is actually holding. Note this pressure and repeat the process for each cylinder. With a four-cylinder Lycoming engine, it is easiest if you simply rotate the prop 180 degrees each time and follow the engine’s firing order—1-3-2-4. The TC mark will not be visible for cylinders two and four, but if you put the prop (assuming 2-blade) in the exact position as for one and three you will be at TDC or very close to it.
With a Rotax engine there are no crankshaft position marks visible, so you can find TDC by feeling for the compression and then placing a soda straw or a piece of safety wire into the spark plug hole to feel for TDC. I prefer the straw because it will not damage engine parts if it gets jammed somewhere. It is also long enough that it can’t fall into the cylinder.
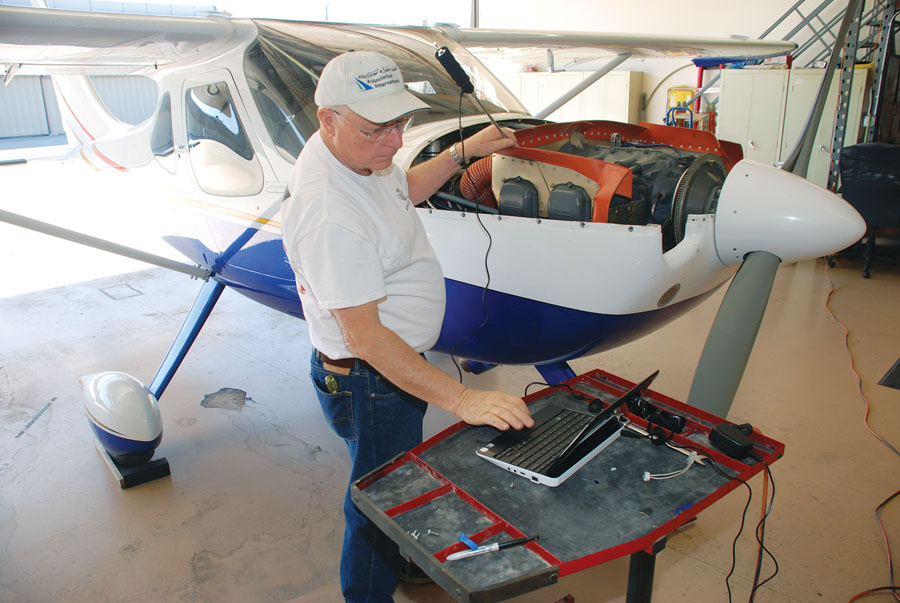
Any troubling test results should be followed up by a borescope examination. Inexpensive borescopes that work with a laptop computer are readily available today. Anyone who is serious about working on engines should have one.
Test Results
In a perfect cylinder with no leakage, the reference pressure and the pressure held would be the same. In the real world there is always some leakage. The question then becomes, how much is too much? Lycoming and Continental differ on this topic for their certificated engines, with Continental putting much less emphasis on the numbers. Rotax uses number guidelines similar to Lycoming’s. Consult their maintenance literature for their guidelines and procedures.
Lycoming says any number greater than or equal to 70/80 is a good test result. Cylinders that will hold less than 70 but more than 65/80 are acceptable. Cylinders that hold 60 psi or less are likely candidates for removal and replacement or overhaul. Cylinder readings should be within 5 psi of each other. If the difference between any two cylinders is 15 psi or more, the low cylinder should get a closer look. If a retest after a few additional hours of flight does not reduce the pressure gap, removal and overhaul or replacement should be considered according to Lycoming. It is common for a low cylinder to yield a better test result after additional running, so panic at the first poor reading is unwarranted. However, it should not be ignored either, and retesting soon is definitely called for.
What is just as important as the test result number is determining the source of the leakage. While the test is underway, listen at three key points: the exhaust pipe, the open dipstick tube, and at the carburetor or fuel injection air intake. A burnt exhaust valve will produce a hissing air sound at the exhaust pipe outlet. A leaking intake valve similarly will produce an air sound at the air intake. Failing rings will allow air to escape into the crankcase, thus producing the sound of leaking air at the dipstick tube. It is important to note the source of the leak, especially for any cylinders that test under 70/80.
Sometimes a low reading will come from a piece of carbon stuck on a valve, holding it open just a bit. This is why it is always good to fly a bit and retest if any cylinders are showing excessive leakage.

Under the borescope the edges of a good valve will be sharp and the color of the valve face will be even. There is some carbon buildup on this valve, but that should have no effect on engine performance.
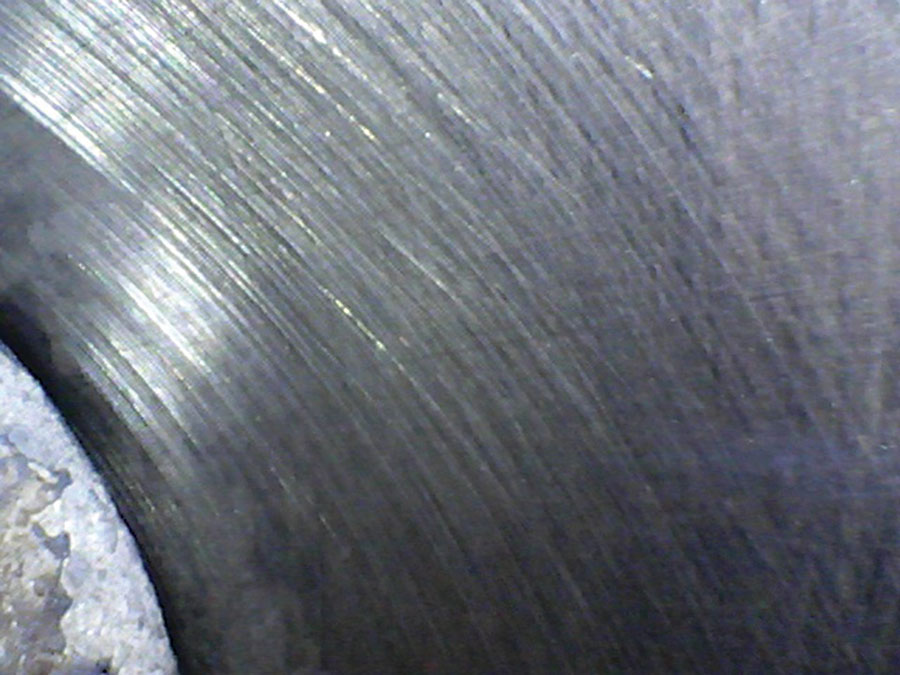
The hash marks from the cylinder’s original honing should remain visible in a good cylinder. If they are not, it is a sure sign of excessive cylinder wear.
Rotax Compression Test
Differential compression testing is similar to the process used on Lycoming and Continental engines but with a slight Rotax twist. Since there are no visible timing marks to indicate (TDC), it is necessary to bring each cylinder up on its compression stroke and then use a straw or piece of wire placed in the spark plug hole to find TDC. Safety demands that you take some care to find the exact top of the compression stroke because it is quite hazardous to try and hang on to the prop once you put air pressure into the cylinder. In other words, set the engine to TDC for that cylinder, insert the compression tester hose, clear the prop area, and then connect the tester and pressurize the cylinder. If you are not at TDC, the prop will move with a great deal of torque, more than most people can restrain due to the mechanical advantage of the gearbox. Be sure to be out of the way. The standard compression tester with a .040-inch orifice works well. Each cylinder should hold at least 75% of the input pressure (60/80 for example). Note that you will need an adapter with 12-millimeter threads, not the aviation standard 18-millimeter threads.
Low Test, Now What?
One or more of my cylinders “failed.” So now what do I do? The first thing to do is retest after at least a few hours of flight. If the cylinder(s) fail again, it is time to dig a little deeper. This is where a borescope comes in handy. These are so inexpensive now that you, or at least someone you know, should have one. If not, go buy one. It will be a lot cheaper than buying a new cylinder. See the July 2016 issue of KITPLANES for an article on affordable borescopes and how to use them.
What we are looking for with the borescope is evidence that supports the low compression reading we saw with the differential compression test. If you heard leakage at the exhaust pipe, take a good look at the exhaust valve for signs of burning or uneven coloration. These are signs of a failing exhaust valve and are cause to remove and overhaul or replace a cylinder. Similarly, damage to an intake valve means that cylinder should come off for repair or replacement. Failed valves can break off and cause damage to the rest of the engine. It is best not to delay repair of a failing valve.
Air leaking into the crankcase means the rings are not holding the pressure they should. If this is the case, use the borescope to look at the cylinder walls. In a good cylinder, the hash marks from its original honing should still be clearly visible. If they are not, especially if there are areas of metal that are completely free of hash marks, you will probably need to overhaul or replace that cylinder. You will also want to look for scoring that typically follows the path of the piston as it travels up and down. Be sure to look at as much of the cylinder wall area as possible because scoring will often be highly localized.

An automotive-type compression tester can be used as an alternative means of checking cylinder condition if that is all that is available. This is not a substitute for a proper differential compression tester, but it can provide some useful information.
Automotive Compression Test
Those of you who work on cars will remember that there is another type of compression test that simply requires a single gauge and no compressed air to perform. There is no standard for this test in aviation, but it has some merit even if it is limited. For one thing, it is easy to find a compression tester in any auto mechanic’s toolbox. A differential compression tester and source of compressed air may be much harder to come by in a remote location. For another it does a better job of detecting poor ring sealing throughout the length of the cylinder. Remember, the differential test only measures the seal at TDC. This test is in no way a suitable replacement for an aviation differential compression test, but in a pinch, it can give you some useful information. This is especially true if you have no other options. To perform the test, attach the gauge to each cylinder in turn, and crank the engine over through five compression strokes. Be sure to keep the prop area clear when performing this test. Any cylinder that is 20% or more below the other cylinders is a likely source of poor engine performance.
I tested my own Lycoming O-360 with an admittedly old automotive compression tester and got these results: #1-150 psi, #2-155 psi, #3-150 psi, and #4-120 and 130 psi in two tests. As a double check, I did a differential compression test on #4 and got a reading of 76/80. I am not yet ready to pull off #4, but I will be keeping an eye on it. A borescope examination of the cylinder wall will be my next step.
Some Context
The differential compression test is a good test by itself, but it is a much better test when combined with other information, especially borescope observations. In fact, any anomalous compression result should be followed up by a borescope check to verify the problem indicated by the test. A low compression reading with air leaking out of the exhaust should point to a visual check of the exhaust valve. A failing valve will have uneven coloration across the face of the valve, or in extreme cases you will actually be able to see the burnt edge of the valve. When this information is combined with the compression test results, you have a high confidence level that pulling the cylinder is the right thing to do. On the other hand, if the valve looks good with the borescope, it would be wise to take a more conservative approach, run the engine for a few hours, and retest.
If an engine starts to use more oil or seems down on power but the compression test looks good, you may need to widen the scope of your inquiry. Remember, the differential compression test only shows what is happening at TDC. Cylinder wear or scoring lower in the cylinder wall will not reveal itself with a differential compression test. It may show up with an automotive-type compression test, but the borescope is most likely to find the problem. Shiny spots on the cylinder walls where the original hash marks are no longer visible or score lines should be easy to see with a borescope.
There are times when you should regard the differential compression test results with some skepticism. If you have a cylinder or two that read in the mid to low 60s, but the engine seems to be making good power and the borescope shows no obvious problems, it is probably prudent to keep running the engine as it is and just keep an eye on things. New cylinders are expensive, and major maintenance work has a way of producing its own problems. Do not be in any hurry to tear your engine apart if it is running well just because a test didn’t come out as well as you had hoped.
A single poor result should first trigger some questions before the engine comes apart:
- What were the results after flying a few hours and repeating the test?
- Is there any significant metal in the oil filter and/or sump screen? If so, what kind of metal?
- What do the low cylinders look like through the borescope?
- How is the plane running? Good power? Clean spark plugs?
If all of the answers point to a serious problem, then by all means do whatever needs to be done. But if the results are mixed, especially if the engine isn’t making metal and the borescope results are good, it may be time to step back and consider your next move at a more relaxed pace.

![]()
Dave Prizio has been plying the skies of the L.A. basin and beyond since 1973. Born into a family of builders, it was only natural that he would make his living as a contractor and spend his leisure time building airplanes. He has so far completed three—a GlaStar, a Glasair Sportsman, and a Texas Sport Cub—and is helping a friend build an RV-8. When he isn’t building something, he shares his love of aviation with others by flying Young Eagles or volunteering as an EAA Technical Counselor. He is also an A&P mechanic, Designated Airworthiness Representative (DAR), and a member of the EAA Homebuilt Aircraft Council.


