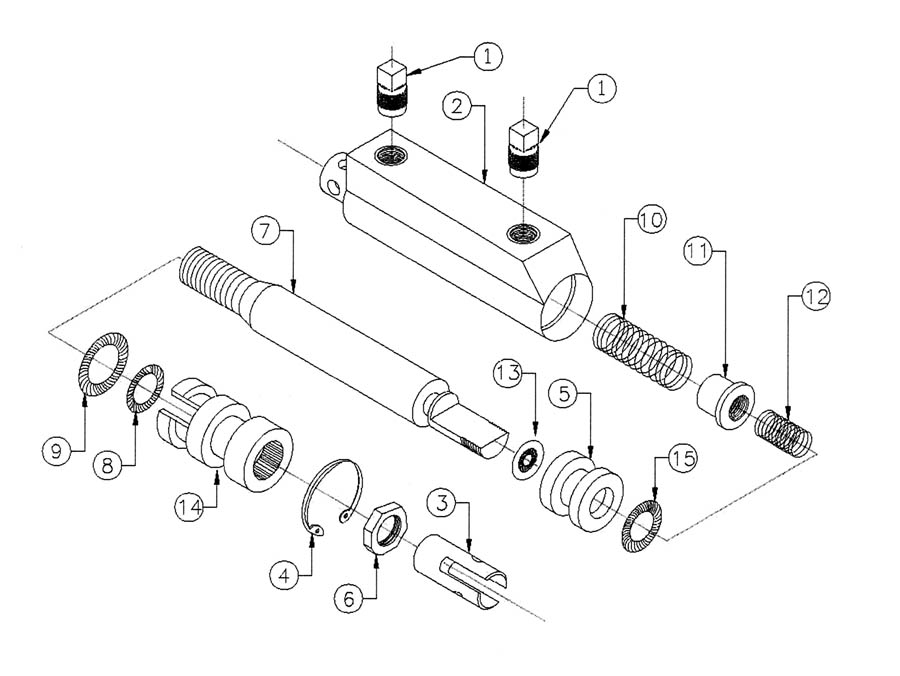
Exploded view of the MC-4 master cylinder. (Drawing: Courtesy of MATCO Mfg.)
The MATCO MC-4 master cylinder is nearly ubiquitous in the Experimental world. Almost everyone activates their brakes with a set of these compact units. They typically enjoy a long and trouble-free life, but every now and then they need to be rebuilt. This is something that you can do with a few simple tools and a kit that MATCO sells for about $11.
Causes of Failures
Failures are not common but they can happen. Causes include age and wear, especially from corrosion of the shaft. Rust and dirt will eventually wear out the O-rings. Using the wrong brake fluid can also cause premature deterioration of the O-rings. Be sure to only use 5606 aviation hydraulic fluid in your system. The current specified hydraulic fluid is MIL-PRF-5606H, but fluid sold for Experimental use as MIL-H-5606A is fine, even though that is an obsolete specification. Other brake fluids, such as automotive brake fluids, may work but are not recommended. Non-approved fluids may attack synthetic rubber parts in the brake system or present other problems.
You will know when your master cylinder is beginning to fail because red hydraulic fluid will begin leaking at the shaft. Another possible failure mode is that firm pressure on the brake pedal results in the pedal continuing to go down after firmly activating the brakes. This could result from the O-rings at the master cylinder piston failing, but it is more likely related to a problem at the brake caliper. A failed seal at the caliper piston will have a similar effect. Be sure to check there before taking your master cylinder apart.
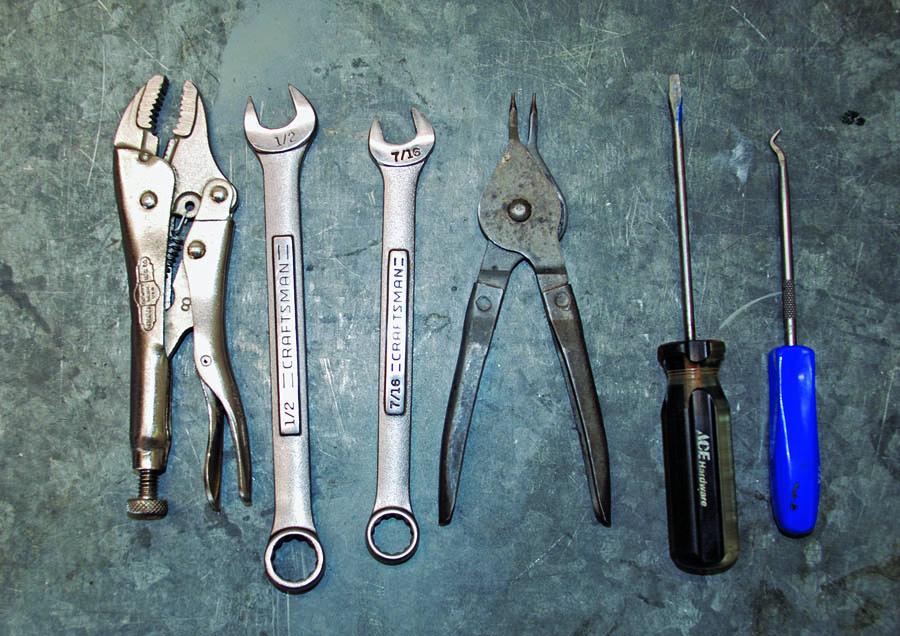
Here are the tools you will need to rebuild your master cylinder and replace the hose fittings. From left to right: Vise-Grips, -inch and 7/16-inch wrenches, snap-ring pliers, small straight-blade screwdriver, and a pick to remove the O-rings.
Disassembly and Cleaning
It may be possible to rebuild the master cylinder in place in the plane, but you are a better man than I am if you can pull it off. It will be much easier to remove the master cylinder from the plane and work on it on the bench. Be sure to cap off the fluid line from the reservoir when you remove the master cylinder. Otherwise you will have brake fluid all over the place.
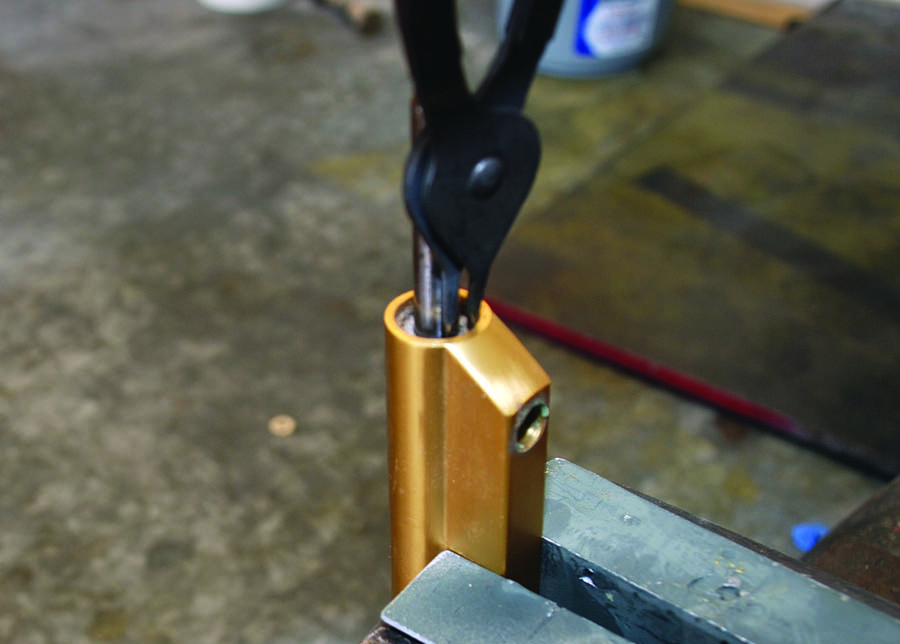
Remove the snap ring with a pair of snap-ring pliers. This will allow the internal moving parts to come out and be serviced.
Once the master cylinder is on the bench, you will need some snap-ring pliers to get it apart. There is a snap ring at the base of the shaft where it goes into the master cylinder. Once that is removed everything will come out. With the snap ring out, a firm tug on the shaft should remove all of the moving parts without any trouble.
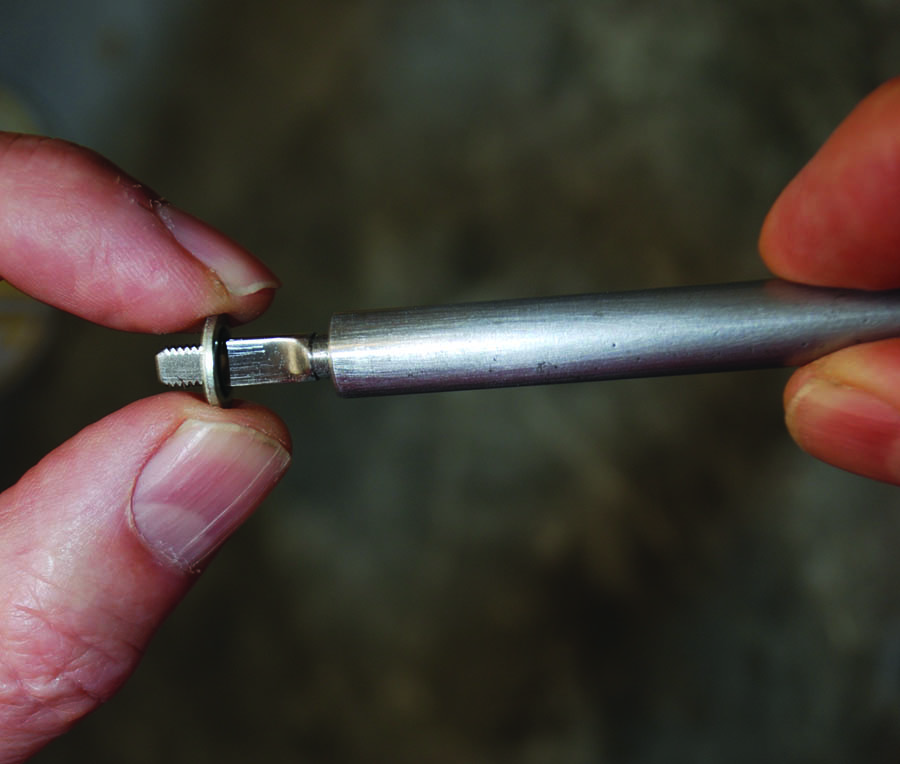
With the shaft in hand, you will need to remove the little brass nut (MATCO calls this the spring guide) from the shaft. At first, I wasn’t sure of the best way to remove this because it does not have flats where a wrench could get ahold of it. A call to MATCO revealed their method. Just grab the spring guide with some Vise-Grips and turn it off. The brass is pretty hard, so it will not mar easily. There is no need to grip the spring guide with a death grip because it isn’t on there that tightly. It has a standard right-hand thread, so there is no trick to removing it. This will allow the piston to come off and allow removal of what they call the Stat-O-Seal. On some versions of the MC-4 this will be an O-ring. This can be removed and replaced with the Stat-O-Seal in the rebuild kit.
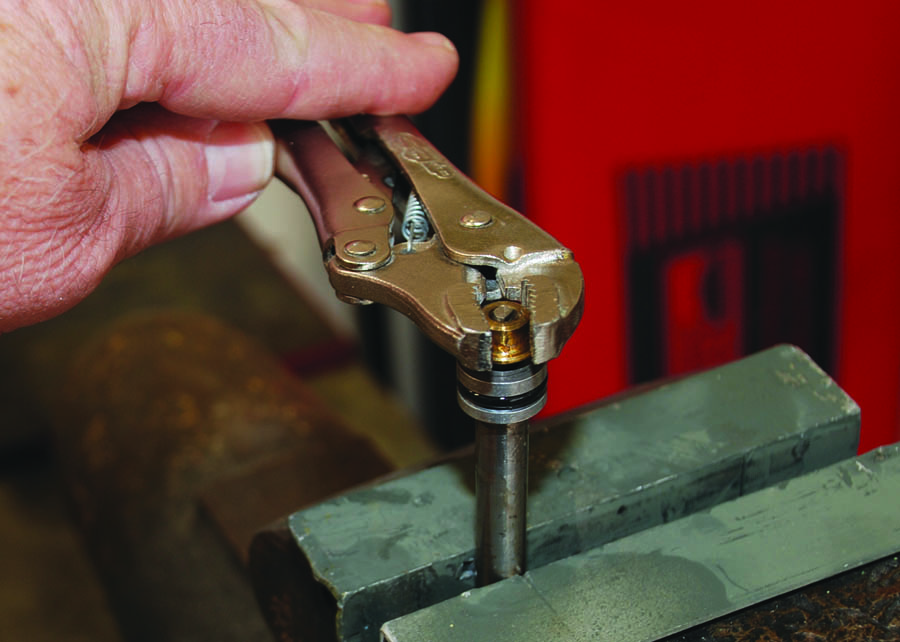
Remove the brass spring guide with Vise-Grips. It doesn’t take a great deal of force to do this, so don’t clamp down too hard on the spring guide, just enough to keep the Vise-Grips from slipping.
Once you pull the end gland off the other end of the shaft, it will be ready to clean. Corrosion on the shaft is a common cause of O-ring failure at the end gland and the cause of leaks at this point. Be sure to remove all corrosion from the shaft with a fine Scotch-Brite pad or some steel wool. The shaft needs to be perfectly smooth and clean before it goes back into the master cylinder. If it still has pits or scores in it after cleaning, you will need to replace the shaft, which is not in the rebuild kit.
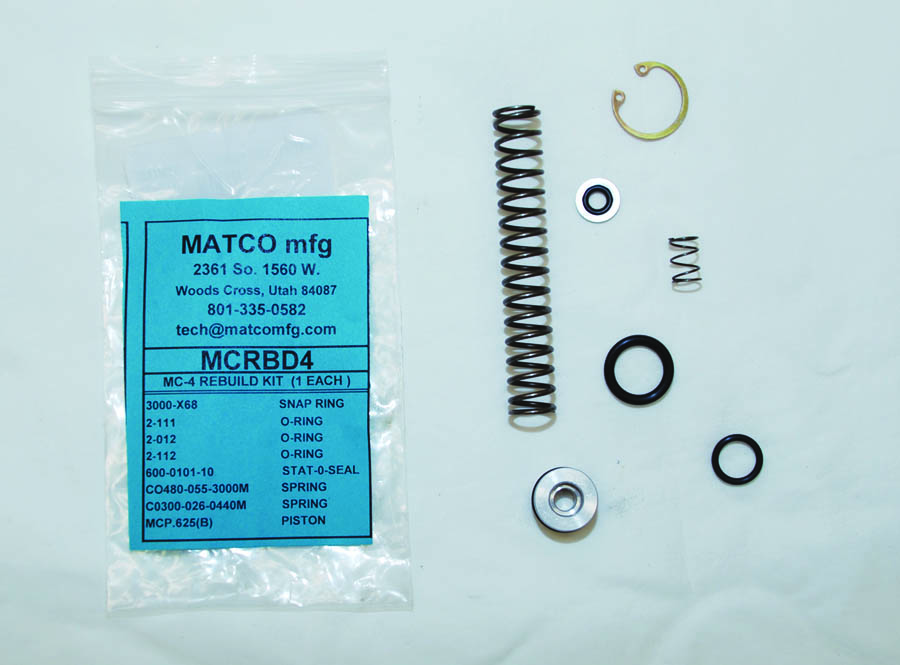
A rebuild kit from MATCO available for about $11 from Aircraft Spruce and other vendors. Note that the smaller O-ring goes inside the end gland. It is easy to miss this.
Before putting everything back together, it is time to clean and inspect the master cylinder bore. Use some brake cleaner in a spray can for this, but be sure to wear safety glasses when you do because brake cleaner can come back and get in your eyes.
[Sidenote: It is a good idea to quickly review the material safety data sheets (MSDS) for 5606 hydraulic fluid and whatever brake cleaner you plan to use before you start to work. These will give you important information about how to handle these chemicals safely and what to do if first aid is required.
MSDS are available on the internet for just about every product that you can think of. If you can’t find it there, ask the vendor that sold it to you. Once you get an MSDS, it is a good idea to print it out and store it in a notebook in your hangar or work area for future reference.]
Once the bore of the master cylinder is clean, be sure to inspect it for any scoring or other damage. If dirt or other foreign material has damaged the bore, you will need to replace the housing or, in effect, the complete master cylinder.
Reassembly
Start the reassembly process by installing a new Stat-O-Seal on the shaft. Lubricate it with some 5606 to help it slide on. Next, the piston goes on with its new O-rings. The small spring holds the piston in place after you install the spring guide. Again, use Vise-Grips to install the spring guide, but don’t get carried away. The brass is pretty hard, but it can be damaged if you really clamp down on it.
Begin the reassembly process by installing the Stat-O-Seal. It needs to be lubricated with hydraulic fluid to help it on.
On the other end of the shaft, it is time to install the end gland, but first replace the internal and external O-rings with new parts from the kit. Be careful when using tools to extract the O-rings so you don’t damage the soft aluminum. With the piston and end gland in place, insert the large spring into the bore of the master cylinder, and then follow it with the shaft assembly. The last step is to install the new O-ring. First, push the end gland in enough to clear the ring slot. You may want to use a small screwdriver or drift punch for this. Then install the snap ring. Be sure the snap ring is fully seated in the slot.
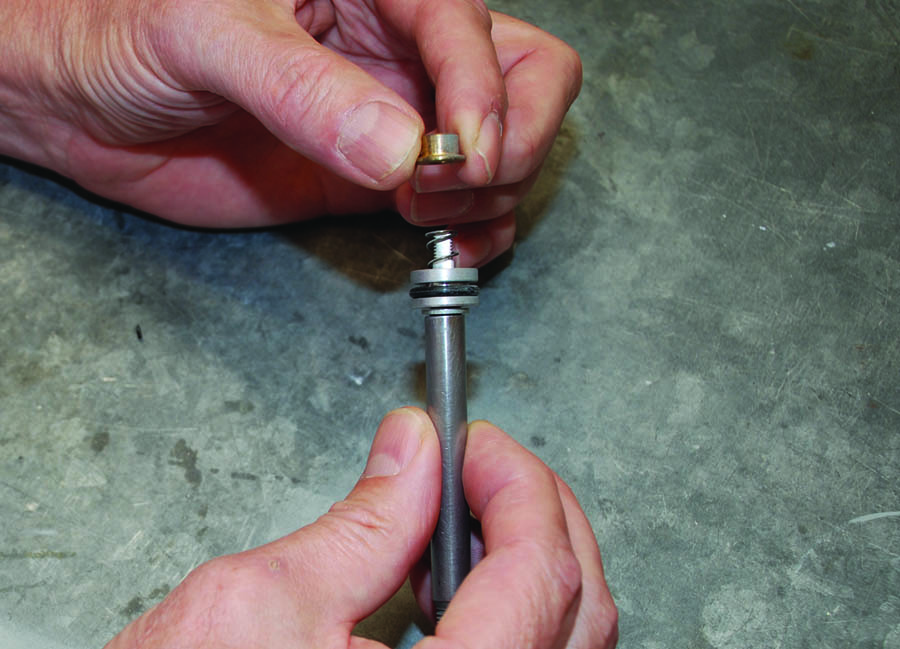
The small new piston and the small spring go on after the Stat-O-Seal. They are all held in place by the brass spring guide. Use Vise-Grips to tighten it.
If you have removed the hose fittings from the master cylinder, it is time to reinstall them. Be sure to use a good thread sealer when you do, keeping the sealer clear of the first thread or two on the fitting. I used Loctite 567 for my installation. Permatex also makes some good thread sealants well-suited for aviation use. EZ Turn (formerly Fuel Lube) also works but is probably not the best solution for brake installations.
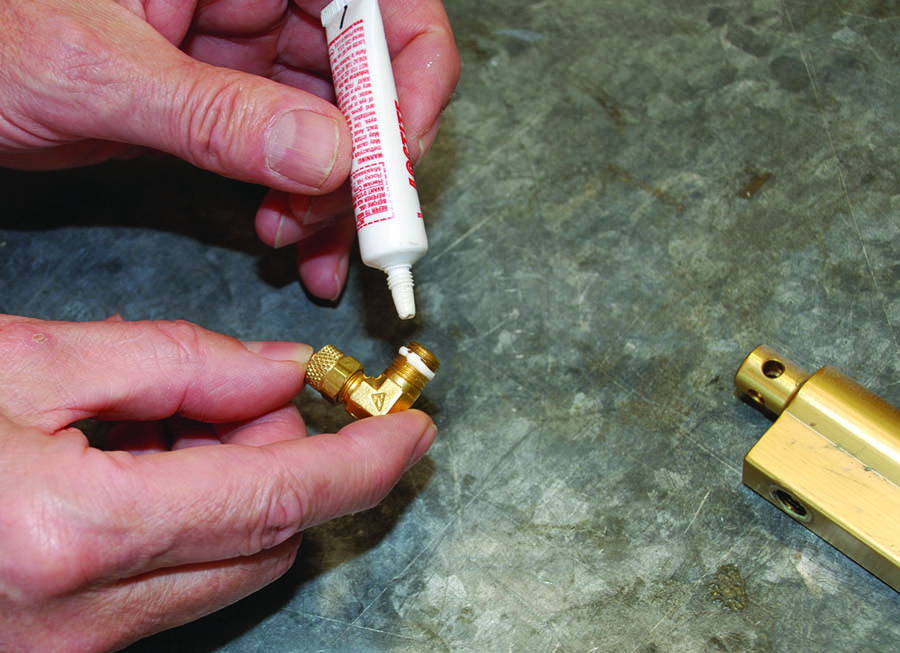
Be sure to use a good quality thread sealant when you install the hose fittings into the master cylinder body. Be careful not to get sealant on the first two threads.
Once your master cylinder has been rebuilt, it is time to reinstall it and bleed the brake system. Bleeding aircraft brakes is pretty simple, but there are some who try to make it more difficult than it needs to be. There is an idea that aircraft brakes can be bled the same way people used to bleed car brakes, by pumping fluid through the system with the brake pedal. Whether or not this is a good way to bleed car brakes, it is not a good way to bleed aircraft brakes. To bleed aircraft brakes, start at the bottom—the brake caliper—and work up. Do not attempt to bleed brakes by adding fluid at the top and pushing the air bubbles out through the calipers. It just doesn’t work. Connect a hose to each caliper, one at a time, open the bleeder screw, and pump brake fluid up until bubbles stop coming up in the fluid reservoir. Do this for each caliper, and then check the brakes for proper feel. Repeat as necessary until both brakes have a solid feel. Do not pump the brake pedals while bleeding the brakes. Brakes that feel spongy or that pump up with repeated applications still have air in the lines somewhere. Continue the bleeding process until all sponginess and/or pumping up disappear.
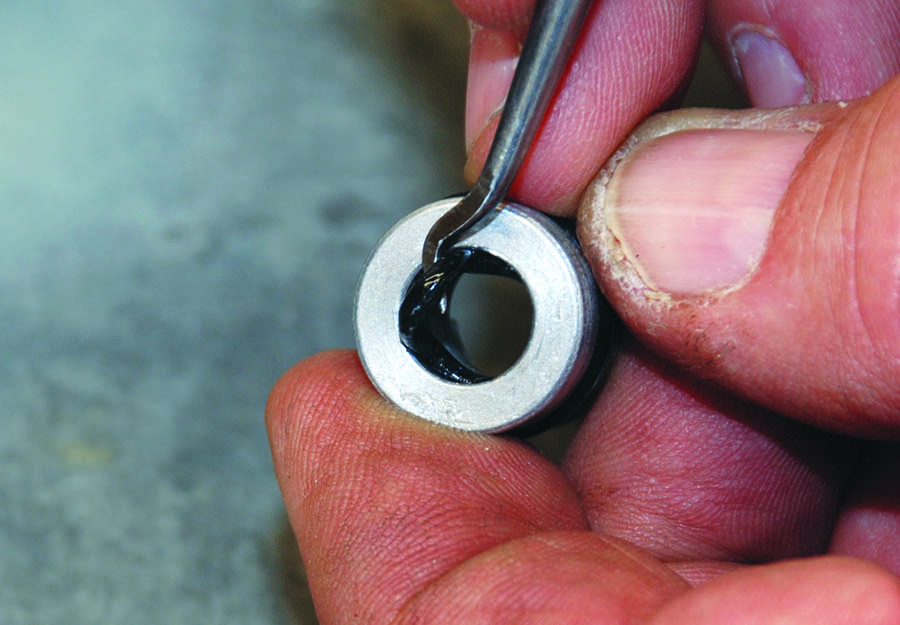
Don’t forget to replace the O-ring inside the end gland. Take care not to damage the soft aluminum as you pick the old O-ring out.
To do this you will need a way to pump fluid into the system. Aircraft Spruce and other aviation vendors sell brake bleeders starting at around $85, but you can make your own setup for less than half of that without much trouble. All you need is a brake bleeder fitting, an oil can and some plastic hose. You can actually do it without the fitting, but it is much harder to keep the hose attached to the bleeder without the fitting. By the way, be sure to only use aircraft brake fluid that meets the MIL-PRF-5606H specification.
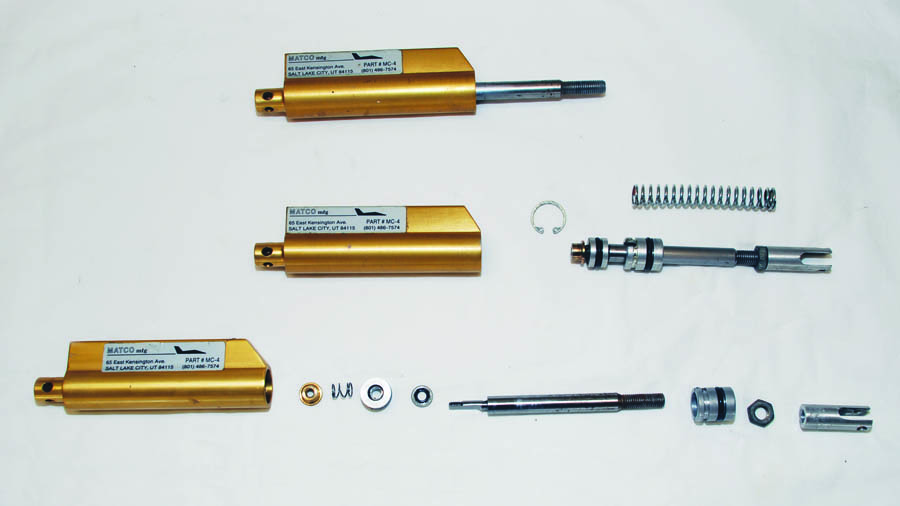
Top: complete MATCO MC-4 master cylinder assembly. Middle: MC-4 with the shaft and its related parts extracted from the housing. Bottom: fully disassembled MC-4 master cylinder.
While you are down there looking at your brakes, be sure to check the wear on the brake pads. If they need to be replaced, now is the time to do it. See “Maintenance Matters: Give Yourself a Brake!” in the April 2014 issue of KITPLANES for a good article on servicing your brakes.


