Tip 1: Reader Larry Merk asked how I sharpen drill bits. I use a Service R&D model drill sharpener made in the 1970s. The company, Service Precision Grinding, is still in business and sells the same basic machine, now called the TRD/SRD Model 80-M. The present-day cost is about $1000, plus accessories. That’s a big investment for the typical home shop, but if you come across a used one on eBay, it would be a good option because spare parts are still available.
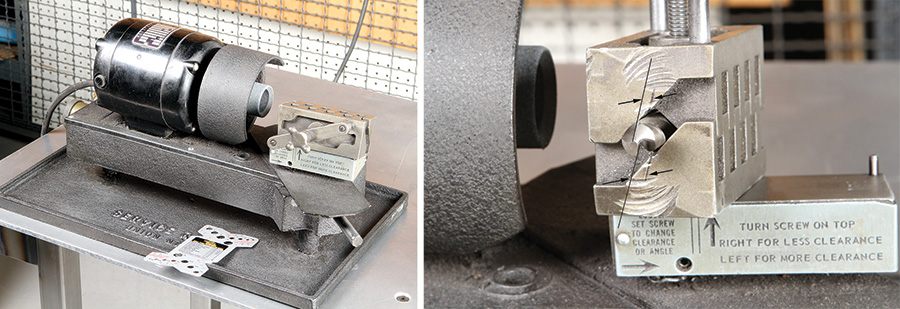
(Left) The author’s 1970s-era Service R&D drill sharpener. (Right) The flutes must be aligned with the guide marks in the clamping chuck.
There are other drill sharpeners you could buy, most notably the Drill Doctor line by Darex. I’ve never used one, so I can’t comment on how they work. Darex also makes professional drill and tool sharpeners, so you might look at those as well, if only for reference.
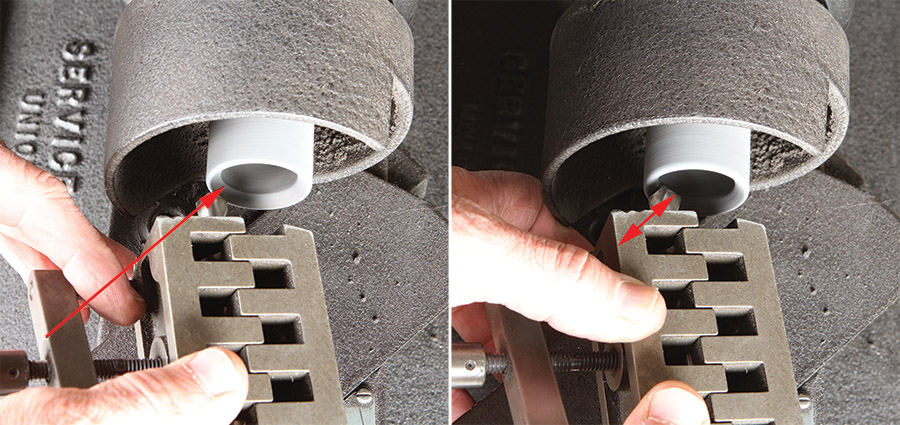
The carriage guides the bit through the cup wheel at the correct angle and height. The point and relief are automatically ground to the correct geometry. To sharpen the second edge, simply flip the clamping chuck over and repeat.
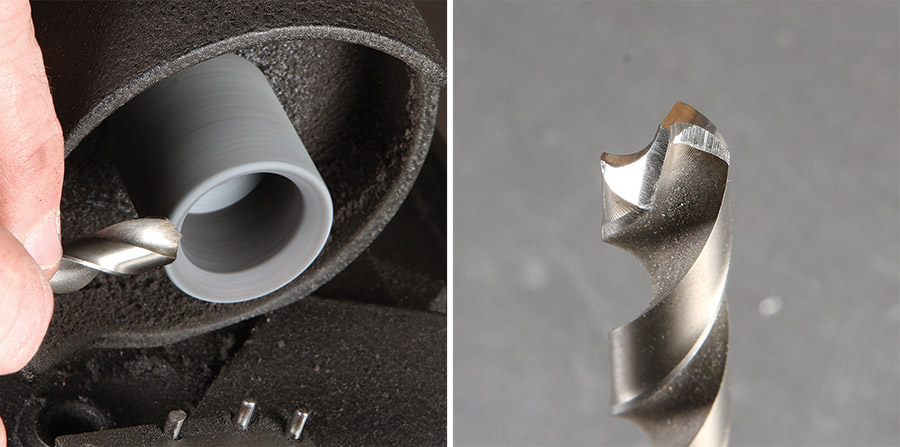
No matter what method or jig you use, the key to a good, sharp drill bit is to grind both edges and the web so they are even and centered. I grew up around old-school (pre-CNC) machinists who sharpened drill bits freehand. It can be done, but it takes a deft touch. I remember being shown how an improperly sharpened drill bit can make a “square” hole or wander off-center and ruin a part. When my dad saw the Service R&D sharpeners demonstrated at the WESTEC show in the early ’70s, he bought two of them (one of which is now mine). There were no more square holes after that!
Web thinning can be done freehand or with the clamping chuck. Web thinning helps reduce the amount of drilling force and improves centering.
Not everyone needs a drill sharpener. Even if you’re drilling lots of holes, it’s an either-or choice to resharpen or replace. You can buy many dozens of the best quality drill bits (USA-made Dormer, Norseman, etc.) for the price of a Drill Doctor. On the other hand, working with exotic materials can be very tough on drill bits. I remember a story from the early days of composite airframes. Dull bits caused big problems on carbon fiber and titanium sandwich structures. So the drill was (excuse the pun) to resharpen them after every use. (Look up U.S. Patents 4898503, WO2004037472A1, US20080019787A1, and US7665935B1 for some interesting insights on drill bits for composites).
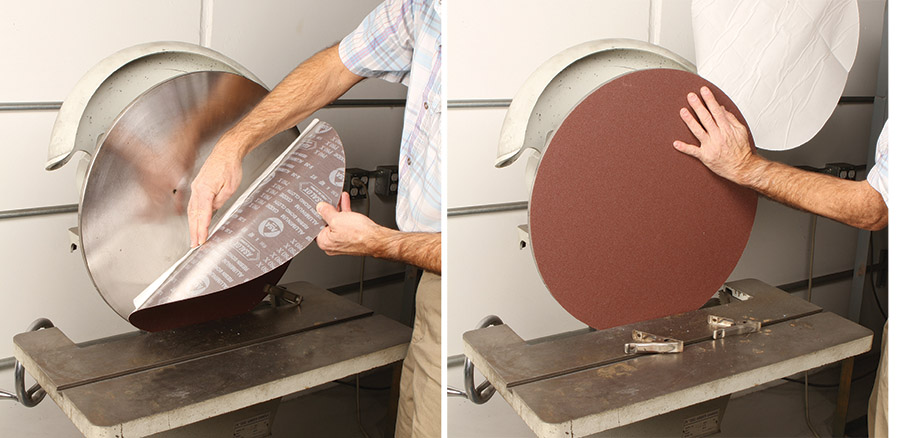
Tip 2: Here’s a quick tip for centering adhesive-backed sanding discs: Although it doesn’t hurt anything to be a little off center, it sure is annoying!

(Left) Clean any residue left behind by the previous disc. (Right) Center the new sanding disc on the platen.
After cleaning the platen of any sticky residue, use a couple of spring clamps to hold the new disc in position. Peel and fold the backing from the half opposite the clamps and stick it down. Remove the clamps, peel the backing all the way off, and stick the rest.
(Left) With the clamps maintaining the disc on center, peel and fold the backing. A crisp fold helps prevent the disc from creeping out of position. (Right) Remove the clamps, then peel and stick the rest of the disc.
If your sander doesn’t have room for clamps, start by folding over about 1/4 to 1/3 of the non-stick backing and, while keeping the sticky part from sticking, line up the unexposed portion of the disk to the edges of the platen. Once centered, carefully press the sticky part down and then peel away the backing and adhere the full disc.
Tip 3: Over the years, I’ve tried out a number of ways to keep my shop and hangar floors tidy. At the hangar I’ve gone through two vacuums, a blower, a sweeper with spinning brushes, and various brooms. Lately I’ve reverted to the old shop class standby: floor sweeping “compound.” Sweeping compounds consist primarily of sawdust, sand, some salt, mineral oil, and dye. Compound helps capture dust and debris that float over, around, and otherwise get missed by normal sweeping or vacuuming. It makes a big difference. You simply spread it out, sweep it up, and the floor has a nice shine to it. A little goes a long way. I work the hangar in sections, back to front, with about three pounds of compound. To maintain the compound, simply sift or pick out any visible debris. Other than that, you can reuse the stuff almost indefinitely. A 20-pound bag sells for about 20 bucks at Home Depot.
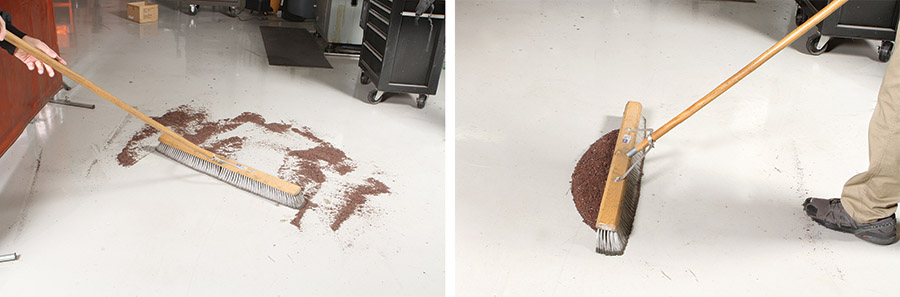
Sweeping compound helps capture dust and debris that often gets missed by normal sweeping or vacuuming. Just spread and sweep. That’s all it takes to get a nice, shiny floor.
Tip 4: The final subject we’ll cover is a great caliper accessory for measuring the center-distance between holes. Centering gauges on a caliper are a quick and accurate way to measure the center distance between holes. They are especially useful on small holes and holes with threads, where trying to measure edge to edge with the caliper jaws can sometimes result in errors.
Why spend $80 for a set of center hole gauges when you can make your own?
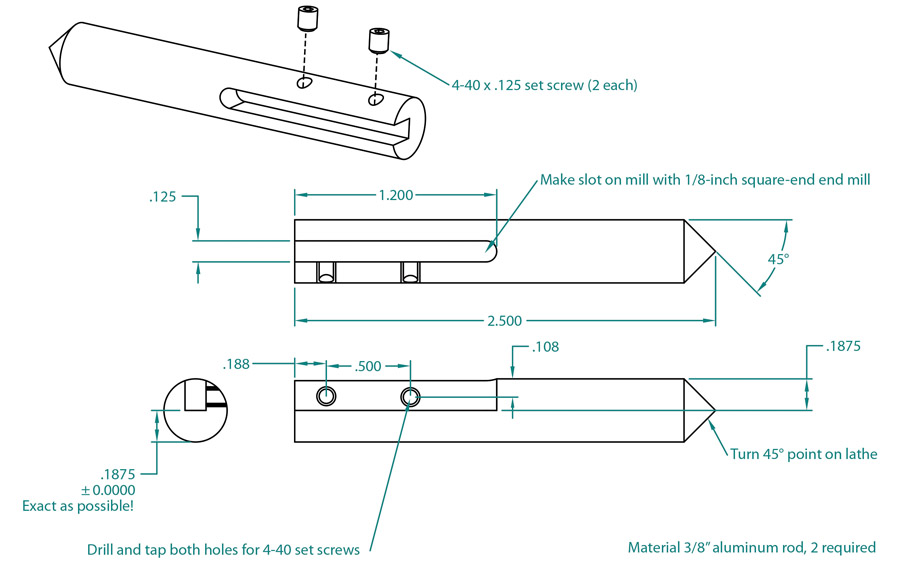
You can buy a precision set of “center hole gauges” from Mitutoyo for about $80, or you can make your own in one easy afternoon for mere pennies and some careful machine work. Just follow the instructions in the drawing to make the centering gauges shown in the photos.
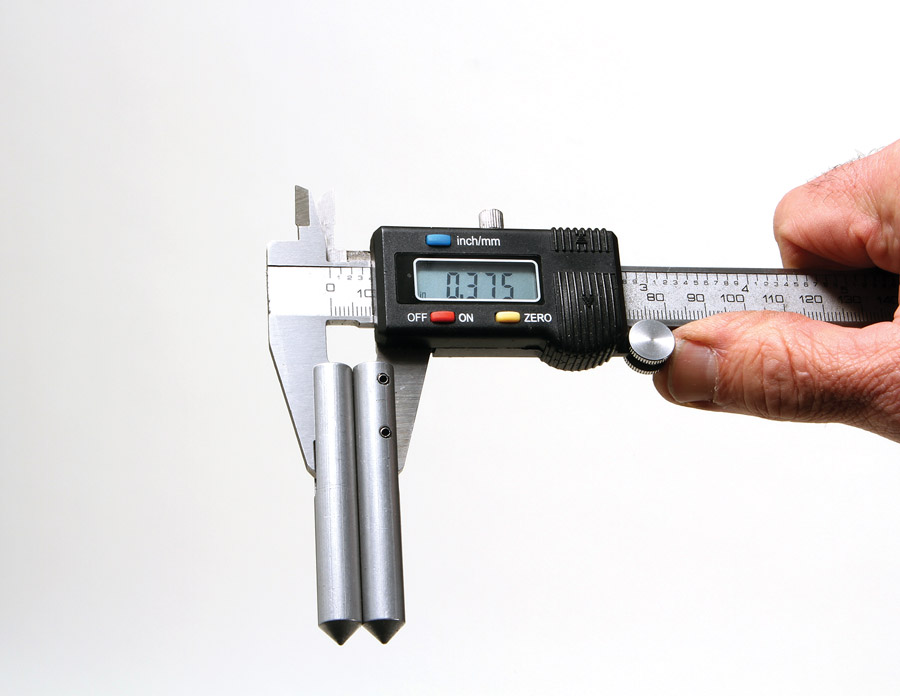
The calipers have to be zero’d before installing the centering gauges. If you milled the jaw slots correctly, the “null” position will be 0.375 between centers. Note the set screws to fix the gauges to the caliper jaws.
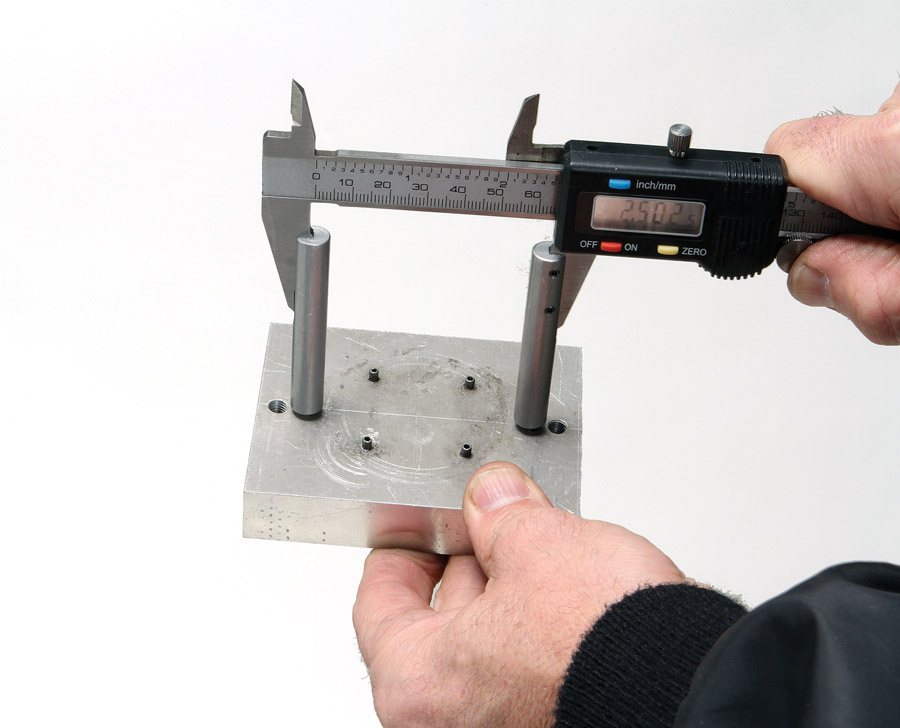
Center measuring gauges allow highly accurate, direct-caliper readings when measuring holes up to 3/8 inch.

![]()
Bob Hadley is the R&D manager for a California-based consumer products company. He holds a Sport Pilot certificate and a Light-Sport Repairman certificate with inspection authorization for his Jabiru J250-SP.


