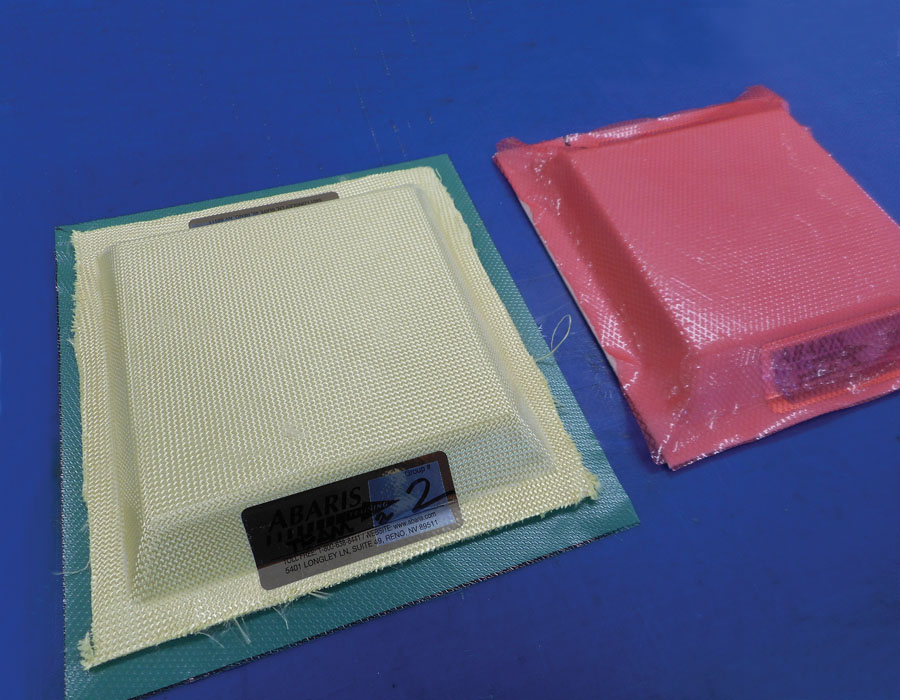
Prepreg Kevlar sandwich core practice layup used in an Abaris training course.
This is the final article on composites and experimental design for the time being. I hope you’ve enjoyed the series. I’ll continue to have articles on various projects in the future on a less regular basis. To finish up, I’ve reviewed a couple of training classes I was able to attend, and I’ve compiled a final “tool list” for prototyping with composites.
Abaris Composite Training
One of the problems with self-guided learning (of the kind I’ve espoused in these articles) is that you don’t always have enough experience to know if what you know is what others (with more experience) would consider the important things to know (a lemma of Rumsfeldian epistemology). That is one of the advantages of formal education: there is a generally agreed body of knowledge in which a student is expected to exhibit some degree of competency. While I think self-guided learners can certainly achieve such competency on their own, the risk that there will be some areas in their competency that remain patchy is arguably higher than in a formal program with an accredited curriculum. At least that’s been my experience with too many years in both the formal and informal education arenas.
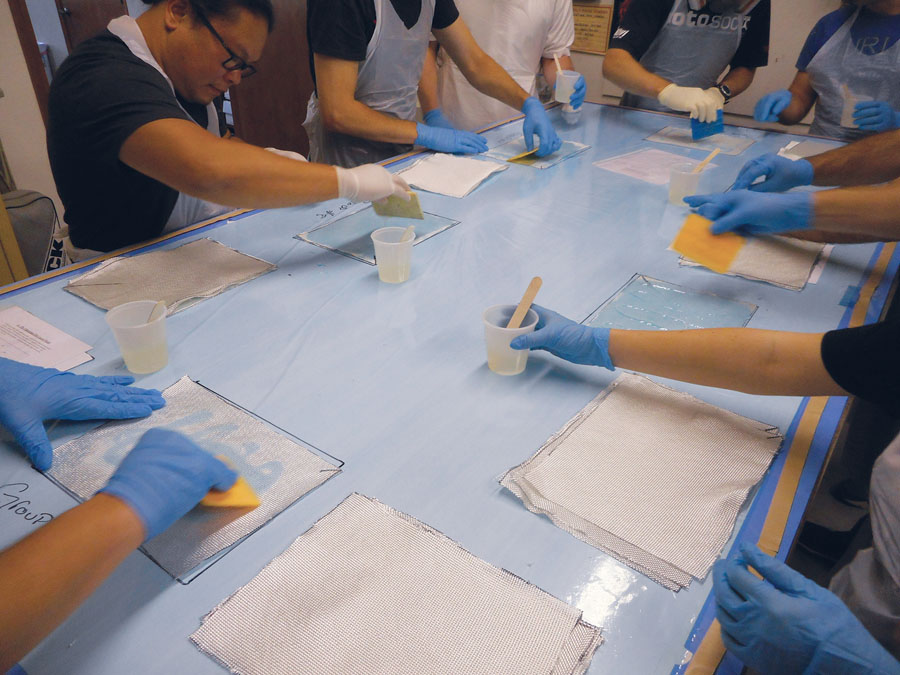
Students work in pairs on their layups. One of the great aspects of the Abaris’ group approach is that every fabrication lab is an experiment: each group is instructed to do a slightly different layup, with the results inspected the following day
My own learning in the area of composites has been largely apprentice-based, with several months spent in others’ shops, supplanted by textbooks, trade journals, and my own in-shop experimentation. I felt like I had a good grasp of the techniques and technology, but had a nagging feeling of doubt: What if the pros at, say, Boeing had a totally different approach? Doubts in mind, when I ran into the Abaris Training booth at CAMX (Composites and Advanced Materials Expo) last year, I thought this would be the perfect opportunity to get some industry training and see if I was on the right track—or seriously derailed. (Full disclosure: Abaris waived their usual class fee so that I could attend, with the understanding that I would write a review for KITPLANES readers. Like most journalists offered freebies to review, I always hope that what I’m getting is good stuff so I don’t have to pan something. No problem with that here—Abaris training was fantastic.)
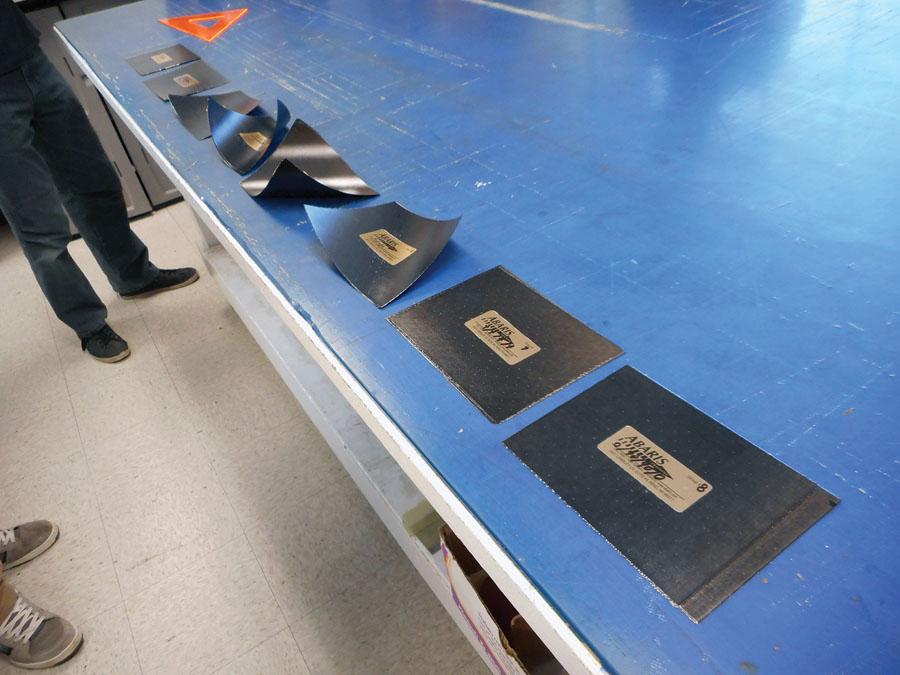
These unidirectional prepreg layups were an introductory fab lab and show how the symmetry of a layup can affect part warpage.
Abaris offers about 10 classes each in three categories: engineering, manufacturing, and repair. Their most popular course is the M1/R1 course, which focuses on the fundamentals of composites manufacturing, but also includes an introduction to repairs as well. Our class, held in Reno, Nevada, had approximately 16 students, evenly divided between industry (SpaceX, Stratasys, Virgin Galactic, Euro-Composites) and government (USAF, New Zealand AF, Turkish Ministry of Science), with a couple of independents thrown in for good measure (myself and a paddleboard maker from Hawaii).
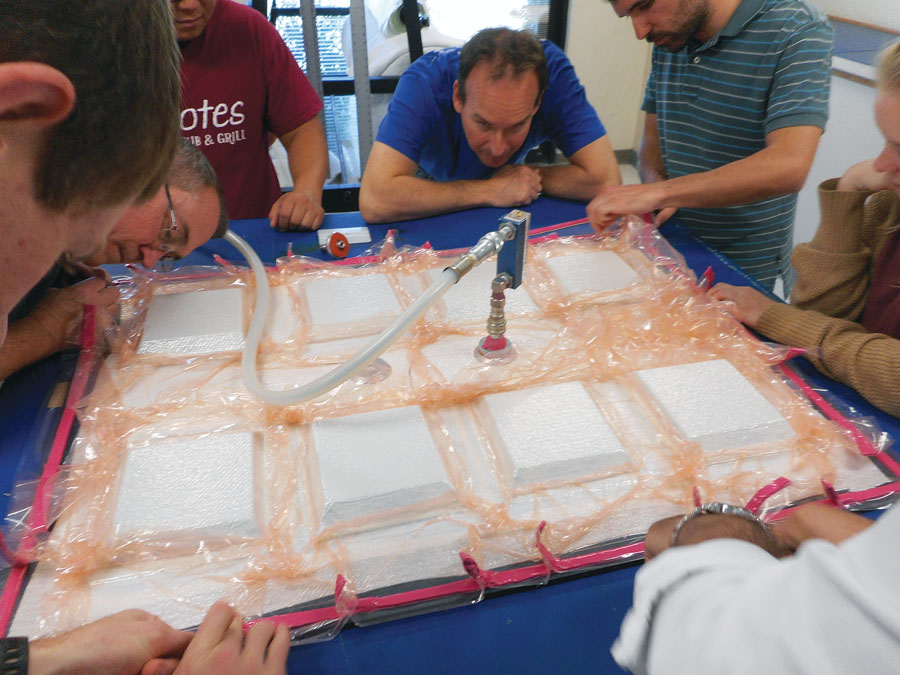
Students performing a vacuum bag operation. Techniques being demonstrated include proper bag pleating, use of a vacuum gauge to determine quality of bag seal, and inclusion of thermocouple to monitor curing temps.
Although Abaris obviously realizes that composites are used in many industries, the company itself is rooted in the aerospace industry (they are an offshoot of the Lear Fan project), so that is the reference point for most discussions and fabrication/repair techniques. That makes for a good foundation, since aerospace probably sets the highest bar for fabrication processes. There is an assumption of a base level of familiarity with composites terminology, which might be confusing to complete beginners, but the instructor checks in with the students frequently to assess understanding—classes are less a lecture and more a guided discussion.
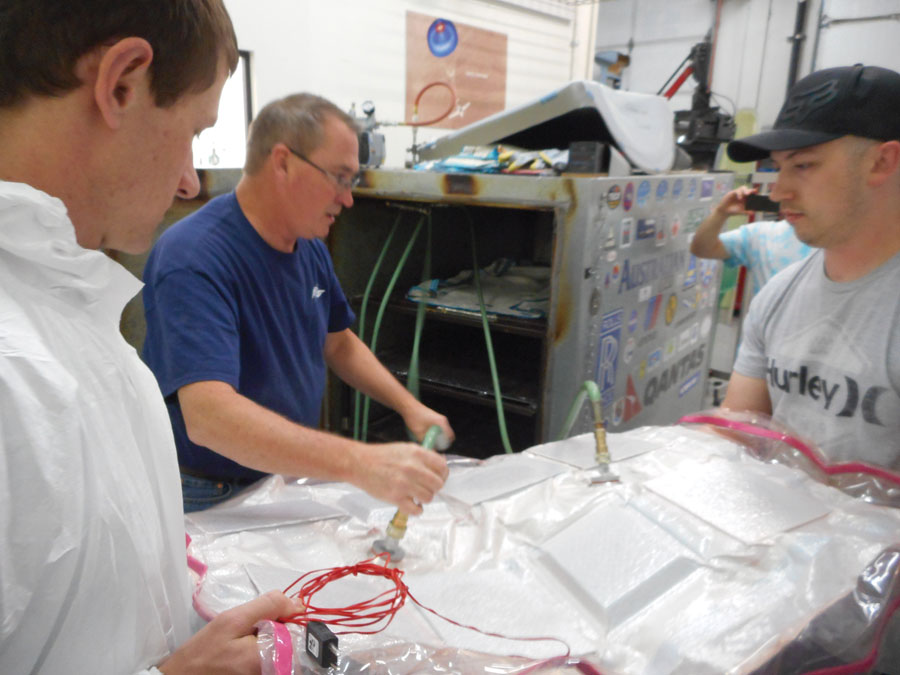
Students load vacuum bagged sandwich panels into an oven for curing.
Classes are about 60% theory and 40% hands-on fabrication. On Day 1 our instructor, Bill Kinard, covered the basics of composites including fabric types and weaves, matrices (i.e., the “glue” that holds composite fabrics like carbon fiber and fiberglass together, such as polyester and epoxy resins), layup schedules (symmetry, balance and nesting), and nomenclature. In the afternoon, the class divided into teams of two, with each team fabricating a 4-ply 5×7-inch coupon of unidirectional prepreg carbon fiber to illustrate the importance of symmetric ply stacks.
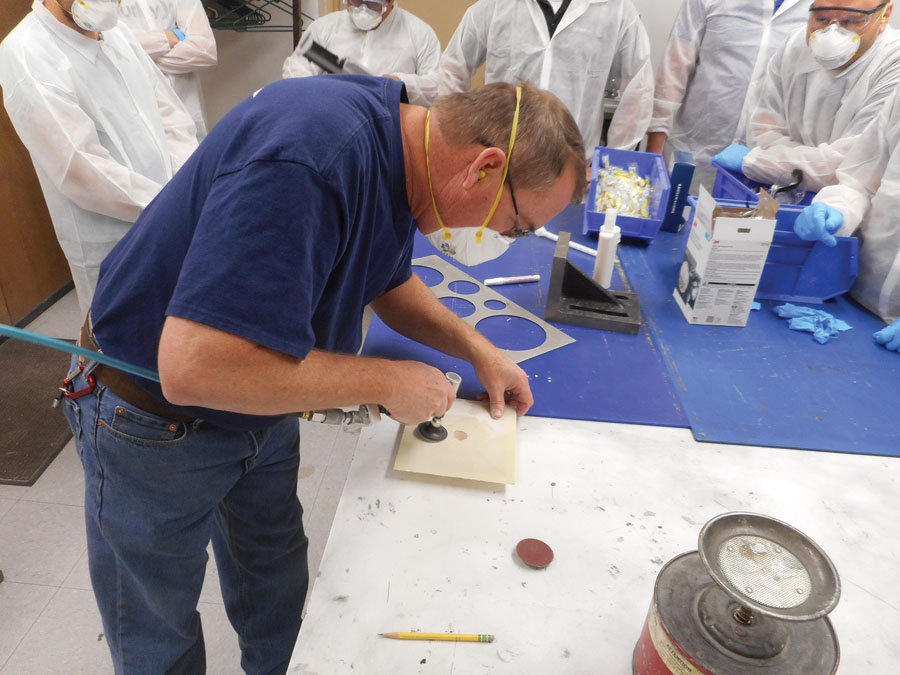
Monkey see, monkey do. (Left) Instructor Bill Kinard shows students the proper method of scarfing a sandwich panel for repair.
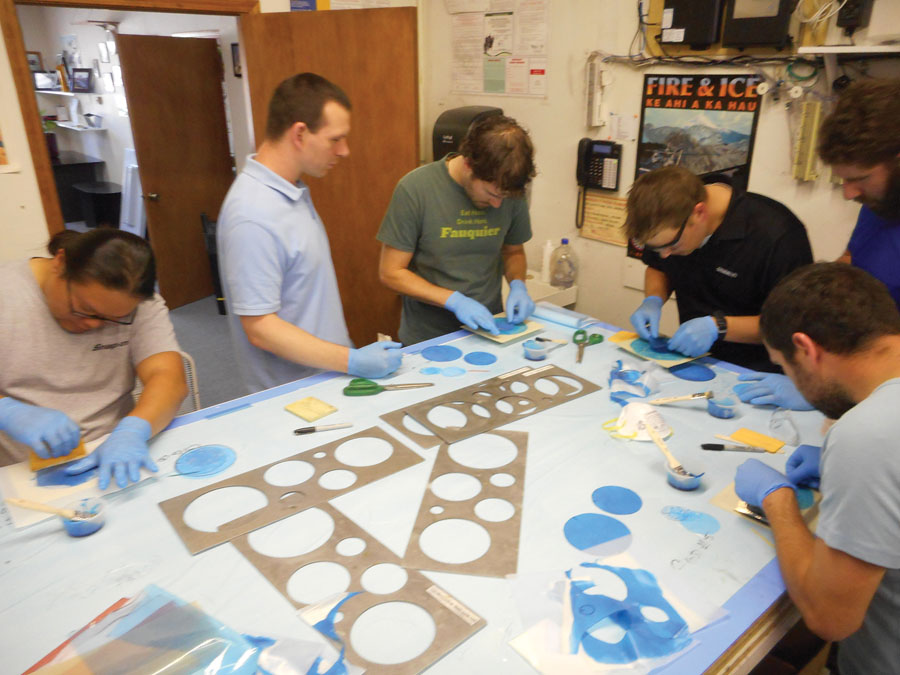
Students have a go at it themselves.
This gave everyone an introduction to using prepregs, the importance of maintaining cleanliness, and accounting for materials (to avoid inclusions). Each team used a different layering method in order to experiment with how that can effect part warpage. The coupons were prepped for cure in the oven, with Bill explaining the various components of the bagging system (peel ply, perf, breather, etc.). The day finished with all eight teams’ coupons being loaded onto a caul plate for cooking that evening, in order to be examined the following day.

Finished scarf repair of sandwich panel.
Day 2 opened with a discussion of health and safety, followed by an explanation of vacuum bagging. Once we finished with classwork, we headed into the lab and discussed the results of the previous day’s experiment. After lunch, teams did a wet fiberglass layup, with each team using a different bleeder schedule (quite similar in fact to the experiments I described in my May 2017 article, “Coupon Testing, Part 2“) to illustrate approaches to vacuum bagging and fiber/resin ratios.
On Day 3 we discussed the results of the previous day’s experiments in the morning, followed by Bill’s discussion of sandwich cores. This was followed in the afternoon by each team fabricating two sandwich core panels, one foam with prepreg fiberglass and the other honeycomb with prepreg Kevlar. As you can see, each fabrication day involved a completely different material and fabrication process, which I think is an excellent opportunity for students to get hands-on experience with all the different types of composites.

The class briefly looked at portable heaters used for onsite composites repair. These are used in the repair-focused classes.
Day 4 started with an inspection of the sandwich panels made the previous day, looking for delamination, ply orientation, and skin quality (i.e., bridging issues, etc.). Then it was back to the classroom to discuss methods of diagnosing and repairing damage. Each team’s fiberglass coupon from the previous day was “damaged” with a hole drilled in it, followed by a repair, which allowed teams to decide their own bagging methodology to test knowledge gained from the previous three days’ experiments. The day ended with a discussion of mechanical fasteners (like Clickbond) and environmental considerations.
Day 5 began with each team explaining the repair methodology they had used the previous day, followed by band sawing the coupons in half to inspect a cross section of our plug-and-scarf repairs. This was followed by a short discussion of tooling, non-destructive testing and, finally, an ungraded, open-book “test.” Missed questions were a final opportunity for students to have Bill re-explain whatever concept the question was testing.
For me, although only about 10% of the material in class was completely new, the class was a validation that my self-guided learning was essentially identical to what I saw in class. And it speaks to the quality of the instruction that, although the class was mostly review, I still found it extremely fun and engaging. In addition, I have had relatively little experience with prepregs, so it was great to get a chance to use those materials. I also enjoyed chatting with my classmates about their own experiences using composites, which I think is one of the big plusses in these kinds of continuing education experiences.
I mentioned earlier that the theory/hands-on ratio was about 60/40. While I can’t speak for other industries, to me this is the perfect ratio for a homebuilder looking to do a crash course preparing to build, say, a Lancair or other composite ship. While some builders might think the theory is less important, the fact is that you will get plenty of hands-on experience as you build. On the other hand, theory is what many builders lack (and manuals often don’t cover) and is, in my opinion, quite important for understanding why we do things the way we do them. The Abaris class starts you off with industry best-practices habits. For someone who wants to jump into composites head first and get going as quickly as possible, it’s hard for me to imagine a better way than taking Abaris’ M1/R1. In all honesty, I can’t imagine how Abaris could improve on the program or the amount of training they deliver over five days. I wholeheartedly recommend the class.
For more information and pricing, visit www.abaris.com. KITPLANES readers can get a $200 discount on Abaris’ Phase 1 class by mentioning this article. You’ll need to enroll by phone to do that; call 775-827-6568.
Micro-Measurements Strain Gauge Training
Several months before taking the Abaris class, I was able to take a similar continuing-education type engineering class offered by Micro-Measurements, a subsidiary of Vishay Precision Group that specializes in strain gauges.
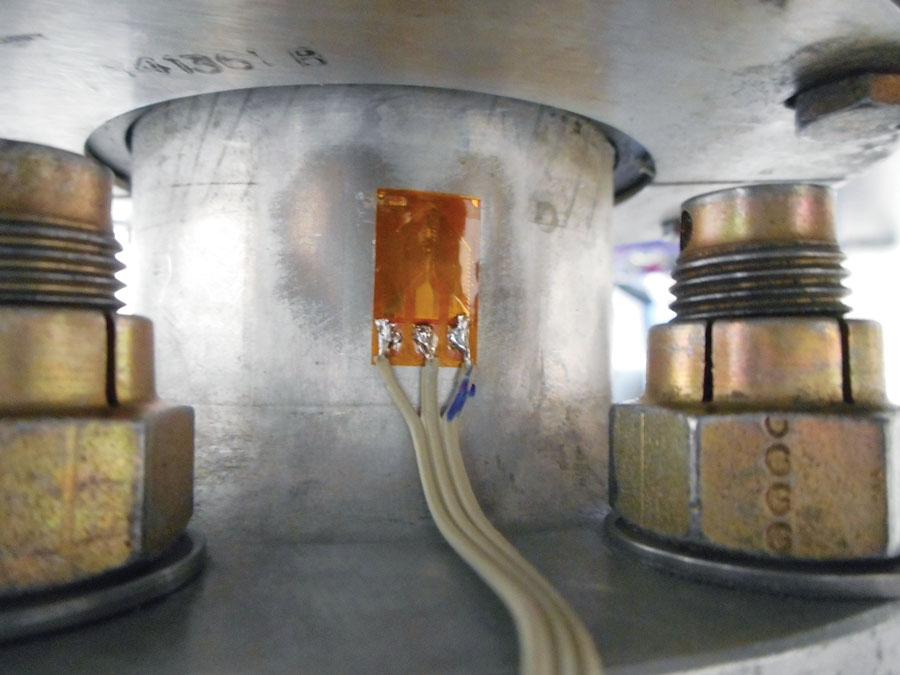
Strain gauge bonded to Lycoming crankshaft for TECAT installation.
Those of you who attended the Reno Air Races may have seen the TECAT Performance Systems table set up in one of the sport class hangars. TECAT is a wireless torque measuring system that is moving from automotive applications (namely manufacturer testing and auto racing) into aviation by offering a system that provides in-flight crankshaft torque (and thus, with rpm input, horsepower to a cockpit interface). This to me looks like the way of things to come, and I introduced a few people to TECAT just because I thought it was super interesting. Well, next thing I knew, TECAT had sold a couple of units and needed someone to do on-site aviation installs, and asked if I’d like to help them out. This required that I take the Micro-Measurements class to become familiar with strain gauges and their installation (the TECAT system uses M-M strain gauges). As with Abaris, I was able to get the class fee waived in exchange for offering to write a review of the class. And again, I feel no conflict of interest here because the M-M course was, like the Abaris course, absolutely fantastic.

The M-M student kit includes a large 3-ring binder with copies of all PowerPoint slides used in the class, a strain gauge calculator and quick lookup guide, tech notes, and tips. In addition, all the equipment for in-class gauge bonding is included—gauges, adhesive, soldering iron, etc.
They pack a lot into a two-day course, and I could feel my brain stretching by the hour. Compared to the Abaris class, the Micro-Measurements class is even more theory intense, although this stands to reason since there are numerous factors that can throw off the gauge readings if not installed/compensated correctly, so a good basic understanding of how strain gauges work is essential for good installation and troubleshooting.
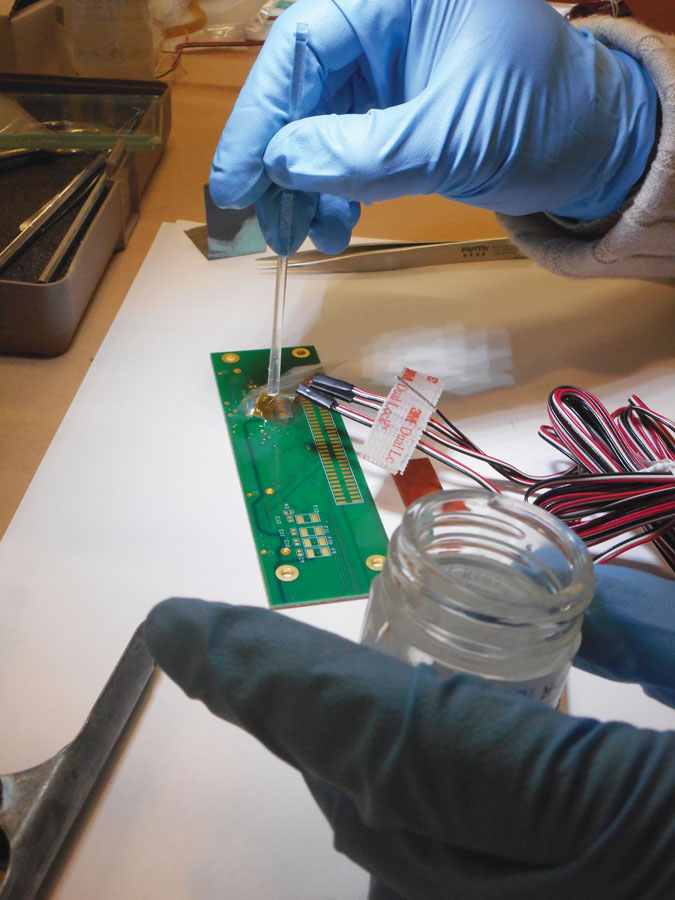
Bonding a gauge onto a composite surface (fiberglass PCB).
On the morning of our first day, we went over the theory and history of strain gauges and discussed how to select the appropriate strain gauge for a particular task, which adhesive to choose, and how to prepare the test surface to which the gauge will be bonded. We then started a lab project, bonding our first gauge to an aluminum coupon using a high-performance cyanoacrylate (similar to Super Glue) before stopping for lunch. After lunch we discussed instrumentation, followed by finishing the lab project (soldering on the wiring and checking/comparing our installations by cantilevering a weight from the end of the coupon and measuring strain with a data-acquisition unit).
Because the aluminum coupons used have a known modulus of elasticity, comparing the readings given by our gauge installations revealed errors that could affect the installation (i.e., too much glue under a gauge, failure to properly remove soldering flux residue from the solder tabs, etc.). Before stopping for the day, we bonded a second gauge to a composite coupon of G10, otherwise known as breadboard or PCB (printed circuit board). The adhesive used for this project was a room-temperature-cure epoxy that needed an overnight cure.

Students have the opportunity to install gauges to both metal and composites.
On the morning of Day 2, we continued with the second project. We again hung a weight from the cantilevered coupon, checking the quality of our installation against a known value, and comparing/troubleshooting problems that appeared in anyone’s coupon. This was followed by continued discussion of instrumentation and how to correct for errors induced by temperature, etc.
Although there is somewhat more theory in the M-M class, this made sense since most of it was related to how various environmental factors could cause reading errors, and was thus connected to the actual performance of installations. Due to the high sensitivity of these instruments, good installation procedures are a must.
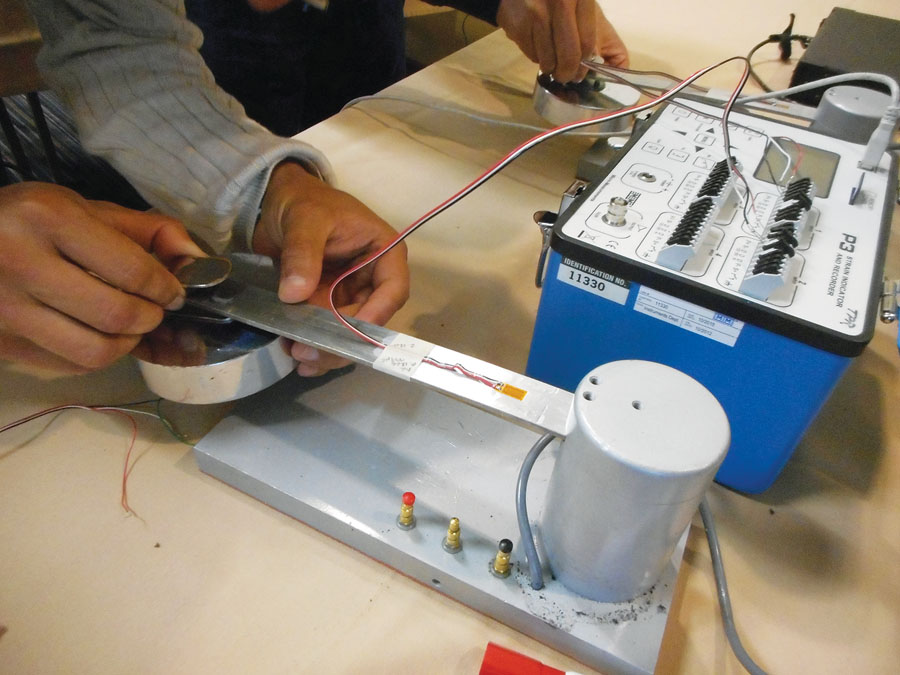
Gauges are connected to a data acquisition unit to allow students to test the quality of their install and also illustrate factors that can lead to measurement error.
Like the Abaris class, the M-M class was attended by a mix of industry and government, including SpaceX, the U.S. Navy and Air Force, Stanford University, Google, Specialized Bicycles, and other Silicon Valley folks (the class was held in San Jose, California). Class size was about a dozen, and was held in a hotel conference room over the two days. The pace was fast, but we had plenty of breaks, and lunch was provided in the hotel, so we could quickly get back to work afterward. It was like drinking from a water hose, but if you like to learn, and work in a busy industry, that’s not such a bad thing.
Although I think strain gauges are super cool, and there is no doubt that instrumenting your airplane could provide you with some interesting insights, I’ve featured the M-M class not because I think the average KITPLANES reader is particularly interested in strain gauges, but because I think this type of class can really add another dimension to your homebuilding experience. Even if you only go to an EAA course at Oshkosh, do go.
You can check out M-M’s great blog, which talks about all the cool projects that have used strain gauges. Who knows, you might be inspired! Pricing can be found here.
Well, that’s it for this series! I hope you enjoyed following the various prototyping and testing methods we’ve discussed and how experimenting can help you build a better plane. The testing continues in my shop for sure—by the time you read this, I’ll be hosting my fourth summer of interns, and hopefully we’ll have some interesting data again to report in the future.
Tools for Composites
Back in the August 2016 issue of KITPLANES, in “Best Practices—Hand Tools,” Dave Prizio covered the basic tools necessary to set up shop for building an airplane. The tools he mentions are for any type of aircraft, regardless of construction. Below are some additional tools that are particularly useful for composites work.
- 1. Cutting table with self-healing plastic mat (Rhino 5×8 feet or longer). Be aware that most rolls of fabric come in 50- or 60-inch widths. Plan your table size accordingly.
- + -OLFA cutter and 6-foot straightedge.
+ Scissors: Kai 7300 for fabrics, Clauss 18425 Kevlar shears, cheapo scissors for everything else. (Even if you don’t use Kevlar, Clauss shears are nice since many fabrics use a Kevlar selvage thread that can be a real pain to cut with regular scissors.) - 2. Sanding blocks:
- a. Straight aluminum channel from metal supply store.
b. Dura-Block 7-piece sanding kit (AF44L).
c. Adhesive sandpaper: RhynoDry White Line rolls, 40/80/120/220 grit. - 3. Layup table (for small projects or flat panels)—tempered glass is easy to clean.
- 4. Vacuum system: pumps, tubing, connectors, valves, through-bag connectors, vacuum gauges.
- 5. Safety equipment: respirator, nitrile gloves, safety glasses, and dust masks.
- 6. Tool cleanup tub: white vinegar denatures uncured epoxy. Acetone is the go-to cleaner before curing. To clean off cured epoxy, use paint stripper (methylene chloride).
- 7. Releases:
- a. Mold release wax (Meguiar’s #8).
b. Packaging tape.
c. PVA—shoot with Harbor Freight detail gun (6.75-ounce touch- up air spray gun). - 8. Dremel 4000—for trimming, grinding. Extra sanding drums can be purchased on Amazon.
- 9. Silver Sharpies for writing on carbon.
-
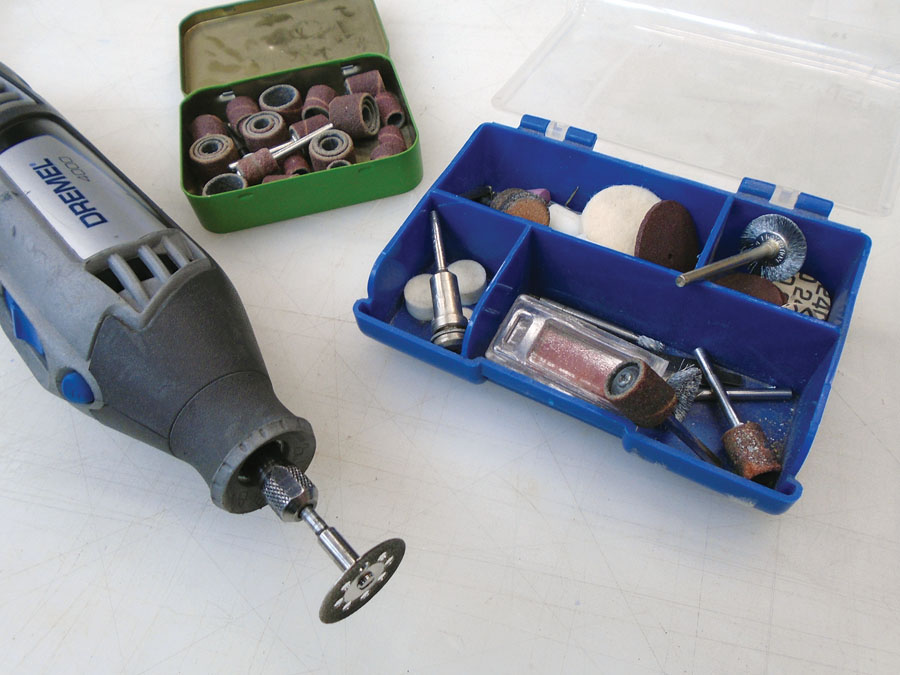 Dremel with accessories. Sanding drums are great; buy the variety pack of replacement drums with various diameters.
 -
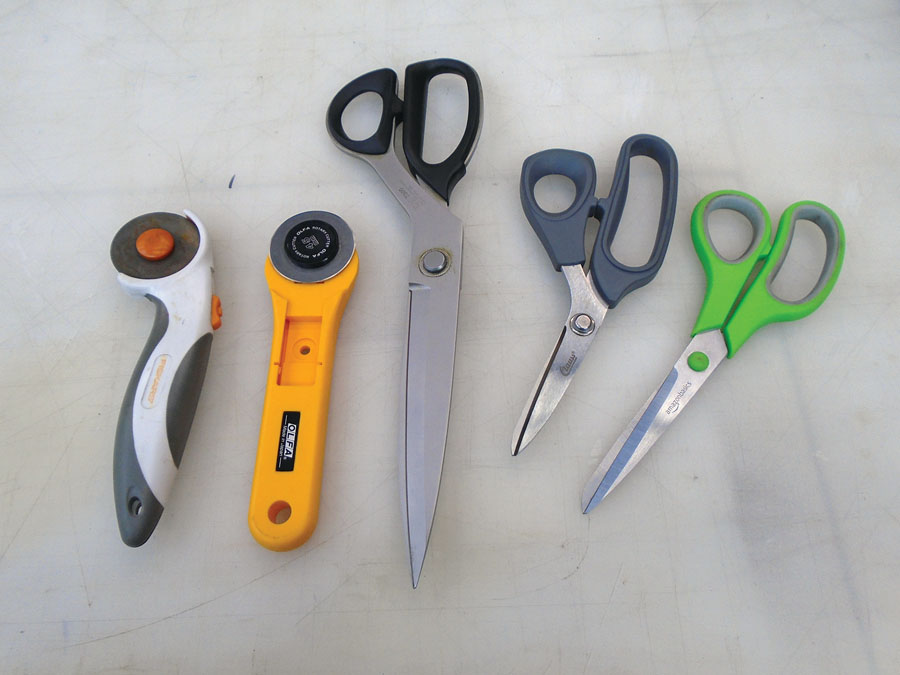 Cutting tools.
 -
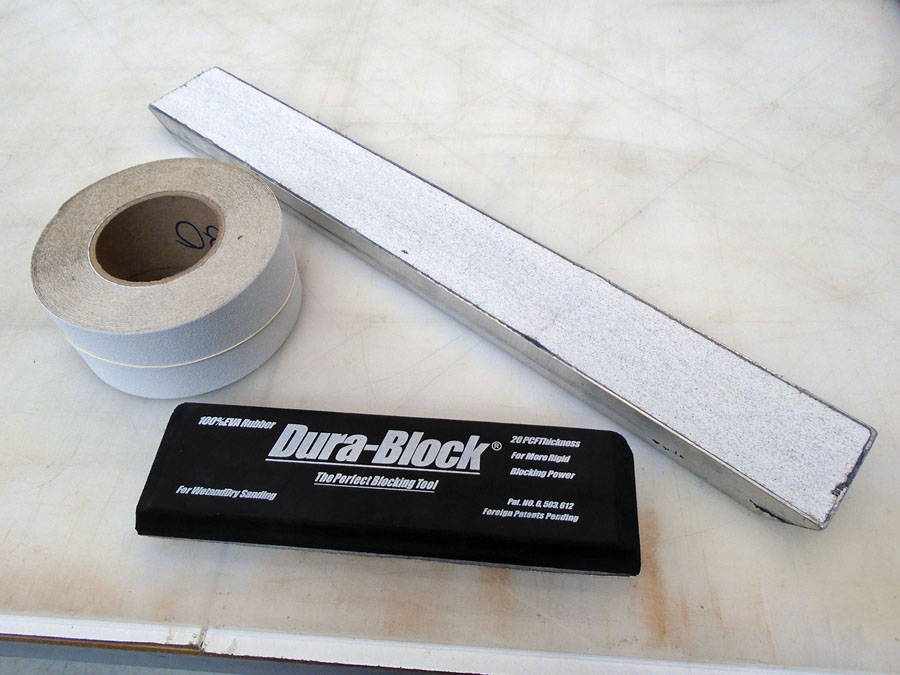 Sanding equipment. RhynoDry adhesive-backed sandpaper on rolls works great (get the white paper, not the red). You can make long, flat sanders from aluminum angle, cheap from the local metal store.


