As part of the requirements to obtain my A&P license, I needed to witness a few more engine overhauls. I called Poplar Grove Airmotive (PGA), one of the largest engine overhaul shops in the country, and asked them if I could spend a day or two following engines through their shop from teardown to delivery. They said I was more than welcome to come in and spend as much time as I’d like.
For those of you not familiar with PGA, it is a locally owned engine shop located at Poplar Grove Airport, an airpark just east of Rockford, Illinois. The airpark and shop are owned by Steve and Tina Thomas, and grew out of what was once his dad’s dairy farm, which Steve bought when his dad passed away. Back then it was just a single grass runway on a farm. Steve and Tina have since grown it into a full-service FBO with flight instruction, 400 hangared aircraft, roughly 150 airpark homes and, last but not least, a very professional engine and airframe rebuild shop. The engine shop rebuilds more than 200 engines a year. Recently it was rated as the second-best rebuild shop in the nation.
Documentation and Engine Teardown
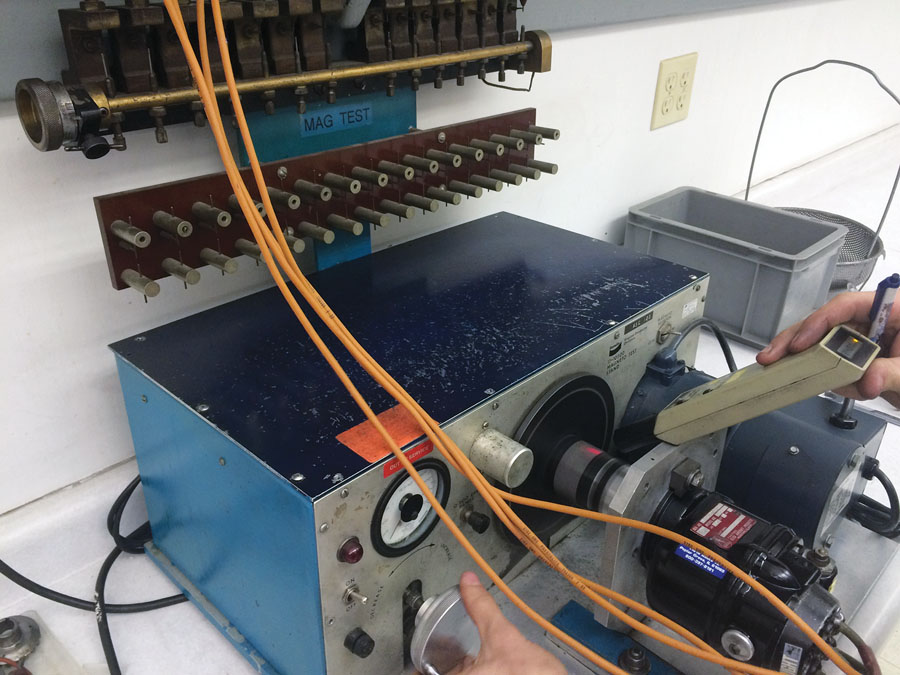
Once an engine arrives at the shop, whether it’s due to a prop strike or a scheduled major overhaul, it goes through a similar process. Almost all of the procedures are regulated and approved by the FAA. Similar to flight schools, the FAA makes regular visits, usually by someone from the local FSDO. Sometimes they perform inspections, but mostly they check to be sure all of the paperwork is in order. Also, all of the tools used for measurement have to be calibrated on a regular basis. This is performed by an independent, certified, FAA-approved company. Calibration was taking place on site during my visit, in a van used as a portable testing facility by the company.

During teardown, the technician takes note of anything unusual he discovers.
The first step in the rebuild process is to verify what components were shipped with the engine. I was told I’d be surprised at the number of customers who have claimed their engine was missing one or more components when it was returned from PGA to their local shop. This might have been an issue at one time, but PGA has since learned to thoroughly document each engine by taking as many pictures as possible. This not only confirms the condition of the engine and components when they arrive, but also helps the technician during reassembly. On any particular engine, whether it’s a Lycoming or Continental, there can be several dozen different variations of the engine and its accessories.
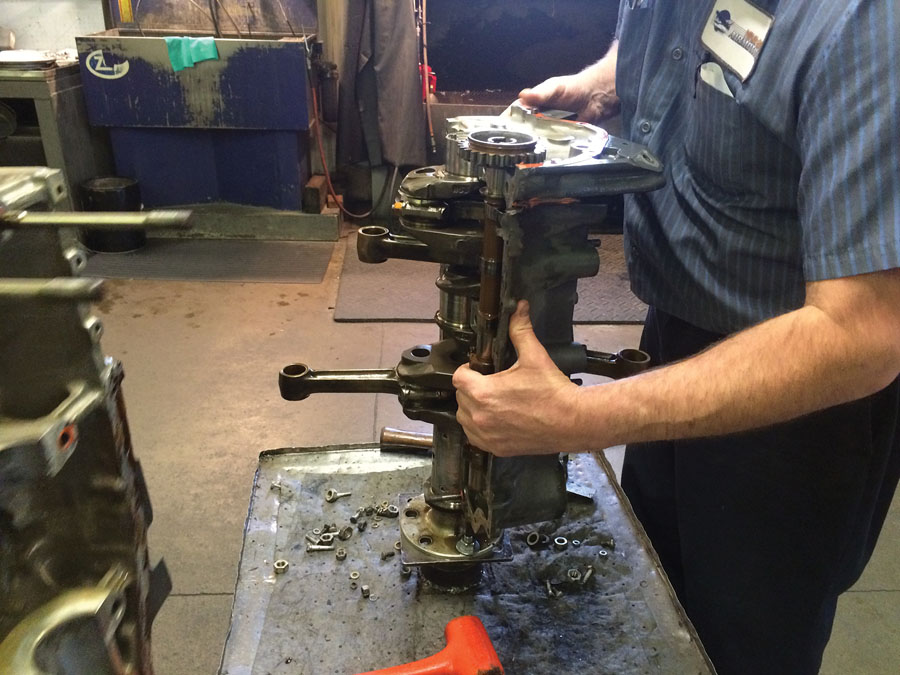
Once the documentation is complete, the engine is sent to the teardown section of the facility, where one technician is assigned to do the teardown. During the teardown phase, the technician takes note of anything unusual he discovers and documents it on paper and with photos if required.
This process for a 4-cylinder Lycoming takes an experienced technician about 2 to 4 hours to complete, depending on how many accessories are on the engine. Some engines are sent to PGA with all the engine baffles on, and usually the technician has to document the condition and note what will need to be repaired or replaced. PGA does the baffle repair work in-house.
As the engine is disassembled, the technician determines which parts are OK, which parts require work, and which parts need to be replaced.
Component Inspection
After teardown, the engine is inspected by a special technician who performs thorough research to identify any ADs that need to be complied with during the overhaul. Then the inspector makes an initial determination as to what parts are OK, what parts will require work, and what parts are no longer usable.
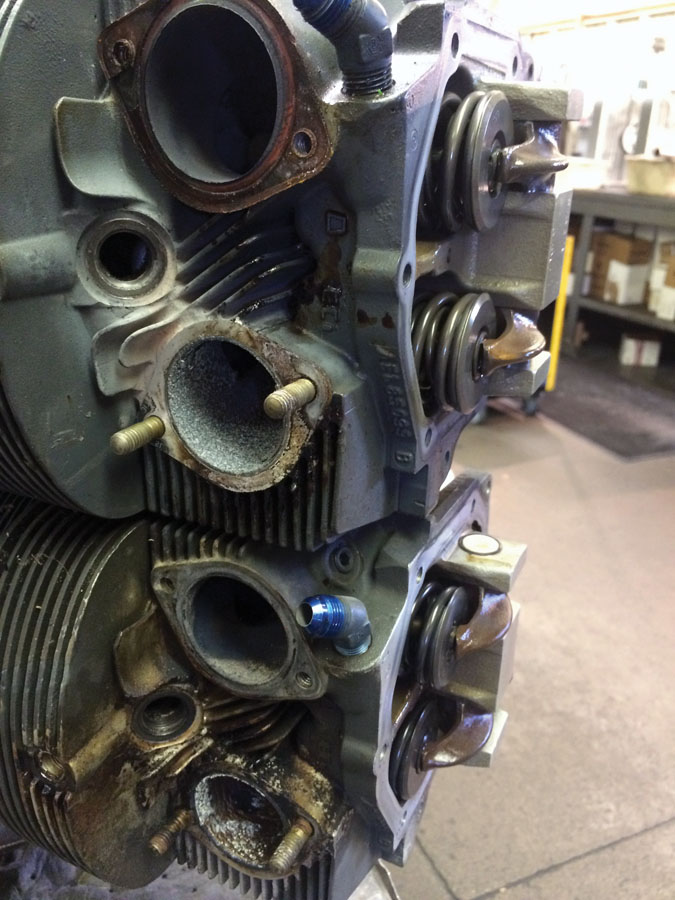
The 4-cylinder Lycoming engine that I was observing was a scheduled overhaul, but upon a visual inspection of the cam, it was discovered that one of the cam lobes had excessive wear, and the cam was not salvageable.
During inspection, it was discovered the cam lobe on the right had excessive wear and was not salvageable.
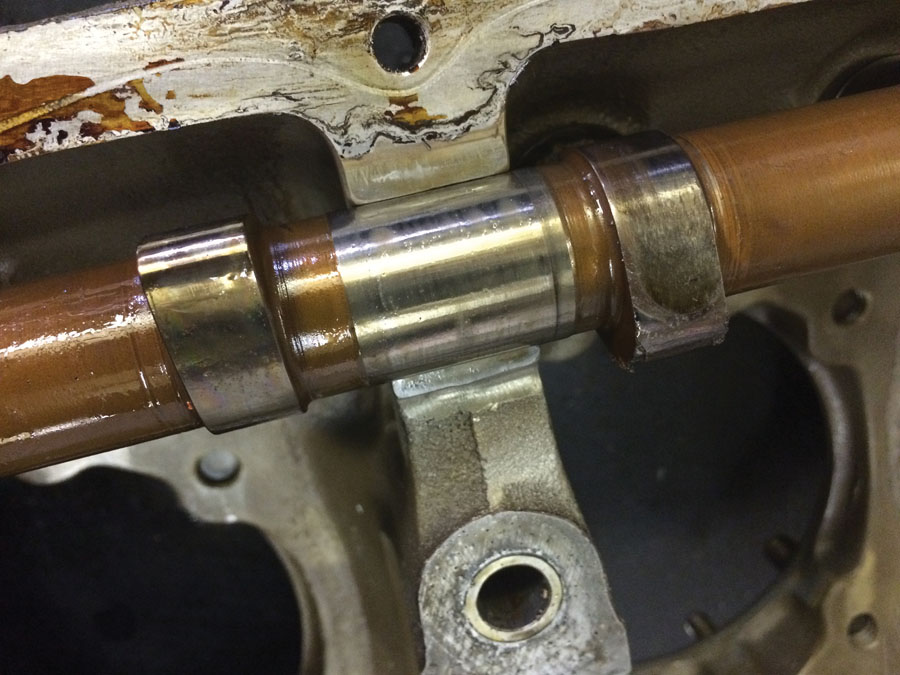
Another issue they often see on damaged engines is crankshaft bearings coming loose. This probably starts out from improper torquing of the bolts on the case, which leads to fretting on the casing halves, which loosens the bearings. Then the bearings will start shifting and/or spinning in the case, which leads to bearing failure since the oil cannot get to the crankshaft bearing, thus seizing up the crank.
The technician noted to me that this particular engine was probably making metal for quite a while, and he was surprised the owner didn’t notice. That said, he also commented that he sees this a lot, and though these engines do keep running, time was running short on this one. A conscientious owner would have inspected his oil filter during a regular oil change and probably would have discovered this much sooner.
He also said these engines are very durable and usually give plenty of warning before they just stop or come apart. The main thing to check to determine the health of an engine is the oil. Change it on a regular basis, check for metal, and look at the condition of the plugs and exhaust. If an engine is combusting properly, there will be a gray film on the inside of the exhaust pipe, and the plugs will have a similar gray-brown coloration. These are signs of a healthy engine.
The cylinders themselves are removed as one assembly and are not disassembled any further. If necessary, that step takes place in a separate area called the cylinder shop.
Checking for Defective Parts
Once the engine is apart, many of the components are checked for cracks and metal fatigue. Two of the main inspection techniques used are dye penetrant and Magnafluxing.
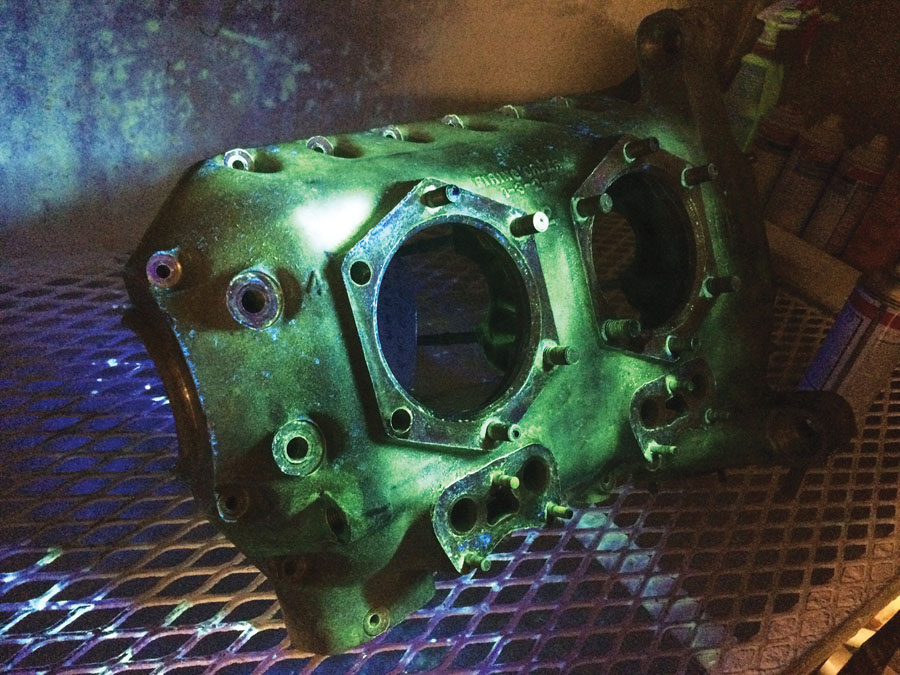
Magnafluxing is a process where steel and other metallic parts are individually charged with a DC electric current while a fluid with magnetic particles is sprayed over it. Then the part is placed under a fluorescent light to observe any cracks. If there are any cracks, they will show up under the light.
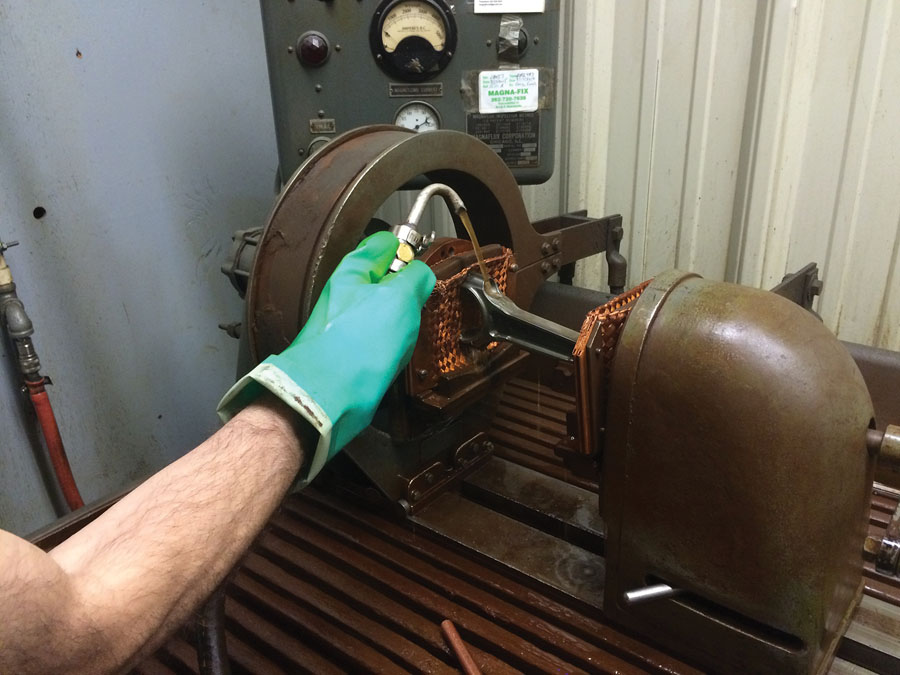
During Magnaflux testing, steel parts are charged with DC electric current while a fluid with magnetic particles is sprayed over it. Cracks will be visible under a fluorescent light.
The technician in the Magnaflux booth had a sample crankshaft he showed me. I could not visually see any cracks in it, but once he Magnafluxed it, a crack was clearly visible. The crank was from an airplane that experienced a sudden prop strike. By FAA regulations, if an engine experiences any sudden stoppage, it is required to be torn down. I asked him what percentage of cranks they see with cracks in them due to prop strikes, and he commented very few.
When dye penetrant is sprayed on nonferrous parts, cracks will be visible when the part is viewed under a black light.
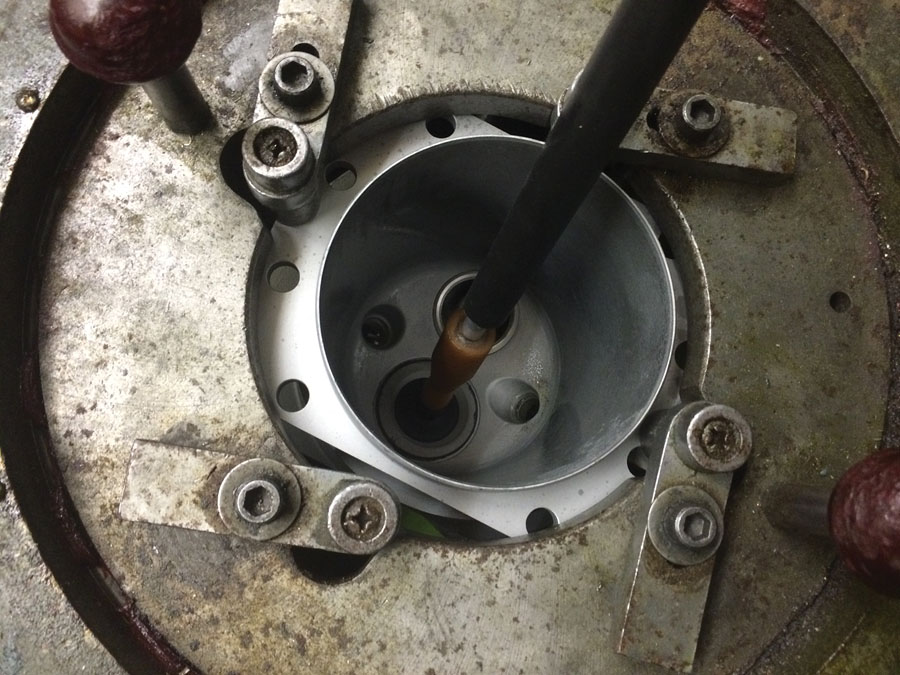
Once the test is complete, every part has to be demagnetized by moving it slowly through a magnetic loop with AC current running through it. This demagnetizes the part.
For the remaining nonferrous parts like aluminum, a dye penetrant is sprayed on the part and put underneath a black light.
The crankcase is usually inspected at the teardown station. Places in the case that are known for cracking are sprayed and checked. On some Lycomings, it’s typically an area where there is some ribbing. This particular engine passed that test.
The FAA requires magnetos to be inspected/overhauled every 500 hours.
Cylinders and Magnetos
In the cylinder shop, the cylinder assemblies are inspected for wear or damage, then checked to see if any of the components are subject to an AD. Here the cylinders can take a number of paths. For instance, if a low-time engine experienced a prop strike, the cylinder would be inspected and tolerances checked. If nothing is out of the ordinary, the parts would just be “dressed up,” meaning valves cleaned and reseated, and cylinders rehoned. If the rings look good, they will not be replaced. However, the owner of the engine will be instructed to run the engine as if it had new rings to reseat them per the engine break-in criteria with mineral oil.
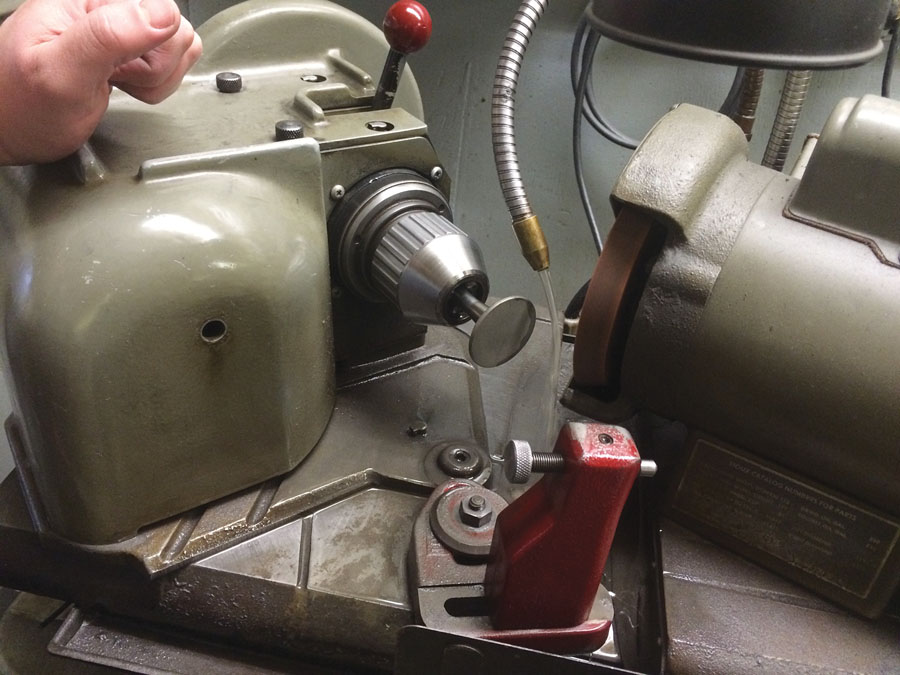
Reseating valve steps includes grinding the seats of the valves with a grindstone under an oil bath.
Reseating the valve steps includes grinding the seats and valves with a grindstone under an oil bath. This appears to be more of an art than a science, and the PGA technician agreed. The same goes for valve seat lapping, where the technician basically uses two types of grinding compounds and works the seat and valve back and forth by hand to obtain the desired result.
The seat/valve has to show what is called a seat mark. It’s a fine line about 1/16 inch in width in the middle of the valve seat. If the mark is off to one side, the parts must be reground and re-lapped to obtain the desired result. If this is not done properly, you can end up with burnt valves, stuck valves, blowby, and all kinds of other trouble. It’s a simple, but very important, process that must be completed on all eight valves in a 4-cylinder engine.
Valve lapping is necessary for the valves to form a seal. When not done properly, problems like burnt valves, stuck valves, blowby, etc. are likely to occur.
Honing is another one of those art processes that must be done properly. One thing to note is that some cylinders have choke in them and some don’t. Choke, being the taper in the cylinder, is to allow for expansion of dissimilar metals and varying temperatures along the length of the cylinder.
Also, the cylinders themselves are made of different materials/coatings. The most common are bare steel and nitride-hardened. Although less common, they also see a lot of chrome cylinders. Chrome plating, along with chemical etching, provides voids for oil to be trapped in, which helps lubricate the cylinder walls properly.
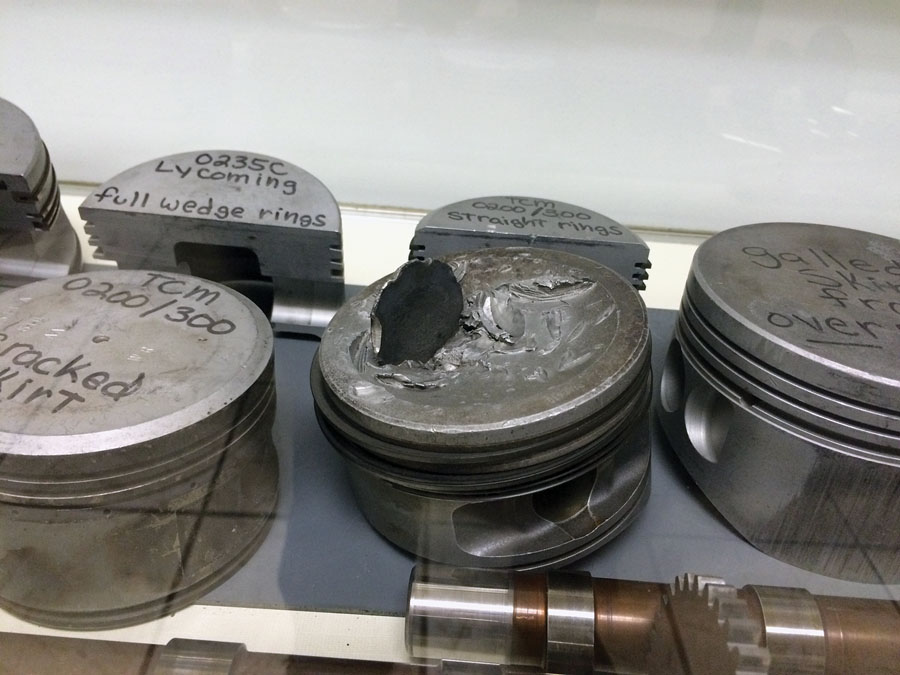
A collection of abused pistons from a variety of engines show different types of damage.
PGA feels that the nitride cylinders are the best and are probably the easiest to break in—without causing cylinder glazing. On the other end of the spectrum is chrome, which may take up to 50-75 hours to break in (seat the rings).
Getting back to cylinder overhaul, they do not exchange heads on cylinders. It is more economically feasible at this time to just replace the entire cylinder.
However, PGA does do major overhauls on magnetos. Typically, the FAA requires an inspection/overhaul every 500 hours, so they do plenty of these. Before and after the overhaul, PGA tests every mag for spark intensity and proper operation of the impulse coupling on mags that have one.

After final assembly, each engine is put in the test cell, where it undergoes various tests while it is run for two hours.
Owner Evaluation
At this stage of the process, the owner will typically be notified and brought up to speed on the health of the engine. PGA will provide options as to what parts can be reused and what parts should be replaced. It’s not always an easy decision. For instance, a cracked case can be repaired or replaced with a new one. A third option is to use a previously repaired case from PGA’s inventory. PGA does not repair cases in-house, as this is a special art. They send them to a shop that specializes in this. The owner has to weigh delay versus cost to decide what is best for their situation.
Finishing Up
After all the parts have been cleaned and new parts that are needed have arrived, some are painted individually using a high-temperature enamel paint per the owner’s choice of color. However, most of the engine is painted as a whole to make sure the nuts and bolts are painted the same color.
Once the parts are painted, the engine is ready for reassembly. On my visit, they had three dedicated technicians doing nothing but engine reassembly. It was quite a process. On the typical 4-cylinder engine, it takes a veteran technician about two days to complete the process.
Here is where they utilize the photos they took when the engine first arrived. This ensures the engine is reassembled the exact same way it came in. PGA generally reuses the hardware and engine baffling.
Once the engine is finally reassembled, it is sent to the engine test cell, where it goes through various tests while it is run for a two-hour period. One thing to note—they do not dyno all the engines. This is only done at the owner’s request. They use a different test cell for that procedure, but it’s done at no extra cost.
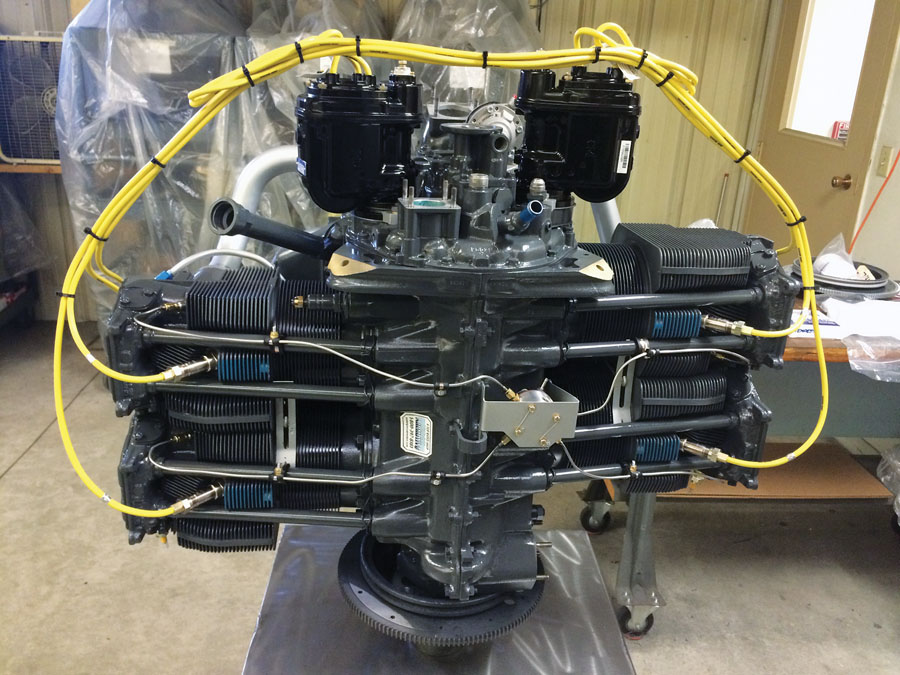
A newly overhauled angle-valve Lycoming, ready for shipment to the owner.
How Long Does it Take?
So, how long does it take to perform a major overhaul? The standard answer PGA gives to their customers for small engines is typically one month, but that can vary drastically depending on whether the casing has to be sent out for repairs and whether all parts are available.
I noticed they had over three dozen engines torn apart and asked what their status was. They indicated that some had been sitting in their shop for up to a year. Many are waiting for parts, but a lot are waiting for the owner to decide on options as to how they would like the shop to proceed. Others are waiting on insurance issues that have not been resolved, while many are large engines where the overhaul can be as much as $50,000. So, neglecting your engine can get very pricey and keep you from flying for quite a while, depending on your financial situation.
The trip to PGA was a rewarding one. These folks are very friendly and professional, and I’d recommend them to anyone. In closing, just keep a watchful eye on your engine, whether it’s factory new, recently overhauled, or mid-time. Preventive maintenance is always a good thing.


