On a bright, sunny Saturday, Simon Wood, student pilot, and I flew my C-150 to EAA Chapter 1055’s fly-in Breakfast at York, Nebraska. I introduced Simon to Connie and Joe Block, Pat and Rod Matlock, and other pilot types (e.g, “Simon, this is Steve Pettygrove. He flies a Taylorcraft.”).
Once we were done with the sausage, omelets, and pancakes, and the Blocks and Matlocks were done cooking, I asked Rod if he would give us a tour of his Pietenpol. He said yes, so we walked to his hangar. Wow!
“You built this?” asked Simon, with amazement.
“Yes,” Rod replied.
“From a kit?”
“There is no kit,” Rod explained. “A guy named Bernard Pietenpol designed it in 1929, then in 1931 he got together with Orrin Hoopman, who drew up the plans.”
“How long did it take to build?” asked Simon.
“Six years.”
“And you pilot it from the back seat?” At this point, Simon had noticed that the only instrumentation was in the rear cockpit.
“The CG needs to be behind the leading edge of the wing, so the pilot balances the weight of the engine up front,” said Rod. “I’m a big guy, so I had to move the engine forward about 4 inches.”
“And the passenger sits in front?”
“Uh-huh. Right under the CG, so it’s just additional weight that doesn’t affect the balance,” answered Rod.

The Piet is flown solo from the rear cockpit. The clean, simple instrument panel has everything needed for low and slow VFR flights.
Building the Piet
Rod has a custom woodworking shop at his home in Waco, Nebraska, so building a plane out of wood was right in his wheelhouse. Once at Oshkosh, he saw a Pietenpol and thought to himself, I could build that. That year, his wife Pat gave him Pietenpol construction plans for Christmas. He used both CAD and an Excel spreadsheet in the planning. “Bernard Pietenpol designed it so you can move the wing,” Rod explained. “On the spreadsheet you can move everything around. I had to keep the CG 15-20 inches in back of the leading edge, and the spreadsheet got it within a quarter-inch.”

Velcro tabs allow the forward cockpit seat back to be removed, providing open access to the back of the rear cockpit instruments.
Rod designed the engine mount for the Continental O-200 with CAD on his laptop. It’s made from 4130 steel tube. The prop surprised me. Looking at the side of the prop, I opined, “The prop has a wider face to the air than the climb prop on my 150.”
“Jim Fix [of the Fix Prop Shop in Lincoln, Nebraska] made it,” said Rod. I told him I wanted to go 75 at 2400, and he just about hit it. Sad to say, Jim has since retired and sold his equipment.”
The struts on the Pietenpol are from Steve Pettygrove’s Taylorcraft. Steve satisfied the AD on T-craft struts by getting new struts, and he and Rod cut both ends off the old struts and welded up new ends to fit the Piet.
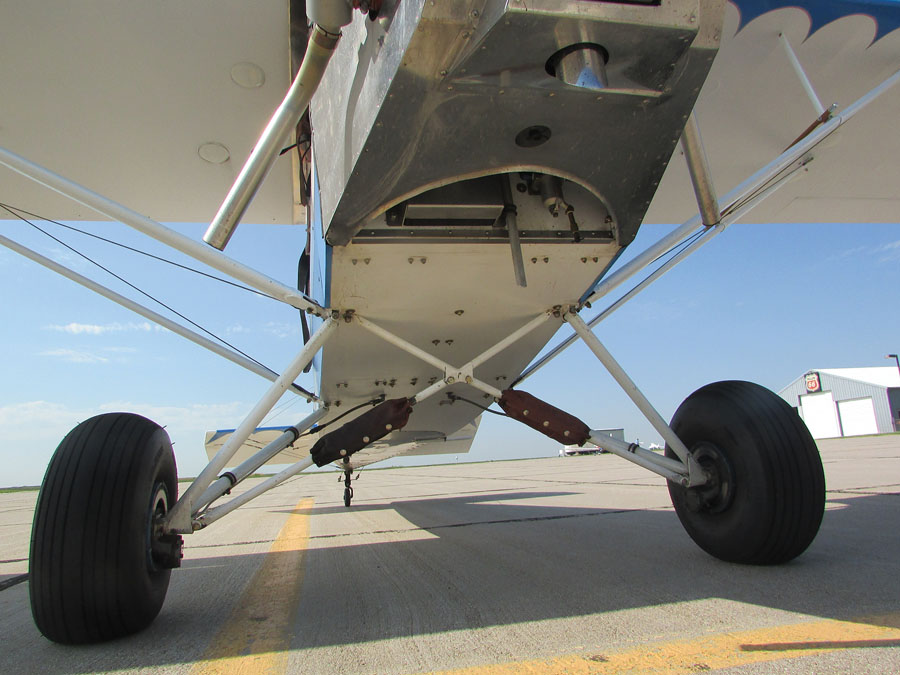
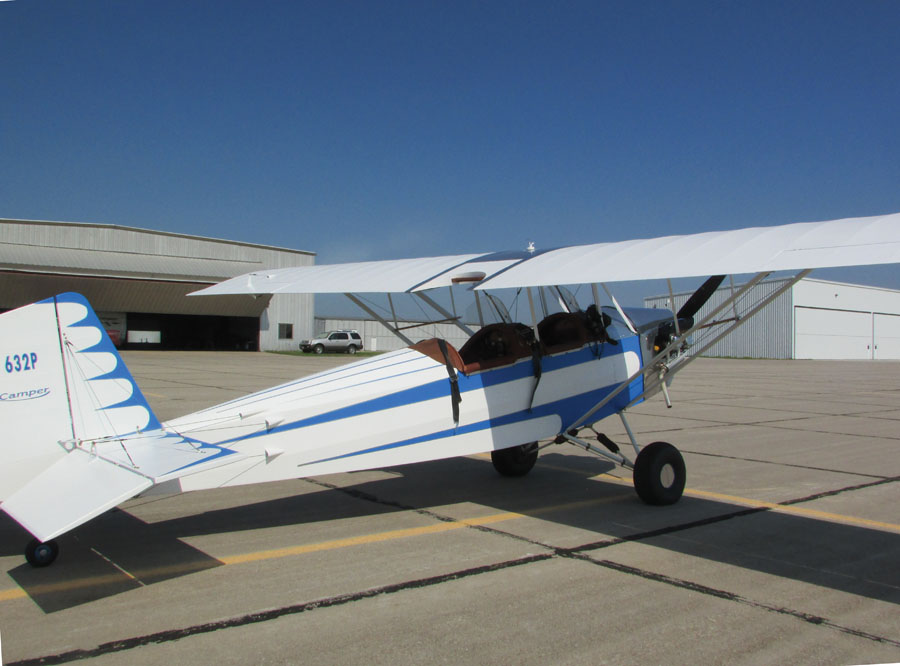
The Cub-style landing gear doesn’t look “Cubby” because the bungee covers are too snug and slim. They contain coil springs, not bungees.
Part of Rod’s plane was actually started in 1960 by a builder who gave up on the project and, thinking of liability, did not want his name anywhere near it. The wings were about 60% done, but the fuselage was in pieces. A friend told Rod about it, and they decided to take a look. The view was underwhelming. The project had been stored in a barn since 1994. Deciding eventually to buy the parts, Rod hauled them home in a trailer and power-washed them. With the dirt, dust, and cobwebs gone, very fine workmanship was revealed. Rod invited several members of EAA Chapter 1055 over to inspect, and they advised him, “If you don’t finish it, you’re an idiot!”
Rod summarized, “50% done, 90% to go is right. It took me six years to finish it.”
Some clever features were striking. The Cub-style landing gear doesn’t look Cubby—the bungee covers are too snug and slim. The reason is that instead of bungees, there is a coil spring under each leather cover.

The fabric covering is Stewart Systems. Rod chose a traditional paint scheme and used Behr Premium house paint, straight from Home Depot. After six years, it still looks like it was just painted.
Access to the tail during condition inspections caused some thought: “Get my big hands through a five-inch inspection hole? No way!” said Rod. Instead, most of the bottom rear fuselage is one big aluminum inspection panel. “What you lose in extra weight, you gain in ease of access. At annual, just put the tailwheel up on a chair and reach everything,” he explained.
Another neat thing that any A&P would appreciate is the access to the instruments. The passenger seat back is not just handsome in embroidered leather; it comes off to provide open access to the back of the instruments. It sticks back on with Velcro tabs.

For easy access to components, most of the bottom rear fuselage is one big aluminum inspection panel.
The fabric covering is Stewart Systems, which Rod recommends. “I covered it in my garage, and there’s no odor to it.”
Rod did the painting with Behr Premium house paint, right out of Home Depot. Twenty seconds in the viscosity cup was just right for spraying, and the paint holds up. After six years, it looks like it was just painted. “Oil and gas don’t bother it,” said Rod.
The airworthiness certification was a memorable day. Two guys with badges and shades came out and said, “Don’t get your hopes up. We’ll probably be here three or four times.” They spent three hours inspecting the plane, but when they were finished, they said, “We’re certifying it today,” and “I’ve never seen workmanship like this.”

Instead of a traditional Ford Model A engine, Rod’s Pietenpol is powered by a Continental O-200 turning a fixed-pitch McCauley prop. Note the eyebrow scoops for cylinder cooling.
Going For a Ride
Back when he was still working on it, Rod and I agreed that if he took me up in his homebuilt Piet, it would make a great article. No better time than now! Simon said he wouldn’t mind waiting on the ground, so Rod sized me up.
“How much do you weigh?” he asked.
“Me and my socks weighed 161 this morning,” I replied.
“OK, but you’ll need some help getting into the front seat,” said Rod.
“No kidding!” I answered, noticing the maze of struts and wires that seemed to block access to the front cockpit.
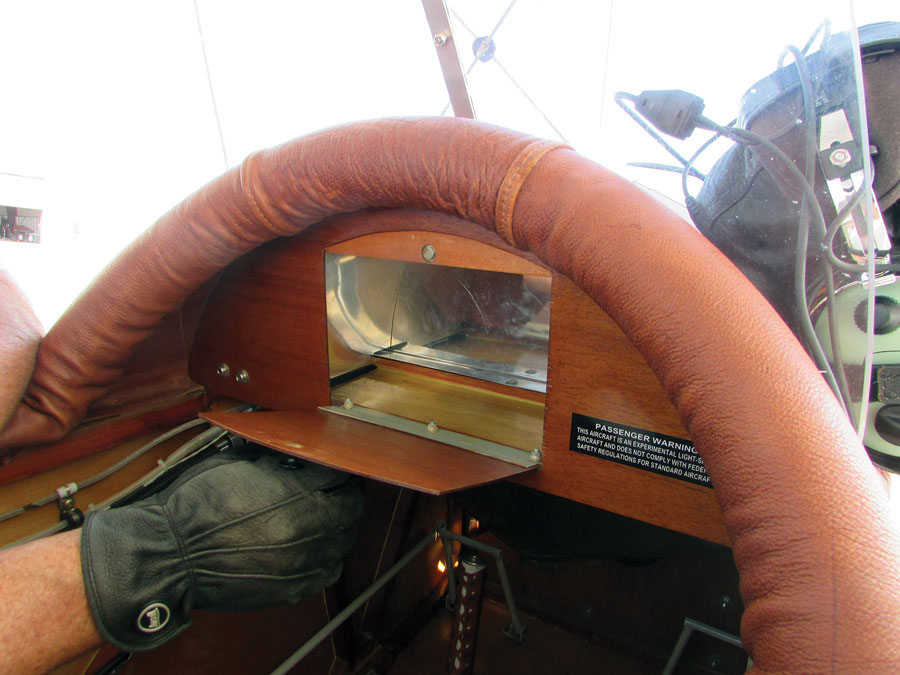
A glove box is built into the panel in the front cockpit. A plush leather coaming surrounds the cockpit.
The big parasol wing is a low ceiling with no handhold on it like there is for the back seat. There are also four wire-braced cabane struts, and there are wing struts with stabilizing cables. It sure looked like an exercise in either agility or three-dimensional geometry! “Crawl over and then back in,” Rod advised.
He brought me a chair, and I crawled over the coaming and then backed in, with some help on the left side getting my feet into the cockpit.
With Joe Block on the right side and Rod on the left, we got me installed in the seat. I was in the pit with my head sticking out over the coaming. Rod handed me a leather helmet with a mic and earphones. Leather helmet? This is swell! I thought to myself. Then Joe reached in and helped with the belt and shoulder harness.
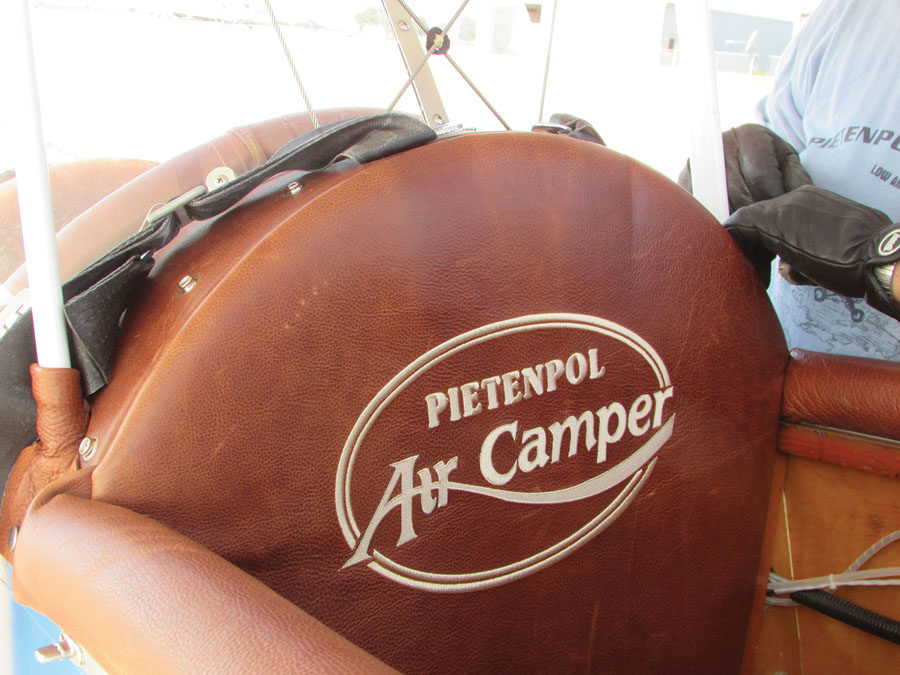
The forward cockpit seat back is covered with embroidered leather that matches the leather cockpit coaming.
“Now how’s he supposed to get out?” asked Joe.
“I’ll just roll the plane and drop him!” said Rod.
Fully ensconced and strapped in, I joked, “Shall I jump out and give you a prop?”
“No need—we’ve got a starter!” answered Rod.
We taxied out to the runway, but there was a Cessna 195 stuck there with a flat tire, so we back-taxied to the turf runway, back-taxied to the downwind end, and turned around.
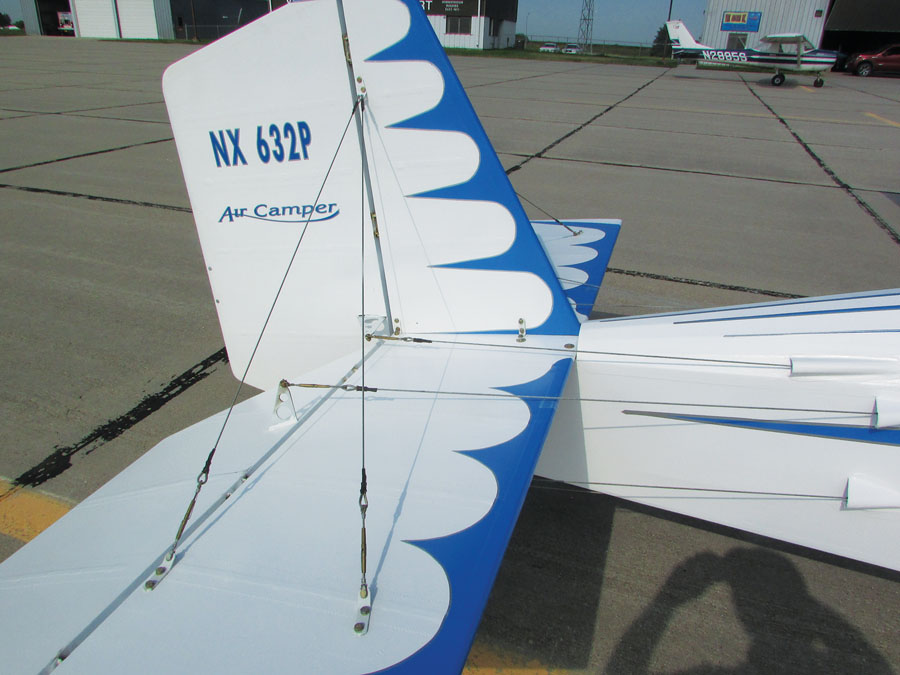
Flying wires help brace the tail fin. Also visible are the elevator and rudder cables.
“You ready?” Rod asked. I stuck two thumbs up in the air. He pushed on the throttle and we rumbled and thumped over the grass and slowly, slowly climbed. The experience was new. I don’t think I have ever before in my life been flying around in an open cockpit.
The little Plexiglas windshield did its job, and the visibility was superb—much better than out the side windows of my Cessna 150. I had no idea how much clearer it is to look out through nothing than to look through Plexiglas! A surprise was a strong draft on the back of my neck. Thanks to the little windshield, there was no wind in my face, but instead the wind eddied around and blew on the back of my neck; I quickly got used to it. Looking out under the wing, I admired the under-cambered Pietenpol airfoil as the air pressure made the fabric accentuate the ribs.

The wooden brace connecting the lift struts is called an arrow. Made from mahogany with machined aluminum tips, it is used with the short vertical jury struts to help dampen vibrations that might occur in the wing lift struts.
We flew in a wide circle around the city of York, and not all that high. I’m not sure if we ever got up to traffic pattern altitude. Since for me the thrill of flight is admiring the landscape below, I enjoyed every second of it.
A word on visibility: Built to the plans, a Pietenpol has a Ford Model A engine and a big radiator right in front of you. But Rod’s Piet, powered with a Continental O-200 engine, has great visibility over the nose. In flight, the Model A radiator in front of you probably wouldn’t make any difference anyway because you’re looking out to the side all the time, with just one exception—lining up with the runway!
As we lined up to land, Rod asked me to tilt my head to one side. I did, and he had a clear view of the turf runway in front of us. On the ground, he explained that once you’re taxiing, you’re guided by the sight at the sides. But for lining up with the runway, it helps if the passenger in front of you tilts his head. No problemo!
We taxied right up to the breakfast hangar, where I pantomimed snapping a picture. Simon Wood, my pax, pulled out his cell phone, walked around to the sunny side, and snapped two. Then came the challenge—getting out!
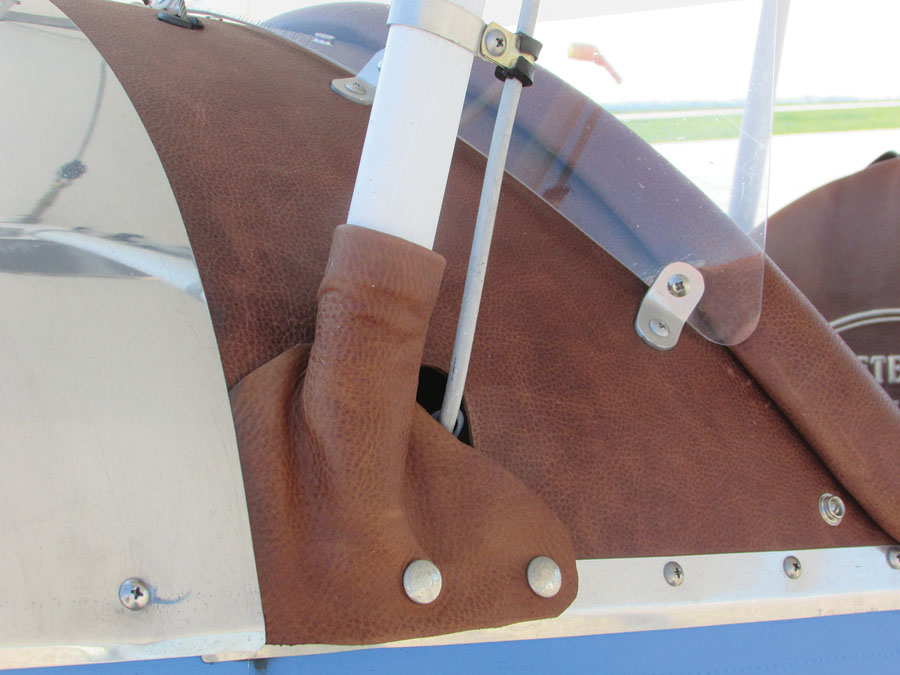
Leather covers the intersection of the cabane strut and forward fuselage. Also visible is the coaming, the fuel line from the wing tank, and forward Plexiglas windshield.
This would be the climax of the adventure. “Just go over the side, and we’ll catch you,” said Rod. I pushed myself up on the coaming, got my feet up on the seat, and finally got both knees on the right side of the coaming. I looked down at the two wing struts and got an idea. “I can do this,” I exclaimed, as I bent down to put a hand on each strut. But then I wanted to put a foot at the base of the rear strut. “No, no!” said Rod. “You could put a shoe through the fuselage fabric!”
For a moment, I was at an impasse. But finally, Rod said, “Just get on my shoulder!” so that’s what I did. I climbed on his shoulder, exclaiming “Fireman’s carry!” and there was laughter all around.
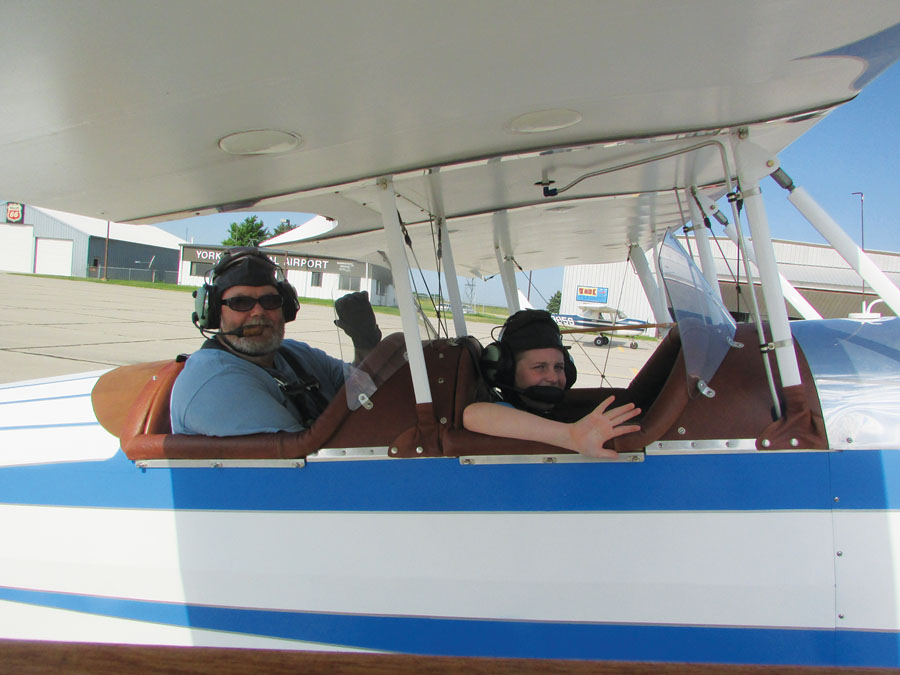
Rod Matlock and his grandson, Rylan Calhoun, prepare for a flight in Rod’s Pietenpol.
Final Thoughts
According to Rod, “There were many times I would get discouraged and overwhelmed with the whole building process and the amount of time it consumed. But when you get to that point, just set it aside for a while, do something else, and come back to it later. Think of it in small parts: Build the rudder, then next week build another small part, and so on…then it’s not so overwhelming.
“It’s all worth it when you are finished and flying, not to mention those moments at a local fly-in when you hear, ‘Did you actually build this?’ Your chest puffs out when you proudly answer, ‘Yes I did!'”
Amen, Rod, and thank you so very much.


