When the Creative Homebuilder started building his Harmon Rocket in 1993, he decided to also build a pull tester to confirm that his unusual building methods—solution heat rivets and aerospace structural adhesive—would not compromise the integrity of the airframe. He has tested, at last count, over 100 different combinations of joint configurations and has never had one that performed less than the design requirements as defined in MIL-HDBK-5F, “Metallic Materials and Elements for Aerospace Vehicle Structures.”

Side view of the Creative Homebuilder’s pull tester. The test coupon can be seen at the lower level, just above the channel iron base. To provide the initial tension on the coupon, there is a -inch 20NC threaded rod attached on one end of the test sample that can be tightened against a stop in the frame.
The pull tester is a simple device, and he acknowledges that in absolute terms it is probably not highly accurate. But as a comparative tool, it provides good information on the makeup of different test coupons.
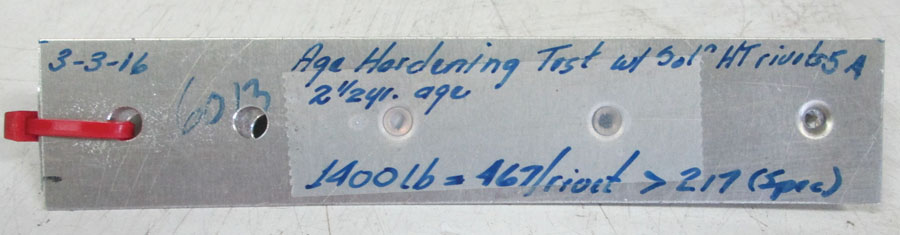
This coupon was used to test the effects of age hardening on solution-heat-treated rivets. Before they failed, the treated rivets exceeded the minimum design specifications by a bit over 200%.
The pull tester uses a 110-pound inline spring scale connected to a 20:1 ratio fulcrum arm, with the coupon attached to the 1-inch leg and the scale to the 20-inch leg. There is an Acme threaded rod on the scale to provide the increase in load to test the coupon to destruction. The rate of the load application is a function of how fast the threaded rod is advanced by hand with an offset handle.

Box of joint tests since 1993—somewhere north of 100!
The close-up photo shows a typical coupon that has been tested to failure. This particular coupon was used to test the effects of age hardening on solution-heat-treated rivets. As you can see by the results (recorded under the strip of Scotch tape as tensile force applied to the coupon), the treated rivets exceeded the minimum design specifications by a bit over 200%—good enough to satisfy the Creative Homebuilder.
Notice that the shearing action caused the coupon segments to move vertically (up the slope of the dimple) before they moved very far laterally. This action stretches the rivet, resulting in the head becoming cupped until at failure it separates from the body of the rivet. The partially failed rivet heads are preserved under the Scotch tape for instructional purposes.


