As much as it seems like a natural thing to do (in order to see if the airspeed indicator is working), we have all been warned to never blow into the pitot tube. Whether using a mechanical gauge or an electronic airspeed display, there is a genuine need to see if the plumbing is functioning correctly during installation or maintenance of our pitot system. A loose tube or even a small leak (or blockage) anywhere in the system can drastically alter the accuracy of the indicated airspeed. A separate but related system, the static plumbing has a similar need for testing as it can adversely affect not only the airspeed but several other indicators such as vertical speed and the altimeter.
With your airspeed indicator displaying 0, push (never pull) your plunger a inch at a time. There should not be a loss of more than 10 knots in one minute’s time.
If we are not allowed to blow for testing, then what is an alternative? With just a couple of inexpensive household items, you can perform a very rigorous test of both the pitot and static systems of your homebuilt.
First, obtain a dental irrigation syringe (use this term to search Amazon or a local drugstore) as pictured here. There is no needle included, just a plastic nose that is perfect to slip some tubing over. I like to use surgical tubing of the appropriate size as it lends itself to adjusting to a wide range of diameters and makes a good seal. This is the hose used for building slingshot toys—that’s another project!
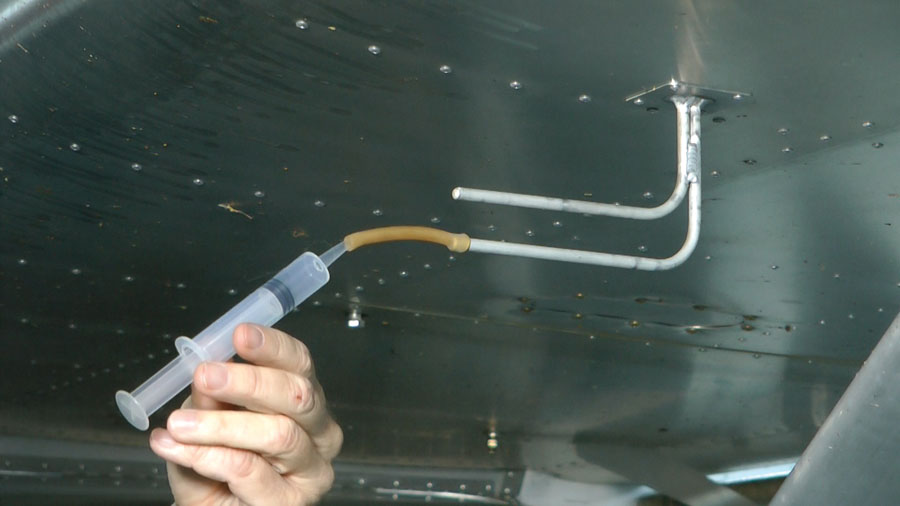
While many aircraft’s pitot tube may differ from the one shown here, the principle is the same. The tubing is used to connect the end of the syringe and the pitot tube with an airtight seal. Now, be careful! You never want to push the syringe plunger more than 1/4 inch at a time before evaluating your next move. Just like the warning to never blow into the pitot tube, never move the plunger more than this small distance or damage could occur to your sensitive instruments. With a long enough tube, you should be able to make these plunger movements while watching your airspeed indicator.
Testing is simple. With your airspeed indicator displaying 0, push (never pull) your plunger a 1/4 inch at a time. You should immediately see an increase of airspeed. (If you do not, then stop—you have a problem that needs to be investigated.) Note the new airspeed and wait a full minute. According to FAA Advisory Circular 43.13-1B, there should not be a loss of more than 10 knots indicated in one minute’s time. If you pass this test, your pitot system is in great shape (demonstrating no leaks). If not, you need to investigate the leak or blockage in your system. Pitot system testing is just that simple!
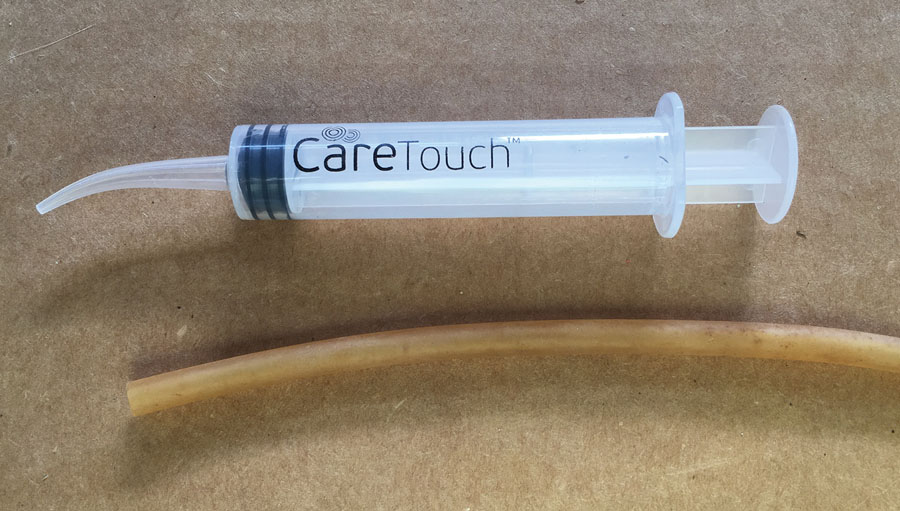
To test your pitot/static system, use a dental irrigation syringe and a piece of surgical tubing in a diameter that will make an airtight seal.
Checking the static system is similar but has one unique challenge: Not all static ports provide an easy way to slip a tube over for an airtight seal. You may need to disconnect or otherwise “T” into your static line for the syringe tube connection. Once the syringe is in line, you will then “pull” the syringe plunger back about inch, creating a small suction. Note the change in reading on the altimeter (as pressure drops, the reading should go up). AC 43.13-1B states that a good static system should display less than a 100-foot loss of altitude in one minute.
It is always better to discover and rectify pitot/static problems when building your aircraft on the ground. This method is inexpensive and plane simple!

![]()
As the founder of HomebuiltHELP.com, Jon Croke has produced instructional videos for Experimental aircraft builders for over 10 years. He has built (and helped others build) over a dozen kit aircraft of all makes and models. Jon is a private pilot and currently owns and flies a Zenith Cruzer.


