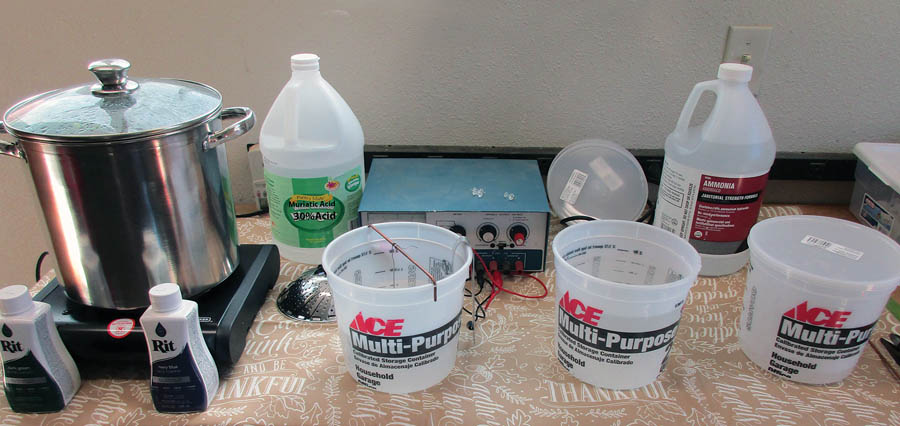
(Front row, right to left) The ammonia pail to degrease and etch the part, the clear water pail to rinse the ammonia, the acid anodize pail, and finally the boiling water pot/heat plate to seal the anodize layer. (Back row, left to right) A gallon jug of ammonia, an old Heathkit power supply, and a gallon jug of muriatic acid. Two bottles of Rit fabric dye are in front of the boiling pot. (We’ll talk about those in a later column.)
Over the years, I’ve shared a great number of projects with you, some of them fairly simple and others a bit more complex. In all of that time, I’ve never told you what sort of chassis, case, or other container to use for the project to be mounted in. Here are some thoughts on one such material for enclosures.
Aluminum is the metal of choice when we are talking about airplanes. Light, strong, and inexpensive come immediately to mind, along with a reasonable resistance to corrosion, fairly easy to form and bend, and a moderately good conductor of electricity. Aluminum comes in fourth in conductivity behind silver (the very best), then copper, gold, and aluminum.
The reason we don’t use aluminum wire in our aircraft instead of that heavy old copper is one of aluminum’s strong points: Almost immediately (measured in thousandths of a second—milliseconds) after raw aluminum is exposed to air, it starts forming a hyper-thin layer of aluminum oxide (Al2O3), which protects the underlying raw aluminum from corroding. Unfortunately, aluminum oxide is a very, very good insulator, so if you can’t break through that insulating layer down to raw aluminum and keep that layer from reforming, you have a high-resistance connection.
We found this in the late 1950s when builders started using aluminum house wire. Ohm told us that power (as in heat power) in a circuit is given by I2R, so if an aluminum joint started to oxidize and the resistance went up, the heat went up, too, which caused even more oxide to form, which caused more heat…right up until the building materials (like wood studs) near the joint started to get warm, which increased the temperature, which caused more oxide to form (lather, rinse, repeat) and the house caught on fire. Bad in a house, worse in an airplane. A lot of folks with airplanes made in Lock Haven have replaced a ton of aluminum starter cables with copper over the years.
Plain old wire solder mechanically attached to the piece to be anodized with a loop to keep the solder from pulling out of the hole. (Note: You can’t solder aluminum with tin-lead [radio] solder and a soldering iron.)
So if aluminum oxide is such a problem, how can we turn that problem into a positive thing? If we aren’t too worried about high currents (like in most of our small electronics projects), then a little bit of assistance with the oxide layer will be a good thing for several reasons:
- A thicker oxide layer will absolutely help to keep the underlying aluminum from corroding under adverse conditions (like a moist warm environment in an Oshkosh hangar in the summer).
- Paint is much happier to stick to a thick oxide layer than a thin one or raw aluminum.
- Aluminum oxide is extremely hard…rubies and sapphires are pure aluminum oxide with a contaminant like chromium (ruby) or titanium (sapphire). It is nearly impossible to scratch a thick aluminum oxide layer with anything short of a diamond.
Forming a thick (relatively speaking…a “thick” layer is several thousand molecules thick, less than a tenth as thick as a sheet of paper) layer of aluminum oxide is a process called “anodizing.” We are going to create a very conducive set of circumstances that will help the aluminum form this oxide barrier.
How It Works
The process of anodization involves an acid to conduct electricity and a battery or power supply to break apart the hydrogen and oxygen water molecule. The hydrogen is attracted to the cathode, and the oxygen is attracted to the anode (hence ANODize). The hydrogen is bubbled off of the cathode, and the oxygen-rich anode begins to form the thick aluminum oxide layer.
The classic way of doing this “electrolysis” is with a DC power supply and enough “impurity” in the water to make it slightly conductive. We can help that impurity situation along a little bit by adding some salt or acid to the water. Mild acids like lemon juice citric acid (C6H8O7) will work, as will strong acids like sulfuric acid (battery acid H2SO4). In general, to use a strong acid it will be diluted with water so as not to eat the battery connections (electrodes) in the water solution.
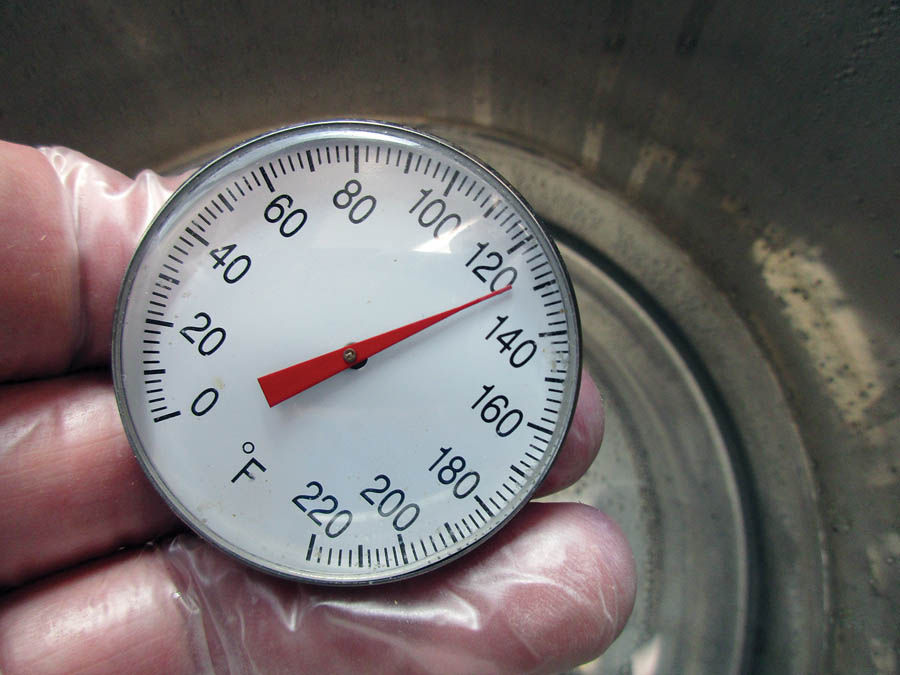
A dial thermometer is handy to have to tell when the colorizing solution is getting too warm.
A preliminary process to the electrolysis is to etch any surface protectant off of the electrodes to get a good electrical connection to the raw electrode material. In the case of aluminum, a moderately strong alkali (base) is used to strip the thin aluminum oxide layer prior to anodization. The classic alkali is lye (sodium hydroxide NaOH), in which the aluminum oxide is made into pure aluminum and released oxygen.
The trouble with sulfuric acid and lye is that they are particularly nasty chemicals. I doubt that there are many mechanics with a few years of service that don’t have holes in their coveralls from just a speck of battery acid that got loose while checking the acid level on a wet aircraft battery.
Same with lye. I know a few plumbers that use lye (Drano) to clear plugged up drain pipes with the same telltale holes in their work clothes.
Both battery acid and lye have to be diluted to make the anodization process work. My thought was, why are we taking really bad chemicals and diluting them rather than taking chemistry that is already diluted and relatively benign? As a matter of fact, why can we safely use one of them to clean our swimming pools and use the other one for cleaning household windows?
I refer specifically to muriatic acid and ammonia. Both of them are available at most supermarkets or home improvement stores in the cleaning supplies section at a couple of bucks a gallon.
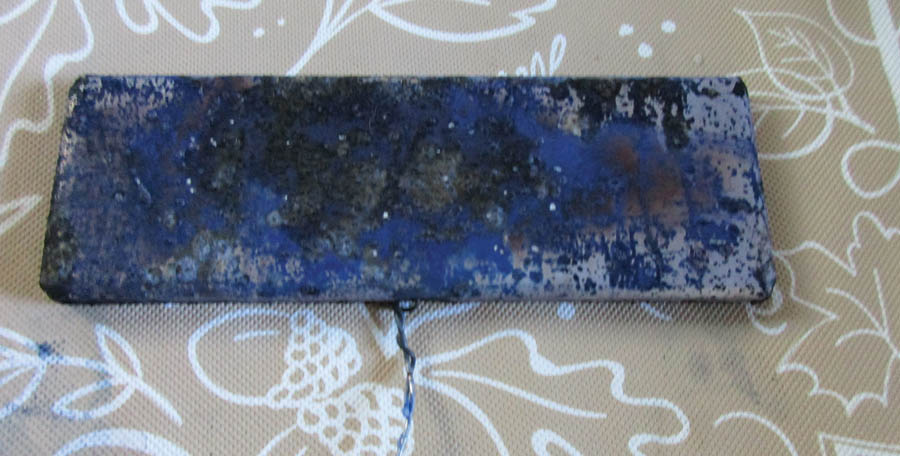
Failure mode trying to colorize the part.
Step by Step
Let’s take the process from one end to the other. You’ve got a small aluminum part that you want to anodize. The first step is to degrease it. Adding a squirt of toothpaste or dishwashing soap on the surface of the part, followed by a brisk application of a kitchen scrubbing pad (S.O.S Tuffy), will take care of most of the grease. Caution, from here on out the part is only to be handled with gloves. A bath in 10% ammonia (the stuff from the supermarket) will also degrease the part and will very slightly etch the oxide layer away. Soaking it overnight in ammonia will take away a lot of the layer.
Little bubbles of oxygen should form on the aluminum part, slowly with ammonia and much faster if you don’t mind using lye.
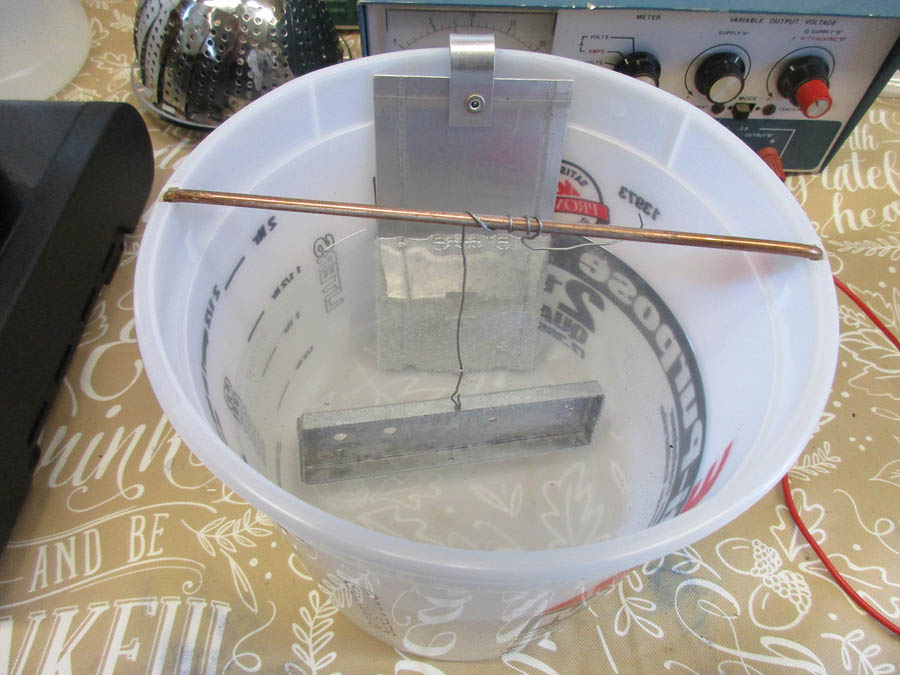
The anodize pail. From top to bottom is the aluminum cathode (negative supply), the copper welding rod positive anode connection, and solder wire connected to the part being anodized.
After the bubbles subside and no more bubbles are forming on the surface, you are down to bare aluminum. Now quickly, before the air gets to the aluminum surface, totally immerse the cleaned and etched part into water. Swish it around a bit to get rid of all the ammonia solution.
Prepare the anodizing bath. Mix the muriatic acid about 5:1 with water. A 30% muriatic acid from the store in a liter of water will take about 250 milliliters of acid to make a 5% solution. Not critical. But what is critical is to pour the acid into water slowly, and slow down or stop when you see hot fumes coming off of the water.
Now put the cathode (a piece of aluminum at least as big as the part you are anodizing) into the bath. Connect the negative lead of a power supply to the cathode. A variable power supply is best, but if all you have is a battery charger, it will probably suffice. Make sure the cathode is not in a place where it will touch the piece being anodized.

Adding 250 milliliters of muriatic acid to water a few milliliters at a time. Always add acid to water, never the reverse.
Here is a trick that I learned a few years ago. The wires that connect the piece to be anodized cannot be made of copper or steel. The conventional way is to use aluminum picture stringing wire from the handyman store, but the problem is that the wires are being anodized as well as the part. I’ve done the research, and neither lead nor tin is affected by the anodizing process. Just use plain old radio tin-lead wire solder to connect the piece to be anodized to the power supply.
The current from your power supply or battery charger should be somewhere around 5 amps per square foot of your part (times two for both sides of the part). Roughly 70 mA per square inch. This is highly noncritical as the power supply or battery charger can be X100 or 100/X and all you have to do is adjust the timing. When the bubbles off of the cathode take a sharp turn and slow down, the part is anodized.
Take it out, rinse it off, and boil it in hot water for an hour to “set” the anodize. After it is dry check it with an ohmmeter to see that it really isn’t an aluminum surface any more but aluminum oxide.
Want to make it a pretty color? More in a later column. Until then…Stay tuned…


