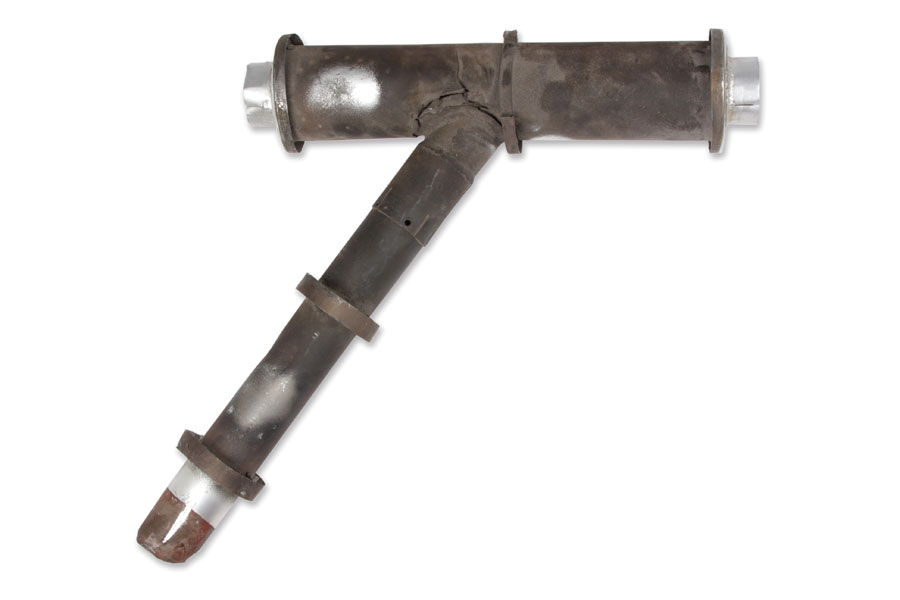
Gaping fissures and corrosion meant this muffler was more deserving of the scrap bin than being on a freshly overhauled engine.
The Pietenpol project at my local EAA Chapter 94 (Corona, California) reached a major milestone this winter: the installation of a J3 Cub Continental A65 engine, which had been meticulously overhauled by Ian Easton and A&P Rich Seifert. The only issue remaining to be resolved was the muffler. The one on hand was, for lack of a better term, roached out. Exposure to several decades of hot exhaust, combined with the forces of nature, had taken its toll. Stainless steel, despite what the name implies, doesn’t prevent rust. It only delays it. This was a perfect example.
Note the DIY version was minus the brackets and bulkheads for the cabin heat shroud and carb heat cuff. The Pietenpol does not have cabin heat, but it does need carb heat, so a cuff (design TBD) has to be added to the tailpipe.
A check of suppliers for a new J3-style exhaust revealed a startling—but not completely unexpected—fact: the cost for a new stainless steel muffler and tailpipe was more than $700. Plan B was discussed and agreed upon: The search would continue for an original stainless steel exhaust, and in the meantime, I’d take a stab at constructing a DIY “home shop” exhaust as a temporary solution.
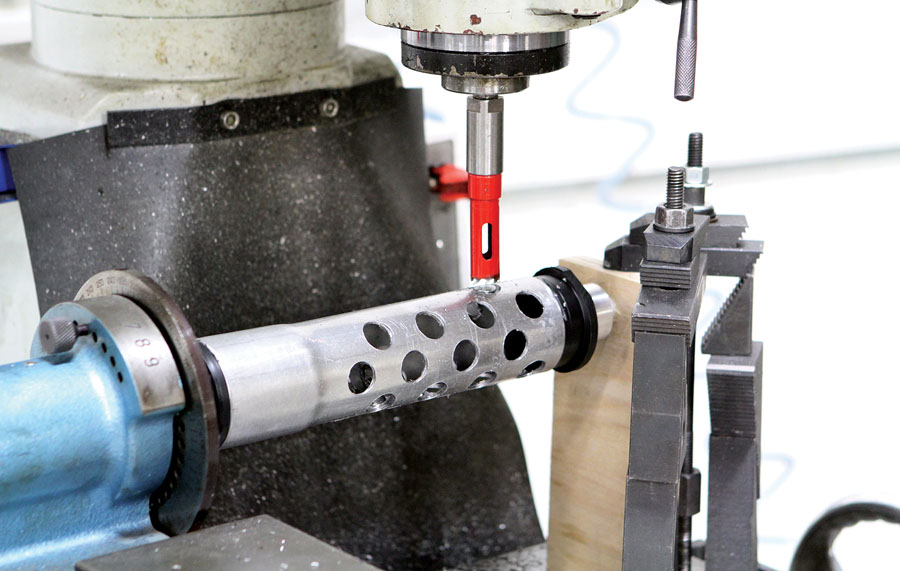
The baffle holes were made on the mill using a 5/8-inch hole saw. A 5C spin indexer was set up with centering adapters pressed into each end. A piece of scrap plywood with a pivot hole was clamped to the mill table to provide outfeed support.
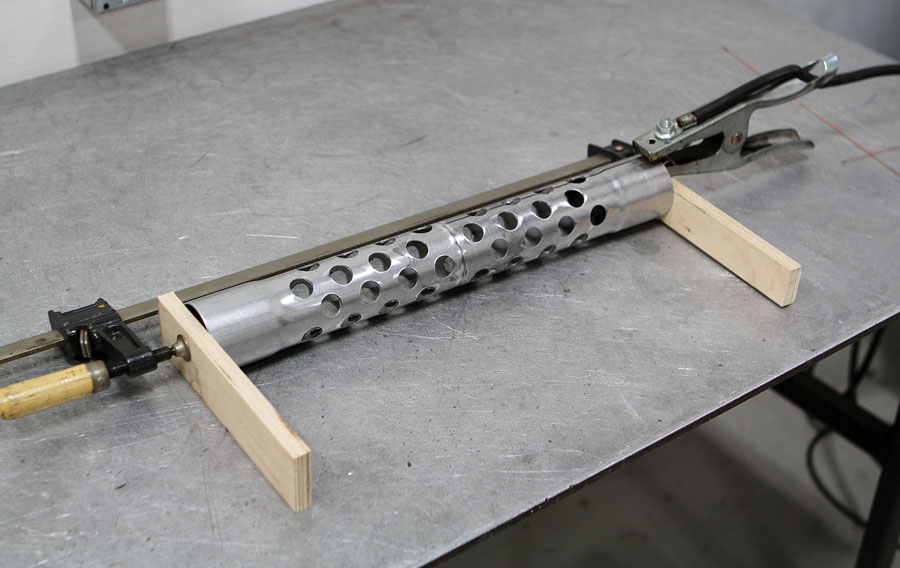
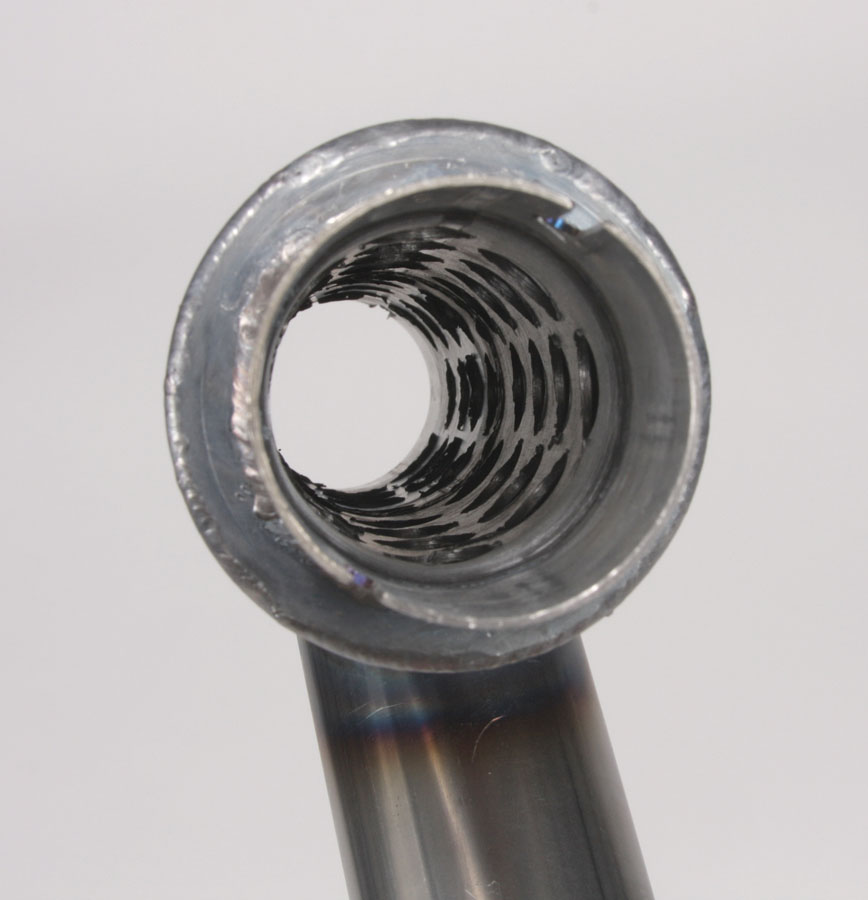
A bar clamp and two scraps of plywood stabilized the inner pipe for tack welding. Note the grounding clamp connected to the workpiece instead of the table.
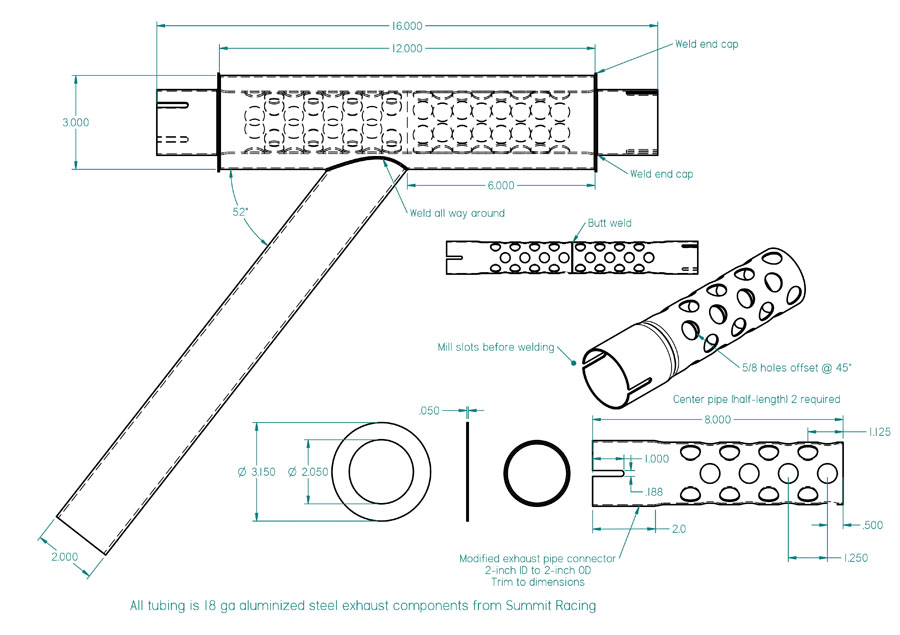
The objective of this project was to replicate the original for a reasonable cost. No consideration was given to performance. A few liberties were taken, the most obvious being the lack of brackets and bulkheads for a cabin heat shroud and an integrated, one-piece tailpipe. But perhaps the most significant difference—maybe compromise is a more appropriate word—was using 18-gauge (0.050-inch thick) “aluminized” steel instead of 0.020 stainless steel. Although the galvanized aluminized finish acts as a rust inhibitor, it’s not as durable as a stainless steel exhaust and, of course, is heavier.
As far as muffler systems go, the J3 design had two things going for it as a DIY project: simplicity and low cost. It consists of straight, round tubes and one angled connection. Other than cutting and welding, no special tools nor extraordinary skills were needed. Thanks to a huge variety of low-cost, off-the-shelf exhaust components from hot rod websites like Summit Racing, the bill for materials was less than $100. The two 2-inch-OD to 2-inch-ID couplers needed to make the inner pipe were $4.99 each. The 5-foot length of 3-inch tubing for the outer pipe cost $46, and the 5-foot length of 2-inch tubing for the tailpipe was $38.

To assure concentricity of the end caps, each ring was first clamped in the three-jaw chuck and the outside diameter (OD) turned true.

With the OD true, the inside diameter (ID) was bored to size. Note the ring is fixed in the notches in the chuck jaws. Very light cuts are in order when turning thin material clamped like this.
It is always important to fixture workpieces as securely as possible, but it goes double when milling thin-wall material. An example of this type of challenge was indexing the coupling tubes to make the baffle holes for the inner pipe (refer to the photos for the solution).
The end caps—the only parts not made from off-the-shelf exhaust components—were rough cut oversize on a CNC plasma machine from 0.050 mild steel sheet and then cleaned up to the final dimension on the lathe. An alternative method would be to use a hole saw to rough cut the ID and band saw the OD, then finish the final dimensions on a lathe (again, refer to the photos).
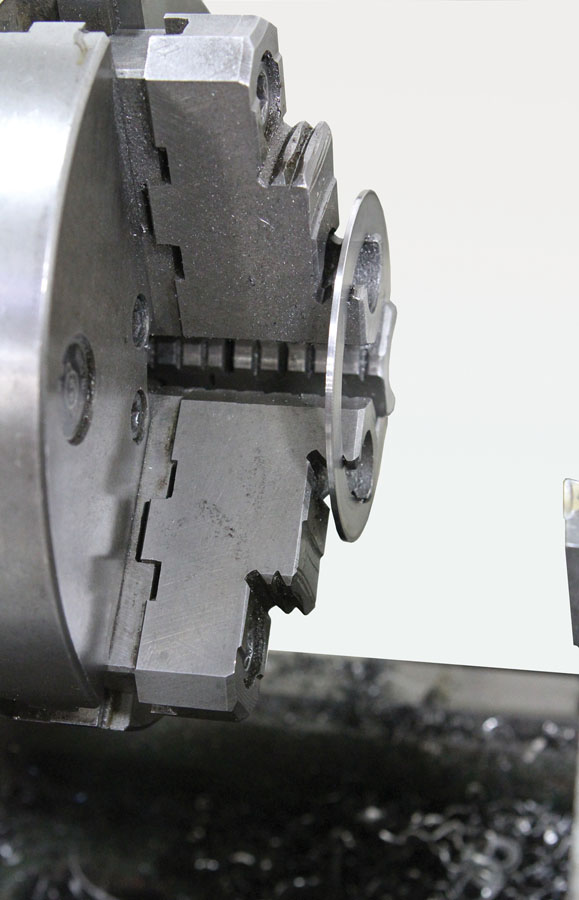
With the ID turned to size, the rings were re-chucked and the OD turned to the final dimension.
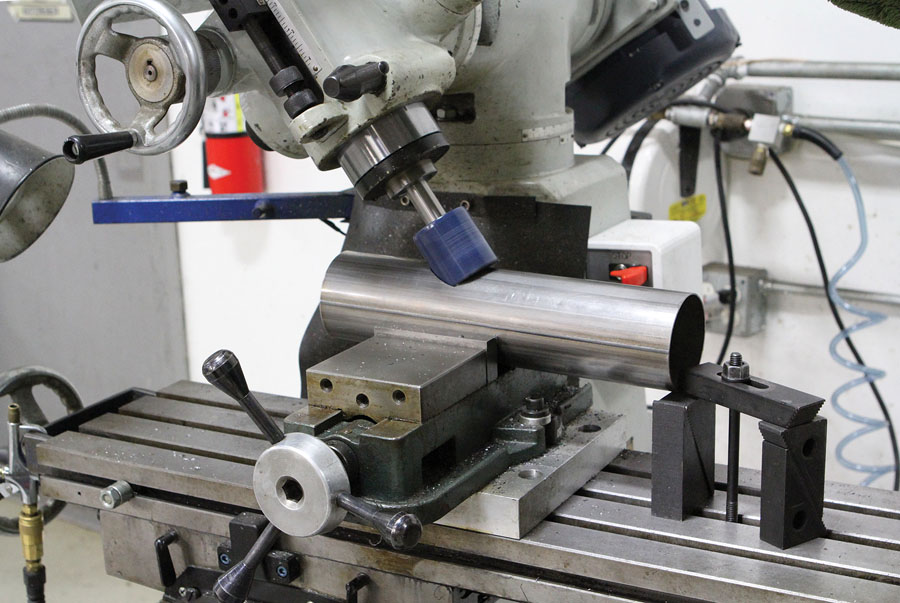
The angled opening for the tailpipe was made in the 3-inch outer pipe by tilting the mill head and making the cutout using a 2-inch hole saw. Note the clamping blocks to help stabilize the tube in the mill vise.
Not long after the exhaust was finished, we discovered Dawley Aviation of Burlington, Wisconsin. Dawley is an FAA-approved (PMA) manufacturer. Although they didn’t list the J3 exhaust on their website, they responded to my e-mail inquiry and confirmed they sell the J3 muffler for $355—a bargain!
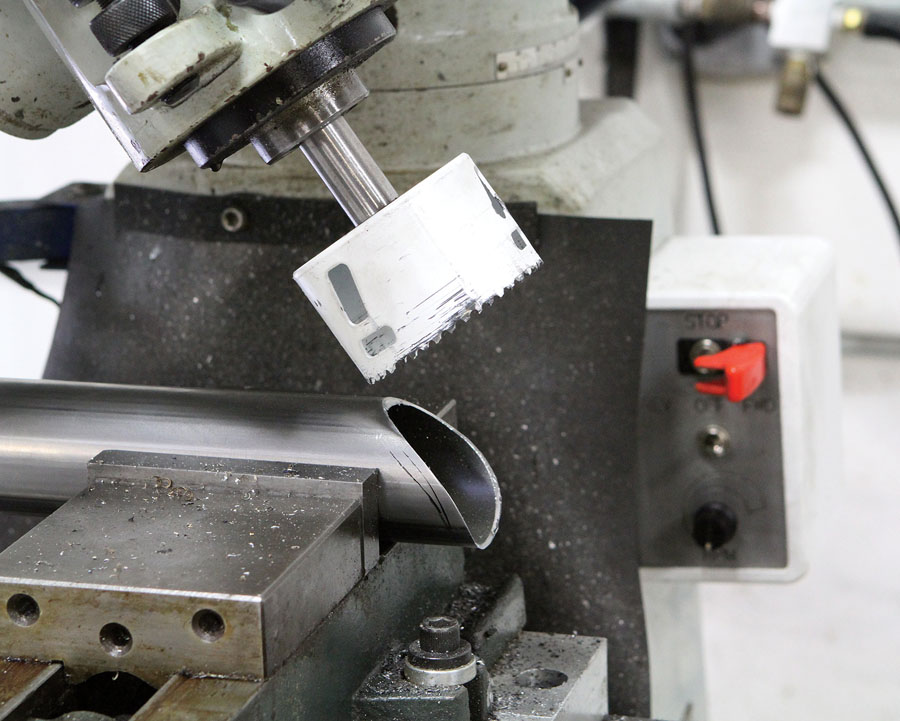
Mitering the tailpipe with a 3-inch hole-saw to match the contour of the opening in the outer pipe.

All the parts were tack-welded in place. The welds were completed after an alignment check.
So our Pietenpol project will, when the time comes, take to the sky with a brand new stainless steel Dawley muffler. The DIY pipe will go who knows where. While it may seem, in retrospect, like a lot of work for nothing, it really wasn’t. It was always meant to be a temporary solution. It just ended up being less temporary than anyone expected. If you wait around for things to happen, you might end up waiting forever! When it comes right down to it, you can sit around and wait, or in the meantime, get out in the shop and make some chips!
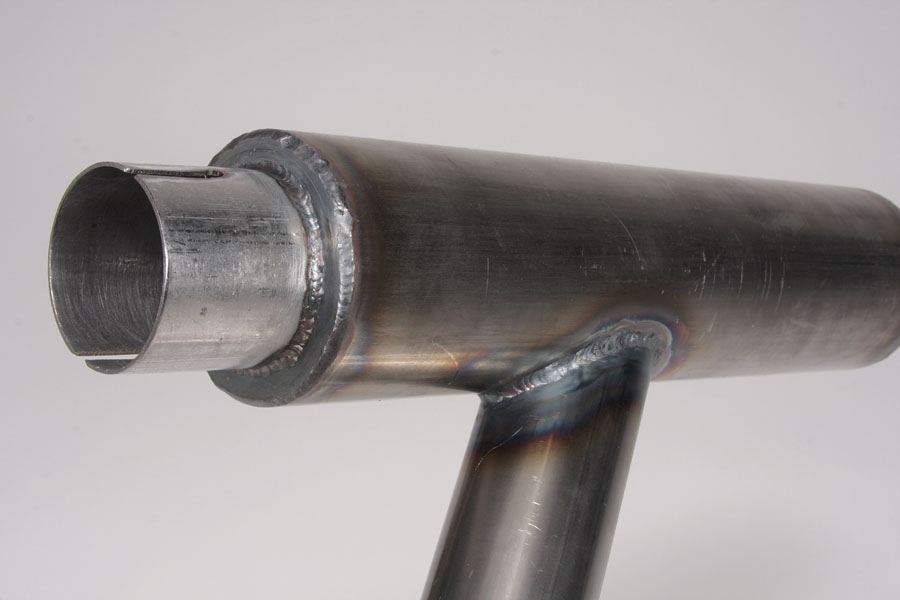
Detail views of the welded muffler and tailpipe assembly.

A side-by-side comparison of the DIY exhaust and the original.


