
What do you do when you can’t find the hardware you want? Make it!
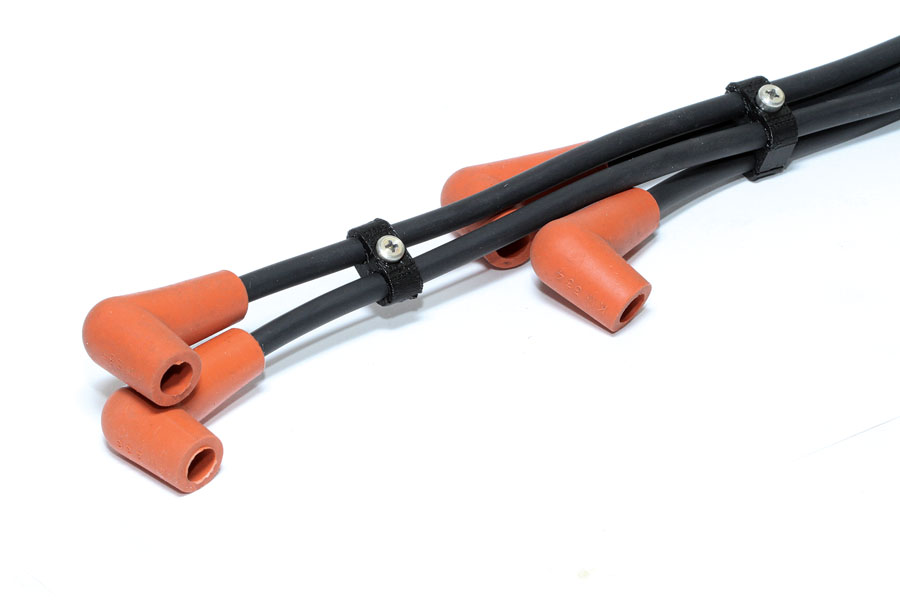
I recently had the occasion to make a batch of Phillips-head aluminum screws for a set of spark plug wire clamps on my Jabiru. Although you can buy aircraft-grade aluminum hardware, I couldn’t find any button-head screws with a Phillips-style drive anywhere, so it was out to the shop to figure out how to make exactly what I wanted.
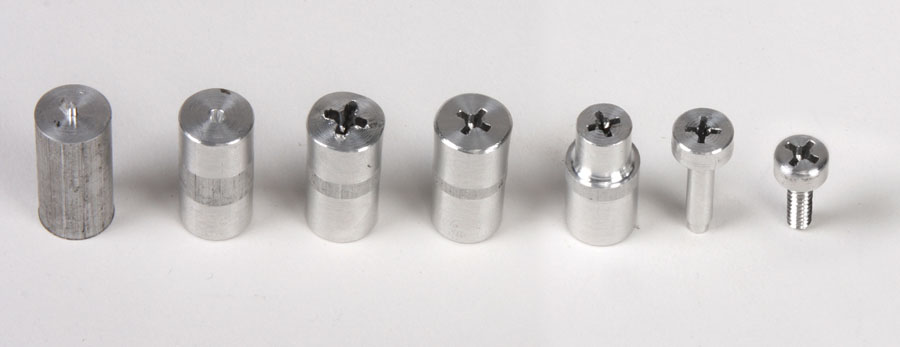
The progression of steps from blank to finished. Cold heading tends to mushroom the top, but after facing, it looks as professional as any store-bought screw.
The obvious reason for aluminum screws over steel is weight—aluminum is half the weight of steel. Before you run out and start making screws for whatever, just remember you can’t trade a steel screw for an aluminum one of the same size and expect it to be the same strength. That said, when properly sized, aluminum hardware can—and often does—perform in place of steel in many applications. The MATCO aluminum axles on the mains of my Jabiru are a good example. Despite my (unintentional) attempt to go for the world record for bad landings, they’ve yet to bend or break!
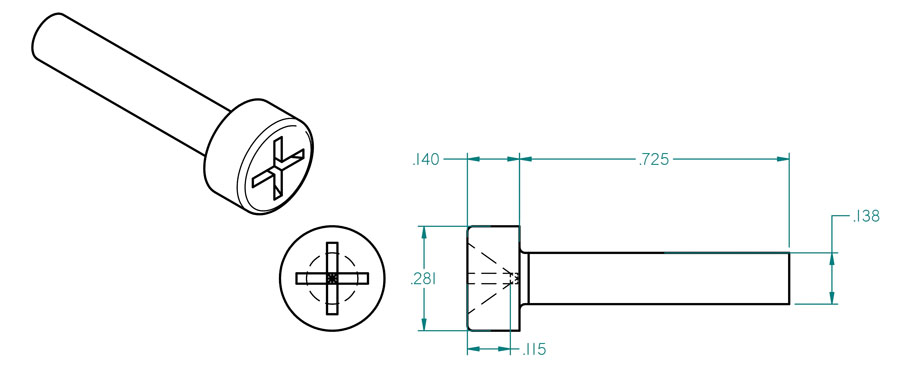
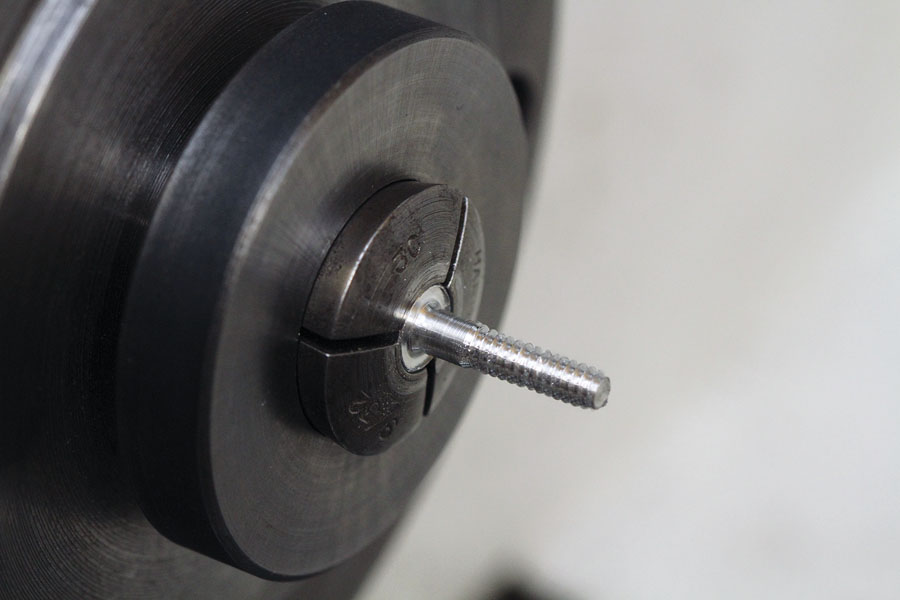
Basic sketch of the machined screw blank before using a 6-32 die to make the threads.
In the past when making aluminum screws, I always kept it simple and slotted the head for a standard screwdriver. But for this project, age and experience told me that using a bladed screwdriver was a bad idea. It’s easy to slip and gouge your hand when tightening screws on small, handheld parts. A hex drive would work, as would a hex socket for an Allen key, but the cable clamps are plastic, and the screws only need to be slightly more than snug. The best option was a Phillips-head screw. Phillips screws are self-centering, so the screwdriver won’t spear anybody, and they will tighten “just right” with a small screwdriver.
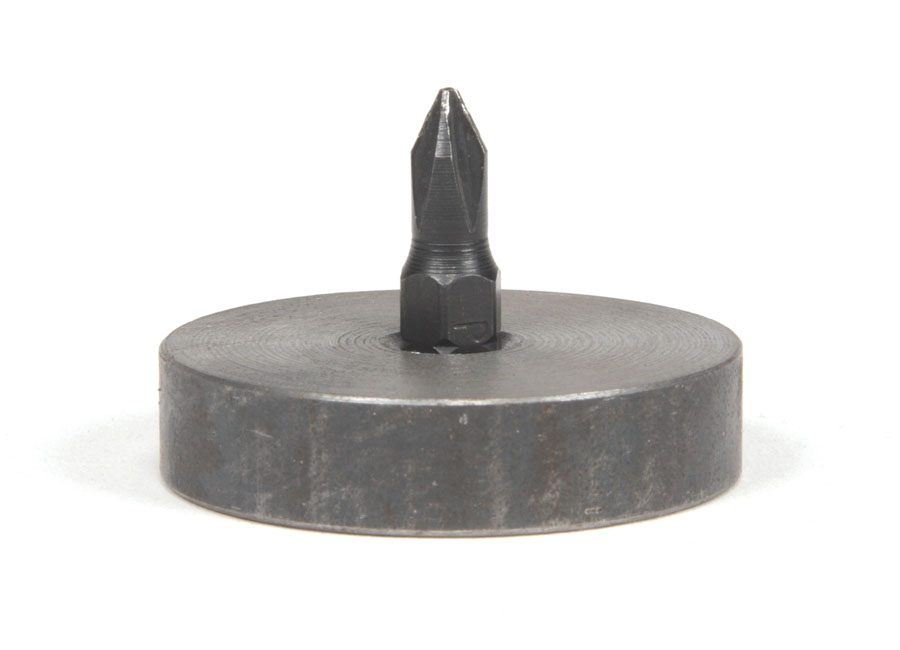
The only “special” tooling required is a PH#1 or PH#0 Phillips driver bit and a base. The base is a steel disk with a 9/32-inch hole drilled halfway through to hold the bit square in the arbor press.
To make the Phillips-shaped sockets, I used a home-shop variation of a production method called cold heading. Cold heading is a type of forging used in the mass production of screws and bolts. It’s an interesting process and, like many forms of machine work, a general familiarity with the how and why can often be adapted for use in the home shop.
After facing, drill a 1/16-inch pilot hole to a depth of 0.125 to 0.150 inch. Cut to length and face.
As the name implies, cold heading is done without heating the material. It relies on force and impact to pound the material (usually a length of rod severed by the same machine) into the desired shank diameter, head shape, and socket type. It all happens in a blur, with production machines spitting out screw blanks by the thousands.
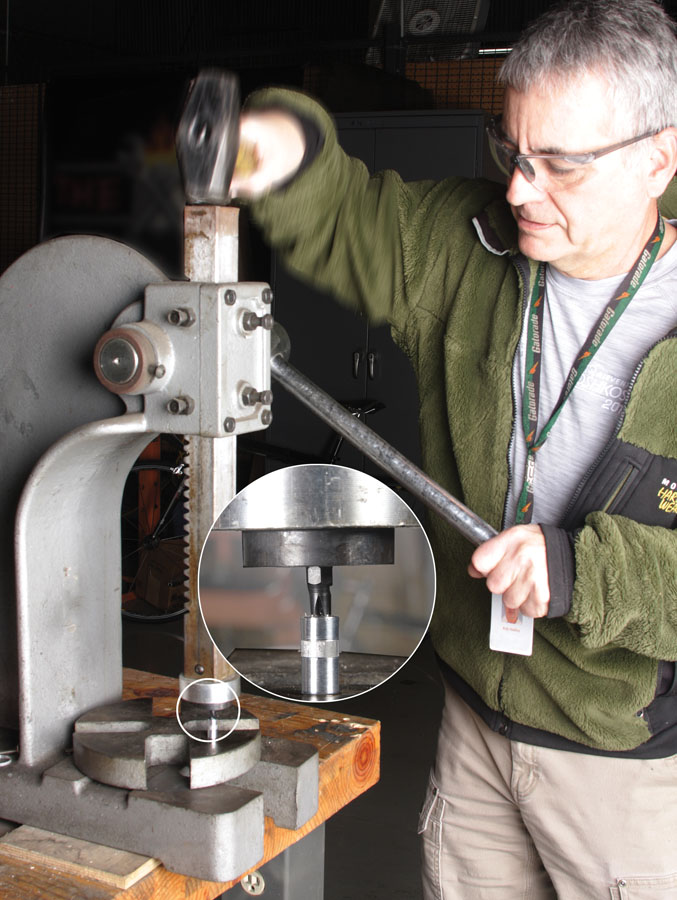
With the bit lined up with the pilot hole and everything square, two or three good whacks on the top of the ram with a 4-pound drill hammer will form a perfect Phillips head.
My home-shop method consisted of using a Phillips driver bit—which you can buy in a pack of 15 from Home Depot or Amazon for about $12—and an arbor press to form the socket (see the photos). The head diameters and shanks were turned on the lathe and threaded with a 6-32 die.
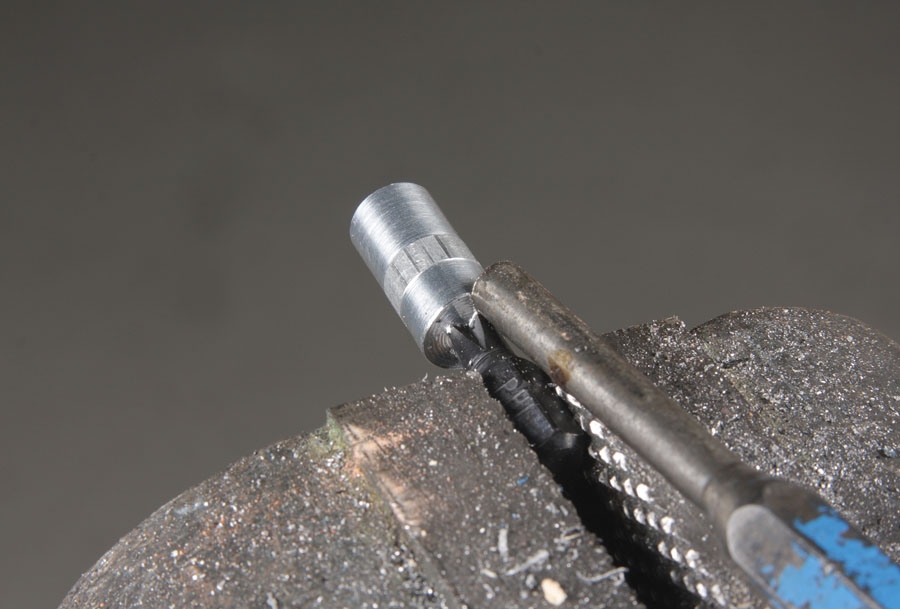
The driver bit might get stuck to the blank after heading. Clamp the bit in a vise and pop it off by tapping it a couple of times with a drift punch.
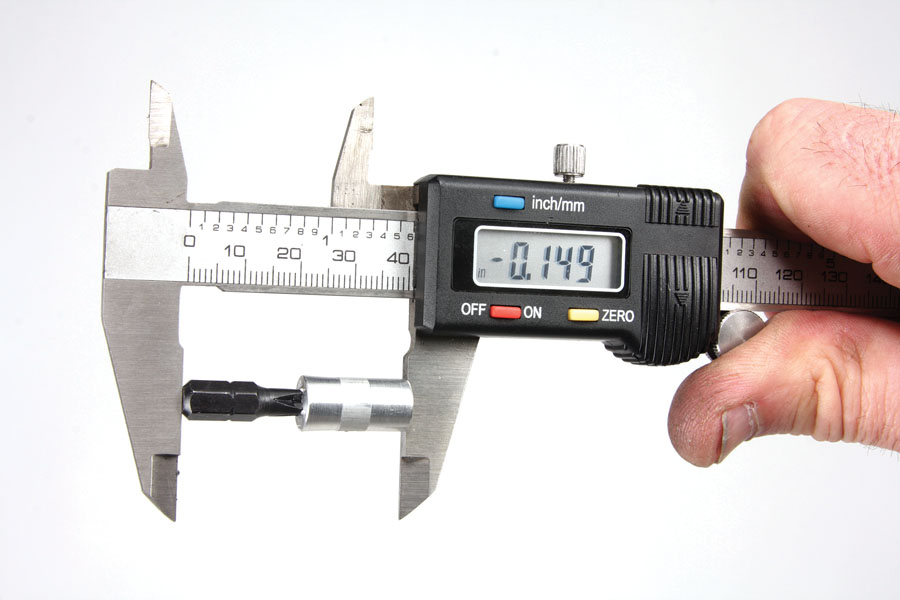
Measuring the depth of the socket by comparing the combined dimension of the bit + blank before and after cold heading. Since I zeroed the caliper when taking the “before” measurement, it’s giving a direct reading of the depth of the socket. The target depth of the finished screw is 0.115 inch, so this one needs 0.034 inch faced off on the lathe.
I tested the cold-heading process on 2024-T4, 6061-T651, and 7075-T6 aluminum alloys. They all worked fine, although one 7075 blank cracked when the Phillips bit hit the bottom of the pilot hole when I got too aggressive with the hammer. Although it’s the highest strength of the three alloys, 7075 is not as forgiving as 2024 or 6061. Strength-wise 2024 is in the middle, but if you plan to leave the screws untreated, 6061 has the best corrosion resistance. If you anodize or passivate the screws (I passivated mine), then using one of the higher strength alloys may be preferred.
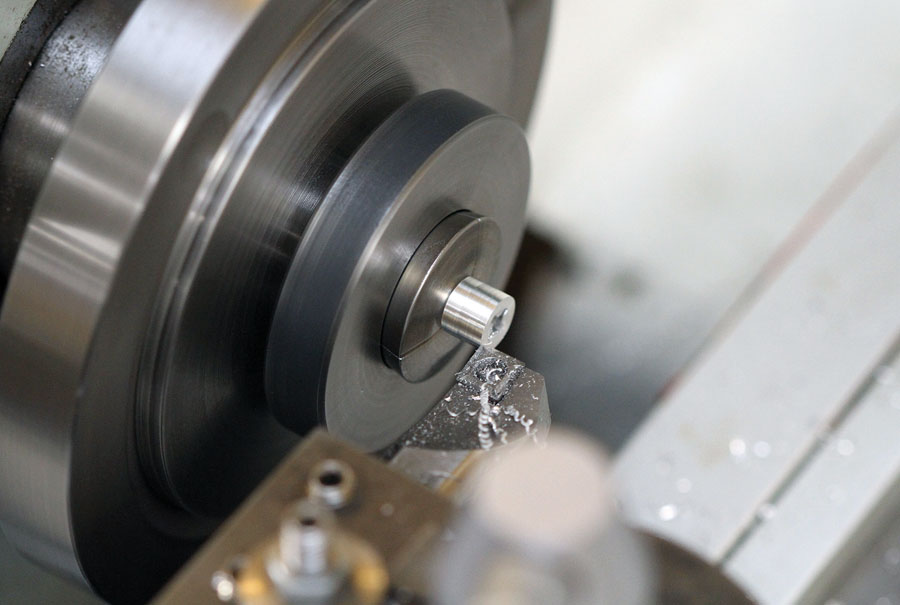
Facing off the end to establish the correct socket depth. After facing, rounding over the hard edge with a file will give the screw that “fillister head” look.
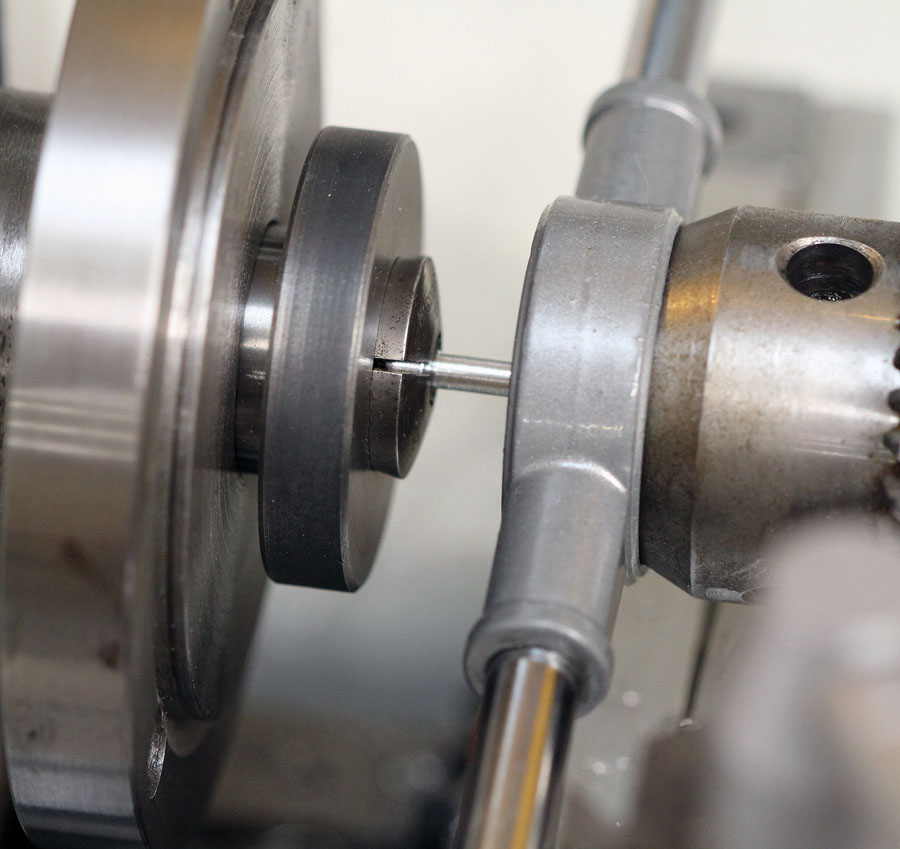
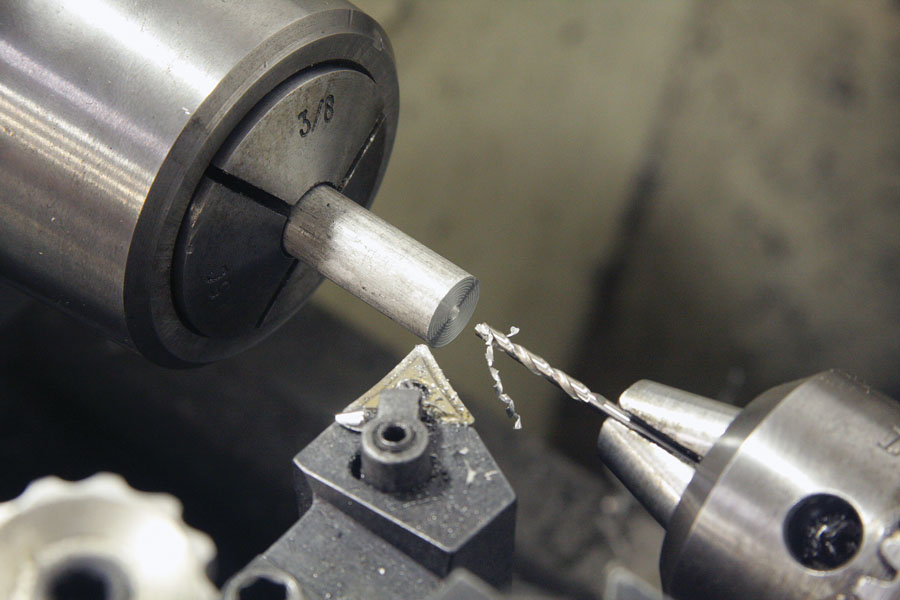
After cutting to length and establishing the head thickness, turn the shank diameter for threading. The threads were cut using a standard 6-32 thread die. Note how the drill chuck (mounted in the lathe tailstock) is lightly pushing on the die holder to help keep it square.
The cost of the material for this project was negligible. I paid $5.33 for a one-foot length of 3/8-inch diameter 7075, $4.48 for 2024, and $2.26 for 6061 (ref: McMaster-Carr). At those prices you can afford to experiment and make practice parts all day long! That’s it! Time to get out in the shop and make some chips!
When your friends ask, “Where did you get those aluminum screws?” they’ll be amazed when you say, “I made them!”


