This is yet another article about an engine rebuild, in this instance a Lycoming O-290G, performed by myself and the kids at the Youth Build sessions. What, you may be asking, is a “G” version, why am I even messing with it, and how is it possibly relevant to you? Read on.
Back when the earth was still cooling, when most TV shows were still in black and white, and shortly before I sprang forth on the planet, John Thorp designed a historic homebuilt airplane, the T-18, and he designed it around the Lycoming O-290G. The “G” was for the ground power units used on aircraft start carts, but as the newer jets were coming into service, the O-290G engines weren’t up to providing enough starting grunt. The GPU engines began to get surplussed in the 1960’s and could be picked up for two or three hundred dollars (!) at the time according to many accounts. John Thorp recognized that Lycoming did not create an entirely new line of engines just for the power carts and figured (correctly) that these could be converted to flight-worthy status for homebuilt aircraft with a relatively small amount of modification. Besides Thorps, there are plenty of other homebuilts using these engines, but I have no idea how many converted G’s may be flying.
The converted engines are de facto O-290D engines, albeit very unofficially and for non-certified use only. That said, I hope this article is informative to anyone considering this conversion, or possibly wanting to do a rebuild, or just to have a better understanding of their O-235, O-290, or even an O-320 since they all have the same basic architecture inside. I will also note that the converted G effectively becomes an uncertified D, not a D2; the D2 has hydraulic lifters and a hydraulic cam. There may be some other small D vs D2 differences, but they are beyond the scope of this article; ditto several notable differences between the O-290 and an O-320. A quick search on the interwebs will find a number of forums, articles, and even Lycoming documents detailing the various engine architectures, differences, and similarities for some fun reading.
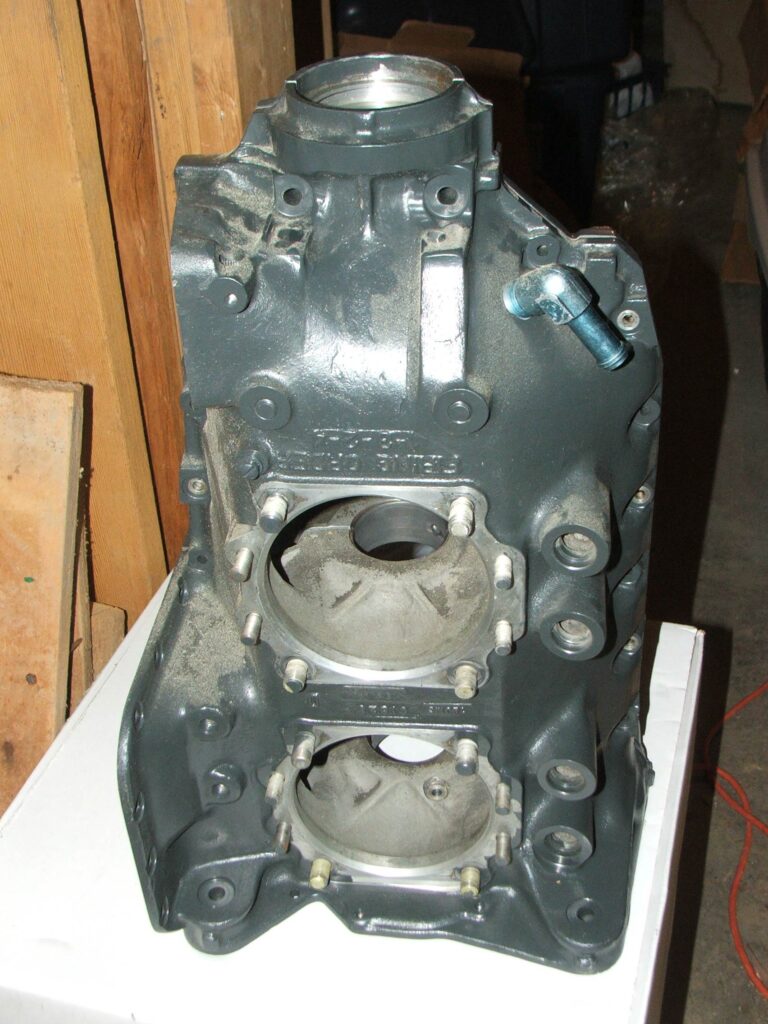
As the G engines began to be snapped up and put into non-GPU use, there began to be enough people – including A&P mechanics, rebuild shops, and homebuilders – wondering about D vs G parts to the point where in 1964 Lycoming issued Service Letter No. L156 detailing O-290G vs O-290D parts commonality so that certain G-specific parts were not making their way into certified O-290 engines. Fast forward 30+ years and the T-18 project that I purchased came with a disassembled O-290G that had been converted to a flight configuration and was awaiting re-assembly. Flight configuration means that the flange at the front of the case (so it could attach to the start cart) has been removed; no joy in finding any good photos with the flange still on, so use your imagination. Fast forward another ten years and parts of this engine disappeared in a divorce, resulting in my interest in another G engine that had been rebuilt and was (supposedly) good to go. The significance of that last qualifier will be evident later.
On the second engine, a boroscope inspection showed no cam or tappet corrosion, and the cylinders all looked good inside, so the rebuilt G was purchased. Why not go with an O-320? Because the replacement O-290G was at a good price, and I still had enough parts from the initial project engine to make it very cost effective vs purchasing and rebuilding an O-320. In theory, the money saved can then go towards a lightweight starter, lightweight battery, and electronic cockpit for more weight savings to benefit takeoff and climb performance with the lower horsepower of the G-motor. From my reading, the O-290 gives up little in cruise speed vs the O-320, so the cost benefits of having an engine and parts in hand won out. That said, the increasing scarcity and cost of O-290 parts means that rebuilding an O-320 will likely be more cost effective for most builders. For all I know, mine may be one of the last G conversion builds that doesn’t end up on the back of an airboat.
On the purchased G engine, the initial thought was a “trust, but verify” approach and that the purchased engine was mostly ready to go, but some very sage advice from a fellow T-18 builder changed that. Bob’s comment was that he had seen a first flight using an engine that had been in storage for a lengthy period of time, with stuck rings leading to an off-airport landing, a prop strike, and the need for a subsequent rebuild anyway. Based on that tale of woe, I decided to do a more thorough inspection and rebuild.
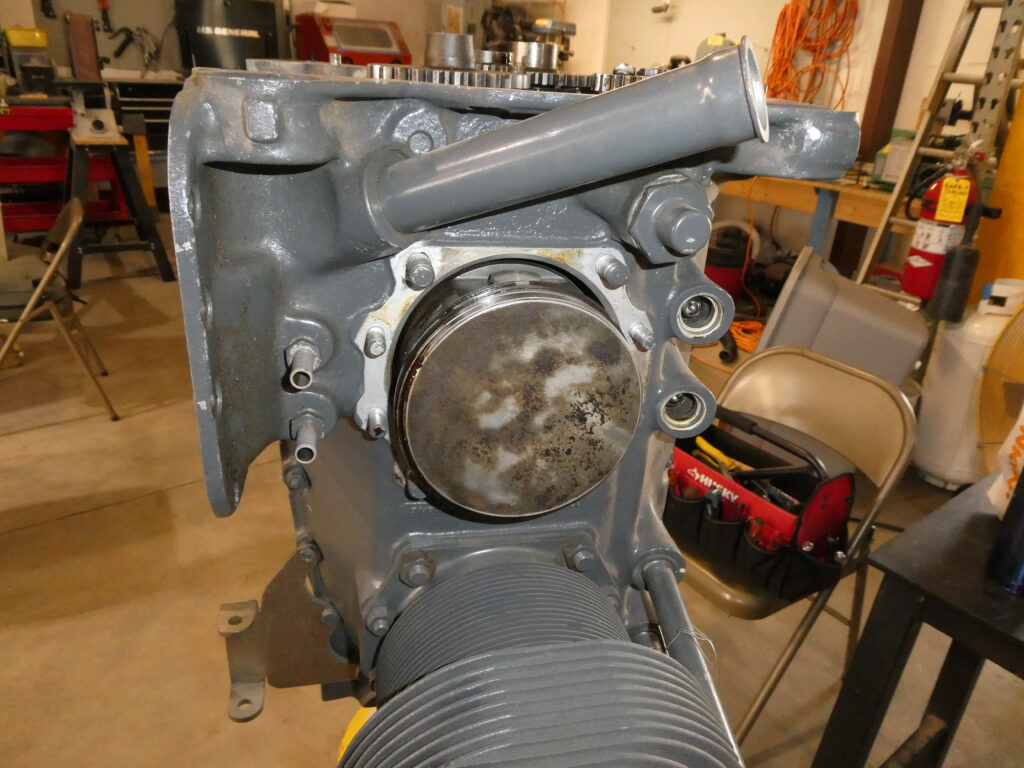
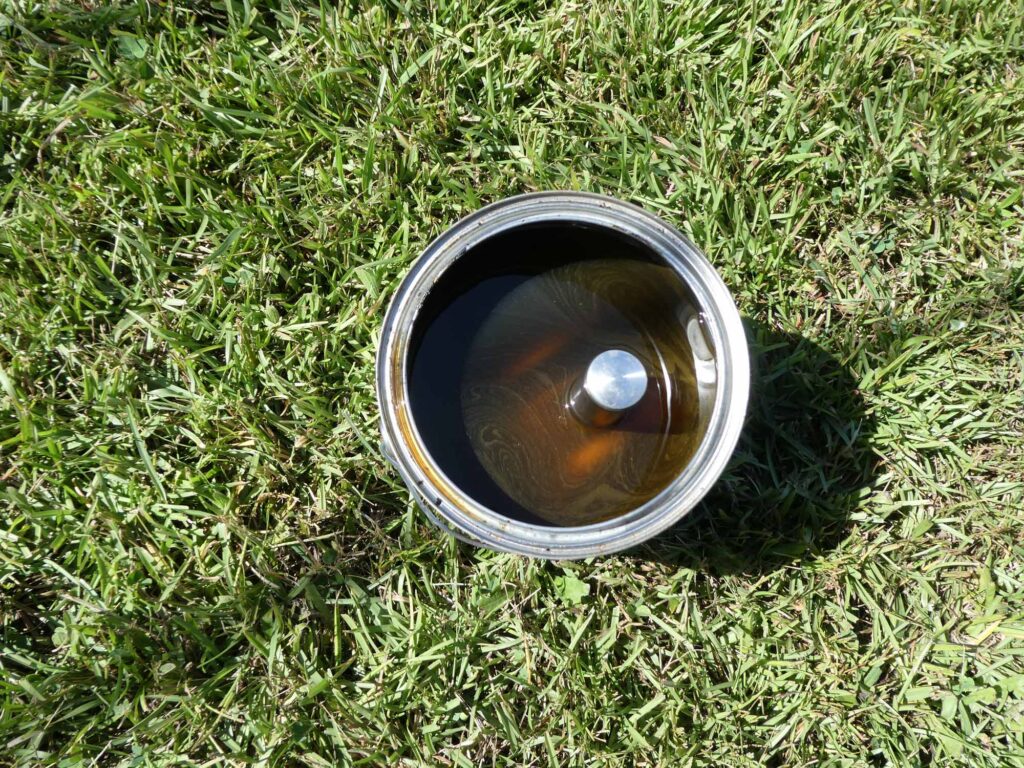
We (myself and the kids working with me at the EAA chapter Youth Build sessions) were initially thinking good things as the insides looked clean and there was plenty of assembly lube still in evidence. Then we pulled the jugs and discovered that during storage the assembly lube had puddled at the lowest points in the cylinders and “sludge-welded” the rings to the pistons. Not good. I pulled out the gallon cans of carb cleaner and dropped the pistons in until the sludge was dissolved and the rings were rattling around loosely. Since these rings have become nearly unobtainable (reference prior comments about the practicality of O-290 conversions), I left them in place and used a sharpened dowel to remove any remaining sludge in the ring grooves, not that there was much, as the carb cleaner really works.
And if new rings had been necessary? There are Mack E6 diesel engine piston rings that are the correct size and apparently work (and for a very small fraction of the price of official Lycoming rings), but the ones on my pistons looked to be in decent shape, so they were used. As for the diesel rings, a fellow EAA-er used the Mack rings and reports no issues after installing them on one cylinder of his O-290D. O-435 rings and pistons are also supposed to be usable in the O-290 as they are the same diameter bore, which you will know once you’ve done your reading assignment on Lycoming engine architectures. If you haven’t done that already, I will leave that as an exercise for the reader, to paraphrase my college profs.
At this point, do we need to “split the suitcase” (pull the case apart), or are we good to put the cylinders back on and move forward? I was thinking the latter until looking more closely inside.
Me: “Wait, what is this that I am seeing inside the case, especially around the part line?
Permatex? Surely that isn’t Permatex.
Seriously? It is Permatex! Gads.“
Yes, grey Permatex Form-a-gasket, with significant amounts squeezed into the inside of the engine!
Some of it was still gooey, but the rest of it had hardened and was crumbling into large, brittle chunks. In neither case did I want it going into the sump and the oil, never mind that it wasn’t the correct case sealant. Decision made easy: split the suitcase it is. See my article in a prior issue of this fine magazine on the inexpensive plates we fabricated to separate the case, necessitated due to the case halves being firmly bonded together by the Permatex. Besides the wrong sealant, there was no silk thread, either.
Happily, further teardown did not reveal anything terribly concerning. Next came the question of whether or not to leave the rods on the crank and use it as-is, or to use a D crank that I had with its thicker prop flange. One reason to leave things as-is was the cost of replacing all the rod bolts and nuts. On the other hand, did they get reused in the earlier rebuild, as these are single-use items? I decided that I didn’t want to have a rod failure and then be thinking that I wished I had spent a few hundred dollars more for new the rod bolts, so off to Aircraft Spruce I went.
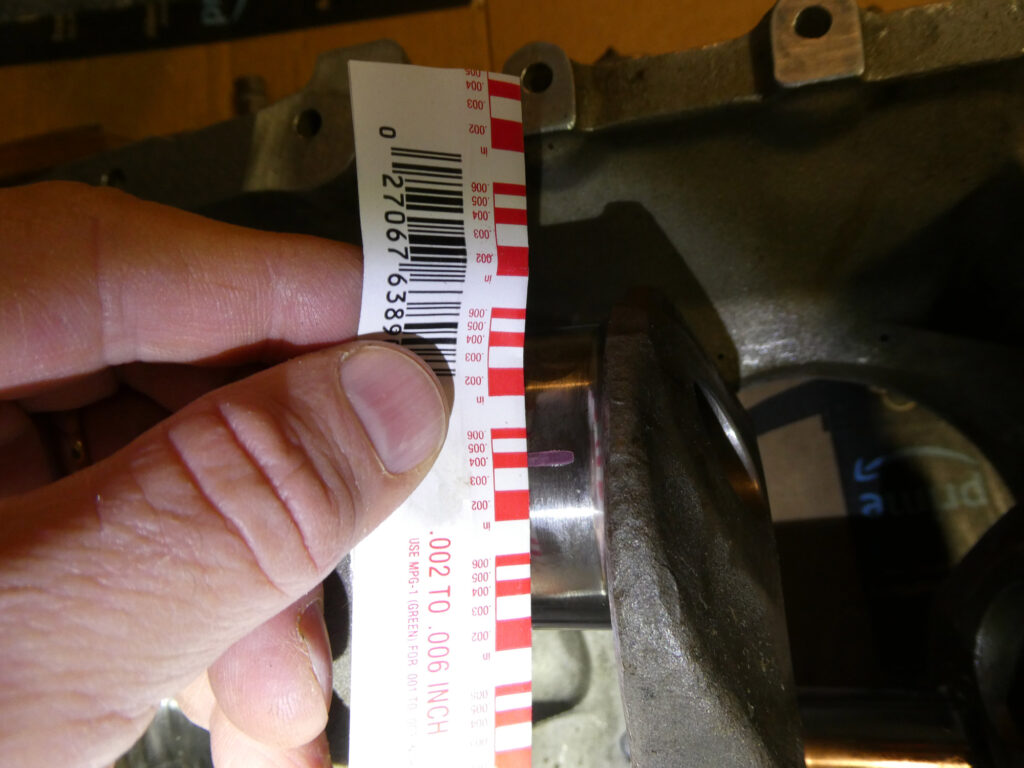
The rod and crank bearings all looked as if they were unused, and Plastigauge showed them to be well within tolerances. Wondering about the viability of using the D crank, I checked the bearings with the D crank using the Plastigauge and found them all to be on the outer edge of tolerances, right around 0.004 inch clearance (see Figure 5). I then compared the two cranks and found the flight crank journals to all be about 0.003 inch smaller than on the G crank per my micrometer. This seemed to be a curiously specific and consistent amount. A little research revealed that 0.003 inch and 0.006 inch are the first two crank bearing rework values, so all I needed in order to use the flight crank were bearing shells to match the 0.003 inch diameter undersized bearing surfaces. For what it is worth, there are also 0.010 inch undersized bearings as the third and final amount that you can turn down a journal. After that, you need a new crank.
Online shopping showed that the bearing shell costs are pricey, and that’s per half! A little checking on eBay found a set of NOS crank bearings for a fraction of the price of new ones. Score! No luck for a repeat on the rod bearings, but fortunately they are less expensive than the crank bearings. Ebay was also a good source for miscellaneous other needed parts such as the sump plug, lifting strap, and the gear on the end of the crank. The caveat for using eBay is to do your homework so that you know exactly what you need and what is and is not acceptable.
What is being glossed over here is hours of online research (usually while sporting events are on the TV) about part numbers and acceptable replacements and substitutions. For instance, even with vintage overhaul manuals and parts catalogs from the early 1970’s, it was difficult to track down the numbers for the existing rod bolts with the castellated nuts and cotter pins. As nearly as I can tell, they were the original G parts from 1952. Yeah, probably good to replace them. Compared to photos of more recent engines I’ve seen, my rods look rough and prehistoric compared to the smooth-surfaced rods that are currently being offered. That said, the rods I have should work, but with new rod bolts and nuts.


Andrew-I have an O-290G sitting on a stand in my hangar that came off a home built 1967 Pitts special. I will probably never use it for anything, so if you are contacted by interested parties, mine is available!