 What do you do when the construction manual says “for this task you will need a helper,” but there is no one around who can help for a couple of hours? You make a jig, of course.
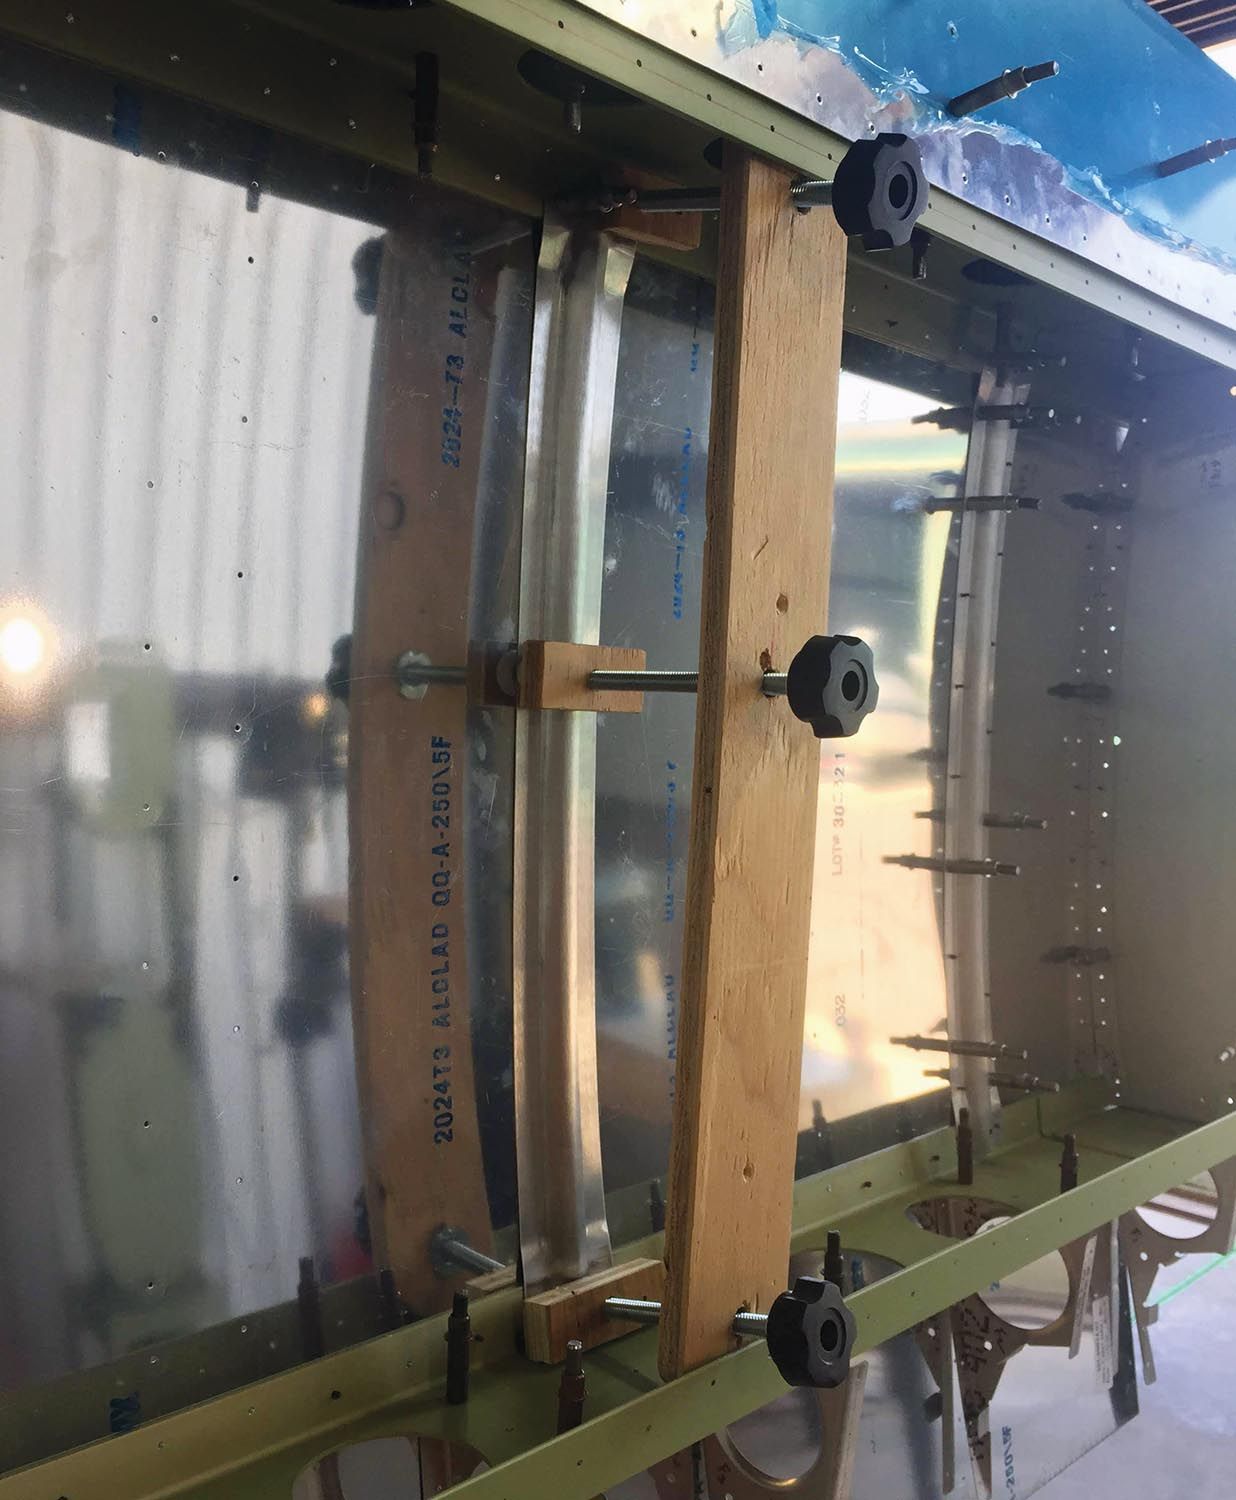
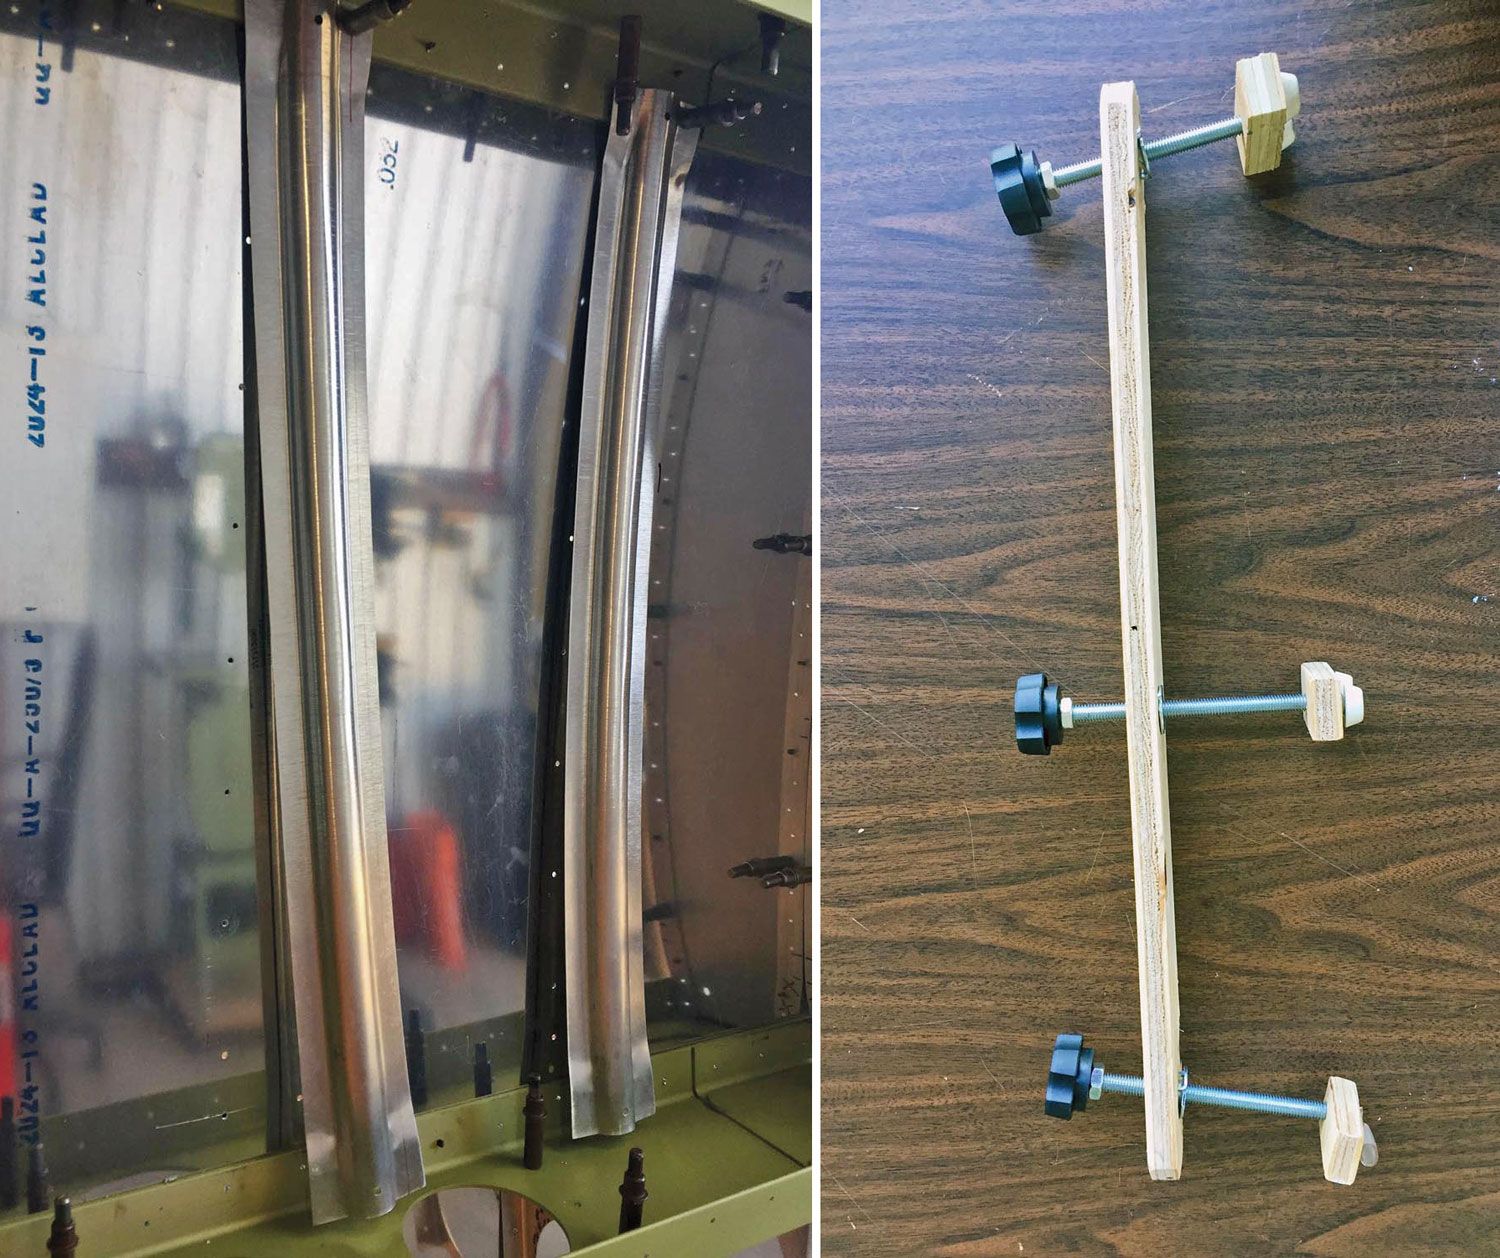
The GlaStar wing has a mix of ribs and hat sections—stiffeners so named because their profile looks like a hat—and they need to be placed and held tightly against the wing skin for drilling. The wing skin has to be in place for this, so there is no way to reach around and hold the stiffener in position on one side while drilling through the skin and the stiffener from the other.
That’s where a jig comes in handy. Most jigs are specific to a task, but their purpose is to hold the workpiece in place or to guide a tool operating on it. The specific purpose of my jig is to press the stiffener against the wing skin freeing me to walk around the other side and drill holes and insert Clecoes, thus obviating the need for a human helper. It is quick and easy to make, and it only needs to last for the duration of the assembly—then its parts can be repurposed for something else.
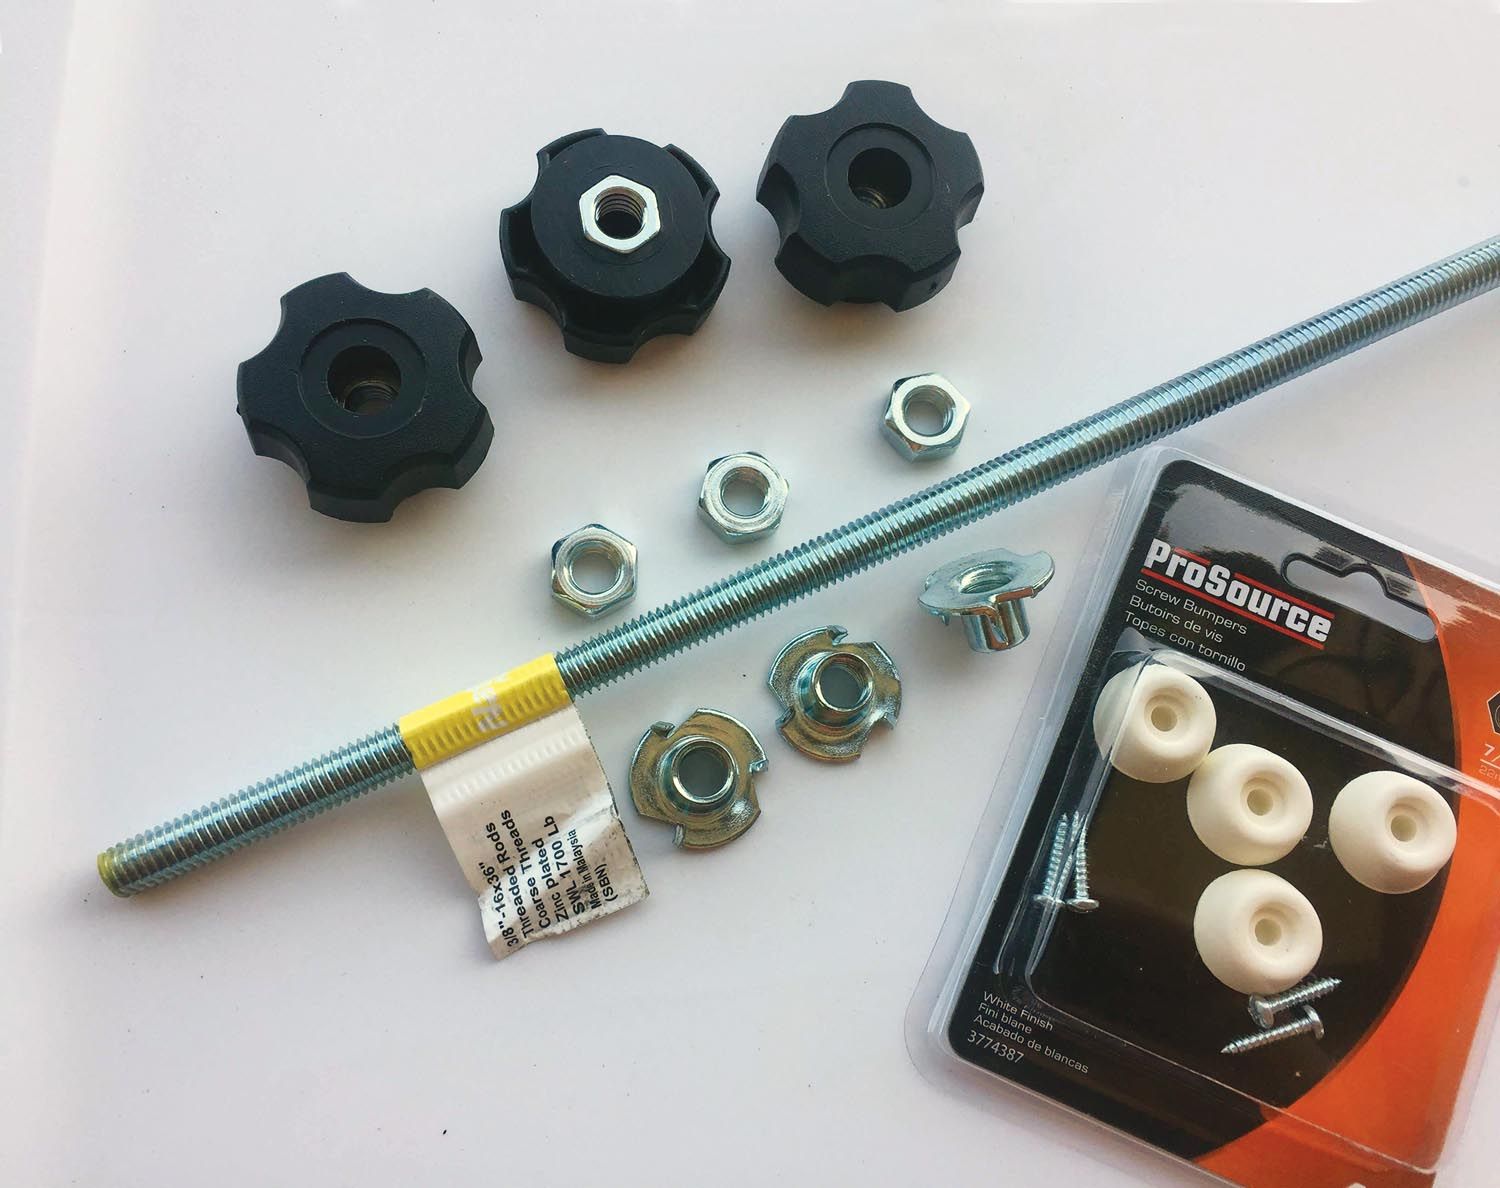
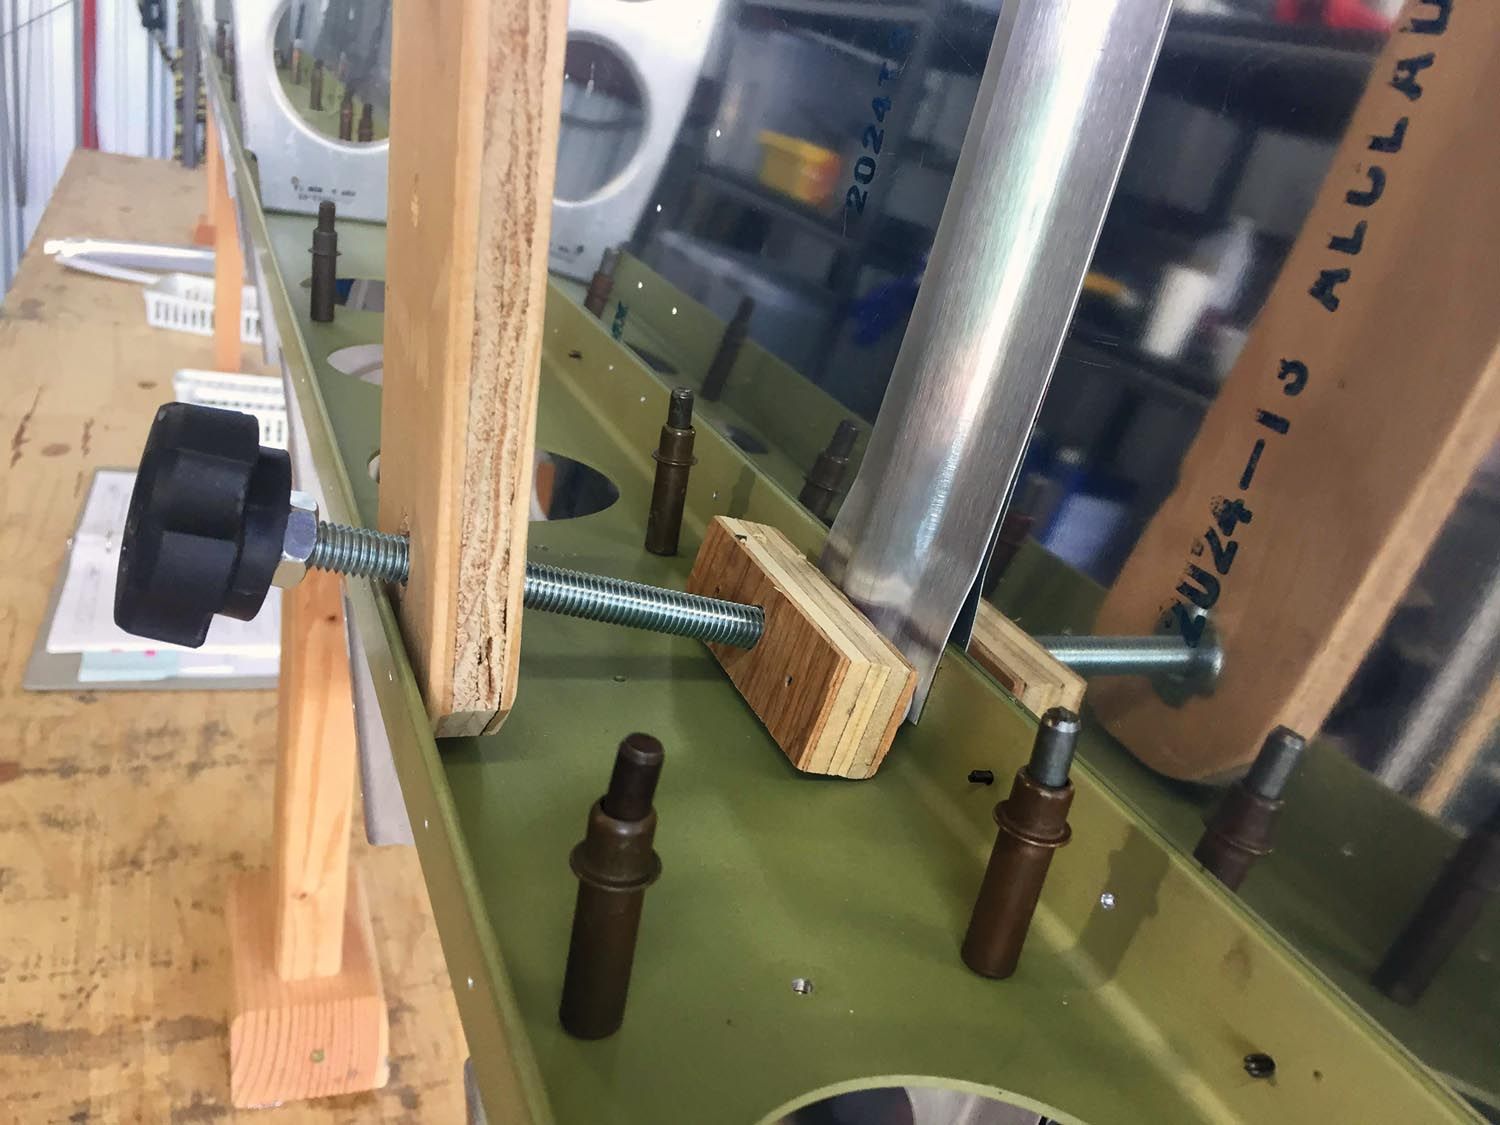
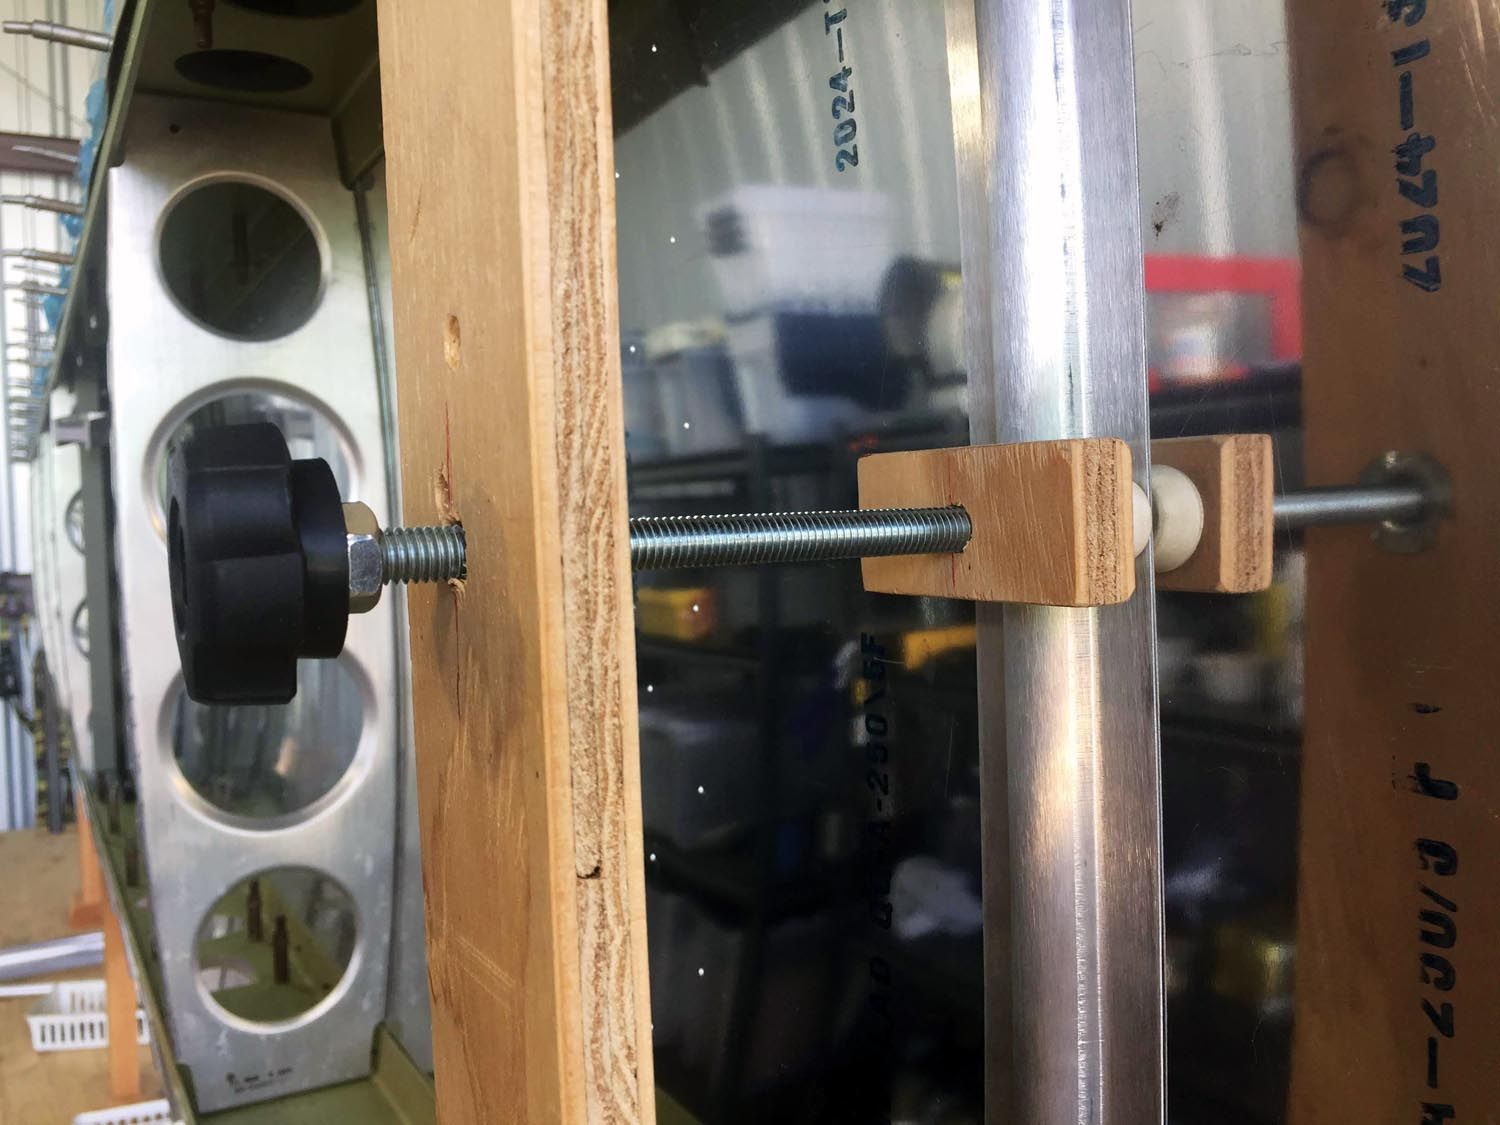
To push against the flat part of the stiffener I made feet with rubber bumpers which are screwed into a small piece of plywood. The opposite side has a partly drilled 3/8-inch hole to receive one end of a 3/8-inch threaded rod. There is no need to capture the rod in the foot because wood fibers in the hole are sufficient to keep it attached, yet the hole is loose enough to allow rotation.
The rod passes through a T-nut installed in the larger piece of plywood that I’ve cut to fit snuggly between the wing spars. The shape of the spars keeps the plywood in place, but it also dictates that the top and bottom rods be at an angle to reach the correct spot on the stiffener, which sits below the edge of the spar.
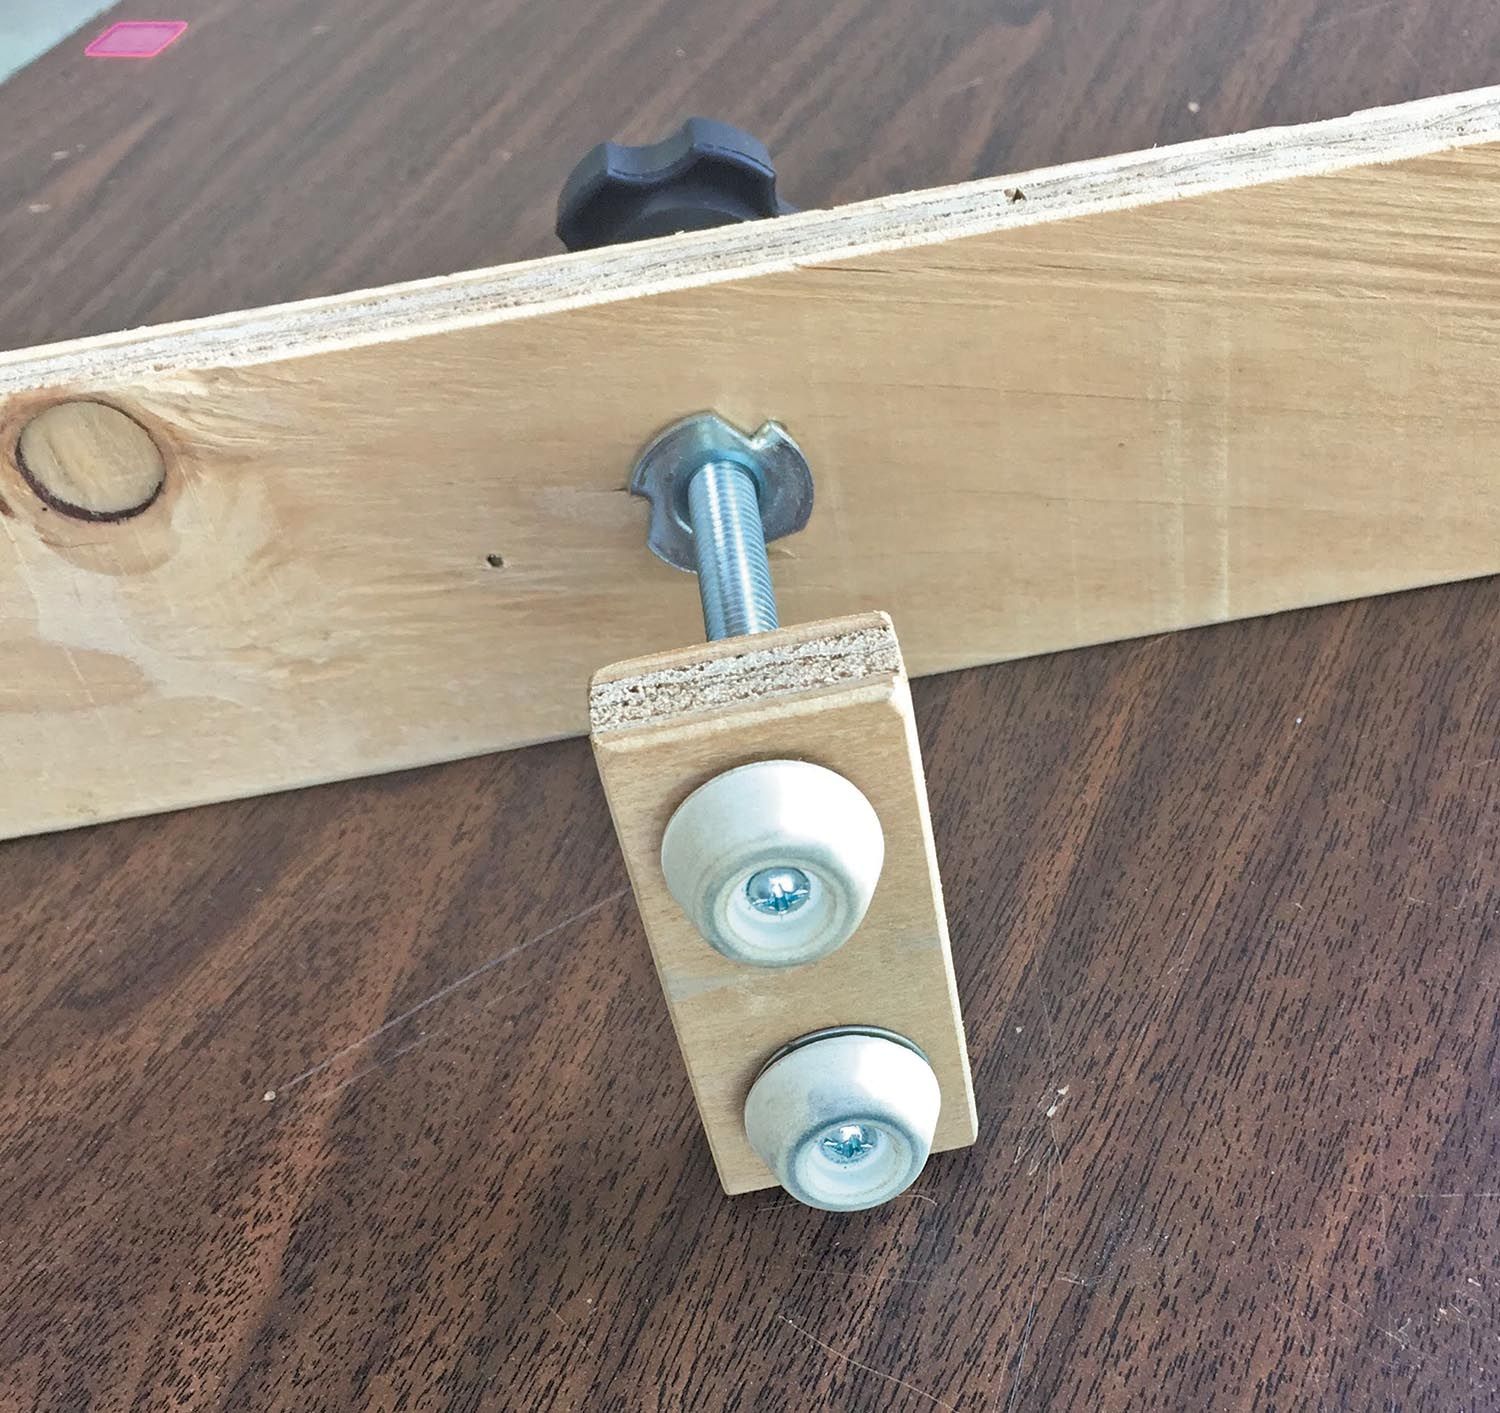
I drilled the holes for the top and bottom T-nuts at an angle, and plywood is soft enough to allow them to be inserted like this. The T-nuts are inserted on the side facing the wing so that the applied force is pushing them into the plywood. If they were on the outside, they would likely pop out.
The most expensive parts of the jig are the threaded knobs. They are held in place with a jam nut and make it easy and comfortable to turn the threaded rod.
When the hat stiffeners are done, I’ll put the jig away and probably find another use for the parts in a different jig.