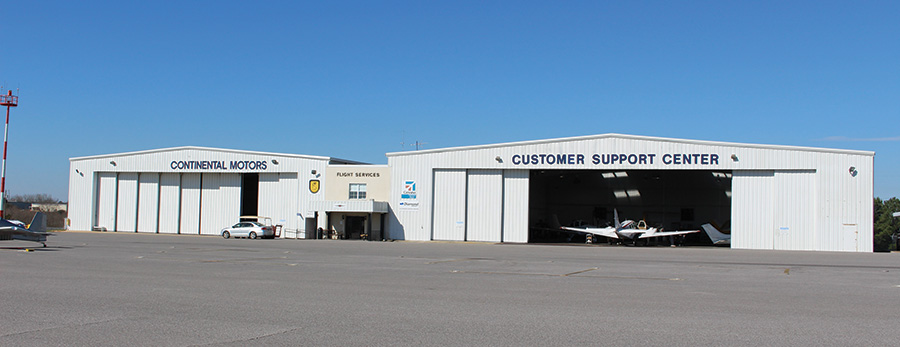
This month we’re visiting the pros at Mattituck Services in Fairhope, Alabama. The Mattituck brand was purchased by Continental Motors in late 1999, and all operations were consolidated at Continental’s Fairhope Customer Support Center in 2012. It’s a full service engine shop, FBO, and flight training facility in the land of Spanish moss and magnolias, just across Mobile Bay from Continental’s Brookley Field production plant.
As you might expect, Mattituck does plenty of Brand C work, but like the old Long Island Mattituck they also build a lot of Lycoming engines. In addition, they service the 2.0L and 4.0L Centurion diesels and distribute Centurion parts. The big news is a major expansion of the engine shop scheduled for completion later this year. All engine operations will move into a dedicated facility on the north end of the ramp, complete with a new state-of-the-art non-destructive inspection line (ultrasonic, magnetic, and Zyglo), a new engine test cell, and more.

A drain tray would make a nice addition to your engine stand.
No Oily Mess
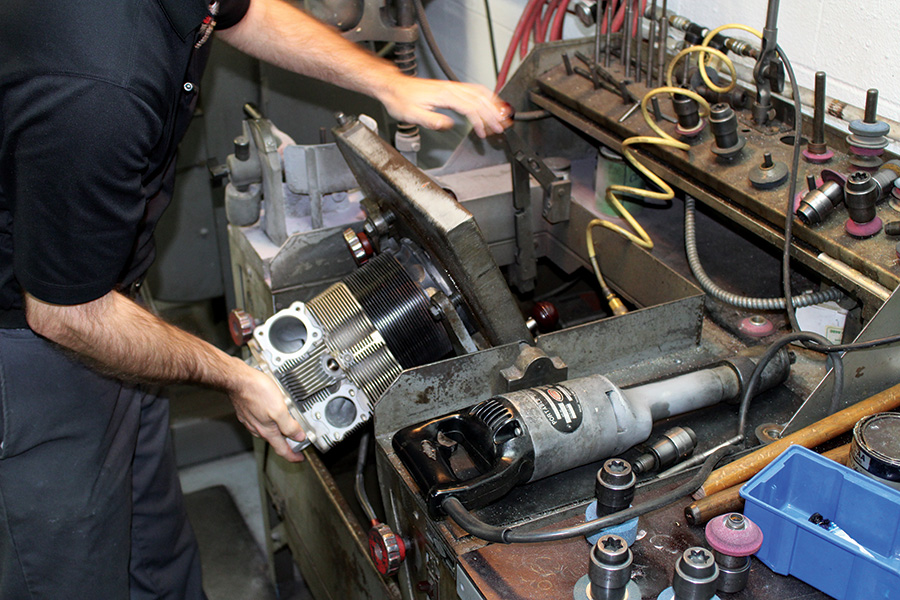
When a worn engine comes in the door, it goes straight to Michael Brady. Brady does triage; he photographs, dismantles, and documents every part, catching problems evident in a visual inspection. The teardown stands are old school, but worth noting. Most of us have one of the popular three-legged stands sold by ATS. They’re great, but dismantling an engine on one results in a lot of oil on the floor. Brady’s stands incorporate a catch tray, complete with drain tube. Engine oil, oily parts, and tools all land in the tray. Fabricating a similar addition to an ATS stand would be a nice evening project, and you can bet I’ll have one before my next teardown.
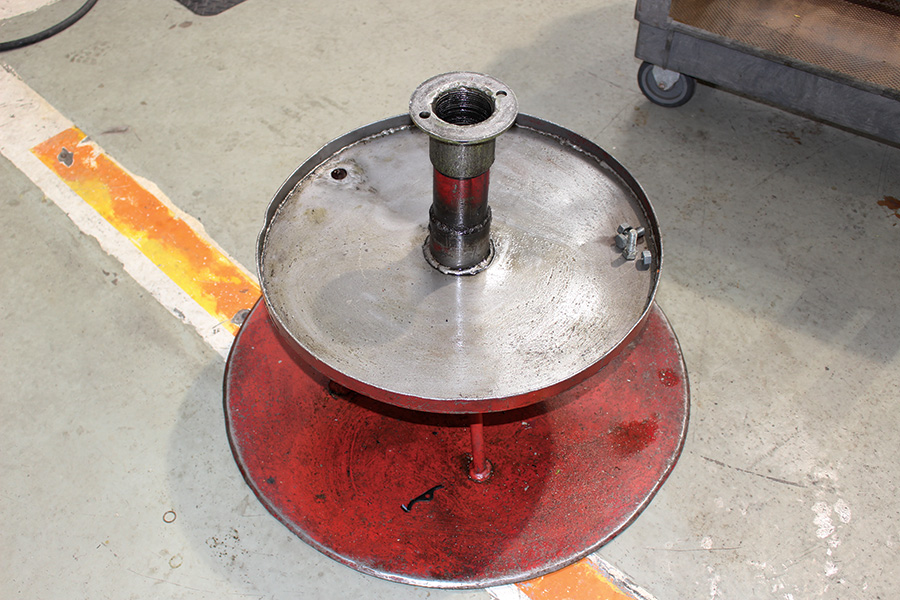
This engine stand has an oil catch tray and drain.
Painting
After careful reconditioning, most exterior surfaces will be painted. The guys at Mattituck don’t poison each other with paint overspray; it’s all done at a spray table. The operating principle is simple. A fan draws room air into the table enclosure and through a catch filter (which captures the overspray), then pushes it to an exhaust vent outside the building. A homebuilder who expects to do a lot of priming (for example) could easily do something similar with a plywood box, some filter material, a small fan, and some flex duct.

Using a spray table eliminates paint fog in the shop.
Floor Mats
The work zones in the engine build room have thick, soft rubber mats covering the concrete floor. The mats certainly improve technician comfort, but there is an additional, more subtle purpose. Inevitably someone will drop an expensive engine part, and the mats can be the difference between re-cleaning and the scrap bin. It doesn’t take many junked connecting rods to pay for a set of mats.
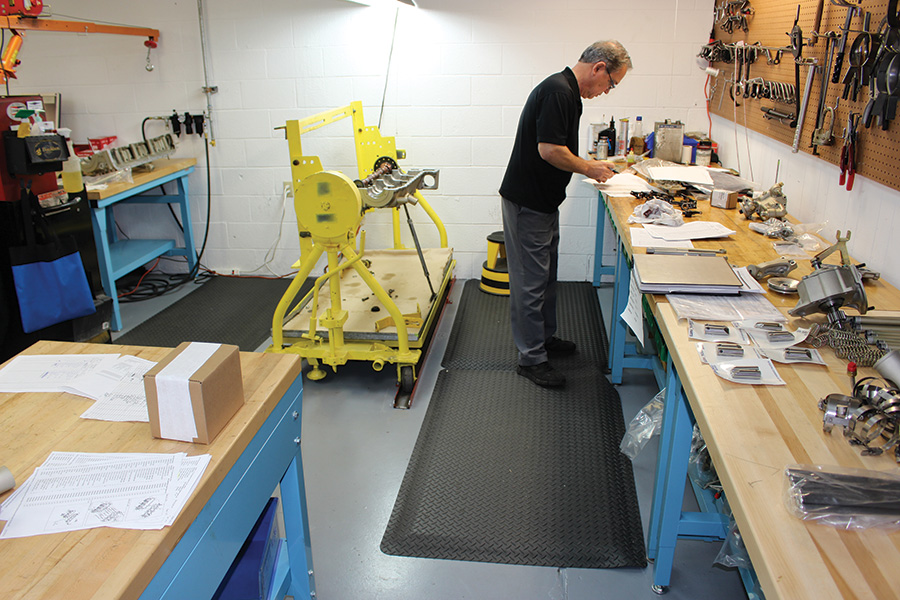
Thick rubber mats increase comfort and save expensive parts.
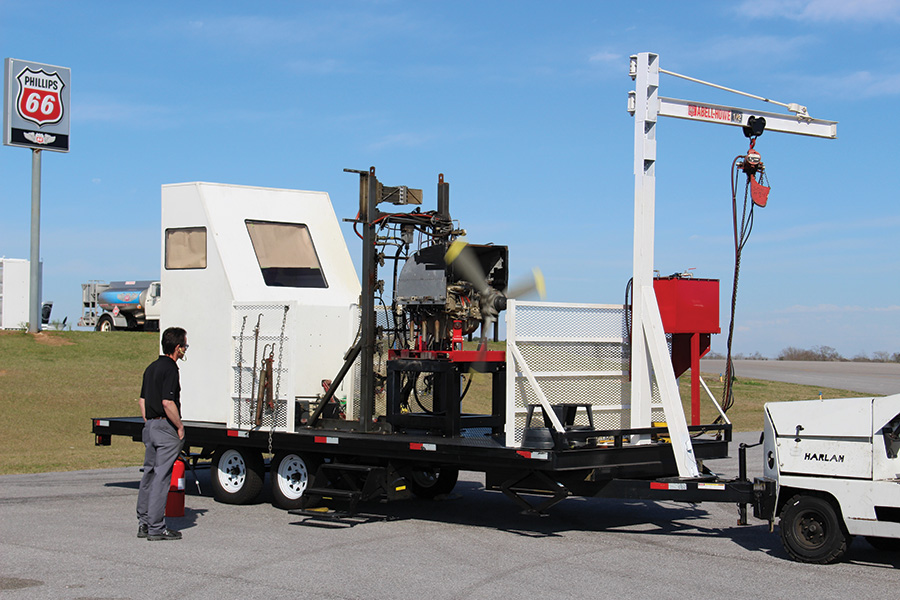
Engine Test Stand
Every finished engine must be proven on the test stand before release to a customer. The current Mattituck stand is a heavy-duty trailer with onboard fuel, electrical, oil cooling, and instrumentation. The central tower anchors a wide variety of quick-change engine mounts (bed type, Dynafocal, etc.), so any kind of engine can be attached. Garrett Morrow is responsible for its operation, with help from Eddie Baggett, Mattituck’s engine shop inspector.
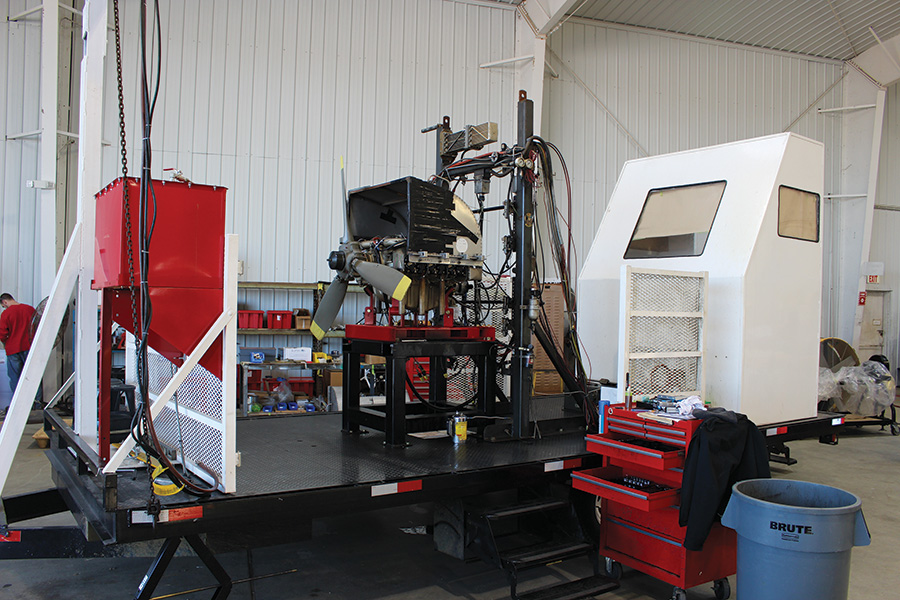
Preparing for a run. Yes, sharp-eyed reader, it’s a left-hand engine.
Engine Pre-Oiler
Engines are pre-oiled before the first start. Mattituck uses a pneumatic oiler built from an off-the-shelf certified stainless steel pressure vessel. Sourced from Alloy Products Corp. of Waukesha, Wis. (about $250 at www.alloyproductscorp.com), the can is the best I’ve ever seen, with a large fill opening, a built-in dip tube, and three additional ports for a pressure gauge, a Schrader valve, and a pressure relief valve. Just run a hose from the dip tube port to an engine oil gallery, dump seven quarts in the can, and pressurize it with shop air.
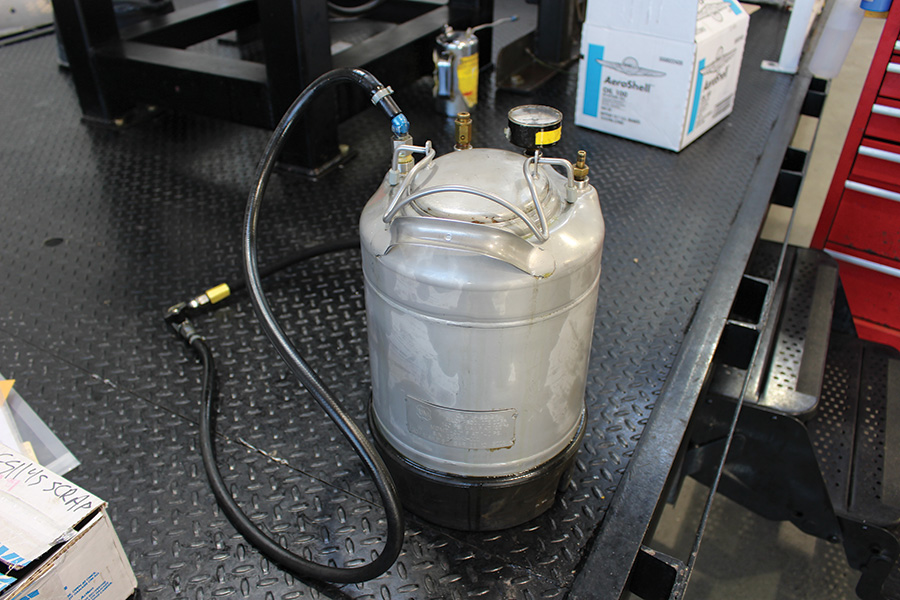
A safe and simple engine pre-oiler.
What a Blast
After teardown some parts must be stripped of old paint and corrosion. Glass beads and sand are fine for shop equipment, but they’re never used on engine parts. Soda blasting is used to clean aluminum, while steel parts are blasted with plastic beads. The cabinets are equipped with lazy-susan turntables for easy handling of larger parts, another nice evening project for the home shop.
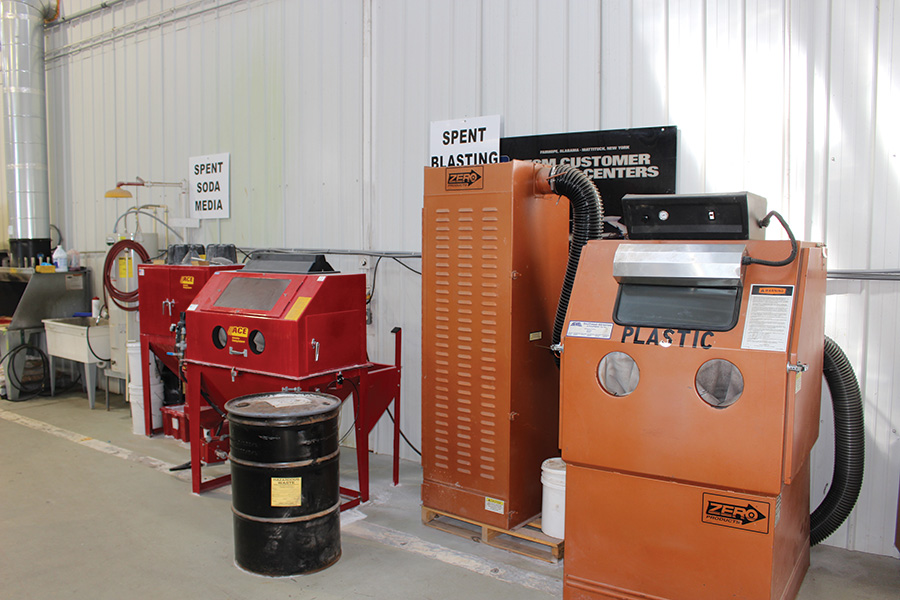
Dedicated blast cabinets for each blasting media.
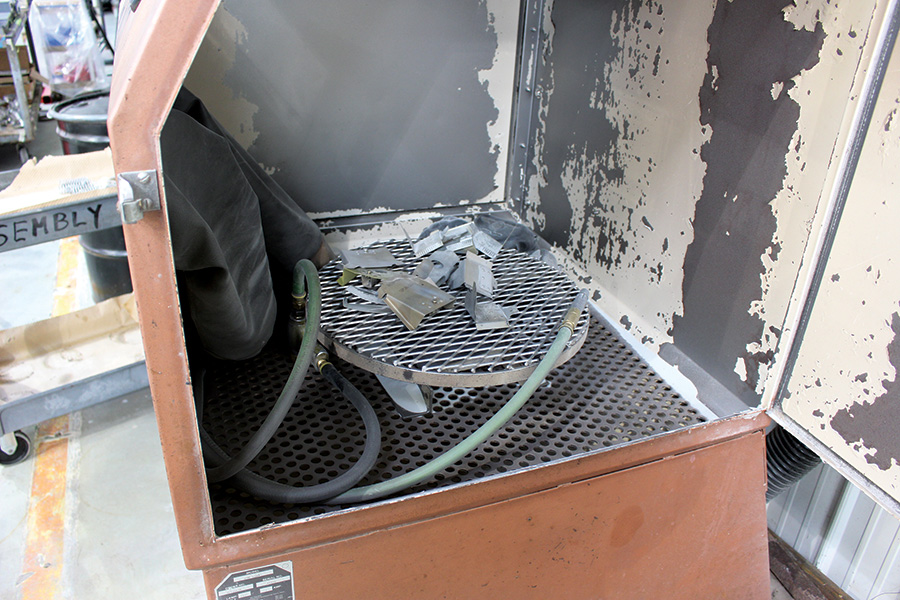
A turntable puts parts within easy reach, without lifting.
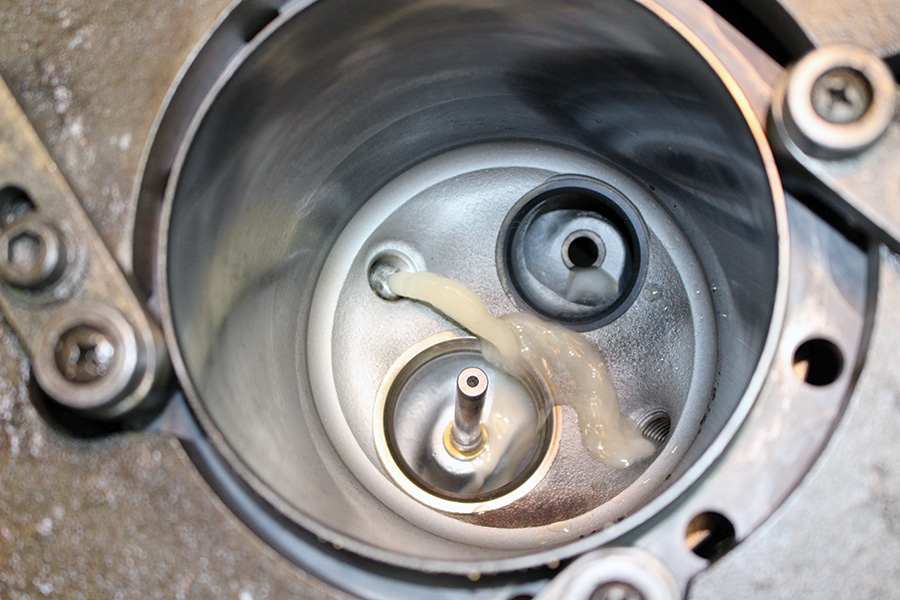
Valve Seat Grinding and Lapping
Every pilot knows cylinder health is the key to engine performance. Most understand leakdown checks and borescope inspections, yet it’s safe to say few know how a valve is actually seated and sealed. Patrick Black runs the Mattituck cylinder shop, and he was kind enough to illustrate traditional valve seat grinding and lapping.
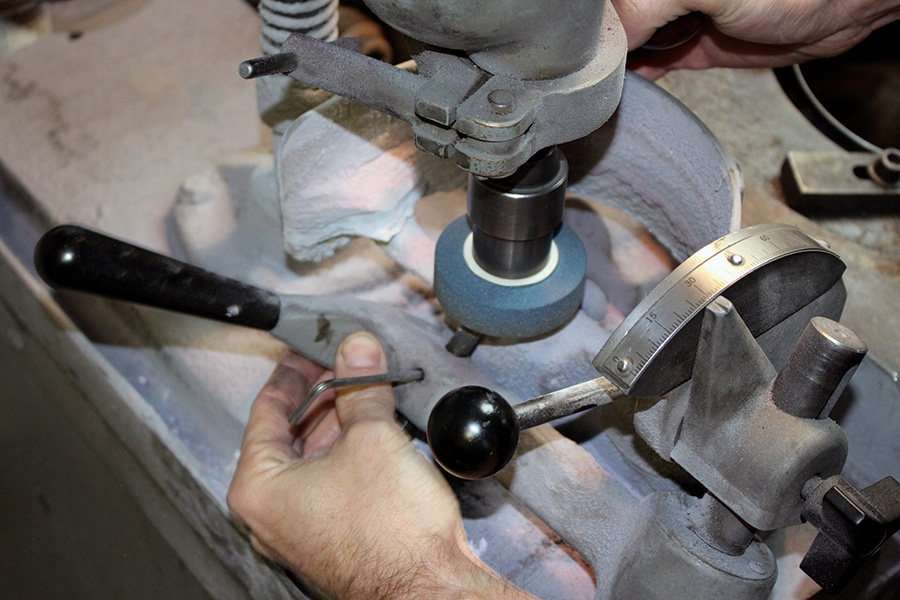
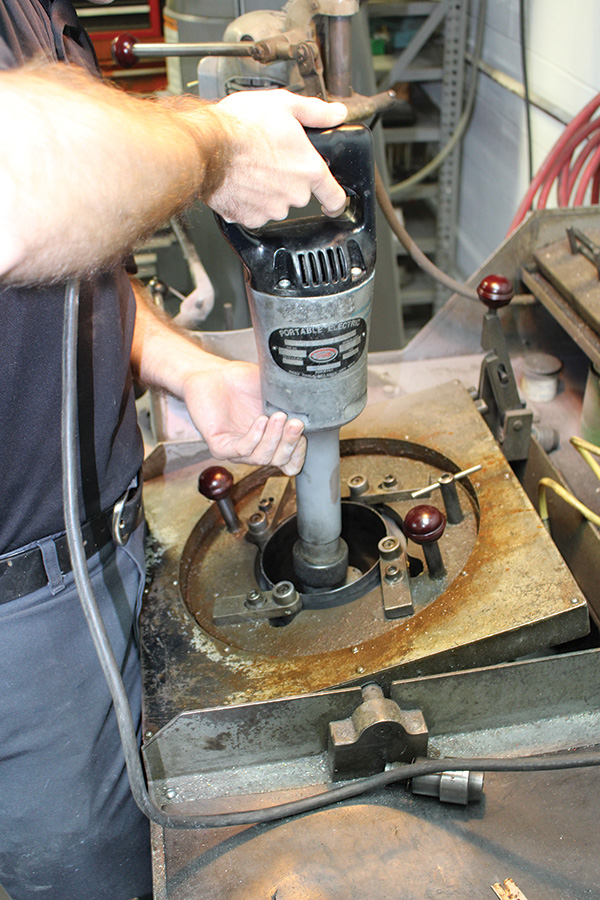
It all starts with a properly prepared stone. The desired seat angle is set on the scale at right. The stone, mounted on a mandrel, is spun with an electric motor. A diamond-tipped stylus on a rigid, rotating arm (here operated by Black’s left hand) is stroked across the stone.

The diamond stylus cuts a perfectly smooth, conical face on the stone. See the hole in the center of the mandrel? The stone and mandrel spin on a pilot shaft, both on the stone-cutting fixture and in the valve port.
Black clamps a cylinder to the grinding table fixture, and flips it upside down.
An expanding collet pilot shaft is inserted into the valve guide. It’s seen here in the larger intake port. A nozzle sends liquid coolant into the combustion chamber through a spark plug hole.

The prepared stone is dropped over the pilot shaft, and Black is ready to grind. The hexagonal recess in the mandrel is the drive socket for the matching tip on the grinder motor.
Black inserts the tip of the motor into the hex and spins the stone for just a moment. He is careful to avoid the application of radial pressure, instead allowing the pilot shaft to guide the work.
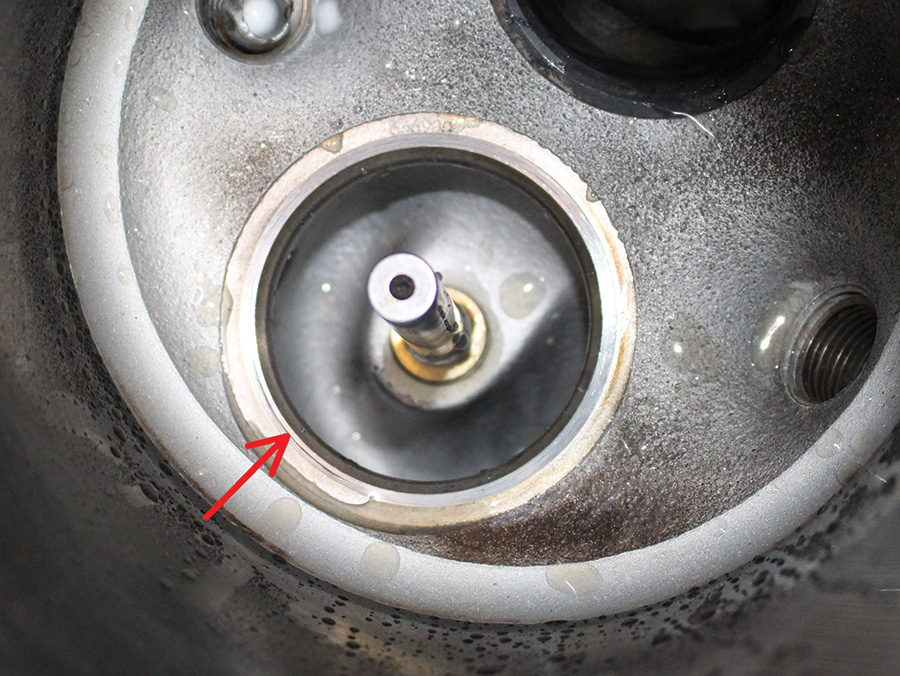
The stone is removed and the seat is inspected. The goal is to remove as little material as possible. Too much cutting sinks the valve deeper into the port; it will flow poorly, and may require a shorter pushrod. This one does need a bit more grinding; the width of the cut sealing surface is too narrow where indicated. The grinding steps will be repeated as necessary to form the seal surface, as well as the desired angles adjacent to the seal cut.
With all grinding complete, it’s time to lap the seat and valve for a perfect match. Lapping compound (a mixture of abrasive and grease) is spread on the valve before it is dropped into the valve guide.
The traditional lapping tool is a small rubber suction cup on the end of a wooden dowel. Black rolls the dowel between his palms, rotating about 90 degrees each way. Every ten seconds or so he will lift the valve off the seat, rotate it a few degrees, drop it, and resume the palm shuffle.

There are air-powered and manual “eggbeater” tools available to oscillate the valve, but Black prefers to do it manually. If the grinding steps were accurate, the valve and seat should not require much lapping.
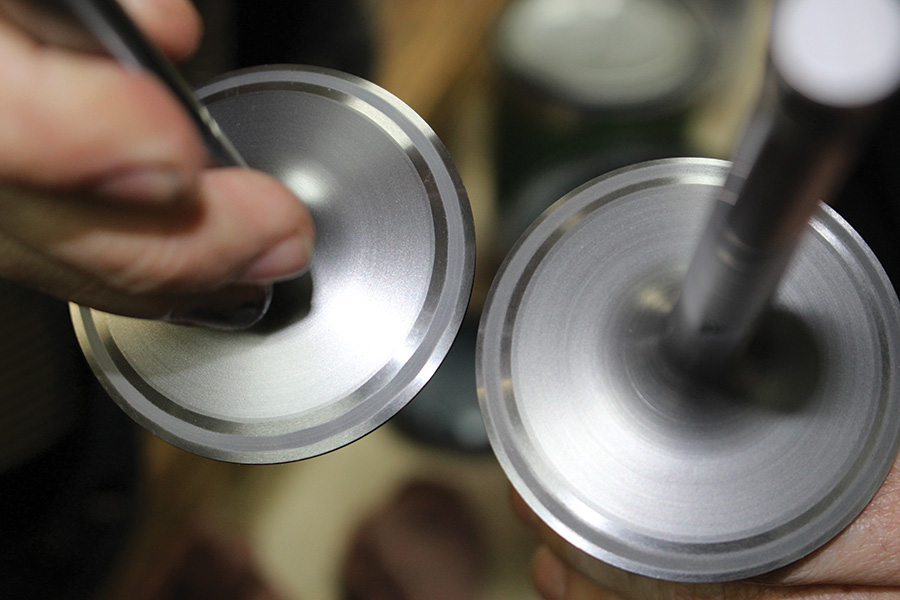
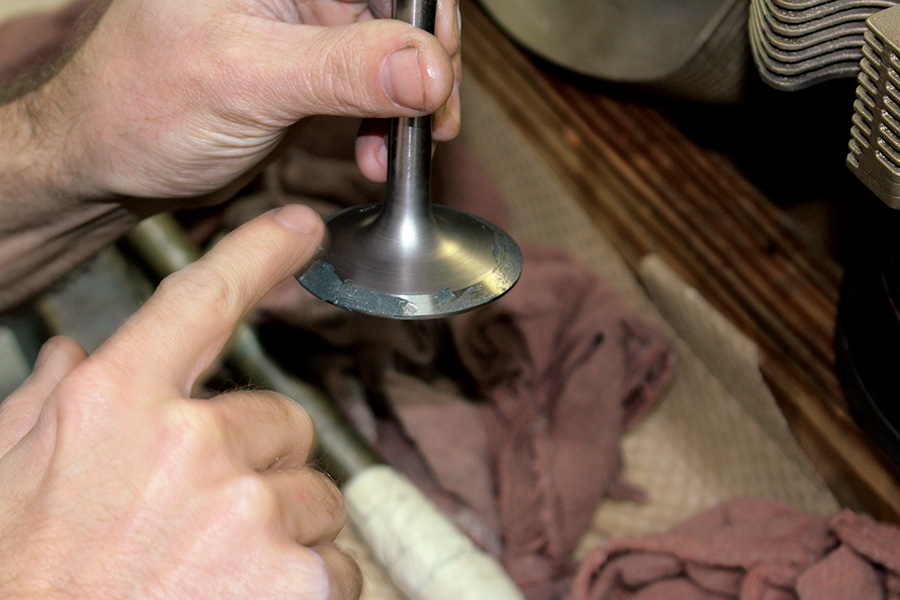
Look close at the dull stripe centered on the face of these two valves. The valve on the left is perfectly matched to its seat, as shown by the consistent width and crisp definition of the seating area. The valve on the right needs a bit more lapping; see the fuzzy edges and inconsistent surface coloration of the seating stripe?
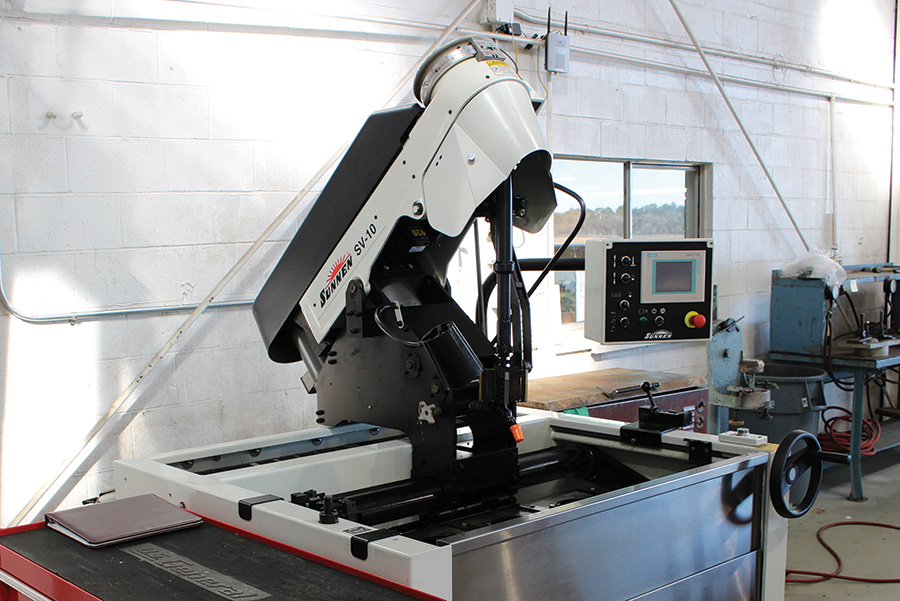
The last step is to clamp the cylinder, complete with valves and plugs, into a simple air test fixture that closes off the bottom of the cylinder. Compressed air is introduced, and valve sealing is checked with a bubble solution. If they pass, the next step is the Sunnen SV-10 cylinder hone, followed by a series of cleaning operations.
You can lap at home if you have a valve that needs minor attention. Check it by bolting a steel plate and rubber gasket across the cylinder base, and applying compressed air with your leakdown tester. A careful mechanic doing a top overhaul might check brand-new cylinders this way, just to be sure of the valve work before installation.
Work safe!
Do you have a fire extinguisher in your hangar? You should, at least for your first engine start. Baggett and Morrow do multiple checks for leaks, yet they still stand fire guard for each new run. Pros know things can go wrong, and they always have a plan.
End of the process; a new engine comes alive while Eddie Baggett stands fire guard.
Photos: Dan Horton
Professionals, would you like to show KITPLANES® readers the clever things you do in your shop? Please email us at [email protected].


I like the idea of having an oil catch tray on your engine stand. You could avoid so much clean up and have more time to fix more parts. Even the slightest amount of increase in time will help any business flourish.