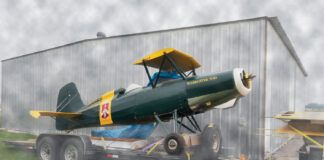
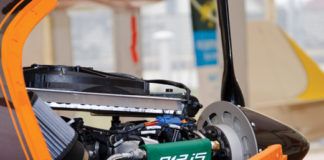
When the day finally arrived to overhaul the Continental C85-12 engine that powered my homebuilt, I was determined to rebuild an engine free of oil leaks. Now these little engines are a marvel, but throughout 40-plus years of flying I have always struggled with annoying oil leaks, especially those seeping from the swaged pushrod tubes and rubber pushrod seals. This is a common complaint among cam-at-the-bottom Continental engine owners. Worse, those knuckle-busting ring hose clamps that are supposed to provide the seal leave much to be desired.
Many months before I initiated overhaul on my engine I discovered the Real Gaskets Continental Pushrod Tube Modification kit that replaces the OEM assembly with a unique and effective spring tension method that does away with the swaged tube, assorted rubber seals and ring hose clamps. I was not previously aware of the modification because Real Gaskets does not promote the product, and further research revealed that the aviation press, aviation suppliers, even repair facilities are mostly unaware that the conversion exists.
How It Happens
Why do these seals leak in the first place? Its actually simple: The considerable heat generated under the cowling, especially at the lower end of the pushrod tube, hardens the rubber seals. Hard seals leak. If you want to have no leaks, you replace the seals every few years. Doing so requires that you remove the cylinders as well as disturbing the pushrod tube where it is swaged into the cylinder. Eventually, the swaged end fits more loosely into the cylinder, causing leaks at the outboard end. The swage itself makes the seal; no gaskets here.
Real Gaskets modification replaces the entire pushrod shroud assembly. The RG-200 pushrod tube is located by a new adaptor plate at the lifter cover (inboard) end. Tension is supplied by an external spring. Silicone seals at both ends of the shroud make the assembly oil tight. Whats more, once installed, its possible to change the seals without removing the cylinder, and each shroud can be serviced independently.
This setup is similar to those used in the later Continentals, and is available for the four- and six-cylinder engines that use this cylinder design. (That would be the A-66, C-75, C-85, C-90, C-125, C-145, O-200, O-300, and GO-300.) It costs $76.50 per cylinder. The conversion kit comes with two pushrod tube assemblies, adaptor sleeves, compression springs and attendant seals, washers, one lifter cover gasket and the Supplemental Type Certificate. The company recommended that I buy the spring compression tool (p/n VSC-1, $24.95), which I did. When the installation got underway, I wondered how these things could be installed without this accessory and a required companion that make a quick, simplified operation.
The Real Gaskets kit seemed like such a great idea that I wanted to know more about the origins of the modification. I had already spoken to the holder of the STC, Harold Carter, at length before I ordered the kit, but we hadn’t talked about the kits background. Sadly, before I could call again and ask, hed passed away. Carters son, Chris, now runs the business, but he is not able to provide historical data or who originally designed and engineered the modification. Chris referred me to a Continental engineer he thought might have been involved and who he thought introduced it to his father, but that line of inquiry didn’t get far. After months of chasing down one dead-end street after another, I finally realized that the only history I would obtain might surface after the story was published. [Submit what you know to us at [email protected].]
Putting It Together
While there are complete assembly instructions with the kit, Ill cover my procedure, adding a few suggestions that might prep the operation and acquaint you with it.
Youll definitely need an appropriate set of cylinder base nut wrenches and a fresh set of cylinder base nuts (pal nuts are no longer used). Of course, the simplest installation is if the engine is resting on the stand, but installation is just as easily accomplished with the engine attached to the airplane. If thats your choice, I would suggest cleaning the entire engine with a good, approved cleaning agent. Then remove the spark plugs, intake elbows and intake and exhaust tubes, exhaust stacks and inner-cylinder baffling.
There is no need to remove cylinder head covers, and leaving them attached facilitates handling. Removal is eased by first disassembling the fuel intake elbows (and induction tubes) before attempting to remove the exhaust stacks. Important: Mark each cylinder for reassembly to its right place in the case and to the connecting rod and wrist pin.
If your cylinders are destined for rebuild-as were mine-leave the pushrod tubes in place for removal at the repair facility. However, if you’re installing the modification to serviceable cylinders, ensure that the piston in each cylinder is at the highest part of the stroke to prevent the rings from being displaced during removal. Its always a good bet to have a friend assist when removing cylinders and, just in case, have a ring compressor on hand in the event that a ring or two is displaced from the piston.
As the cylinder is backed away from the case, ease it to just above the wrist pin. Have that extra set of hands
gently tap out each wrist pin with a wood dowel, but only enough to separate it from the rod. Then ease the wrist pin back into the piston and stuff the cylinder with heavy cloth to hold the pistons in place. Set the cylinder aside, case side up.
Once all cylinders are on the bench, remove the stock pushrod tubes. The tubes are swaged in place, and if they’re really tight, care and ease during removal is important to prevent damage to the cylinder hole. With the cylinder head covers removed, use a rubber mallet and wood dowel sized to the diameter of the swaged pushrod tube, and gently tap each tube through the top of the cylinder to loosen it, at which time it will slide free. Some will go quickly, and others might take a bit of careful persuasion (gentle tapping) along the sides of the tube with the mallet.
Next Step: Assembly
Before assembly, its recommended that you remove all lifter covers and, following the kit instructions, carefully inspect and polish each base mating surface for nicks or damage, including each cylinder base crankcase seal area. Even if it all looks good, use 320 or 400 grit wet or dry sandpaper to lightly polish the surfaces and then clean thoroughly!
Liberally lubricate the base of each cylinder with STP (or any good quality medium lubricant), and then install the new base seals, ensuring that they did not twist. As each cylinder is ready for installation, the crank should be positioned to allow the farthest reach of the connecting rod from the case. With assistance, each piston is eased out (of its respective cylinder) only far enough to expose the wrist pin and aligned with the connecting rod, and the wrist pin is inserted. The cylinder is then eased into position just enough to show a couple of threads of the base studs (about 1/8 inch between the cylinder and crankcase base), and the base nuts are screwed to hold the cylinder in place, ready for the pushrod tube installation. Follow the manufacturers assembly instructions for each component-seals, washers, collars, compression springs, etc.
Both ends of the tubes must be sealed with either Permatex Ultra Copper or #101 RTV silicone (all fully spelled out in the instructions), applied as each is installed. The instructions make the process easy. Using the spring compression tool also makes life simpler. With the spring fully compressed, the pushrod tube is eased into the lifter cover, pushing far enough to allow the cylinder end to be inserted into the cylinder hole. Once the pushrod tube is in place, the compression tool is released, and each lifter cover nut is tightened ever so slightly, as the spring itself is enough to set the seal. Once each set is installed and the cylinder is tightened in place, the compression that makes the seal complete is apparent.
As I installed the components, I marveled at the design and especially the quality of manufacture of each part. I would suggest a dry run before assembling the first pushrod tube to get the idea of what is involved and how easily and simply it all goes together.
Given the effectiveness of this modification-and how easily it can be installed-its a shame the product is not better known. Of the few aviation supply firms and engine overhaul shops I do business with, only three are even aware of its existence, and two that once sold the modification no longer list or offer the product-thats because its gone underground, promotionally speaking. Maybe this story will help.
For more information on Real Gaskets Corporation, call 423/543-6194, or visit http://www.realgaskets.com.


Only top gets copper sealant on my 0300a tubes