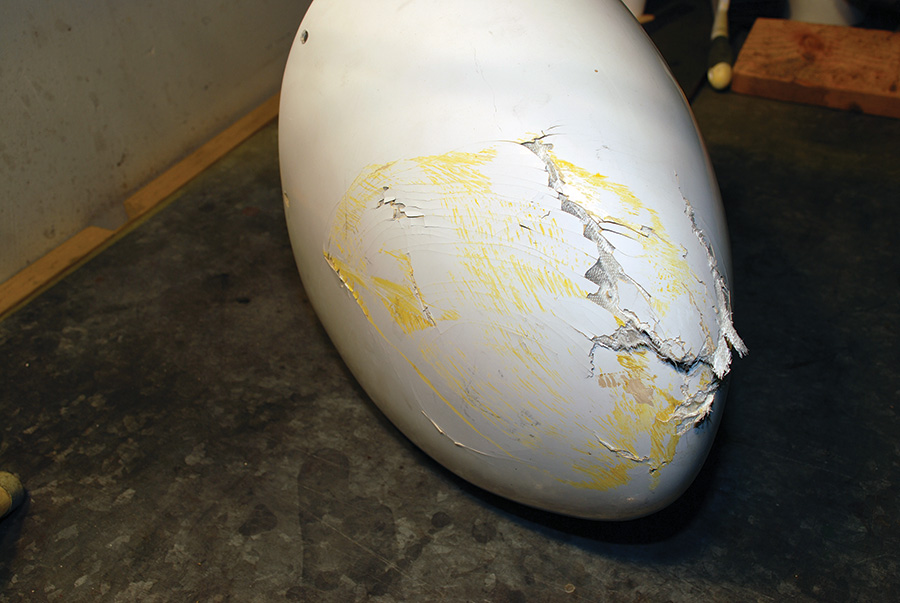
Many builders who eagerly dive into sheet metal or engine work dread fiberglass construction and repairs, but there is no need for such concern. Fiberglass repairs are fairly easy to do and hard to screw up in a way that ruins the part. It takes a little practice to get really good, but simple repairs are a good place to start building your fiberglass skills. Anyone with wheelpants on their plane will most likely need this skill sooner or later, so let’s get started.
Picking Up the Pieces
If you have just had a tire blowout or dropped your nosewheel into a hole you didn’t see, be sure to retrieve all the broken pieces. These can be very helpful when it comes to restoring that broken wheelpant or fairing. Cracked cowls at least have the benefit of usually not falling completely apart but, in any case, collect whatever you can so it can be fit back together.
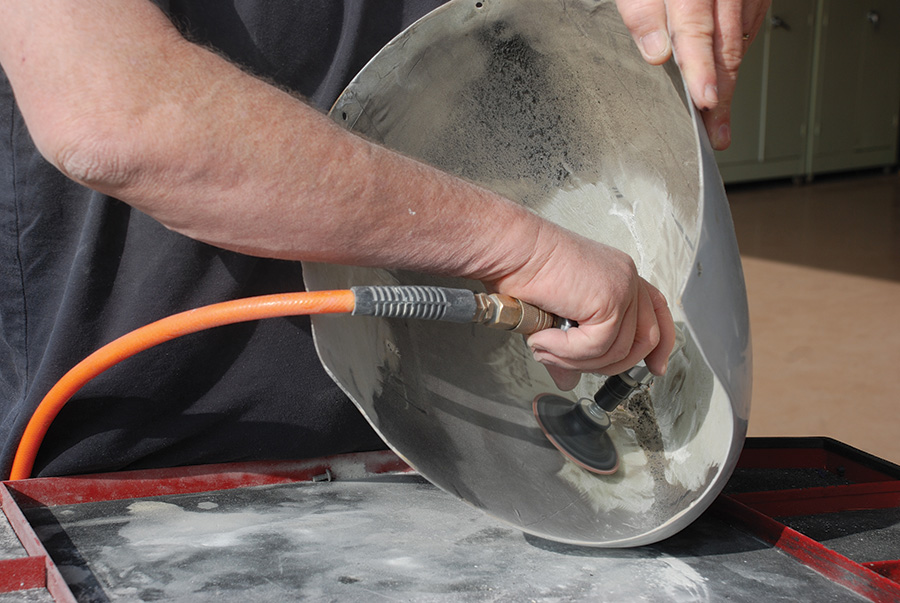
Remove shattered fiberglass and rough up the area to be repaired with a small angle grinder and a rough sanding disc. Be sure to wear goggles and a dust mask when sanding fiberglass.
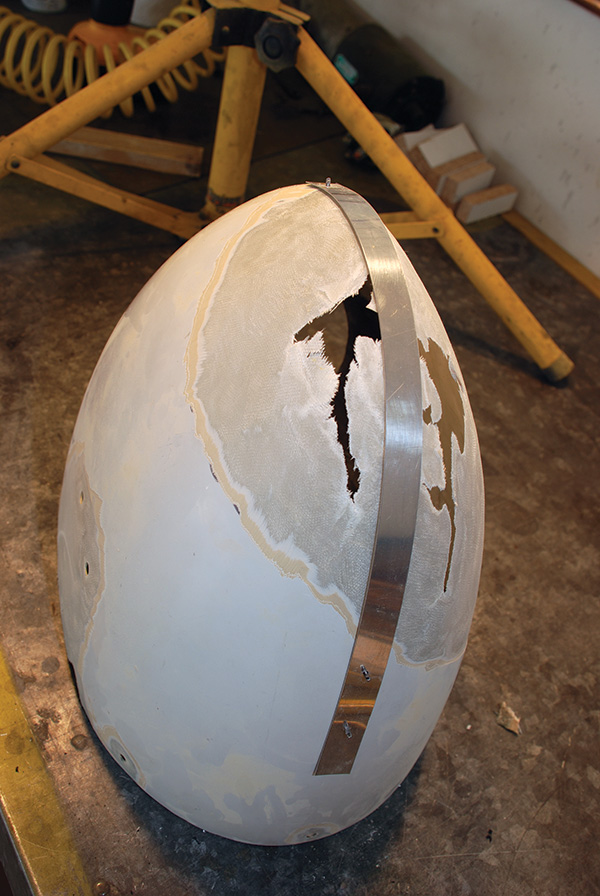
After grinding away shattered material, the basic shape is restored with a strip of aluminum and a few Clecoes.
With all the pieces in hand, it is time to remove any dirt or oil from the parts. Next, all the paint and gelcoat from around the damaged areas should be sanded away. Strip it back two inches if you can. You will want plenty of room to work. Use a coarse grit such as 60 or 80 for this work. The surface needs to be a little rough to aid in bonding to the fiberglass repair material. Be sure to clean up both the inside and the outside surfaces in the repair area. In most cases the major patching will be done on the inside surface, but there is often cosmetic repairing to be done on the outside. Be sure to remove any shattered fiberglass completely. This may leave some holes or gaps, but these will be filled in later.
Various methods lend themselves to holding the damaged parts together for the repair. Sometimes strips of thin aluminum and a few Clecoes will work well, other times some simple Mylar packing tape will do the job. The great thing about the tape is that fiberglass resins will not stick to it. If sticking is a concern, you can coat removable items with polyvinyl alcohol (PVA), which should be available where you buy your other fiberglass repair materials.
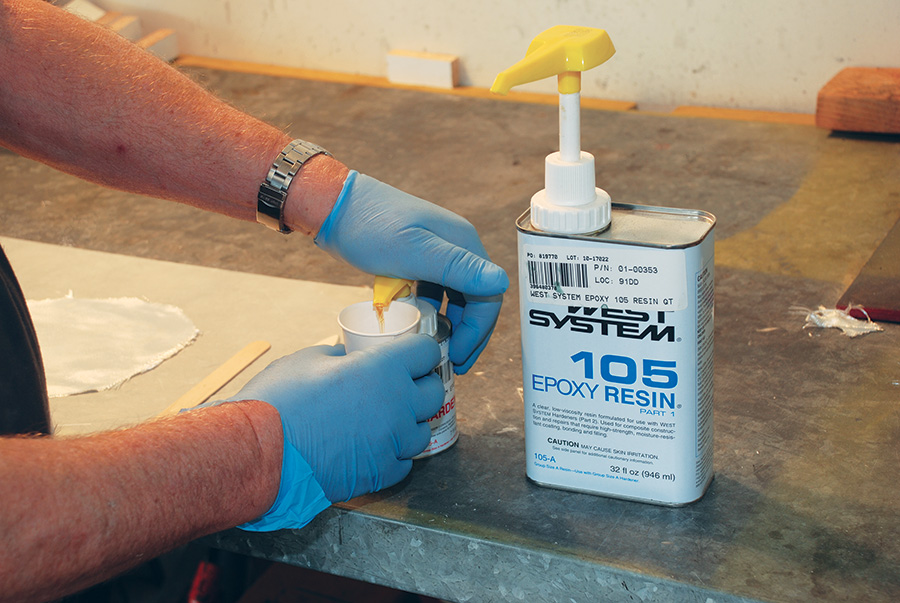
Pumper cans make measuring West epoxy easy. Be sure to wear gloves when working with resins to protect your skin.
Which Resin?
Before we can start to make a fiberglass repair, we need to know something about the damaged part. The type of resin used to make the original part and the type of resin used to assemble it (if different) are important. Many kit makers use vinyl ester resin for their kit components, but some use epoxy resin. Most parts are vacuum bagged during initial curing at the factory, but later assembly or modifications were probably cured in the open air by the builder. This is important information to know.

A fiberglass patch is wetted with resin laid over wax paper. It will then be put in place inside the damaged wheelpant.
If your broken parts were made with vinyl ester resin, for example, and later assembled with the same type of resin, then vinyl ester resin is a good choice for any repairs. That way you can establish a chemical bond between the old part and the repair. If you try to apply an epoxy resin repair to an uncured vinyl ester part, it will not hold. Note that the field assembly of fiberglass parts performed by the builder are almost never vacuum bagged. Since vinyl ester resin will never fully cure when exposed to air, any work done by the builder is most likely not fully cured. This uncured resin will prevent epoxy resin from adhering to it. The uncured material can be sanded off, but it may be easier to simply use the same resin and not worry about it.
If your broken part is made from an epoxy resin, then you should absolutely use epoxy resin to repair it. A vinyl ester resin repair will not adhere to an epoxy resin part.
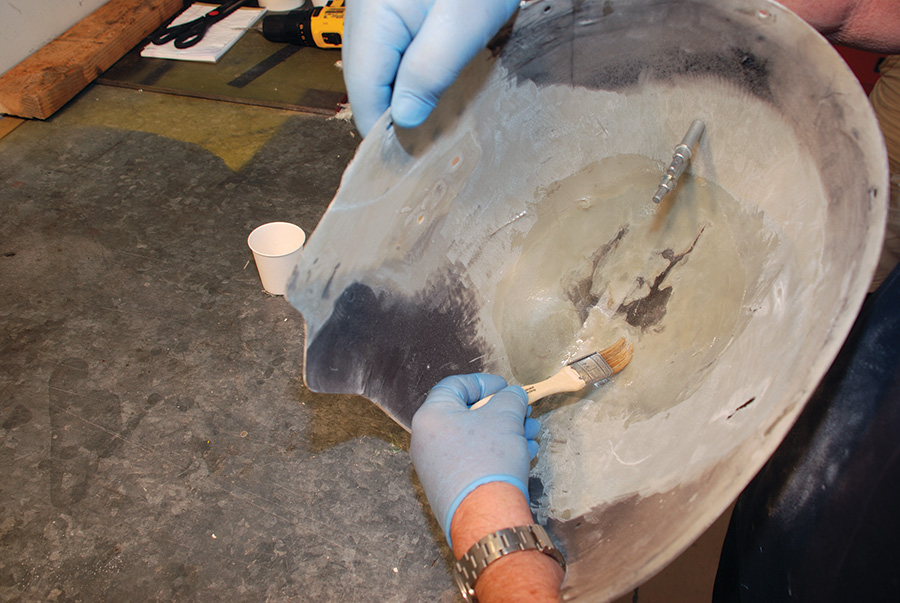
Pre-wetting the repair area with resin makes it easier to manipulate the patch material on the irregular surface of the repair area.
If your broken part is fully cured (vacuum bagged) vinyl ester or polyester, you have the option of using epoxy resin for the repair. Epoxy resins such as the West products are very easy to work with, making them a good choice for small repairs. However, don’t forget the compatibility problem. Vinyl ester, or for that matter polyester resin, parts must be fully cured, or uncured material must be removed before attempting to repair such parts with epoxy resin. Removing uncured material means sanding it until no more uncured resin sticks to the sandpaper you are using.
To demonstrate the two processes, let’s take a look at the steps I used to repair one part with epoxy resin and one with vinyl ester resin.
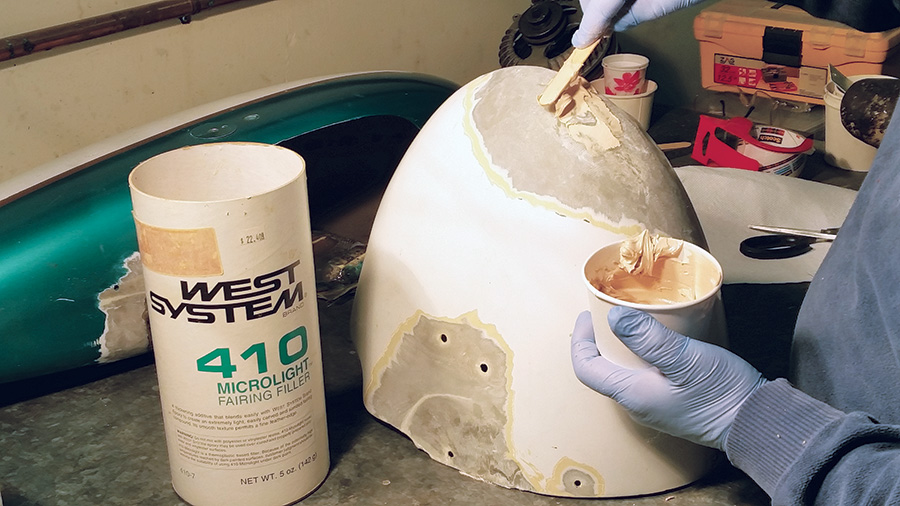
Once the basic strength of the wheelpant has been restored with several layers of fiberglass, use West 410 Microlight to fill in the rough spots.
Epoxy Repair
Our friend Richard taxied his Sportsman into an unseen steel dolly left in the taxiway by an errant helicopter handler. Besides damage to the prop, which we will not address, one wheelpant took a direct hit. To restore the front half of the wheelpant I had to remove a lot of shattered fiberglass, which left some pretty big holes to fill.
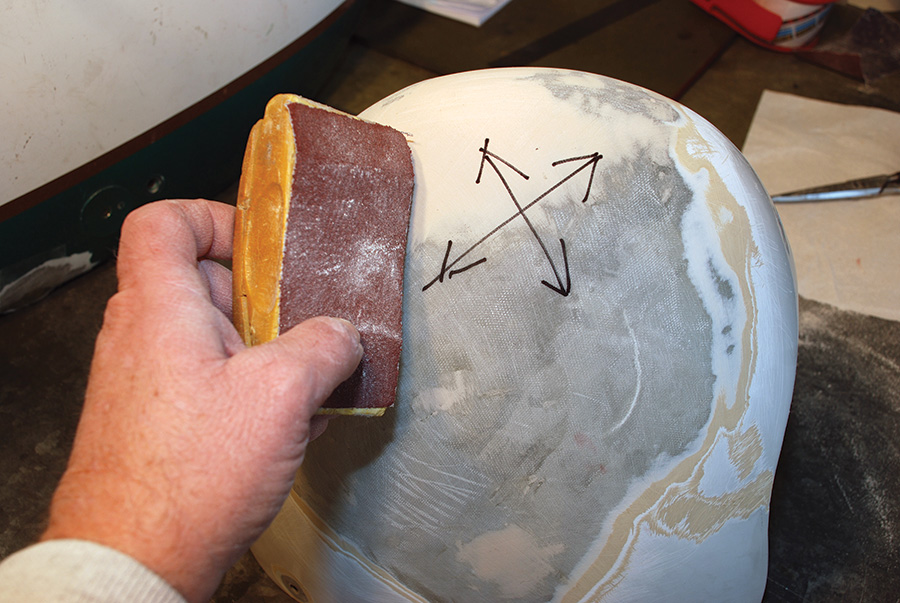
Use a sanding block with 80-grit paper to do your rough sanding. Sand at a 45 angle to ridges, and then sand at 90 to the first pass to avoid any flat spots.
To restore the shape I took a strip of 0.020 aluminum about an inch wide and a foot long and Clecoed it into place along the centerline of the pant. With a little work I was able to re-establish the basic shape of the old part. I sanded the damaged areas inside and out, finally blowing them out with compressed air. I then lightly coated the surrounding inside surface with epoxy resin. Next I dabbed some more resin into a piece of fiberglass cloth and worked it in with a throwaway brush. A piece of wax paper makes a handy way to keep the work surface clean as you work the resin into the cloth. I set the resin-soaked fiberglass in place and worked it into shape. Some other cracks were similarly repaired, and then the part was left to cure overnight.
The West System 105 epoxy is easy to work with because there is no measuring or weighing involved. One pump of 105 resin and one pump of 205 catalyst makes plenty of material for most patching jobs. If more is needed just use two pumps of each. If temperatures are 80 F or above, the 206 catalyst is easier to work with since it takes longer to activate than the 205. West says that their 205 hardener has a pot life of nine to 12 minutes at 70 F, and their 206 hardener will stay useable for 30 to 40 minutes at the same temperature. If kept sealed, cans of West resin and hardener will last several years. This long shelf life is why I prefer it for repairs and small projects.
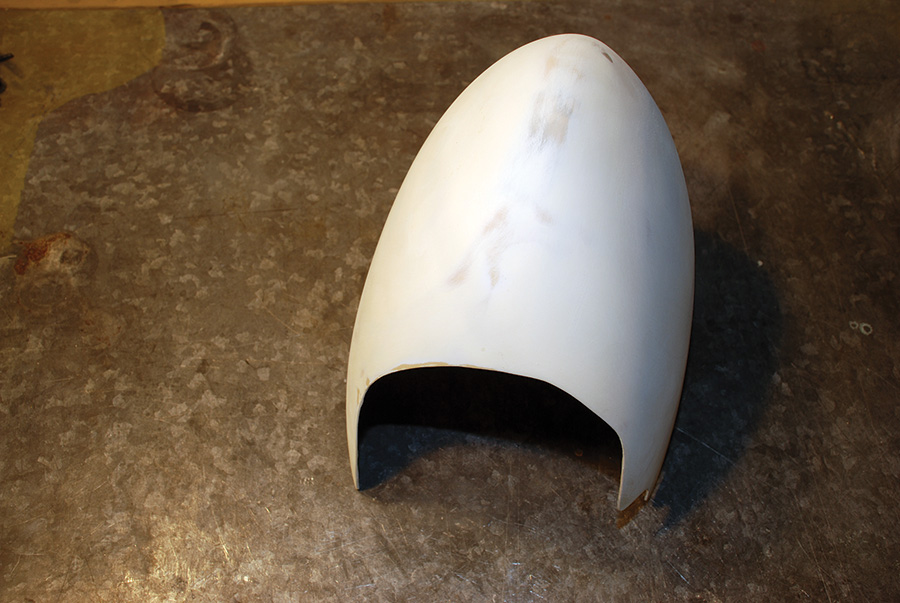
Once sanding is complete, paint the repair area with a filling primer. Then finish sand to prepare for painting.
Once the first application of cloth and resin has cured, it is time to fill in some of the rough spots and add some more layers of cloth to the inside. To make some filler for the uneven exterior surface, I once again turned to West products and mixed some 410 Microlight filler with some West resin and catalyst. It is best to start out with a small cup of dry filler and add catalyzed resin to it until it is the consistence of a thick milkshake. It will then fill and spread fairly easily, but will not sag at that consistency. When cured it is easy to sand and does not shrink.
The repair process is simply a matter of adding layers of fiberglass cloth to the inside and outside as needed to restore the strength of the part. The filler gets applied and sanded until the proper shape is restored, which may take two or three passes to get it just right. If you don’t like the shape you have at any one point, simply sand it off and add new filler until you are happy. If the filler starts to get thick (over 1/8 inch), it is a good idea to put a layer or two of fiberglass cloth over the filler to prevent cracking in the future. As a last step, paint the part with a filling primer and sand with progressively finer sandpaper until it is smooth and ready to paint.
A few points worth mentioning:
• Clean the repair area thoroughly before sanding. Sanding a dirty part can introduce contamination into the repair and weaken it.
• After sanding do not use solvents to clean the repair area. Blow off any dust or debris using clean, dry compressed air.
• Be sure to wear nitrile gloves when working with these resins. Gloves ease cleanup and prevent exposure of your skin to the resins, which cause allergic reactions in some people.
• If you will need to add fiberglass to the outside surface, be sure to sand down the part enough to make room for the thickness you plan to add. Otherwise you will not be able to get the exact same shape back when you are finished.
• If you can’t get your shop temperature up to 70 F, expect to have long cure times. If possible bring the part into a heated space to cure it or apply mild heat to the part with an incandescent light.
• It is best not to attempt fiberglass work at temperatures of 40 F or less, or at temperatures of 90 F or more.
• Epoxy resin will work just fine on vinyl ester or polyester resin parts if they are fully cured (vacuum bagged during manufacture).
• Bondo is a poor substitute for West Microlight or Q-cell filler because it is heavy and shrinks over time.
• As you build up layers of fiberglass cloth, vary the orientation of the fabric for better strength.
• When sanding curved surfaces, sand at a 45 angle to any ridges and then go back and sand at a 90 angle to the first sanding pattern. This will help to eliminate flat spots. Be sure to wear a dust mask when sanding fiberglass.
• Don’t get impatient and add too much catalyst. You certainly don’t want the resin to start taking a set while you are still working with it, plus excess catalyst will weaken the resin.
Vinyl Ester Repair
Brad had a blowout on one of the main tires of his GlaStar that damaged the bottom part of his wheelpant. Since the original part was made from vinyl ester resin and his subsequent assembly used the same resin, I decided to stick with vinyl ester for the repair. The process begins with cleaning and sanding the areas near the damage until all the paint and gelcoat are removed, both inside and out. Next the broken pieces are put back in place with Mylar packing tape. By curving the tape around the old part, some of the missing pieces can be recreated.
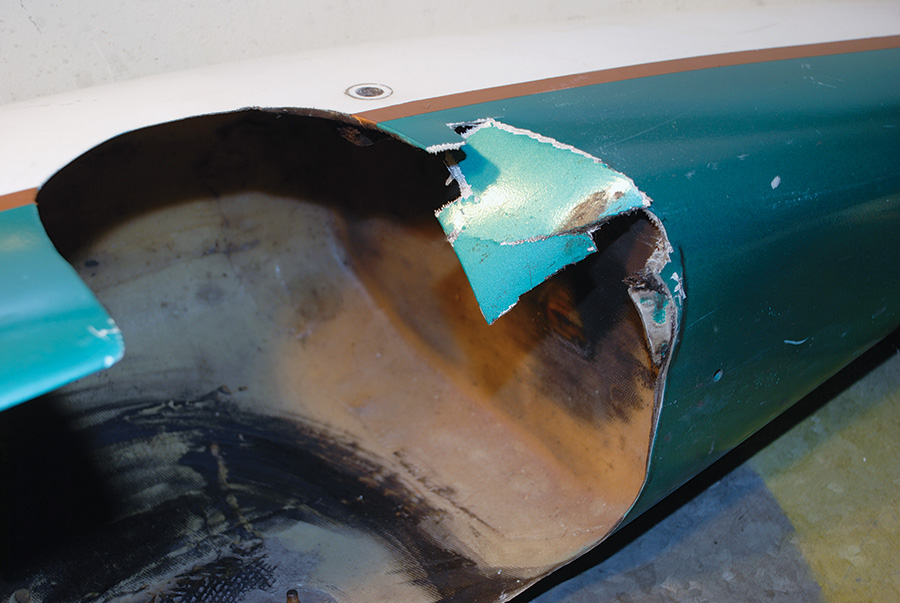
Some of the damage to Brad’s wheelpant caused by a tire blowout. This damage will be repaired with vinyl ester resin.
Mixing vinyl ester resin is a bit different than epoxy. The resin must be weighed, preferably on a scale that reads weight in grams, and one that has the ability to zero-out the tare weight (weight of empty cup). Aircraft Spruce sells just such a scale for less than $27. This scale, or something similar, should already be in the toolbox of a builder who used vinyl ester resin during construction. Pour enough resin into a paper cup to do the work and add catalyst according to the instructions. As a rule the catalyst should be 1% of the weight of the resin and should not exceed 2%. Rather than weighing the catalyst, it is usually easier to use a graduated syringe. One cc on the syringe is pretty close to one gram, so a 50-gram batch of resin will need 0.5 cc of catalyst. If you are fighting low temperatures in your shop, you could increase the catalyst to 1.0 cc. In all cases follow the resin manufacturer’s instructions. Less catalyst will give you more time to work with the resin, but it will then take more time to cure.
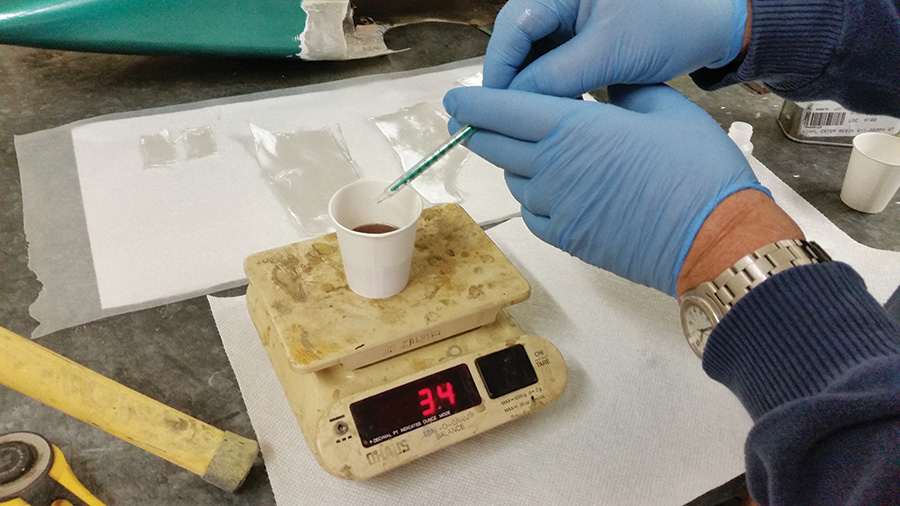
Vinyl ester resin should be mixed by weight; catalyst is easily measured with a syringe. Catalyst should be one to two percent of the resin weight in most cases, but be sure to follow the manufacturer’s instructions.
Once the resin is mixed up, the application process is the same as for the epoxy resin. Apply resin to the area around the repair and then place fiberglass cloth to cover it. If there are holes left from the damage or removal of a broken part, it may be easier to pre-wet the cloth before putting it in place. If there is good support behind the cloth in the repair area, the cloth can be wetted in place. In any case, be sure to work out all wrinkles and bubbles with a dabbing motion of your brush as you go. Do not drag your brush across the fiberglass as if painting it. Bubbles or spots that did not get adequate resin will appear lighter in color than the surrounding cloth. Keep dabbing until all the light spots are gone.
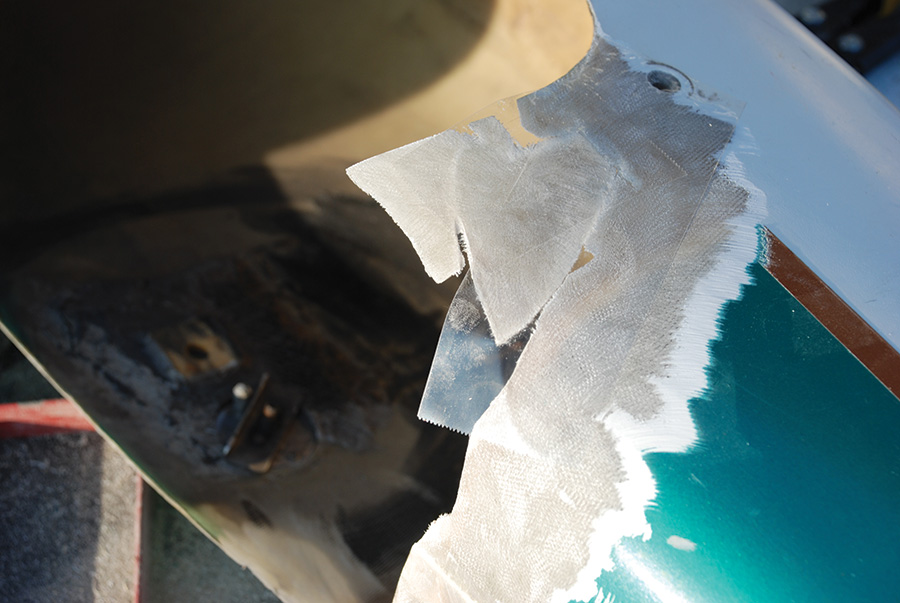
Mylar packing tape works to position broken parts after sanding to remove paint and shattered material.
It may be necessary to apply several layers of cloth to restore the strength of the part. It is possible to apply more than one layer of cloth at a time, but I suggest not doing so until you get comfortable with the process of doing one layer at a time. No matter how badly you mess things up with fiberglass, you can always grind it out and start over, but there is no need to test that theory by getting impatient on your first try.

Add layers of fiberglass and resin to restore strength as needed. The basic process is the same as with epoxy resin. Here a block of wood is used to push the damaged part back into shape.
Once you get to the stage where the major fiberglass work is finished, you can make a filler similar to West Microlight by mixing vinyl ester resin with glass bubbles (sometimes called microballoons) or Q-cell. The mixing process is the same. Place some Q-cell in a cup and add catalyzed resin until it is the consistency of a thick milkshake. Adding a little Cab-O-Sil to the Q-cell can make it easier to work with, but don’t get carried away because the Cab-O-Sil is much harder to sand. Then apply the filler to the repair area and let it cure. Sand to achieve the final shape once it hardens.

Make filler for vinyl ester resin by mixing glass bubbles or micro-balloons with about ten percent Cab-O-Sil. Add resin until the mixture looks like a thick milkshake. Then apply to the repair with a disposable tool such as a tongue depressor. West 410 should not be used with vinyl ester resin.
By the way, vinyl ester resin needs to be promoted before you can use it. This means that a cobalt promoter must be added to the resin before it will be workable. When you buy the resin from a vendor such as Aircraft Spruce, it should already be promoted, but it doesn’t hurt to ask. Unpromoted resin will last up to a year or two if you keep it refrigerated. Once it is promoted it is only good for about three months.
Note that epoxy can be used to repair vinyl ester or polyester parts if they are fully cured or uncured material is removed first, but vinyl ester resin will not work to repair epoxy parts or to go over a previous epoxy repair.
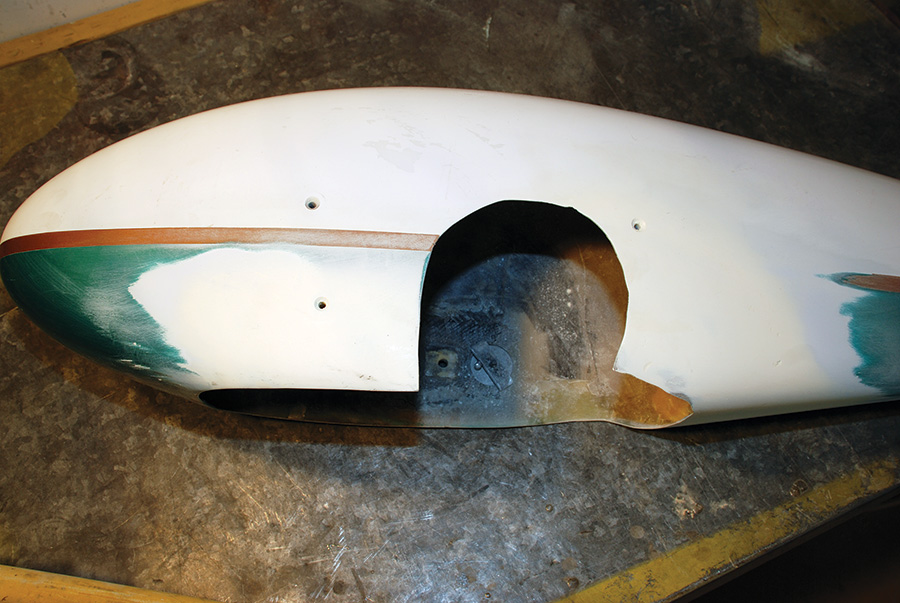
Sand and prime until the part is restored and ready to paint. The process is about the same as it is with epoxy resin—only the materials are different.
Fiberglass Cloth
When you open the Aircraft Spruce catalog to the fiberglass section, you will notice that there are lots of different types and weights of fiberglass cloth to choose from. For non-structural repairs such as the one described here, standard E-glass weighing 8.5 to nine ounces per square yard usually works best. Lighter cloth such as 5.8-ounce E-glass may be a better choice if you have tight spaces or sharp corners to deal with. Lighter cloth will just take more layers to get the same strength. S-glass, Kevlar, and carbon fiber all have their place in aircraft construction, but they are not usually needed for the repair of non-structural items. Carbon fiber can be useful if you need to add strength and stiffness to a part.
When you go to prime paint your fiberglass repair, be sure to check to see if the primer is compatible with your finished paint. Usually an epoxy primer will work with anything, but it is always good to check and be sure.
The most likely causes of failure of a fiberglass repair are contamination of the bonding area or using epoxy resin over uncured vinyl ester resin. It is easy to avoid both of these problems, so be sure to take care that you do.

