
My RV-3B landed in Lakeland, Florida at Sun ‘n Fun 2011 as one of 12 aircraft in the formation flight group, Team RV (now known as Team AeroDynamix), flown by its original builder and family friend, Tony Spicer. By the end of the week, the little turquoise machine was a wrinkled and disassembled mess, strapped to a flatbed truck headed for a salvage yard in Griffin, Georgia. Tony Boy II had been flipped on its back as one of about 60 airplanes damaged or destroyed during an EF1 tornado and severe thunderstorm that tore through the fly-in. I had already started on construction of a new RV-3B tail kit, so after discussing the extent of the damage with Tony and inspecting the wreck at the salvage yard, I decided to buy the totaled-out salvage from his insurance company, repair what I could save, and replace the rest.
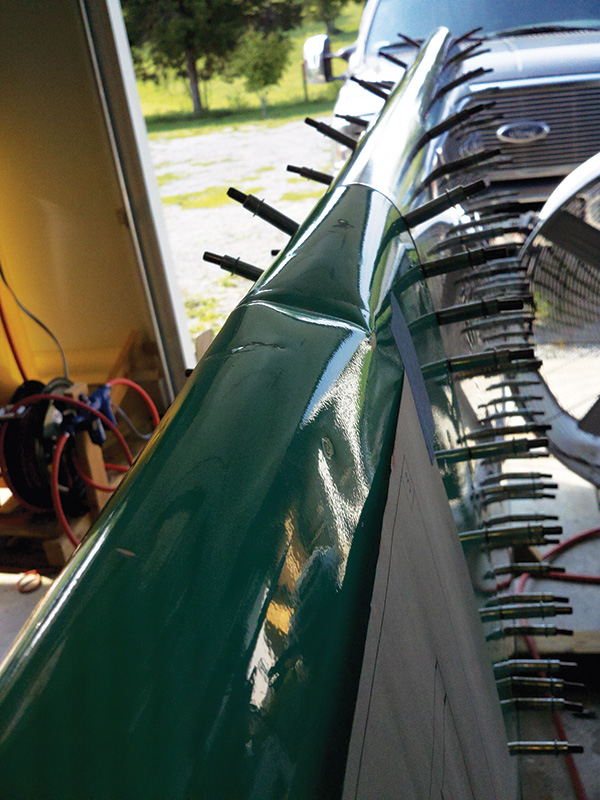
The salvage operation left a deep dent in the leading edge of the left fuel tank-enough of a cracking hazard to require re-skinning or rebuilding of the tank.
While much of the rebuild project has involved straightforward creation of new components, such as the empennage and canopy, the wings required major sheet metal repairs. Saving the wings, in particular the modern-design “B” model aerobatic wingspars, was important to me because it made the rebuild project more economical than building a totally new airplane. The leading edges outboard of the fuel tanks and the fiberglass wingtips were all crushed, likely due to a cartwheel after the tiedowns tore from the sandy soil. However, the core airframe structure was spared, possibly due to the use of Bob Japundza’s hapless RV-6 as a crash pillow. (Sorry, Bob.)
Because the type of damage to Tony Boy’s wings is often seen in ramp mishaps, bird strikes, and forced landings in the vicinity of saplings and fence posts, I thought it might be helpful to share what we did to repair them. My boyfriend, Ben Krotje, is an A&P who’s spent most of his life working on Experimental and Light Sport Aircraft. Over the years, he’s taught me how to create new parts out of aluminum, how to evaluate craftsmanship and condition, and how to drive and drill out rivets; a major structural repair is just a creative mix of all those skills.
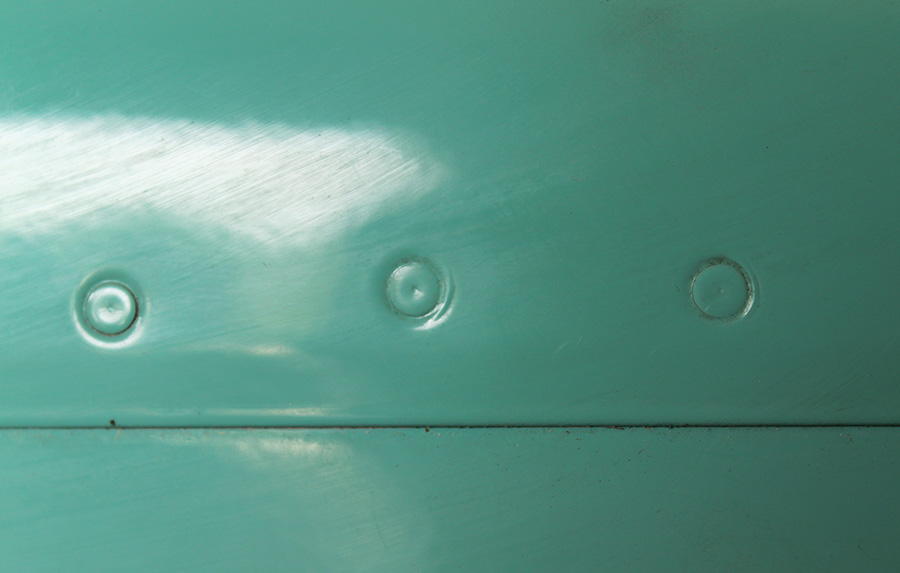
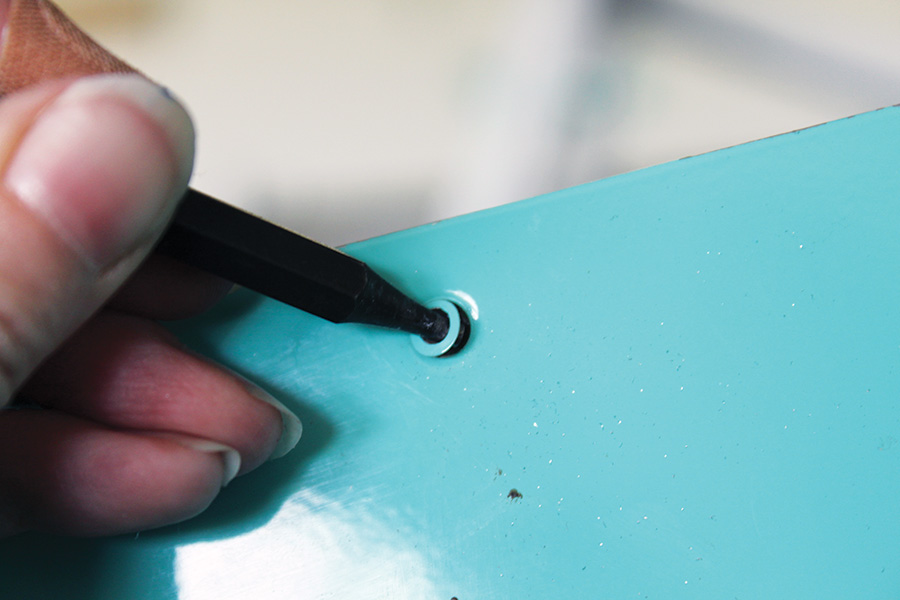
The fuselage rivets shown here were stressed when the roll bar hit the ground. Note the thin paint cracks and wrinkles around the edges of the rivet heads.
Damage Inspection
In many cases, damage is only skin-deep, with no damage to underlying structure. However, when ribs are obviously crushed, such as in our case, it’s always smart to question the integrity of the spar and the structure as a whole. The first step is to take off all the components from the wing that can be conveniently removed, such as inspection covers and the wingtip. If possible, remove the wing itself from the fuselage. If the fuel tank can be removed, such as with most RV wings, take that off, too. The more places you can inspect from the inside, the more confident you will be that all of the underlying structure is sound. If there is mud, oil or other grime on the parts, wash it all thoroughly to inspect for cracks and dents.
There are several things to look for when you determine the extent of damage to a wing:
Skin dents can be anything from minor depressions to fully developed tears. Sometimes it’s a tough judgment call on whether to replace a skin or fill the dent. The right wing tank had a few shallow golf-ball sized depressions under one leading edge; the dents don’t have any sort of hard edge to them, so I felt confident that I could fill them in without worrying about cracks later on. The other tank had a sharp crease in the leading edge that looked like it was due to impact with the side rail of the salvage truck flat bed. Rather than pound it out, putty it, and risk a cracked fuel tank or compromised wing structure, I chose to play it safe and build a new tank. Call me masochistic, but I also wanted the experience of working with ProSeal tank sealant-which is, in my twisted way of thinking, a rite of passage as an RV builder that goes along with fabrication of trim tabs and fighting with canopy skirts.
Be on the lookout for stressed rivets. Look for a sharp edge of cracked or wrinkled paint around the rivet head. Stressed rivets usually occur in groups; if you spot an isolated rivet with cracked or missing paint, it could be just a poorly set rivet. “Smoking” rivets usually have a trail of dirt streaming behind them, which is a sign that the rivet loosened and corroded over time, as opposed to receiving damage during a single traumatic event. Even if the structural parts are intact, the rivets are a good indicator of impact forces and can help you see how the force was applied. Stressed rivets should be replaced during the course of the repair, even if the parts they hold together prove to be OK.
Inspect the wingskins along the spar line, top and bottom, for buckles in the edges of the skins along the spar flange. Despite all the damage in the forward portion of Tony Boy’s wings, the spar rivet lines and their associated skin edges were all straight and smooth, which gave us confidence in the condition of the spars. The wingskins between the main and rear spars had a couple of minor dents, but no buckles, twists or stressed rivets. Inside the fuselage, the spar carry-through area was straight, with no deformed floor panels. We determined that the major wing damage was contained to the replaceable nose rib sections, fiberglass tips, and the one mortally-dented fuel tank.
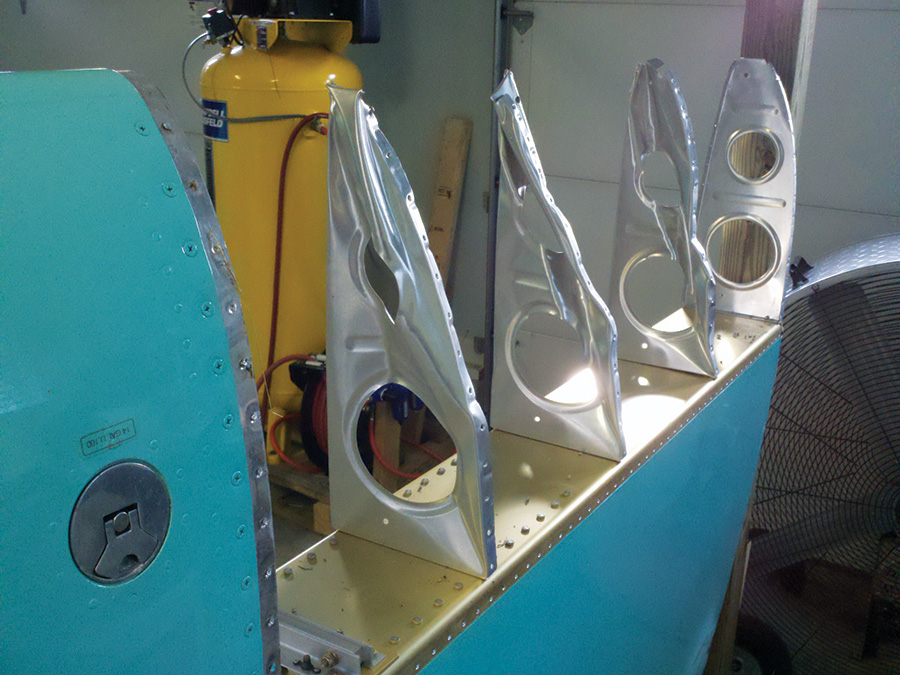
Removal of the skin from the right wing revealed badly crushed nose ribs, but a pristine underlying spar structure.
The Fixture
Removing the damaged wing from the fuselage is a lot of work up front, but will likely pay off in the end with an easier repair experience. If you can do it, I highly recommend it for easy access to the top, bottom, and both ends of the wing, as well as a more thorough inspection of the root end. Of course, if your airplane is trucked back to the hangar, as Tony Boy was, this is a moot discussion and that tedious job will have already been done.
We modified my existing horizontal stabilizer jig to provide a sturdy, simple way to hold the wing leading edge up for the repair procedure. Because we were not removing any of the sheet metal aft of the spar, the wings would maintain their rigidity, so we didn’t have to worry about keeping the wing structure free of twists. The simple wing stand consisted of a pair of vertical 4×4 treated posts with 4×4 cross-member feet braced diagonally with 2x4s. They were fastened to the cement garage floor using cement anchor bolts. The wing was attached to an angle-aluminum “shelf” on each post with the spar web parallel to the floor. To keep the wing from rocking fore and aft, we put a bolt through the outboard aileron attach bracket and ran it through the diagonal brace at the base of the jig. The stand allowed easy access to both sides of the wing, with the repair area at a comfortable height for drilling.
The author uses a grinder to remove the shop heads of the pulled rivets that held the damaged ribs to the spars. Note the tape applied next to the ribs to protect the surface of the wingspar.
Carnage Clean-Up
Removal of broken stuff is fun. I found it really satisfying to get to a point where the airplane was no longer “broken,” but a clean, unfinished project. Remember, though, this isn’t a home renovation project-as tempting as it may be to smash things, it’s best to keep your sledgehammer and Sawzall on the shelf. The broken pieces can prove to be useful as templates for making new parts. I prefer more of a surgical approach to disassembly.
The removal of solid rivets is pretty mundane-most of them are consistent in their shape and substance (see sidebar). The interesting part of disassembly comes with drilling out pulled blind rivets, which are often a challenge because of their odd shapes and embedded mandrels. Normally you drill into the factory head of a rivet to remove it, but if you only have access to the deformed shop head “tail,” it can be nearly impossible to drill on-center. One way to deal with this is to cut off most of the tail with a wire cutter, then grind it down to the surface using a file or a pneumatic angle grinder with a sanding disk. It’s time consuming, but safer than guessing at the locations of the rivet holes beneath the deformed rivet tails. I used this technique to remove the rivets that held the nose and main ribs to the spar web. Once you can see the edges of the rivet hole, clear it carefully with a drill, taking care to avoid damaging any soft structure behind it.
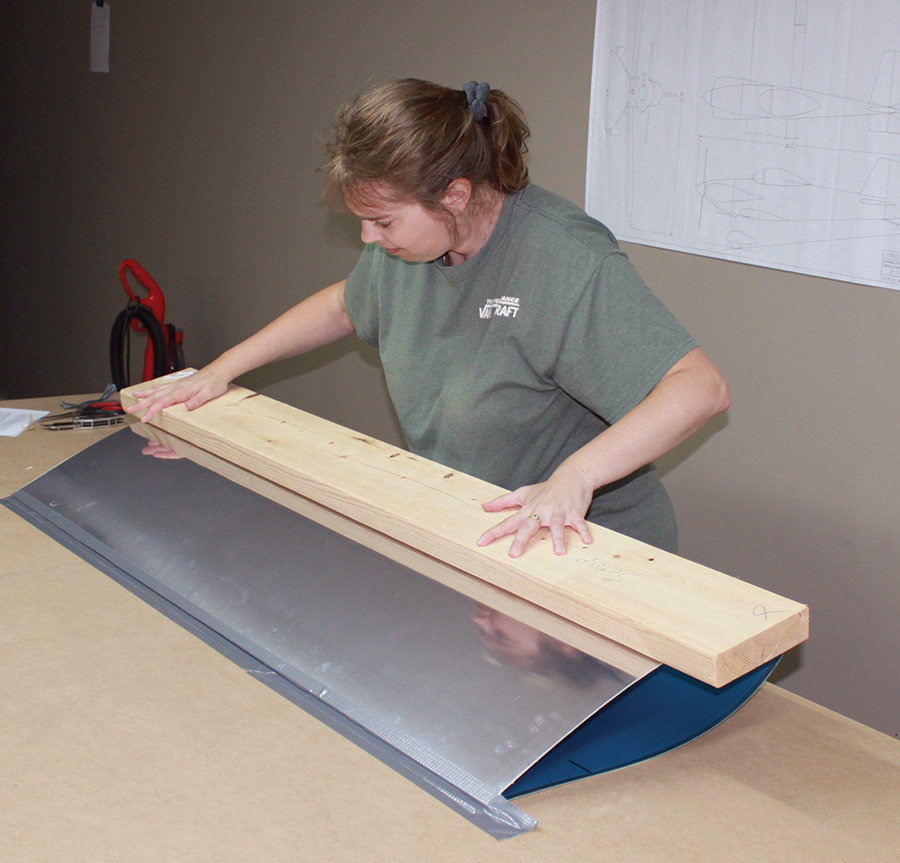
Bending a leading-edge skin on the bench is not as difficult as it might seem, as long as you don’t crush it.
Strategic Assembly Planning
Normally when an RV wing is built, the leading edge “D-cell” area forward of the spar is assembled in a U-shaped jig. The nose ribs are inserted into the skin and riveted, and then the whole assembly is riveted to the mainspar, before the rear wingskins are installed from behind the spar web. During a repair, when the aft portion of the wing is already closed up, there is limited access to the rivets that attach the D-cell skin and ribs to the spar. In this situation, a significant repair begins to take on its own storyline where the original builder’s manual sequence no longer applies and you find yourself off in the weeds thinking, “OK…what now?”
The solution was fairly easy-build the D-cell right on the spar by riveting the new nose ribs to the spar web first, then installing the skin. On most RVs, the inboard section of the leading edge is a removable fuel tank. We left the fuel tank attached to the spar for the match-drilling phase of assembly to provide accurate placement and solid support of the new skin, as well as a way to double-check the consistency of the airfoil along the span. We would rivet all the ribs we could reach through the rib lightening holes from the wingtip, then remove the tank to finish up the inboard side of the new skin. Piece of cake!

New skin on the bench with a portion of the old skin to be used as a drill template.
Creating New Parts
While stock replacement ribs are cheap and still available for most kit aircraft, a large skin costs up to several hundred dollars and can be expensive to ship. However, it’s not difficult to make the skins from scratch to save material and shipping costs. Skin material .032 inch and thinner can be rolled up and shipped in a standard-sized box from aircraft supply sources, saving a lot of money on both materials and shipping.
Sheet aluminum has a grain to it, small faint lines running along one dimension. Make your skin so that the grain runs chordwise, around the leading edge bend, for better retention of the curve. To find the chordwise dimension of the nose skin, wrap a piece of string around an undamaged portion of the wing from the upper trailing edge of the skin, all the way around the nose rib to the lower trailing edge. We added inch to this dimension for a working margin, to be trimmed off and filed later.
Van’s old leading-edge bending procedure might seem archaic, but it’s not that difficult and still works well to bend the leading edge radius on the workbench. It’s sort of like folding a big piece of paper. Duct tape the top edge to the tabletop, making sure the bend will be supported solidly by the tabletop. Bring the other edge of the sheet up parallel with it, set back inch to allow for the greater curve across the top of the airfoil, and tape it down. Then, smoosh it with a long smooth 2×6 until the leading edge has a nice, rounded shape. It may help to have two people during the procedure to keep the board pressed evenly. Keep the board parallel to the tabletop to create a leading edge radius that’s consistent along the entire span. Apply pressure in stages-it’s better to under-smoosh and bring it back to the bench for more than it is to overbend or make a crease. Call it done when the radius looks comparable to the good parts of the wing. The bend in the sheet should relax to a little less than 90 degrees.
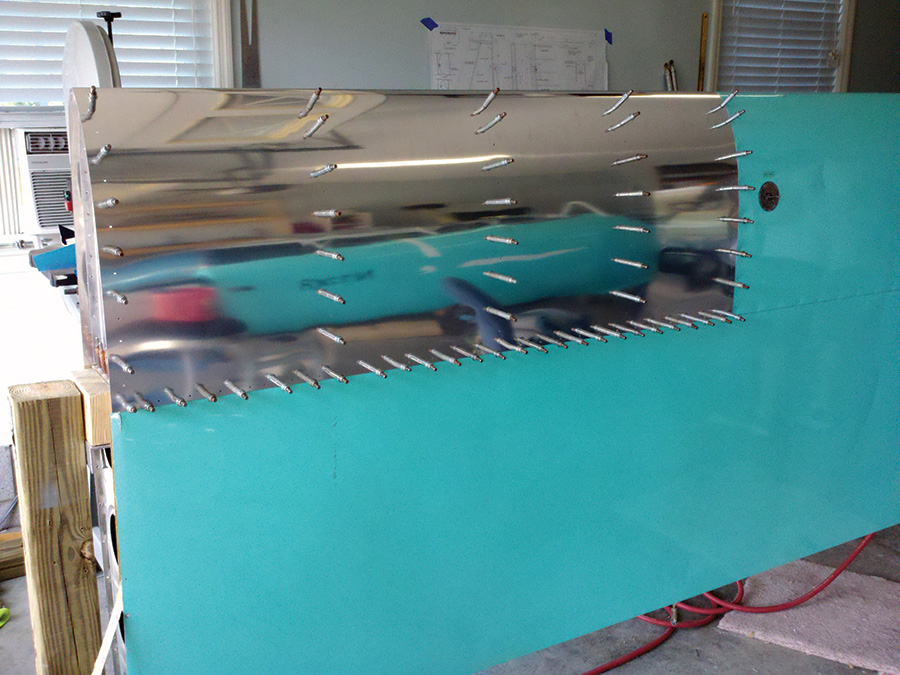
Coming together! New skin Clecoed in place.
Assembling the New Parts
Now that we have a nose skin and some ribs, how do we match drill the skin to the spar, and the ribs to the skins?
There are a couple of ways to replicate the rivet hole pattern in a wingskin. Drilling through a hole finder tool can work if you are able to tape or otherwise hold the skin in place while the first few holes are drilled. But hole finders have a certain amount of thickness and flexibility that can throw off a hole location, and they are sort of clunky to work with. Because the aft few inches of the original skin was undamaged, we used it as a hole template for the spar rivets and the rib locations. I cut off the trailing edge of the original skin, keeping a couple of rib rivet holes to mark rib positions, then aligned it with the new skin and taped the sandwich to the tabletop. Even though dimpled holes are slightly oversize, I didn’t flatten them. I left the dimples as they were to avoid distorting the hole position, and drilled the center of a few widely-spaced test holes right on the benchtop. If the test holes did not line up with the spar, our tactic could be changed and the few holes enlarged without scrapping the skin. We moved the skin to the wing, Clecoed the holes, and it worked…the new skin fit the top spar line, and to my utter glee, the leading edge bend followed the contour of the new nose ribs and matched the curve of the fuel tank. I carefully drilled the rest of the spar rivet holes, Clecoing the sandwich to the spar all down the line.
With the skin back on the bench, rib rivet lines were drawn using the old skin template and a framing square, and the rivet holes marked off and drilled with spacing according to the plans. I like pre-drilling skins on the bench-then the wing assembly is just like a pre-punched skin, with me doing the pre-punching. After that, it’s easy to match drill pre-marked rivet-hole centerlines on the new ribs through the skin. We smoothed the skin down tight against the other side of the ribs, carefully marked where the aft edge of the skin needed to be, trimmed/filed as necessary, and repeated the process for the bottom.
It’s important to note that unless you’re lopping this thing off with an eight-foot long metal shear, you should not hand trim right up to the line when trimming an aluminum skin to size. Some snip tools will leave little pucker marks at the end of each squeeze, so be sure to leave 1/8 inch or so for the file. Ugh. “The file,” she says. Yes, the file. The sore muscles and tendonitis will be worth it. Finish your edges with a Scotch-Brite wheel and a very light edge roll to keep the edge flat to the spar.
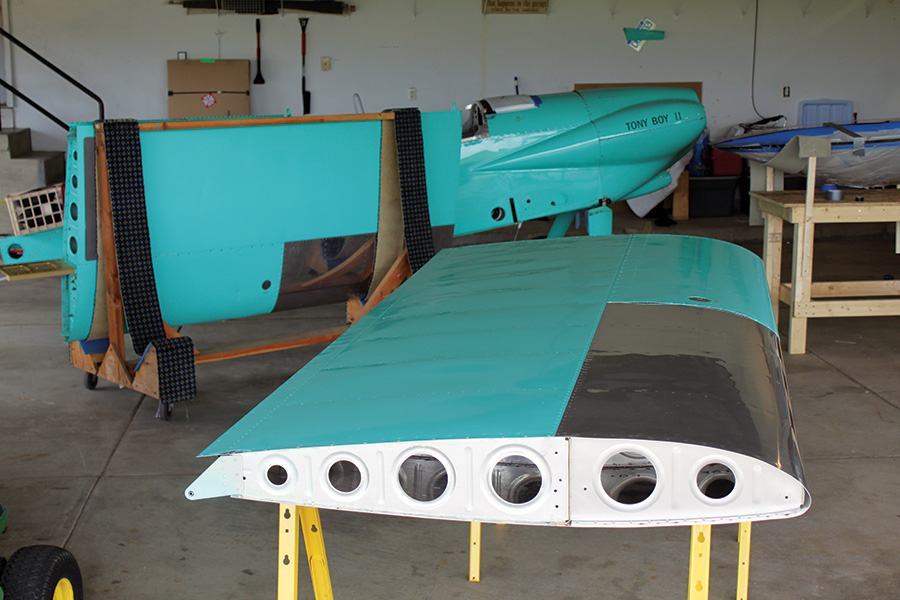
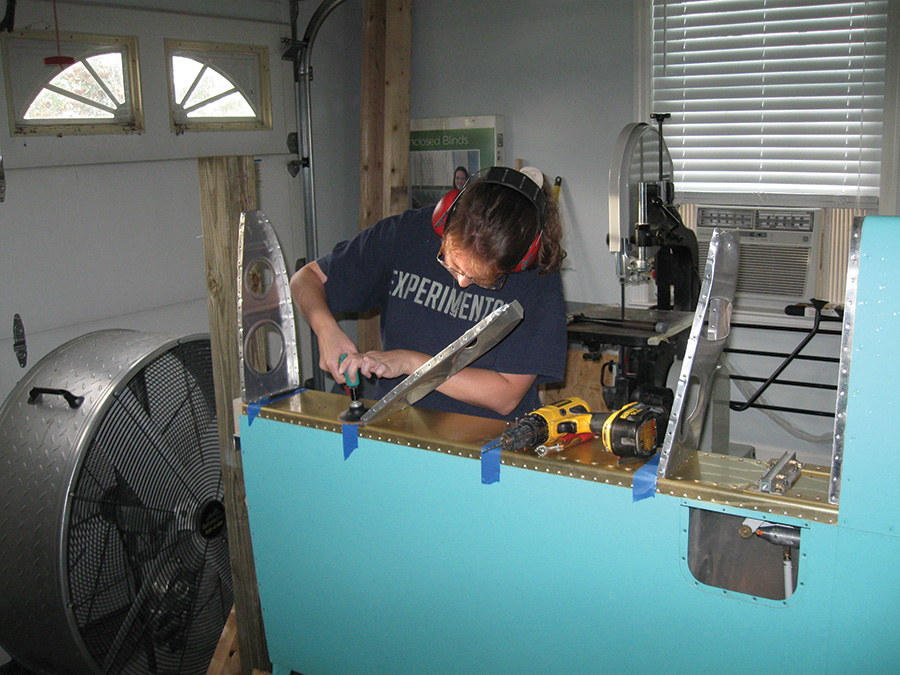
Wings structurally complete, minus the new left tank and tips. Canopy construction in process in the background.
Riveting It All Together
This is where the strategic planning pays off. Follow your assembly plan and do whatever it takes to reach all the rivets. If it’s a low-wing airplane, rivet the top of the wing first. There may be some rivets you just can’t reach with a bucking bar, and in those cases you’ll need to use structural pulled rivets to finish the job-so you might as well put those out of sight. I was happy to have relatively narrow girly arms to reach in through the lightening holes in the ribs and the inspection hole with the bucking bar while Ben hit them with the rivet gun. We took the fuel tank off to access the inboard rivets and left the tip rib out until the very end, giving us extra shoulder room to reach in through the tip. To make riveting the tip ribs really easy, we swapped them wing-for-wing, so the rib flange faced outward.
In the end, the wings look great, and it feels good to see them structurally whole again. The repair for both wings took about 100 hours to complete, minus paint and new fiberglass tips-a fast-paced project for a homebuilder that would quickly turn expensive if it were left to a repair shop. Damage like this looks daunting, and if you built the airplane, there is also the emotional frustration of having to tear apart what you’ve already spent so much time putting together. There is quite a bit of uncertainty when you first start opening up the damaged portions, and you might feel overwhelmed. That’s OK, as long as you treat it like any new project-just take it on one piece at a time. You’ll be surprised at what you’re capable of fixing when you understand your materials and you’re willing to think outside the confines of that old dusty builder’s manual.
Removing a rivet head with a punch of the same size as the drilled hole.
Obviously, drilling out rivets is a key skill in disassembly. I prefer a small battery-powered drill for this so that I can vary the speed, starting with a low rpm until the hole is established. Don’t plow blindly through what you think is the center of the rivet shank-drill partially into the center of the head, just deep enough to wedge a punch in there and snap off the rivet head. If the drill bit wanders, point the drill bit back toward the center of the rivet head for a couple seconds’ worth of revolutions, then slowly pull the drill back in line with the shank to finish drilling the hole deep enough for the punch to get a grip. Once you remove the head and can see the rivet shank, hit it with a hammer and punch to extricate it, or carefully drill a little farther until it will punch or fall out. Be careful with the hammer-remember that soft structure underneath, such as wingrib flanges, can bend with the striking force. Sometimes in those situations, it’s best to carefully drill it all the way out instead of using the hammer and punch. By drilling and punching in stages, you will avoid enlarging the rivet holes in structure that will be reused.
-K.B.


great article thanks for the insight on wing repair.