There are a number of things you will get good at when building an airplane. At or near the top of the list is making holes. Most of the umpteen thousand holes require only basic drilling, but a few here and there may call for precision beyond the capabilities of a twist drill. For those “special” holes on pivoting parts like bellcranks, brake pedals, or gear legs, you’ll probably be tasked with reaming a previously drilled, but undersized, or malformed, hole.
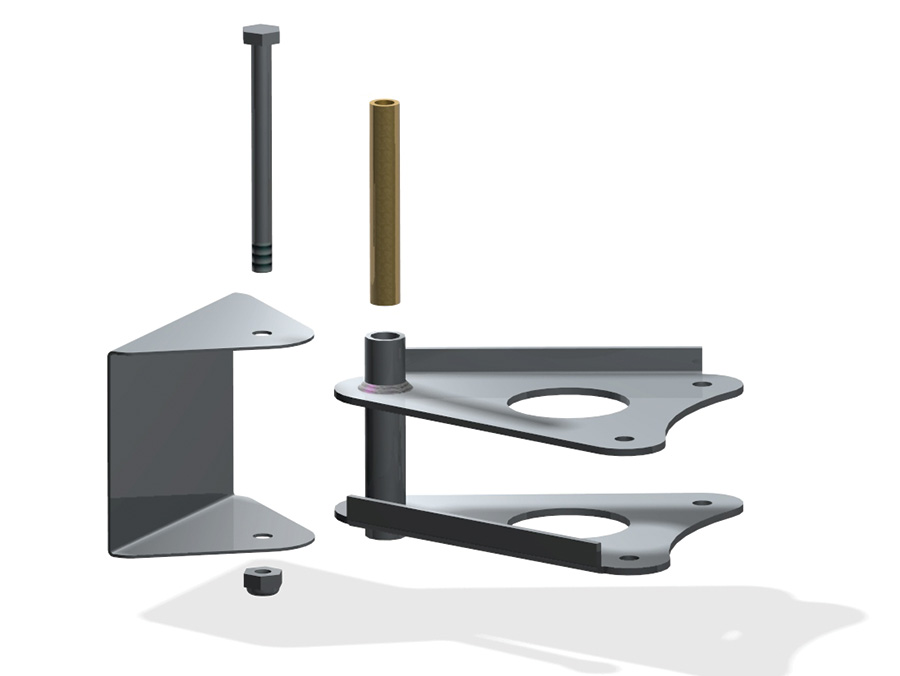
A bellcrank is a good example. The assembly depicted in Figure 1 is typical of what you might find on an RV-7 or RV-8. The construction is the embodiment of simplicity: one or more “crank arms” (or flanges) welded to a pivot (usually a tube). The pivot tube often will have a steel sleeve bushing that is slightly longer than the pivot to act as a fixed axle. If the fit is too tight, it will bind with friction, and if it’s loose and wobbly, you will feel a “clunk” in the stick every time you roll the plane from one side to the other. Getting a bellcrank to rotate smoothly and with no discernible play directly translates into a more enjoyable flying experience. If you need to fine-tune the fit of this pivot, Van’s recommends reaming.
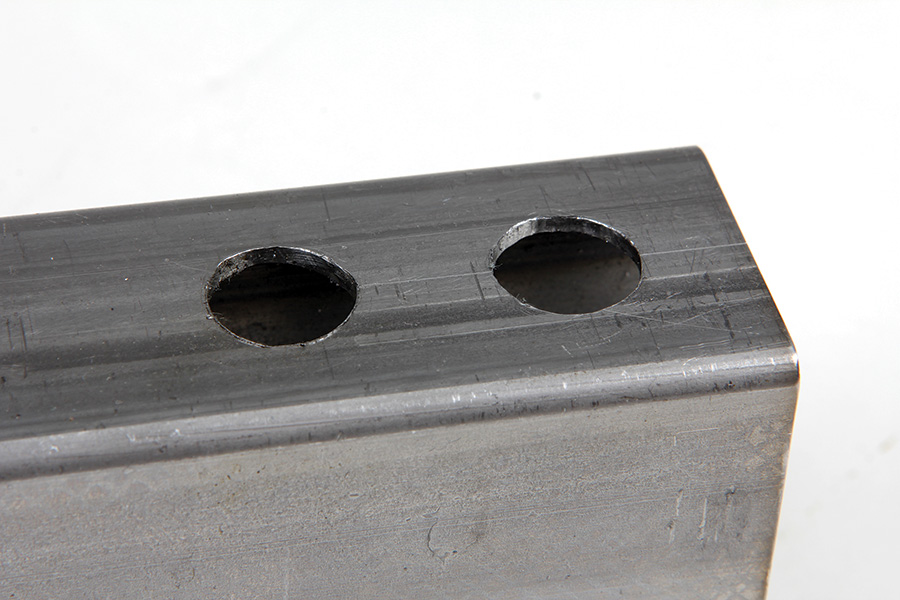
The pre-drilled hole (left) in thin-wall 1020 mild steel tubing and the reamed-to-size hole (right). Note the drilled hole is not exactly round, but after hand reaming, perfecto!
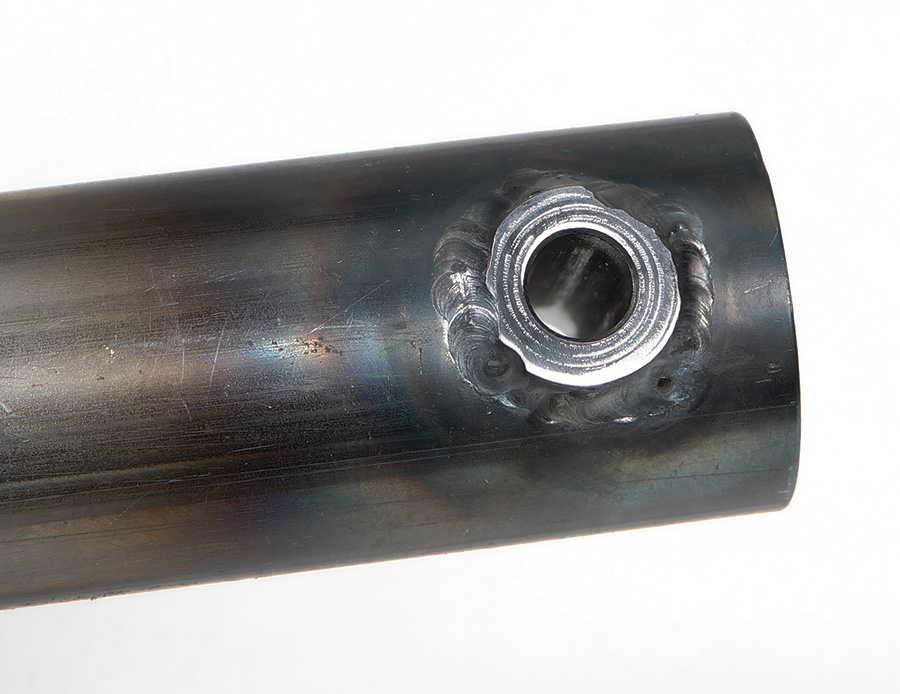
Reaming is the precision solution to cleaning up and sizing a pivot tube for a bushing. Cleaning up could include clearing out weld bumps that might be penetrating and affecting the ID. Or the heat from welding may have caused the tube to take on a slight bow.
Why not just drill it with a twist bit? That question is a hot topic on various RV forums. Many builders were satisfied with the results obtained by using a twist drill instead of a reamer. Others mentioned they did not need to do anything: the bushing-to-bellcrank pivot was fine out of the box. So the answer is: it depends. You can take your chances with a twist drill, but if you want the best possible “close sliding fit” (what engineers call free movement with minimal play), a reamer is the tool of choice.
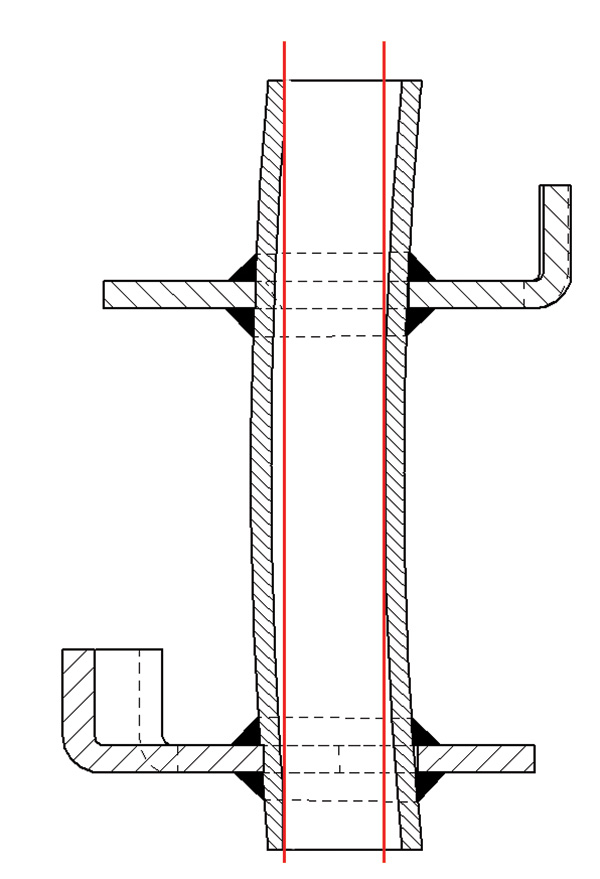
If you try to “drill out” weld bulges, the most likely outcome will be that the harder weld will force the drill off-line. The result is a gouge in the opposite side of the tube and an off-line hole. Drilling to try to correct a bow will create a similar issue because the drill will tend to follow the initial angle of entry. Reamers reduce this possibility by a combination of multiple flutes, slightly offset phasing of the flutes, and a taper at the starting end. The taper not only facilitates starting, it helps average the material removal in a bowed or weld-bump-affected opening. The red lines in Figure 2 show exaggerated examples: the drilled tube example shows an exit hole that is off axis and a potentially weakened sidewall. In the reamed example, the hole is centered and the material removal more even.
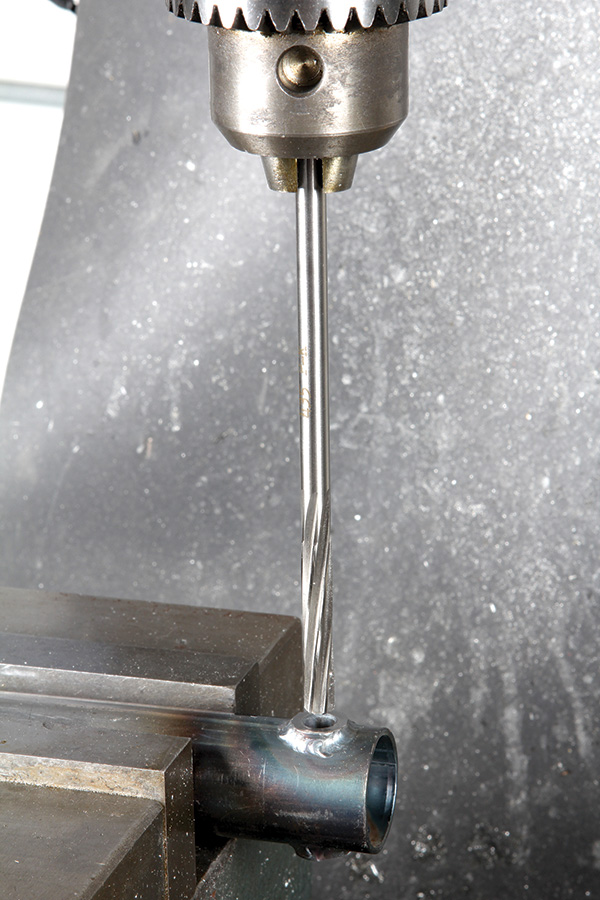
Among the types of reamers are hand reamers and chucking reamers. As the names imply, one is for use by hand and the other for use in a drill or drilling machine. If you are reaming fresh-drilled holes to size, chucking reamers in a drill or drill press are fast and foolproof. A little cutting oil (always use oil for any reaming), slow rpm, slow feed rate, and your holes will gleam.
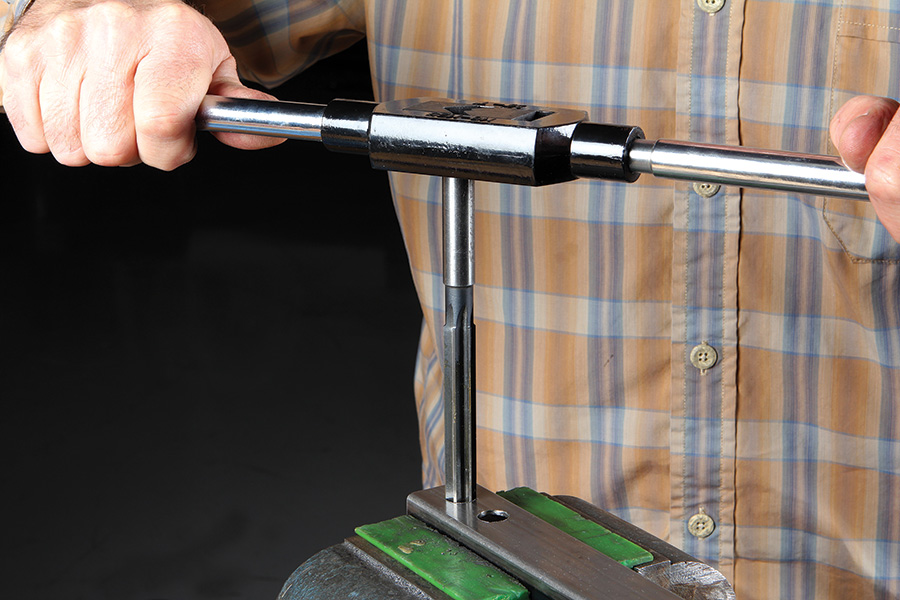
If you’re reaming weldments, a hand reamer is a better choice because of the tactile feedback through the T-handle. If there’s a weld bump or the starter hole is not exactly straight, the cutting forces will vary. With a hand reamer you can adjust the force and feed to compensate. The drawback to hand reaming is you have to eyeball that you’re feeding straight and square. If you’re wobbly or off-axis, you will create a bell-shaped hole. Fortunately, reaming is not all that complicated and a couple of practice holes will make you ready for the real thing.
In addition to hand and chucking styles, reamers can have straight or spiral flutes, or have a taper-shank (usually a Morse- or Browning-taper) to fit the quill of a machine tool, such as a lathe or boring machine. Also available are adjustable reamers with free-floating cutters that can be dialed-in to ream odd-sized holes or to match-fit custom-sized parts.
Spiral flute reamers are used mainly for holes with a key-way or grooves, but they work fine for any normal reaming application. They tend to self-feed like a twist drill, so ideally they should be used in a drill press with the work-piece clamped in a vise. If circumstances dictate using a spiral flute reamer in a hand drill, it should not be a problem, as long as the work-piece can be held steady.
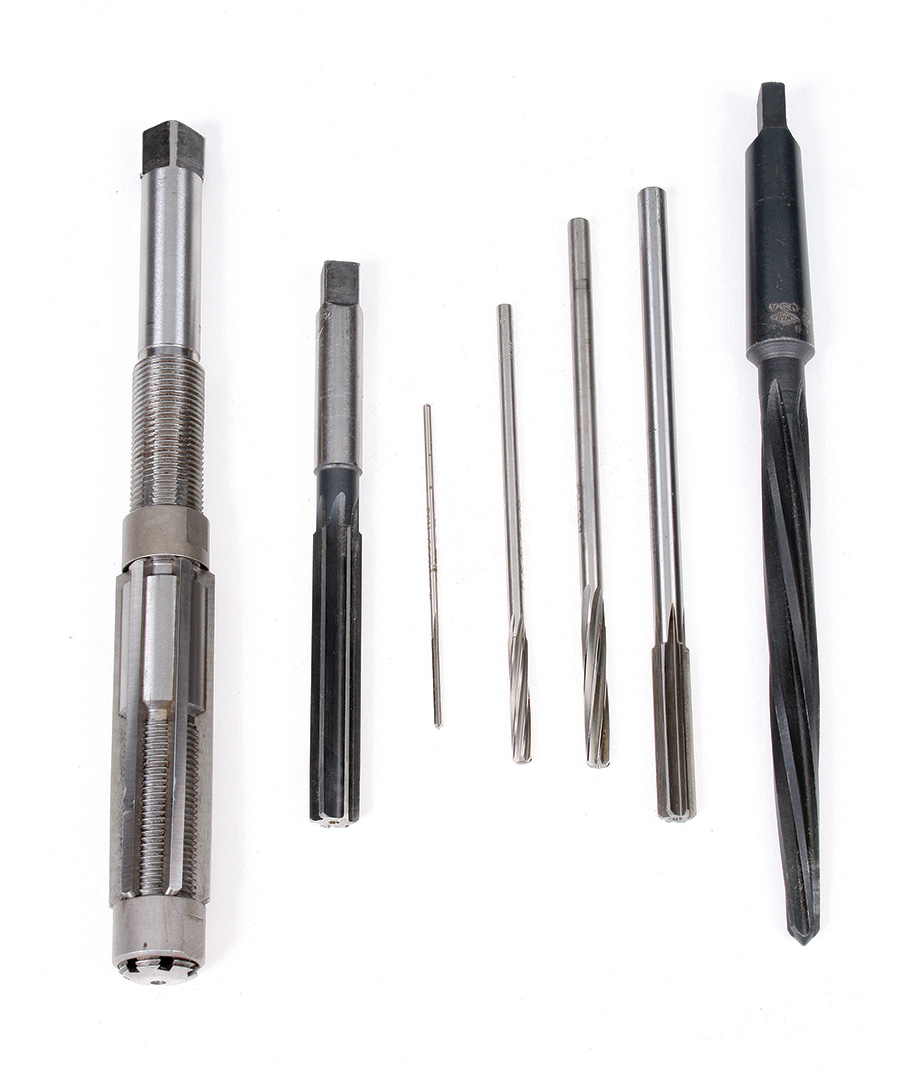
Left to right: A 7/8- to 1-inch adjustable hand reamer, a 1/2-inch straight-flute hand reamer, a small-diameter straight-flute chucking reamer, a 1/4-inch spiral-flute chucking reamer, a 5/16-inch spiral-flute chucking reamer, a 1/2-inch straight-flute chucking reamer, a taper-shank 1/2-inch “aligning” reamer. An aligning reamer is used to align and enlarge holes in mating faces.
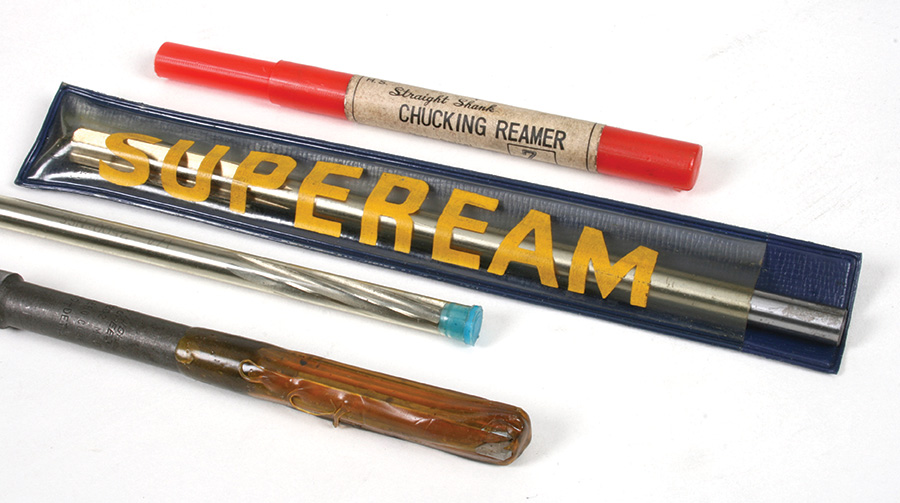
Reamers should be stored in a plastic tube or a sleeve to protect the edges. Treat them right and your reamers will last for thousands of holes.
Reamers are considered by some machinist to be old-school retro tools. In their world, modern CNC technology and precision carbide tooling have rendered reaming, at least in machined parts, to be obsolete. To test this premise, I lathe-drilled test holes in opposite ends of a piece of aluminum and sectioned them to compare the finish of the drilled end to the drilled-and-reamed end. Even under a microscope there was barely any difference. So for most hole-making and basic drilling applications, reaming adds little, if any benefit. But for those instances where you need to resize a hole in a welded part, or when sleeve-to-bushing clearance is critical, reamers offer an easy-to-use, reliable, and inexpensive (as in buy the one you need when you need it) solution.
A cross-section comparison of the off-tool finish of a drilled hole (L) and a reamed hole (R) in aluminum.

