When I build an airplane, I sort fo build everything all at once. That means that while I spend one day on metal work, I might spend the next installing nut plates, and the one after that doing wiring. Many wait to wire until the airframe structure is complete, but I have found that building wiring in along the way – while access is easy – can save time in the long run. Of course, that means you have to do some planning up front!

The majority of wire length—by footage—is running the length of the fuselage, and then some runs out to the wingtips. You probably run as much copper in those two places as you will behind the panel, because avionics wiring is short. Building the “spinal cord” from panel to tail is far easier (even when you use conduit) before the floors are nailed down, so think about it early.
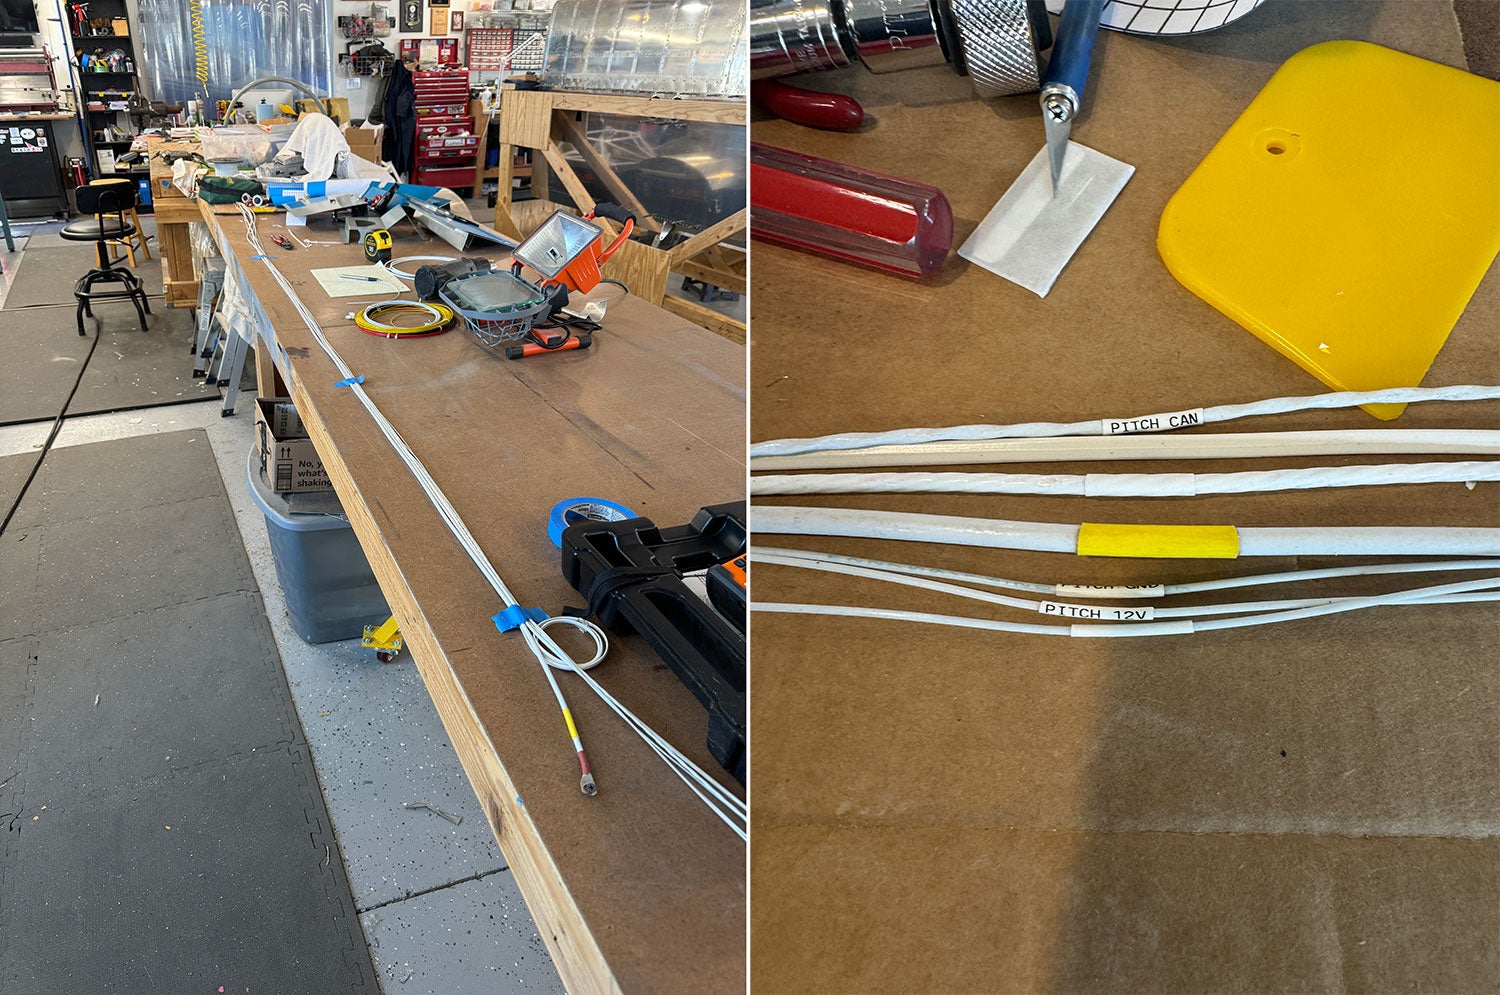
In the case of the F1 Rocket we’re working on, I started by doing an overview drawing of the entire electrical system, then zeroing on on where components were located in the fuselage. There are tail lights and a trim servo all the way back, the battery, master and starter contractors in the baggage area (along with an ELT), and some lights for the baggage compartment. I made a sketch of the fuselage bulkheads, and laid out which wires went from the forward cockpit to each point, and where it needed to stop. I then measured those bulkheads onto the layout table and began running wires, taping them to the table. Yup—lots of planning, including the sizes of wires and number of twisted pairs that need to go places. I labeled each wire at each end as I went using heat shrink labels.

Once all the wires were laid down, I added a couple of extra runs of 20 gauge, and an extra twisted pair of 22 gauge. I know from experience that I haven’t thought of everything! With all those wires in place, I pulled out the lacing cord and put some music on in the background while I tied up the bundle all the way from front to back. that completed, I carried it to the fuselage and pulled it through the under-floor conduit, running the long wires all the way to the tail, and coiling the stuff that goes up to the panel under the seat… for now.
We’ll do the same thing with the wings before closing them up. Then it’s just a matter of connecting everything up and building the panel harness. Piece of cake! Remember: all wires only have two ends, and where when you use traditional circuit breakers, fuses, or a “smart” electrical box like a VPX, you still have to do all the wire runs. So make it easy on yourself and run the spinal cord early.


Great tip. I was thinking about this the other day while re-wiring parts of a British sports car, wishing I could pull it all out and start from scratch and not have to work in tight, dark, awkward corners. I remember touring Basler Turbo Conversion and seeing a harness being made on a DC-3-sized loom.
Well I’m not sure how this technique will work with 6 volt positive ground……but Lucas (the prince of darkness) might allow it!
I’m wondering about induced current in parallel wires? Are all these wires shielded and that’s why you aren’t worried about one large bundle?
I’ve flown planes where you can hear the beacon “beeping” in your headset… that would be my concern. But I do like how neat and tidy it looks!
Good question! All of the wires that need to be shielded are shielded. Those that have DC current aren’t – and you’ll note that there are no antenna wires in that bundle -they’ll be going from the panel to the antennas under the pilot seat. In general, you’ll find lots of thick wire bundles in any aircraft with any significant avionics package – the trick is making sure that the bundles have compatible wires in them.
Comments are closed.