It started in 1974 with my first flying lessons. I was 14. Delivering newspapers, riding 17 miles a day on my bicycle before school, landed me enough money to take a one-hour lesson a month, or sometimes every other month at 12 bucks an hour with the instructor in a Cessna 150. Soloed on my 16th birthday after riding my bike to the airport…it was only 12 miles. I had to ride my bike; I did not have my driver’s license. The state trooper who gave me the driving test a few days later had a good laugh with it—yep, can fly an airplane but could not drive to the airport.
In ’77 I enlisted in the Air Force and ended up at Fairchild AFB, Spokane, Washington. This is where I built my Rutan VariEze. Pusher, canard, looks futuristic…sign me up. In ’86, during my crop dusting days, I decided to build a Rutan Quickie. Single place, pretty inexpensive, cheap to operate, and took me six months to complete.
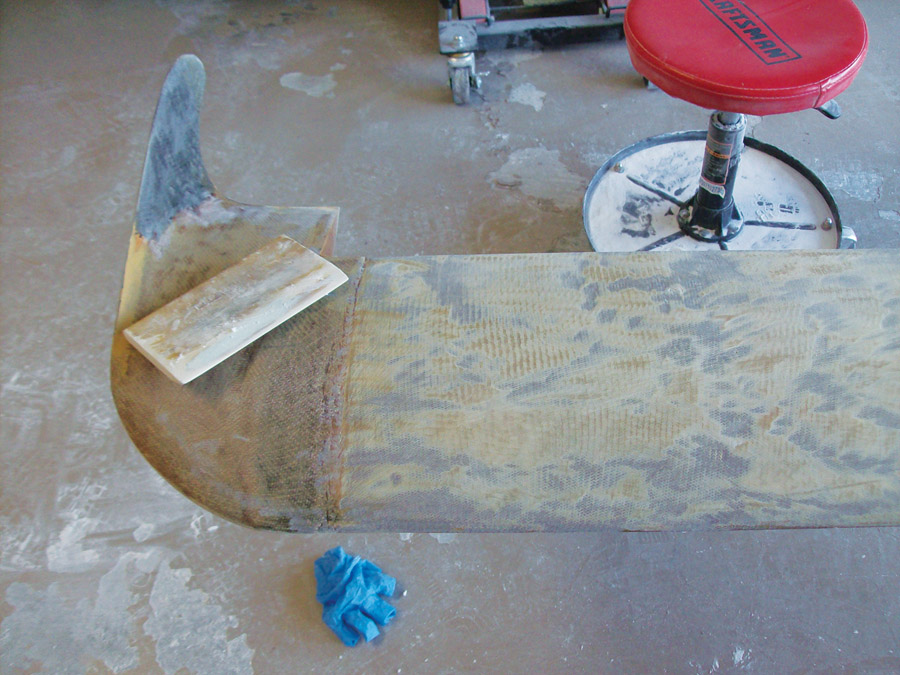
Canard tip. On a lot of the parts for the original Long-EZ, Burt Rutan says, “Sand to a pleasing shape.” Works for me…This is made out of carbon.
In ’95 I built a DR-107 One Design. I was getting heavy into aerobatics. The 107 took me two years to build. What a crotch rocket! One of the easiest taildraggers to land I have ever flown. It had an O-360 in it with a fixed-pitch prop. Just a blast to fly. During my time with the 107, I was doing fabric work for Ray Williams in Tennessee. This gave me experience rebuilding airplanes—mostly Pitts, but also a Stinson 108, Skybolts, and an Eagle or two.
Some of this rebuild stuff was insurance work…translation, it be broke. Cracked spars, ribs, wing tip bows. This started me down the path of how do I do this?
While flying for a commuter airline in Orlando, Florida, in 1999, I worked at Jim Kimball Enterprises doing their fabric work. This was top-end stuff. You only do the best with them. Their award list shows it, too. In 2000 I moved to Tennessee again and was out of building airplanes. But not for too long.
Back to Building
In 2001 the bug to build bit me again. Just kinda in my nature to create. This is when the Long-EZ kept coming back to the top of my “wanna build” list. Fiberglass work was no stranger to me, so this did not slow me down…well sorta. The finish work is labor intensive. The biggest expense is time. Lots of time to build a moldless composite airplane.
There were also a lot of unknowns. Could I build another airplane? Yeah, I’ve already built two other Rutan-type airplanes. Where would I do it? Hopefully at home. The build goes faster when you can work on it anytime you can. How long would this one take? Longest it had taken me in the past was two years. Could I afford it? Pay as I go; this will defer the costs over a period of time. It will cost blood, sweat, and a few tears. It’s not a hobby if it doesn’t involve blood.
Have you noticed the question of could I build it did not come up? In no way did I think I had all the knowledge to build it. However, I do not believe in can’t. Learning is enjoyable to me. So finding out all I needed to know to build an airplane was part of the journey. So why build? Learning. Building a cool airplane almost exactly as I wanted it was cool itself.
The Long-EZ has always had an appeal to me. Man, is it an older design though, like 1977 or so. But even to this day, it looks futuristic. Along came an article in Sport Aviation about Robert Harris and the EZ Hangar in Covington, Tennessee. I was living in Nashville at the time and called them. Robert was more than willing to talk to me about building a Long. So my soon-to-be wife and I did a day trip over to see him. My concern about the older design was put to rest when Robert suggested I build it with current knowledge of fiberglass structure and materials.
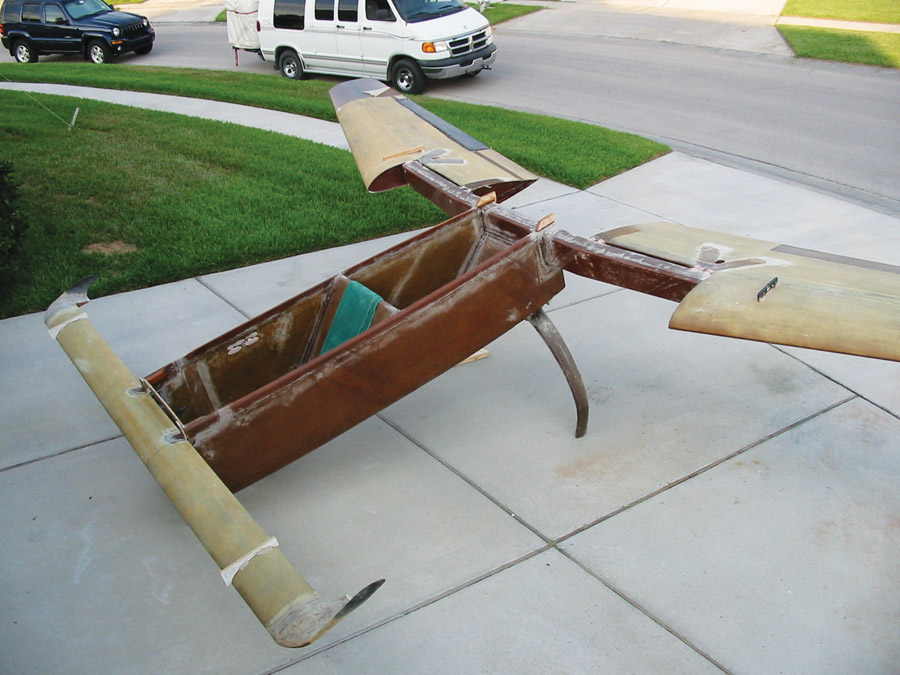
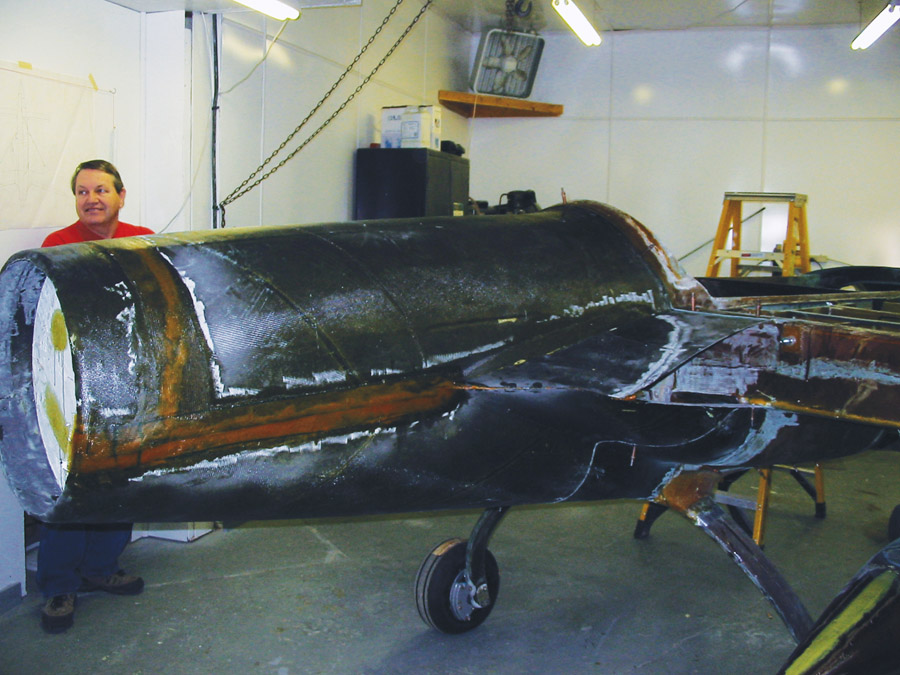
The second tub, with all the mods for strength, out of the garage for the first time. No wheels yet.
The visit started a friendship between Robert and myself, which we continue today. Robert ended up being my mentor with airplanes. He mentored me in the building process, building for ease of maintaining and flying homebuilts. How did this happen? Easy. Robert gets a lot of tire kickers. People talk a lot and then do nothing. It gets frustrating since Robert does not charge for this…consultation. It blows his time though. Then I disappeared for a while, so naturally he thought I was a pipsqueak tire kicker, too. I called Robert one day to say I had the center section spar built in Florida. Robert told me some time later it was then he realized I was serious about this and being a builder.
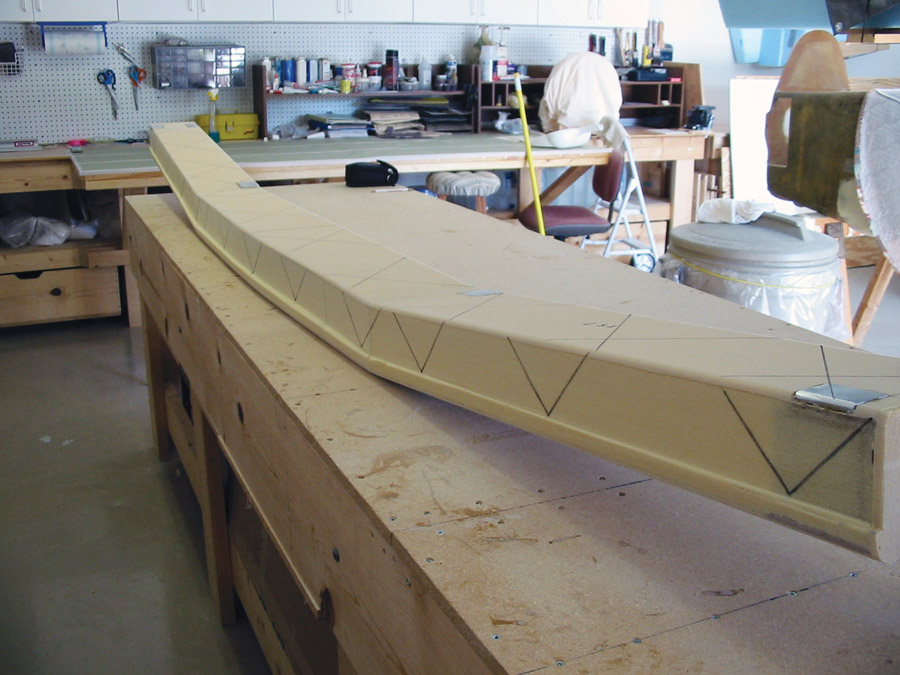
The center section spar ready for fiberglass layups. The black lines are for fiberglass weave orientation reference.
Why Not a Jet?
So now it gets interesting. As if building an airplane was not interesting enough already. From here on, it’s not a Long-EZ. I wanted a big engine in it…more power. The only time you have too much power is right before impact. I wanted to put an IO-360 in it with dual electronic ignition. Robert said fine, but we needed to change the structure since a Long has a 190-knot VNE and was never intended to have this much power.
First up was the canard. The airfoil is the stock GU canard…the internal structure is a bit different. Next came the wings and winglets. They come from another design, modified for higher speeds and weights. The winglet construction was pretty much stock at this point.
I had the fuselage to the tub stage, with mods for the higher horsepower engine, when I called Robert about the center section spar mods needed because of larger engine mount attachments. Robert suggested making the fuselage man size—four inches wider right down the middle and six inches longer in the back seat, along with moving the front seat bulkhead top forward one inch and moving the main gear aft one inch, so it would stand on its own and not have to be parked nose down. He also mentioned adding a ply of Kevlar to the bottom for off-airport puncture resistance. Crap. It would be easier and quicker for me to build another fuselage than modify the current one.
I gave the tub away…don’t know if the guy who took it ever did anything with it. But I built another tub with all the mods. I didn’t know how to make these mods when I started tub 2, but I figured it out as I went. All the measurements in the Long-EZ plans had to be changed—spar cutouts, bulkhead locations, etc. Change one thing and change six more…do the math.
Here is where we took a large jump toward unique. Robert suggested putting a GE T-58 jet engine on it, like he did with the CozyJet he built. Whaaat? Robert put a feather in my cap and said he thought I could handle the building and, more importantly, the flying of it. Up to me, but it would be different. I saw a challenge. Boy, did I underestimate this. Yep, we would only have to bolt it on and build a different engine mount. How hard could it be?
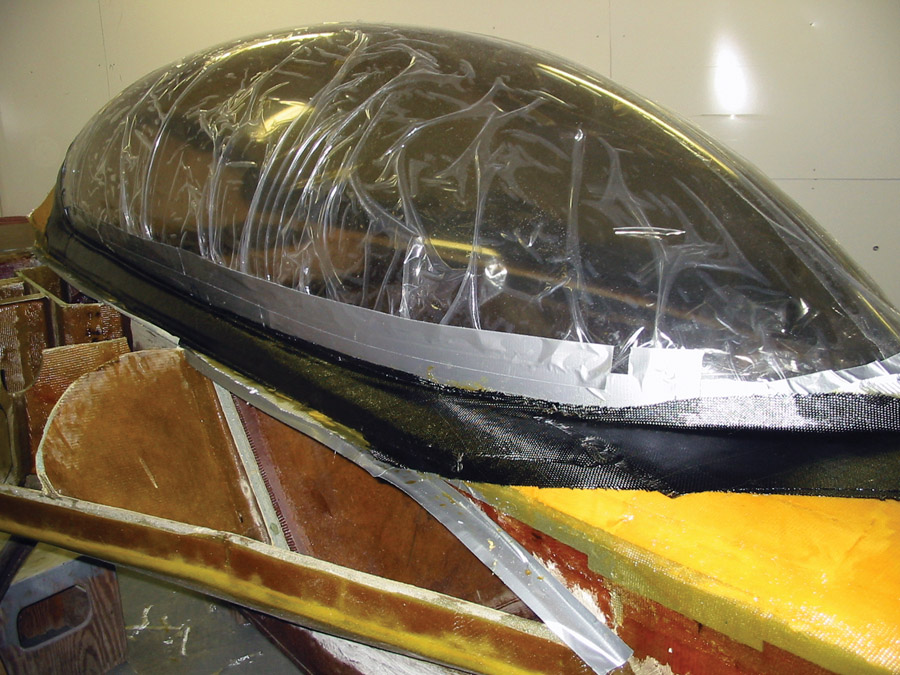
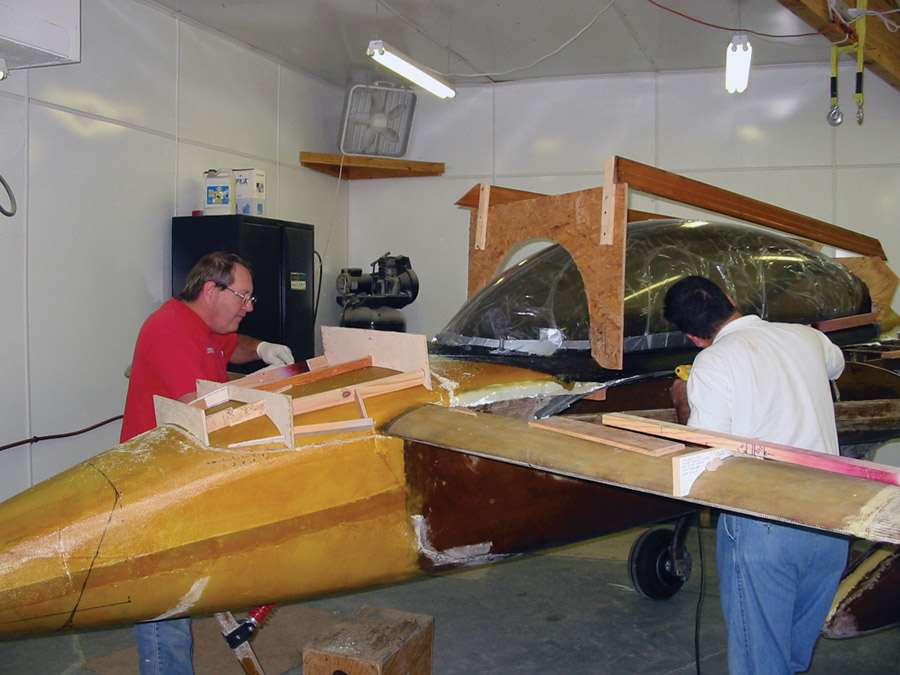
Canopy prior to being cut off. Yep, it’s bedded in carbon fiber. Most of the airplane is constructed with E-Z Poxy.
Full-On Building
Robert came to Kissimmee, Florida, to pick up my fuselage and take it back to his shop for us to have a concentrated effort to get some critical components built under his supervision. Robert and his wife, along with my wife and me, got the nose on it, along with the gear under it, and the canopy on it, mounted in carbon fiber. The nose gear is mounted a little lower than expected, as the main gear is modified for much higher weights and is longer than a Long-EZ gear. Mine is more like a Rutan Defiant. So for the airplane to sit at the correct attitude on the ground, we had to mount the nose gear lower. It has an F-4 style bump on the bottom…you did notice this, right? Most people don’t. We did all this in 10 days. This also exposed me to Robert’s advanced building techniques. Really advanced. How else were we to do all this in just 10 days? Oh yeah, we also cut out all the access holes these parts needed and glassed them in this time. We also completed minor stuff like cutting the canopy off the tub, mounting all three gear, cutting the canard access cover, and cutting the nose off for the batteries to be kept in the nose.
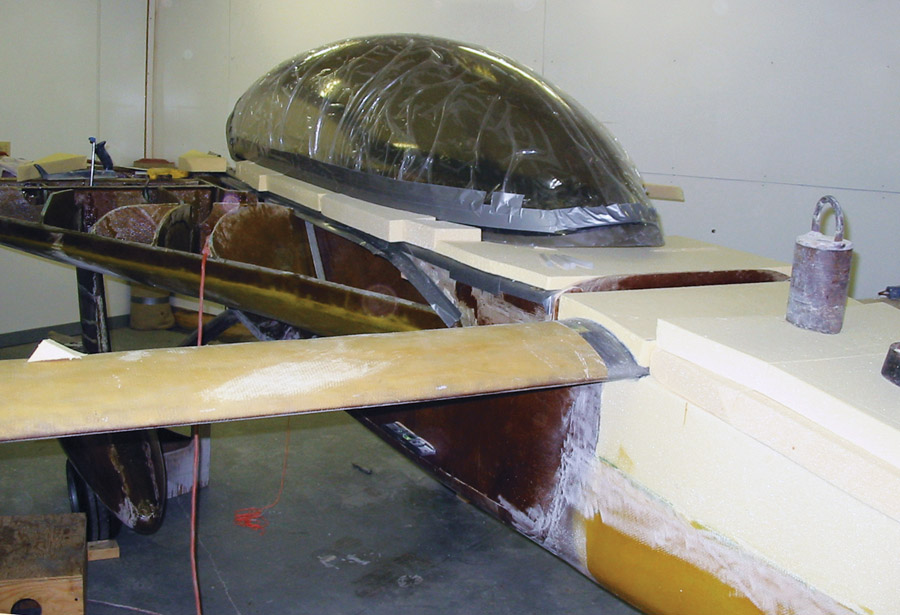
This is how the “pleasing shape” starts out…with foam blocks hot glued together, then you sand off what doesn’t look right.
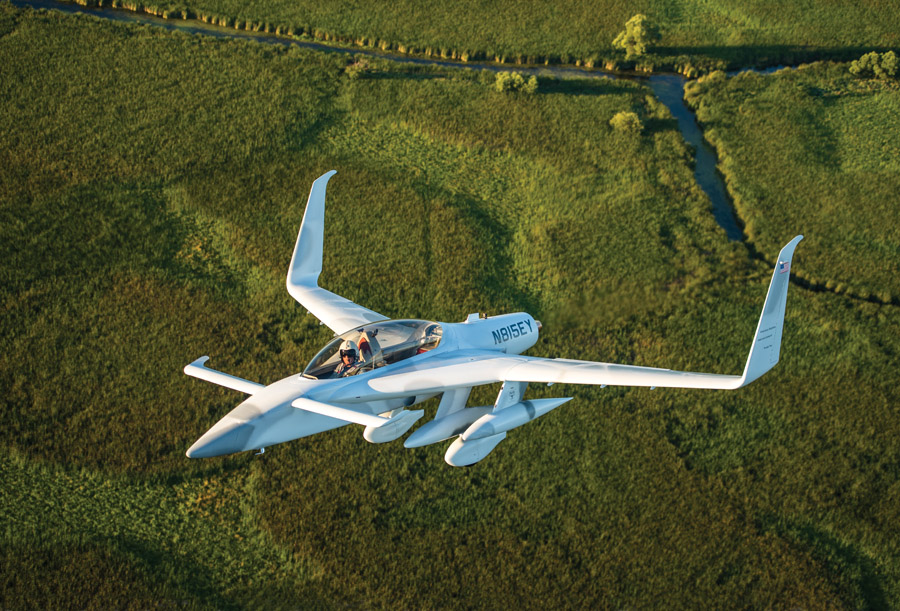
The canopy is much larger than a Long-EZ. As you can see from the picture on page 6, there is a lot of room between my helmet and the canopy. The canopy is also twice as thick as a Long-EZ canopy. Airplane Plastics in Tipp City, Ohio, blew the canopy plastic for us. I sent in a full-size drawing from the side and top, and they sent a clear test canopy. We marked the test canopy with a grease pencil, indicating things like move this down, make this shorter, etc., and sent it back. A short time later, the actual canopy arrived, tinted like I wanted, and it fit great. Really nice job at what I thought was a very reasonable price.
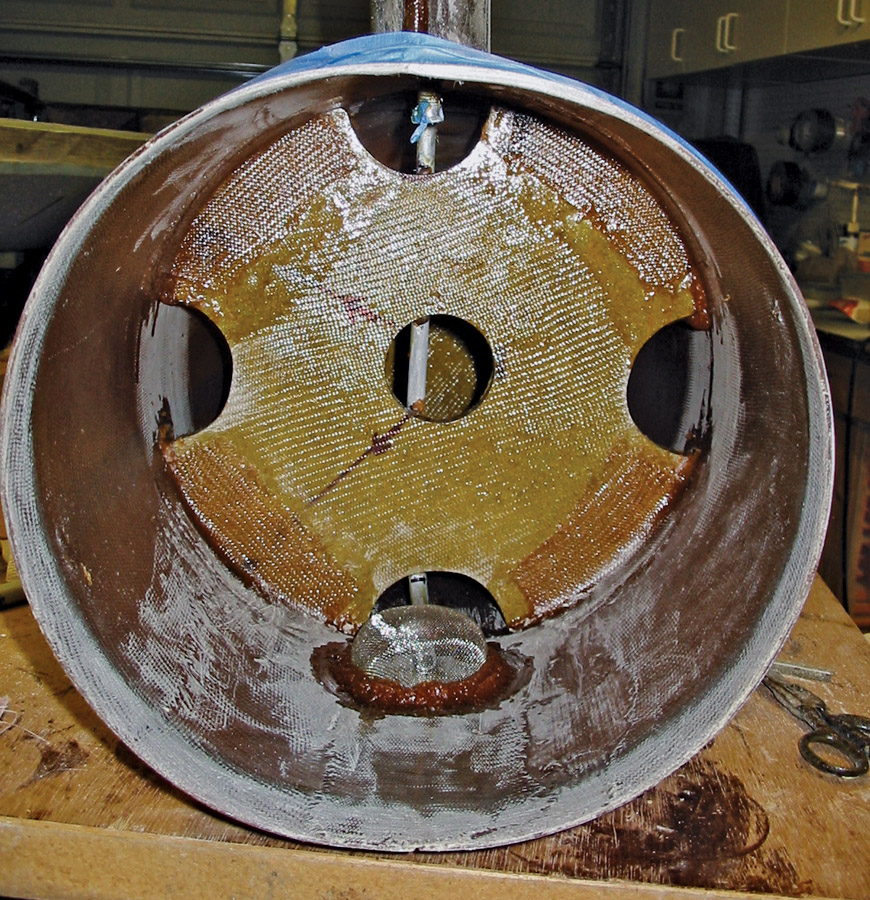
Looking forward inside one of the fuel pods prior to installing the back half. I put several baffles in to keep fuel slosh to a minimum.
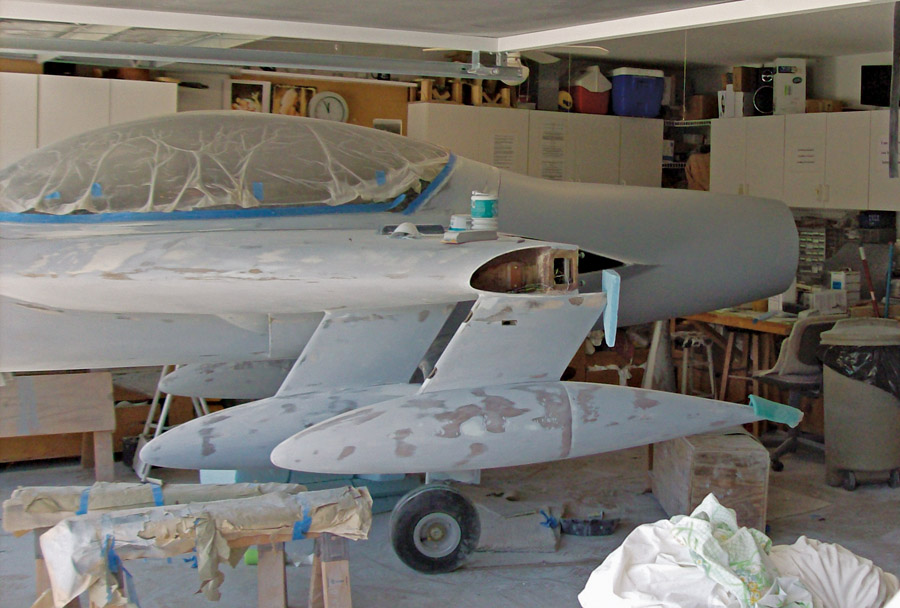
With the airplane back in Kissimmee, I built four sets of pods…yep, four. All four are modified FeatherLite pods. They are mounted permanently. Usually the pods are removable. Mine are not. The inner two are fuel tanks, and the outer pods are for baggage. Remember the change rule? How do you make mostly hollow structures (the pods) load bearing? They were meant to carry 15 pounds each. Twenty-five gallons of fuel per pod times 6.75 pounds per gallon is…a lot of weight. Back to learning. How to translate the weight to the strakes? I figured it out, along with the plumbing required to get the fuel from the pods into the strakes where fuel is usually kept.
Next came building the strakes themselves. They are bigger than a normal Long. Plus I wanted the strakes to carry the load of all four pods. There is additional structure inside the strakes for this. OK, I got carried away and overbuilt the strakes and pods. The pods have bruised, tweaked, cut, and poked all of us. They do not move—at all. I think they sometimes reach out and grab you because you’re too close.

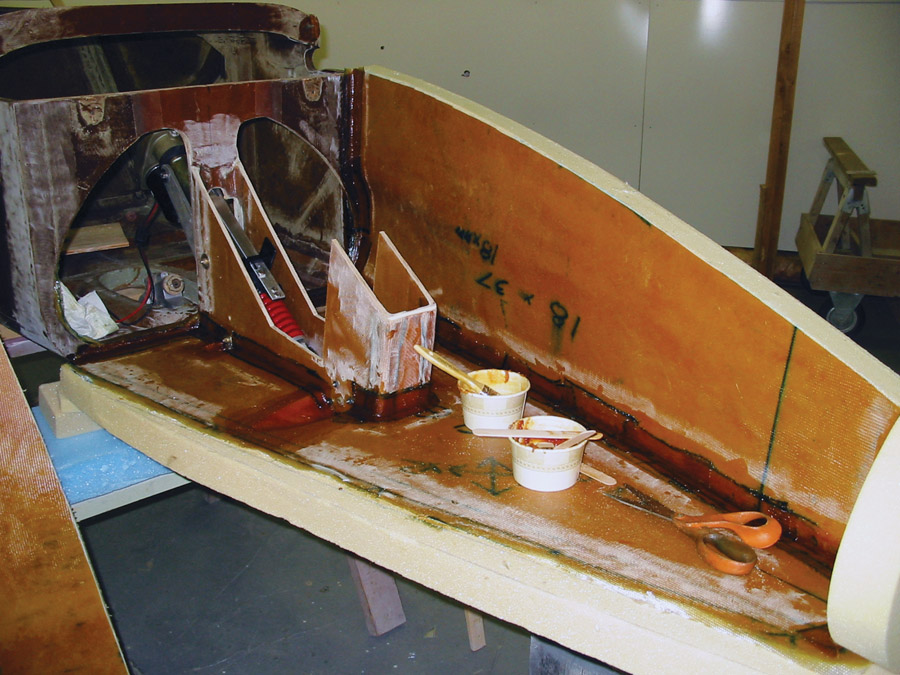
Internal structure of the left strake. I built two sub spars to carry the load of the fuel and baggage pods.
More Math
I wanted to know how much the strakes would hold, based on the size I made them. Robert wrote the formula upside down on the forward face of the left center section spar. It’s still there. Here was more math I had to learn. There is only one straight line in the strakes: the aft edge. Everything else is a curved edge. We did quick measurements and figured 107 gallons total. Based on this, I did not need the pods. I mean, we have over three hours of fuel in the strakes alone, and I have a two-hour bladder. The pods stayed on just for the cool factor alone. They kinda grow on you. We were wrong about the quantity of the strakes. Turned out to be 105.5 gallons. Well, they were quick measurements!
More math again: This engine will suck an Olympic-size swimming pool of air in one minute. What size do you make the intakes? Too small and you starve the engine, too large and it creates an air dam and drag, along with tunnel rumble and other problems. There’s a formula for that, too. Four of us used the formula and came up with the same square inches for an answer needed to size the intakes. Now build them! Aaargh. More aerodynamics involved here. By the way, the intakes work really well. We ended up with the airframe on a trailer, pulled it through several thunderstorms, and the water left a lot of streaks inside the intakes. They were all straight lines—perfect attachment front to rear. It was cool to see.
Aft of the intakes on the firewall is where the plenum has to bend the air around to the engine. There is a fair amount of voodoo involved with this. You don’t want to choke the air or cause it to separate and hit the first stage turbine at an angle. There are something like 45 cure cycles in the plenum alone. Yeah, it’s complicated. If you want to know how to build them, talk to Robert. He’ll probably laugh at you and say, “It’s complicated.”
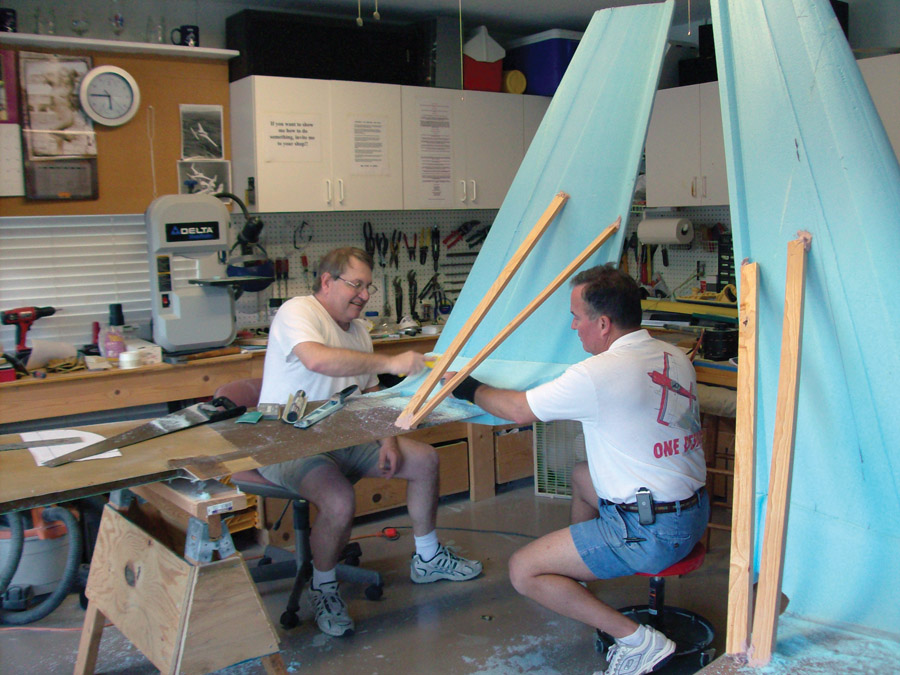
Robert (on the left) and I sanding the blend for the blended winglets. We were both much heavier back then.
The cowling is one-piece carbon fiber…well it is now. What you do is this: Put the engine on, cover it in foam, carve to a pleasing shape, glass the bottom (yeah, the airplane has to be upside down), turn the airplane over, then glass the top. Next, pull the cowling with the foam off in one piece, get rid of the foam, add rigidity to the inside, add the attachment points to put it back on the airplane, and you’re done! Yeah, right. Down the road I put a rather large hole in it where it had to be modified to accept the alternator, it needed intake scoops on the bottom to allow ventilation air, and I also added drain holes. Had to build a bump for the alternator hole, too. More aerodynamics here.
Blended Winglets
I thought it would be cool to have blended winglets. There’s no drag advantage in having them unless you can do better than about 150 knots in cruise, but it sure looks good. Talk about adding problems. The rudders on this airplane, Longs, and VariEzes are on the winglets. However, the inside surfaces of the winglets create lift. So the rudder only goes outboard. This makes the rudder act like a flap on a wing and increases the lift on the inside surface, which pulls the nose around. Works just like a normal rudder, only different. Also when you want brakes, you push on the rudder pedals, just like a normal airplane. When the rudders reach full deflection, you start to get brakes. So yes, you can push on both rudders at the same time in flight…mini speed brakes. So…the blend is curved…and it needs a cable going through the wing to actuate the rudder. This got into arms, radiuses, and deflections. Great, more math. Remember the change rule. So I figured it out. Move the rudder out sometime when you see the airplane, and you can see how I did it.
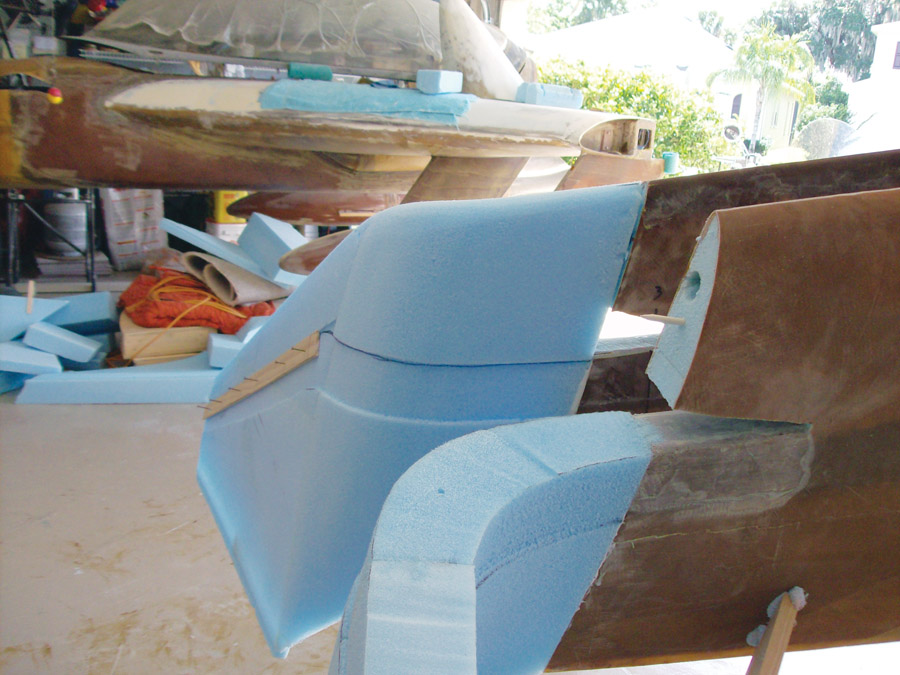
The front half of the winglet in the foreground has been cut off to allow the wing spar to be extended into the winglet.
Then there is the problem of structurally integrating the winglet to the wing and the shape of the blend. This is a biggie. The Long-EZ is able to take a side load on its winglets of 170 knots at 90 degrees. Now, I would not want to try it, but it’s strong. Robert came down to Florida for a visit, and we went after it. Basically—very basically—we extended the wing spar through to the tip of the winglet. Then we put the winglets on, shaped the foam for the blend, and glassed them on in three days. Day two was kinda long, but we got it done.
This is where the pipsqueak thought he was the master. When we glassed the outer skin of the winglets, I wanted to use peel ply at the end. Peel ply is used to wick up the excess epoxy, smooth the layup, make the layup appear thinner, and pre-prep the surface for more layups later. Robert had only seen peel ply in 2-inch wide rolls…this would take forever. I came out with a roll that was 5 feet wide. Slapped it on, and we were done in 10 minutes. Robert uses this technique to this day.
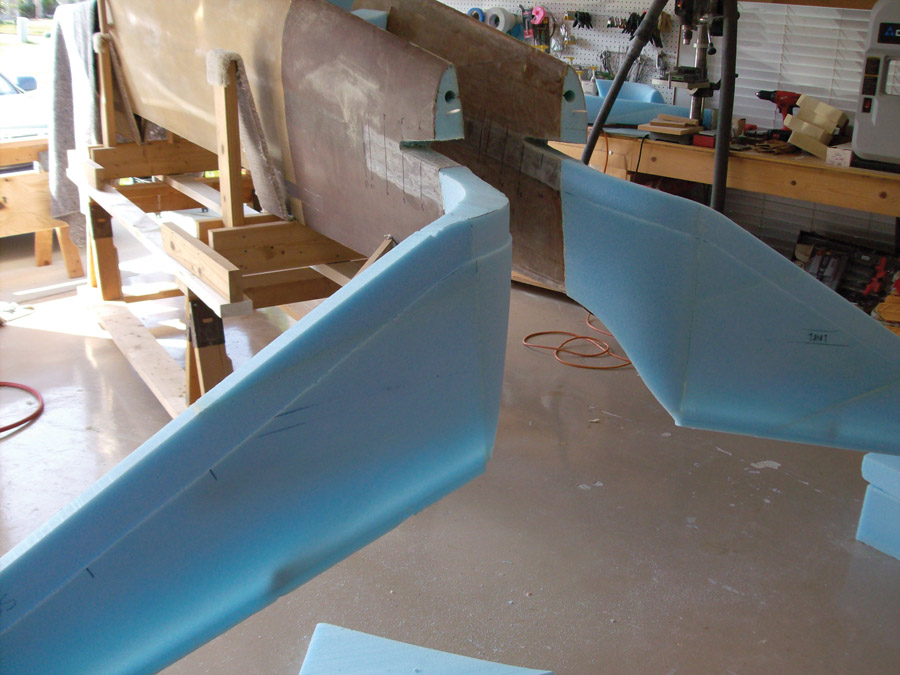
Both winglets ready for the fiberglass layups. Notice the cutouts for overlap onto the main wing spar at the end of the wing.
Before I wanted blended winglets, I thought I was going to use the stock winglets and had already built a pair to mount on the wings, complete with antennas in them. We did not use them because structurally, they were not strong enough to use blended. There is a lot of this when you build a one-of-a-kind airplane. Many parts I have built two or three times. Two sets of winglets, two fuselage tubs. What happens is this: I would be trying to overcome a problem, build the solution, and then see a better way—sometimes safer, sometimes lighter, sometimes a cooler way of doing it. I found it easier at times to think on it until I was happy with the plan, then jump in. Yep, you’re gonna make mistakes, yep you’re going to make more than one of the same part. But you know, in the end you’re learning, solving problems, and making it happen. And that’s what the Jet Eze project was all about.
There’s still a lot more work to do before it flies, but we’re out of space, so I’ll tell you the rest of the story in part 2.




I see alot of references to math. Can you point me in the direction of what math I need to learn? I want to make sure I dont get in over my head before I start.
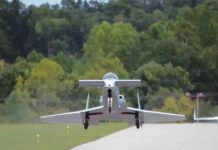
This great talented man died in his Jet Ez. I look at pilots and buildeers and kinda see that too much enthusiasm seems to cause one to over estimate their skills and build. Apparently, the left wing detached from the aircraft on a low pass over the airfield. This is one thing that steers me completely away from experimental aircraft, the fact that some guy, who can be both talented and skilled at building, really has no way to measure the practical implication of design modification except with actual flying. This is sad, I was reading this article by Lance on how he decided to build this aircraft, his past builds and experience. If you didn’t know that the Jet EZE crashed and killed Lance, you would think that this guy was a very enthusiastic genius and it nearly motivates a reader to replicate his accomplishments in building. When you know that he died in this aircraft that, essentially, represented his life experience in building, it completely sobers the idea and tapers the enthusiasm with ridiculous amounts of caution and fear caused by acknowledging the true risk. My conclusion is that builders are generally lucky that their innovations don’t kill them, and anyone who hasn’t yet died is either lucky and has not flown enough hours to make the percentages ring true.