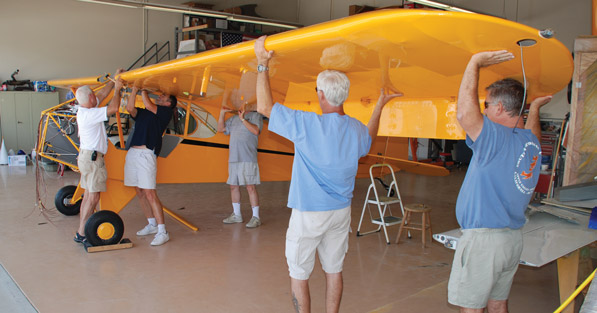
Dave Klages and the crew from Flo’s Cafe lend a hand to hang the wings.
With the fabric covering and the painting complete, the time has come to put the parts of the Texas Sport Cub together. So how long will that take? A few more Saturdays ought to do it, don’t you think? Right!
With the accomplishment of a major step, there is sometimes a tendency to believe that the rest of the work will be quick and easy. When it isn’t, the saying so well-known to homebuilders, “90% done, 90% to go,” rears its ugly head.
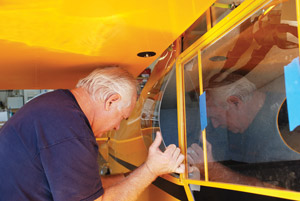
Prizio flexes the D window to get it into place. Easy….eeeaaassyyy.
The euphoria of being “almost” done succumbs to the depression of realizing that there is still much to do, and that which remains is often the most difficult and frustrating part. With this being our third airplane, you would think my buddy, Ed Zaleski, and I would be immune to this particular delusion, but you would be wrong. We stood there glowing as we surveyed our freshly painted parts on Memorial Day and actually thought we might be able to make Oshkosh a scant two months later. I can offer no explanation for this silliness. We don’t even keep beer in our hangar refrigerator. Maybe it was brain damage from the paint fumes.
Wishing to channel our good feelings into good progress, we immediately started bolting on parts. There is something intensely gratifying about bolting on large parts. We were making quick headway and feeling fine. The gear went on first so that we could roll the fuselage around more easily. The wheels and brakes quickly followed. These are standard Grove components that can be found on many kit aircraft. Of course, we bled them by pumping fluid in from the brake caliper up through the system into the reservoir. (Note: Never let anyone talk you into bleeding airplane brakes by filling the reservoir and pumping the pedals to push the fluid downward. This process may work for some, but it’s not a sure bet. Do it the right way the first time and save yourself some grief.)
The tailwheel presented us with a problem. It was secured with a nylon insert lock nut, not good practice for a rotating part, but worse yet, the bolt was too short to protrude at least one full thread beyond the top of the nut. We solved both problems by drilling the bolt for a cotter pin and substituting a castellated nut.
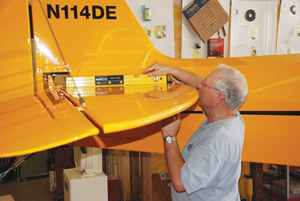
After leveling the plane, Zaleski uses a Smart Level to set the angle of incidence on the horizontal stabilizer.
Next came the tail surfaces. The horizontal stabilizer attaches to two tubes, one at the rear pivot that secures the trailing edges of each half, and one at the trim system jack screw that holds the leading edges. Brace wires top and bottom give the stabilizer strength and stability. A simple fixture and a fish scale let us set the proper tension in the wires. Elevators simply pin onto the stabilizer halves and bolt together in the middle. A special link between the elevators and their cables controls the elevator travel, but the part in the kit didn’t match the explanation of how it was supposed to work in the assembly manual. Rather than waste time hashing this out with our friends in Texas, we just made a new part. Such are the benefits of having a well-equipped shop.
With all of the control cables premade by Texas Sport, rigging the tail surfaces went quickly, and only setting the rudder remained. It pins in place, but the travel limits must be set by cutting and filing stops protruding from the back of the cage. Some care must be taken not to overdo it. We made a cardboard template with the travel limits marked on it and taped it to the top of the vertical stabilizer. A few judicious cuts with the Dremel tool, and we were all set.
Now for the Wings
As luck would have it, we ran into Dave Klages, another Cub builder (see KITPLANES®, January 2009), and some of his friends at Flo’s Cafe, that famous lunch spot at the Chino, California, Airport. We quickly recruited them to help us mount the wings, a job that benefits from having many hands available. With such a capable crew we had both wings in place in less than an hour. I must admit that my main contribution to this was taking pictures, but heck, that’s important—such a big event needed to be recorded for posterity.
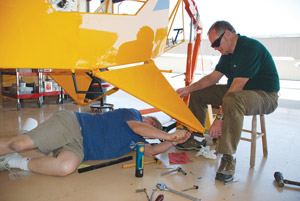
Zaleski installs the gear spring as Richard Eastman holds the gear leg in place.
When the crowd dispersed, we leveled the plane and checked the dihedral and washout of the wings. The initial settings Texas Sport provided were pretty close, so this was easy.
The boot cowl and firewall, which had previously been fitted, went quickly into place, as did the engine mount and Jabiru engine. Wow! It really looked like an airplane now. Of course, hanging the engine and fully installing the engine are not the same—not even close. There are still those little matters of sensors and wiring and exhaust system and fuel lines and throttle control and…well, you get the idea. Jabiru provides fairly complete documentation for installing and maintaining its engines. And attending the Jabiru USA seminar also gave me a good level of confidence (read the seminar story in the December 2008 issue of KITPLANES®).
Texas Sport, on the other hand, dropped the ball in this department. As far as I know they are still working on firewall-forward instructions for the Jabiru engine. A trip to Texas with my camera and a pattern of the firewall solved this problem, but it shouldn’t be that hard. The one good thing that came from another trip to the factory was the opportunity to fly the demo Cub again, which was nice. Whenever I am there, they always make time to take me up for an hour, so it is hard to stay mad at them, but I think it’s fair warning that this aspect of the kit is, shall we say, less than fully rendered.
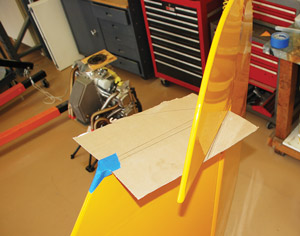
A cardboard template makes it easy to adjust rudder travel while you carefully file the stops.
Making Connections
One little problem that neither Jabiru nor Texas Sport addressed well was the connection from the carburetor to the air cleaner. The inlet to the Bing carburetor on the Jabiru engine has an outside diameter of 2.18 inches, but the SCAT hose that connects it to the air cleaner is 2.25 inches. We solved this problem by machining an aluminum ring to take up the difference, but for people who do not have access to a good lathe this could be unreasonably difficult.
The other offered solutions include wrapping some thin rubber around the carburetor inlet or pulling the wire out of the SCAT hose and simply crushing it down to fit. For a kit and engine that are both high quality, these strike me as unacceptably low-quality solutions, and this is a problem that either Jabiru or Texas Sport should fix.
With the engine hooked up and the Sensenich composite prop bolted in place, it was time to fit the cowl. Again, the high quality of the bulk of the kit parts was not matched by the quality of the fiberglass components. Way too much resin, fiberglass cloth and filler were needed to get the cowl where it needed to be. Luckily, we had plenty of composite experience to draw on from our past GlaStar and Sportsman work.
The cowl itself is made from polyester resin, but we had good luck using West System epoxy resin and 410 Microlite filler for the repair work. There is obviously no chemical link-up between these dissimilar resins, but with good surface prep the mechanical bond is solid. This only works because the cowl was fully cured using vacuum bagging. Epoxy resin will not adhere well to polyester or vinylester parts that are not fully cured.
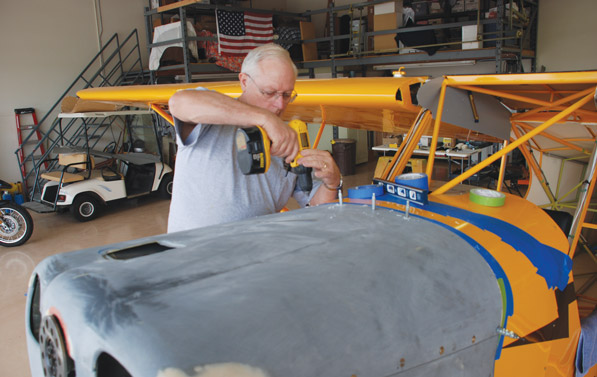
Clecoes hold the cowling in place before the Camloc fasteners can be installed. Some remedial fiberglass work was necessary to get the cowl where it needed to be.
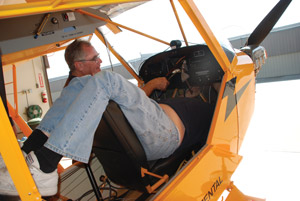
Zaleski assumes an awkward position to get behind the instrument panel as Eastman assists from outside.
The wiring and instrument panel came next. I agonized over letting Texas Sport provide me with a prewired panel versus going with another vendor who had given me good service in the past. Because they had the panel template, which had to fit the boot cowl exactly, and they knew where cross tubes behind the panel could potentially interfere with radios and other components, I decided to give them a shot at it. This could have gone better. It wouldn’t be fair to say they did a bad job, but it didn’t turn out the way I had hoped.
The components were as ordered: Dynon FlightDEK-D180, Garmin SL40 com, Garmin GTX 330 transponder, Garmin GPSMAP 496, and PS Engineering PM 1000 intercom. This package was designed to give me everything I needed to operate in our busy Southern California airspace, while also being as light and simple as possible. The finished product looked good at a glance, but there were a few things missing. Most notably, the panel came with nothing labeled and no instructions or wiring diagram. When I say nothing was labeled, I mean nothing: no labels on switches or circuit breakers, no labels on wires that had to connect to other components, and no labels on points of connection for anything. Using the Jabiru and Dynon manuals, we were able to figure everything out, but we had to cut wire bundles apart and trace things down wire by wire.
Engine Start
With everything hooked up in a way that seemed right, we pulled the Cub out of the hangar and fired it up. The engine started right up and ran smoothly. It is always great fun to start the engine for the first time, but our euphoria was short-lived when I noticed that there was no indication of oil pressure. The engine was running so smoothly that I really didn’t believe it, but who has the guts to keep running a new engine when the oil pressure gauge says zero? Not me! Thus began a saga lasting some three months that ended with us having the panel rebuilt by Aerotronics, and finally sending the D180 back to Dynon. Some of this was clearly unnecessary, and not entirely the fault of Texas Sport, but we could never overcome the basic lack of confidence we had in our ability to decipher the panel wiring. We now have a panel we are confident with and a Dynon unit that has been repaired by the factory under warranty. Everything works, but it wasn’t easy getting there.
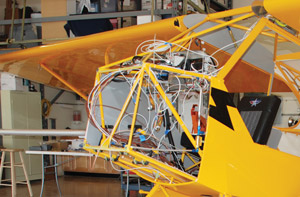
Wire bundles had to be cut apart to trace the circuits, because no wiring diagram was provided with the kit.
The interior and windows, even without instructions, went in quickly. The windscreen was our biggest concern, but the Texas Sport guys talked us through it. It’s fairly obvious how everything should go together, and if there was ever any doubt we just drove around the airport until we saw a Cub parked outside and looked at it. Examining other Cubs and meeting Cub owners became part of the fun. Maybe those Texans knew that all along.
Down by Law
With the wiring and electronics now sorted out, the plane was nearly complete. We weighed it, and I put together the equipment list and weight-and-balance paperwork. The Pilot Operating Handbook got its needed final touches, and the appropriate FAA forms were filled out. We were ready for the DAR inspection. Two things added some drama to this normally fairly uneventful process. The first was that the Texas Sport kit is not on the FAA’s pre-approved kit list. In other words, the kit has not been reviewed for compliance with the so-called 51% rule. This is because just about the time Texas Sport got its paperwork in order to get the kit approved, the FAA shut down the approval process for all new kits. This led to the second problem, which was the uncertainty caused by the protracted FAA review and rewrite of the 51% rule. With a new rule coming, everyone was unsure of what effect, if any, the pending revision would have on what they were doing while the review was in process.
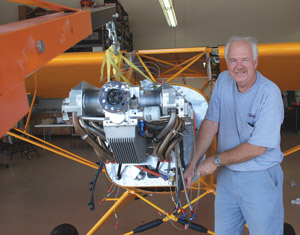
Installation of wires and hoses must be completed after hanging the Jabiru engine.
The proposed new 51% rule was going to add requirements that the Texas Sport kit might not meet, and there was talk that it would not be grandfathered in, because it was not on the approved list. To add stress to the moment, the proposed rule was set to be implemented on November 1, 2008, a mere two weeks hence. It took some serious negotiating with the DAR to convince him that my version of the FAA Form 8000-38 was correct, and that five other Texas Sport Cub kits just like mine had already been given Airworthiness Certificates. Because he trusted us from our two previous projects, and because he could point to the other Texas Sport Cubs that had been certified, he issued the Airworthiness Certificate for N114DE on October 18. Whew! What a relief.
Now that the new rule has been implemented, and the old Form 8000-38 has been replaced with a new form found in Appendix 8 of AC 20-27G, we can see that our kit would probably pass muster as amateur-built under this new rule. However, while we were nearing completion of the project, it was not at all clear that this would be the case. In retrospect, our concern about the announced implementation date of November 1, 2008, was also unnecessary. It was 11 months later before the FAA published the final rule. Not having a crystal ball, we had no way of knowing any of this at the time.
The Value of DIY
We now have a completely assembled and certified airworthy Experimental/Amateur-Built airplane. It took 13 months and about 900 man-hours to get here. We could have done it more rapidly through the factory’s builder-assist program, but we just didn’t want to go that route. We had taken advantage of quite a bit of factory assistance on the Sportsman, which was great and really saved a lot of time, but Ed Zaleski and I both felt that something was lost in the Sportsman building experience that we didn’t want to lose with the Cub. We had pushed so hard to get the Sportsman done quickly that much of the fun had been squeezed out of the process.
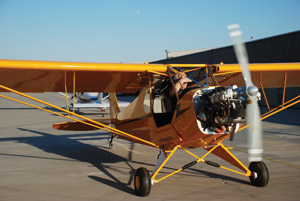
Prizio starts the Jabiru engine for the first time, even though there is still much work left to be done to complete the project.
This is not to say that factory assistance is not a good thing—quite the contrary for some people. You just have to decide if you are building because you enjoy building, or if you are building because you enjoy having something to fly. If you just want to go flying, the factory builder-assist program is wonderful, saving months of time and many hours of personal effort. Also, items such as the instruction manual suddenly become unimportant. There is no waiting for missing parts or helpful advice, no head scratching, no messed up parts because you didn’t understand the instructions, and no driving around the airport looking for another Cub so you can see how to do something. On the other hand, there is no satisfaction from figuring something out yourself or coming up with a better way to do it. And there is not much of an opportunity to meet other Cub owners as you search for answers to your questions. Like everything else in life, there are pluses and minuses to each approach.
As kit manufacturers come to grips with the changes to the 51% rule, we will see how these factory builder-assist programs fare. My guess is that some of these programs will need to be restructured to be more educational with less direct assistance than they had before, but they will probably survive.
In the next and final article of this series: first flight, the flight-test period and a look back at the whole process—what went well, what didn’t and what we would do differently if we had the chance. But for now we are just basking in the glow of a beautiful new Cub that has been blessed by the FAA and is ready to fly. Woo-hoo!
For more information, call 866/746-6159 or visit www.txsport.aero.

