As much as I wanted to do everything on my RV-4, there were a few areas where I felt I’d be happier in the long run by working with a professional. Note the emphasis on working with; I did as much of the paint prep as I could, but left the actual application of paint to an aircraft paint shop. Likewise, I assembled the backing plates and foam before handing my seats over to an upholsterer. (See the June 2013 issue of KITPLANES® for an article on this approach to seats.) And finally, though my fluid lines were all professionally made, consulting with the experts and fabricating the proxy lines proved quite educational. In each case, having a pro take that last step meant that I was involved in the process, but the final outcome met professional standards of quality, safety, and appearance.
The Importance of Fluid Lines
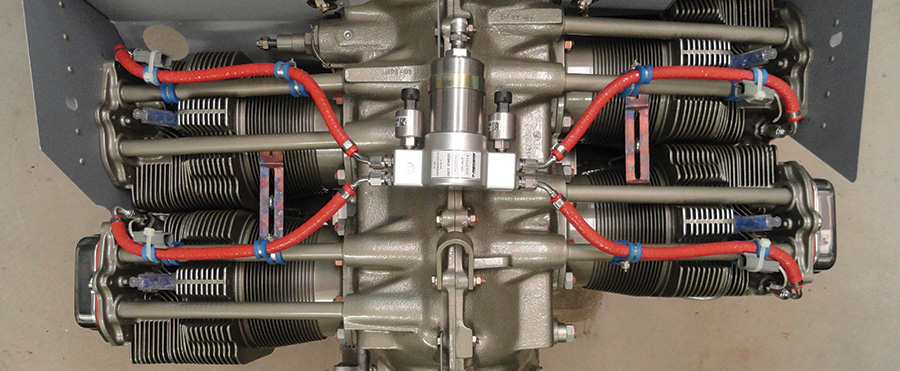
According to the NTSB study on Experimental/Amateur-Built accident rates released last year (a fascinating read at www.ntsb.gov/doclib/reports/2012/SS1201.pdf), “accident analyses indicate that powerplant failures (23.2%) and loss of control in flight are the most common E/A-B aircraft accident occurrences by a large margin.” Combined with “loss of control on ground” (10.5%) and “fuel related” (9.8%), fluid lines (fuel, oil, brake) were either directly or indirectly involved with systems accounting for nearly half of all E/A-B accidents. This fact alone convinced me that having professionally-made, firewall-forward fluid lines was a good investment; furthermore, the economic advantage of making my own was not significant enough to invest in the tools required. This is not to say that homebuilders can’t make their own safe fluid lines; they can and do. Hopefully this article will provide the information you need to decide on the approach you’ll take regarding your hoses. In this article, we’ll first discuss the pros and cons of do-it-yourself (DIY) versus professionally-built fluid lines. Then we’ll show you how to rig up the proxy lines, which are a good first step, regardless of the route you choose.
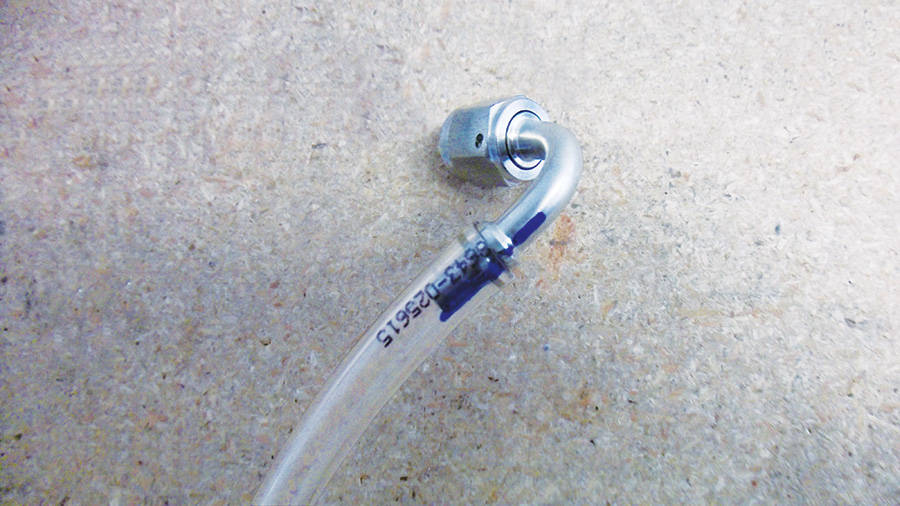
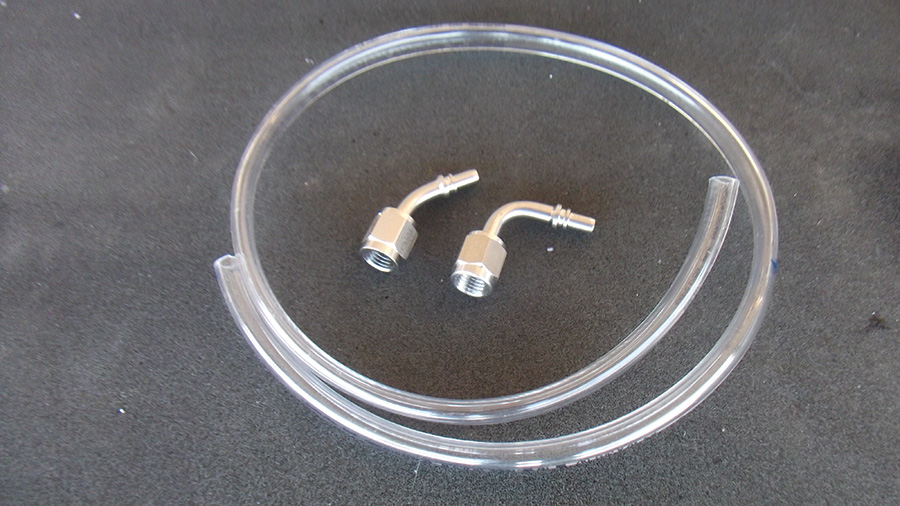
Proxy stainless steel fitting in poly tubing. Note Sharpie mark indicating clocking. Make this mark when the proxy hose fits as desired, while still on the airplane.
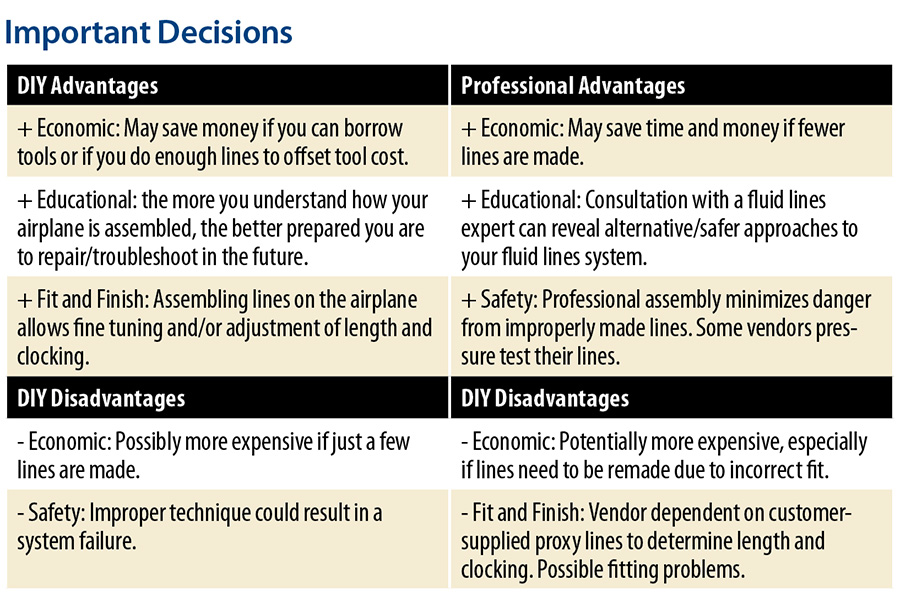
If you decide to go the DIY route, don’t underestimate the extra legwork involved with any customized subsystem of your aircraft. Research the available hoses, fittings and tools (and be prepared for some serious sticker shock when you see what a single fitting can cost), and then learn the proper assembly methods and pressure test your lines. DIY hoses will typically be either Aeroquip 301- or 701-type rubber hose with their associated Aeroquip threaded compression-style aluminum fittings, as compared to Teflon hose with crimped stainless steel fittings supplied by custom line vendors. DIY rubber hose is cheaper than Teflon, but it may not last as long and may not be compatible with auto gas that contains ethanol. On the other hand, Aeroquip fittings are more expensive than crimped fittings—but may be reused. (Crimped fittings won’t be a DIY option for most builders since the crimper runs several thousand dollars). Actual fabrication of lines is beyond the scope of this article but was covered in the September 2006 edition of KITPLANES® (see “Getting Hosed” by Marc Cook), as well as a couple of EAA Hints for Homebuilders videos (online at http://eaavideo.org, “Aeroquip Hose End Fabrication and Removal,” etc.). Further information is available in Chapter 9 of AC43.13, and Chapter 7 of Reithmaier’s Standard Aircraft Handbook, which provides an excellent overview of aircraft plumbing systems. There’s no shortage of informational resources for the motivated builder.
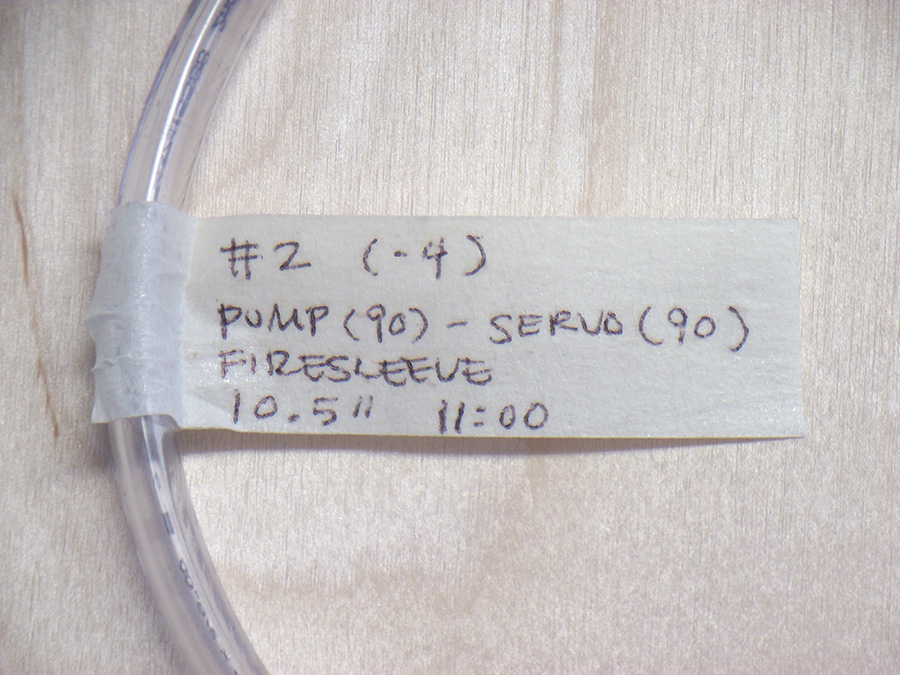
Label each proxy line with a number at the very least. Reference this number with detailed notes in your log per the article.
It’s worth noting that one of the big advantages of custom-made lines is that some vendors will send you a variety of fittings that you can use to come up with the best fluid line set-up. The fittings you use in your proxy lines will simply be transferred to the final fluid lines, and there is no charge for the unused fittings—assuming you send them all back! For DIYers, having a sufficient number of fittings can tie up a fair bit of your budget. Before deciding on a vendor, see if they are OK with sending you fittings for mocking up proxy lines.
For other builders, the issues of safety and the cost of investing in tools will steer them towards professionally made lines. Within this category though, we can divide available products into truly custom made versus pre-manufactured lines of fixed length/fittings. For example, while my RV-4’s firewall-forward fuel and transducer lines were custom-made by TS Flightlines, I was able to use Van’s stock oil cooler hose and Summit Racing pre-made -4 stainless hose for my brakes. This saved me quite a bit of money over having these custom made. So before fabbing your own lines or ordering custom, make life a bit easier on yourself and see what’s available in the catalogs.
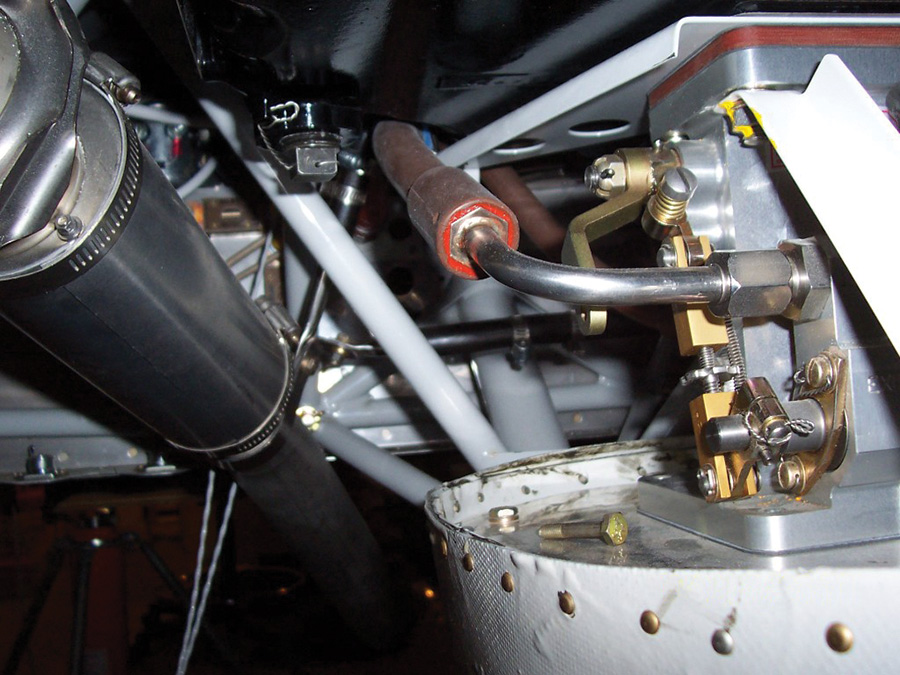
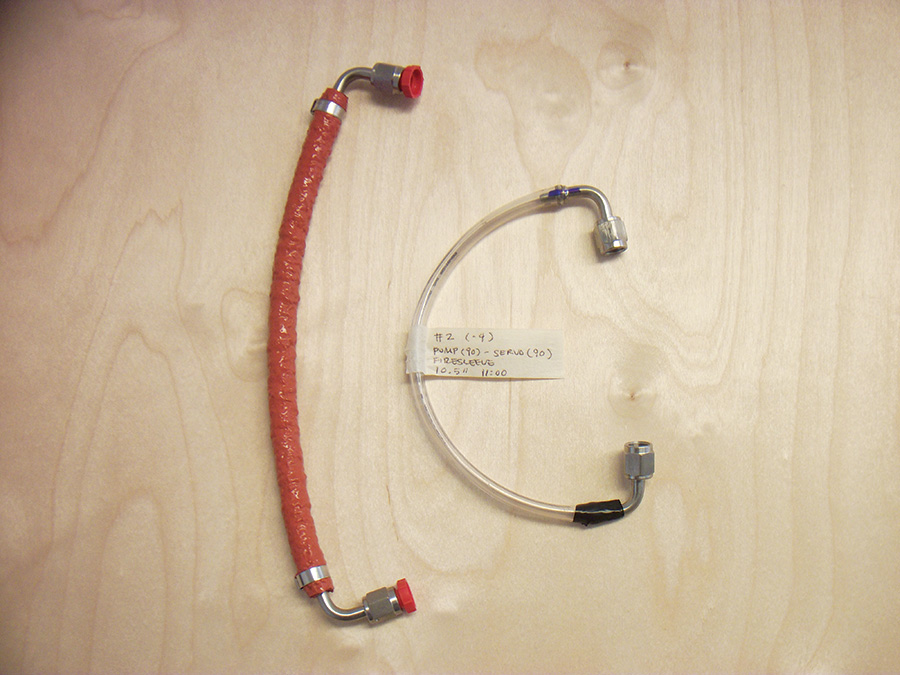
Bob Federhofer has a SilverHawk servo for his RV9A. A standard drop-90-degree hose end would hit the control levers on the servo, so a 2.375-inch drop-90-degree hose end was made from 304 stainless and crimped to an Aeroquip AE466 integral firesleeved hose.
Going Custom
It may be difficult, however, to use catalog/kit manufacturer-supplied hoses exclusively. In that case, it is time to find someone to fab your lines. I originally used a vendor well known in the Experimental community, but unfortunately ran into real difficulties as the vendor missed multiple deadlines to deliver the remaining hoses. Frustrated, I went online and found that many Van’s builders highly recommended Tom Swearengen of TS Flightlines. I emailed Tom and told him my dilemma: I was several weeks away from my FAA inspection and still had no fuel lines. Tom called back within 2 hours and shipped a set of fittings the next morning. Once he had my proxies in hand, he had my finished lines heading back to Nevada in less than 24 hours—truly outstanding customer service.
Tom has been building hoses for automotive and industrial applications—and now Experimental airplanes—for 30-plus years. He got his start in hoses when building a Manta Mirage kit car. “You couldn’t just go to your neighborhood parts store and buy hoses,” said Tom, “so I learned from some retired military mechanics, took some classes, and applied what I learned.” Tom founded TS Flightlines in 2009 and has built lines for the RV-1 restoration project, Team AeroDynamix, KITPLANES® Editor Paul Dye’s Tsamsiyu, and a host of other Experimental aircraft.
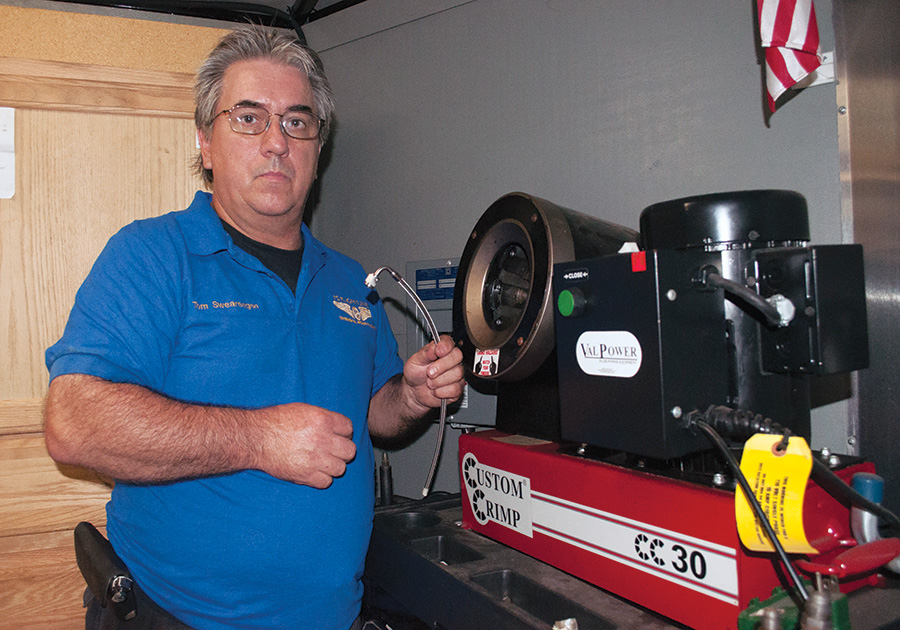
Tom Swearingen of TS Flightlines, pictured here along with a crimping machine that ensures high-quality, high-pressure hose assemblies.
Getting Started
When you are ready to order your lines, the first step is to call the vendor and discuss your installation. “Ninety-nine percent of what I build is stainless braid conductive Teflon hose,” says Tom. “It’s perfect for most airplanes, and adaptable to virtually any application. The Teflon liner is impervious to most fluids, including fuels with ethanol. The general working pressure of up to 3000 psi is overkill for our applications, but it’s good to know that the hoses will stand that pressure.”
For firewall-forward applications, Tom uses AS1072 firesleeve to protect hoses from heat and possible fire. “Most of my hose ends are stainless, with some AN aluminum for specialized applications,” he said. In addition to the more common hoses, TS Flightlines also makes specialized hose ends, such as long-drop 90-degree and 180-degree fittings for fuel systems, as well as rigid tube assemblies. Don’t be afraid to ask for the vendor’s help in solving problems that defy ordinary hose solutions.
Builders can expect to spend between $400 and $600 on custom lines, depending on the vendor, number and length of hoses, and what kind of fittings they use. For example, 90-degree fittings are more expensive than straight fittings. Tom says most builders report saving 10–15% using his assemblies versus buying and assembling their own bulk hoses and fittings.
When discussing your system with the vendor, find out if they want you to mock up proxy lines. You’ll send these proxies to them, and they will use them as models for the final hoses. If you’ve never held a stainless-braid fuel line in your hands, they are moderately flexible but torsionally very stiff, which is why it’s essential to get the clocking right on your proxies. The steps that follow explain how to make the proxies.

If you are mailing proxy fittings to a vendor, consider taping the fitting on after marking with a Sharpie to hold in place during shipping.
1. Assemble Your Components: After discussing your system, the vendor will mail you a set of fittings. Be sure to get enough of each type (straight, 45, 90 or some custom angle), so that you can tape the fittings in each proxy while it is on the airplane and you don’t need to rob fittings from a completed proxy to mock up a different proxy. Your proxy hoses should be ¼-inch ID for -4 hoses and 3/8-inch for -6. Clear plastic poly tubing from the hardware store works fine for this. Avoid soft, flexible hose like silicone or tygon—you want something that will mimic the stiffness of fuel hose. Also get a Sharpie and some masking tape.
2. Determine Length and Clocking: Insert an appropriate fitting into one end of your proxy tubing and screw in place. Run the tubing to the desired termination and cut the tubing 2–3 inches longer. Insert the second fitting. Screw in and check to make sure the routing of the line is appropriate. It should be well supported, avoid exhaust pipes, and not be too taut or too snaky—see AC43.13 or Reithmaier for details. Cut the tubing to final length and mark the fitting and tubing with a Sharpie, as shown in the picture. This establishes the clocking of the fitting, in case the fitting shifts under the tape. Tape the fitting in place while still installed on the airplane. Note: If you have the option, try to use straight fittings on one or both ends of your hose. Straight fittings are cheaper and generally make clocking a non-issue.
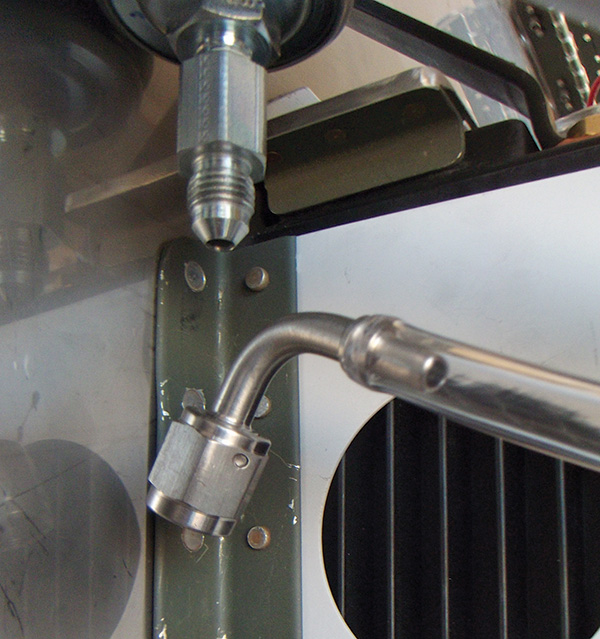
This fitting is clocked 180 degrees off (photo above). A real hose would not be able to twist 180 degrees without putting severe strain on the assembly. The fitting, properly clocked (photo below).
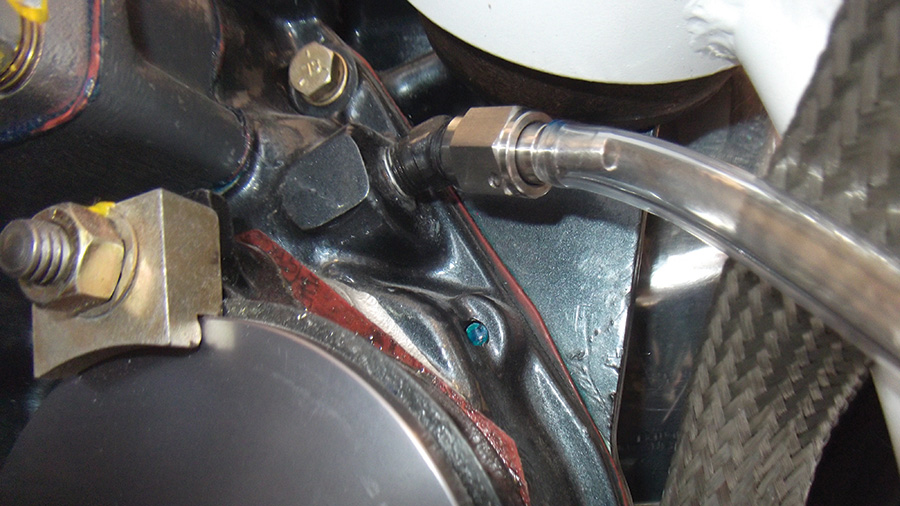
Straight fittings can reduce clocking/fitting difficulties. Note the near-interference between the oil pressure fitting and the motor mount. Make sure you check for any fluid-line fittings that require installation before mounting the engine.
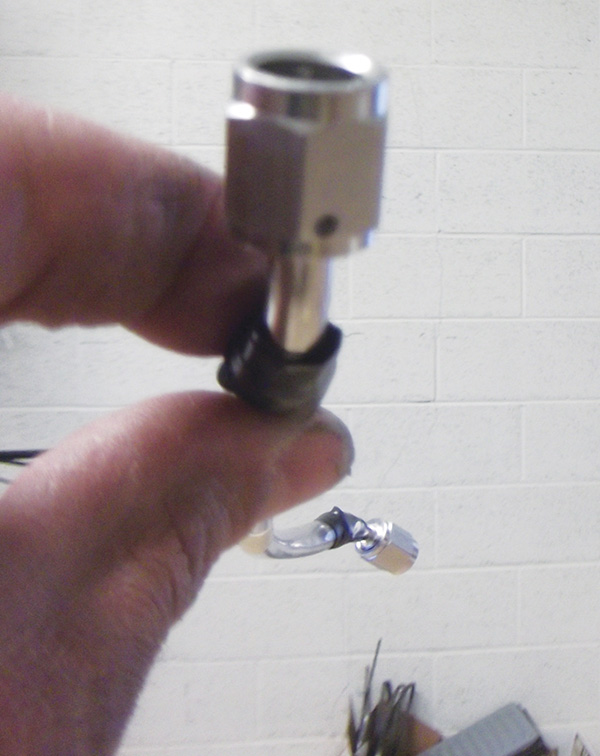
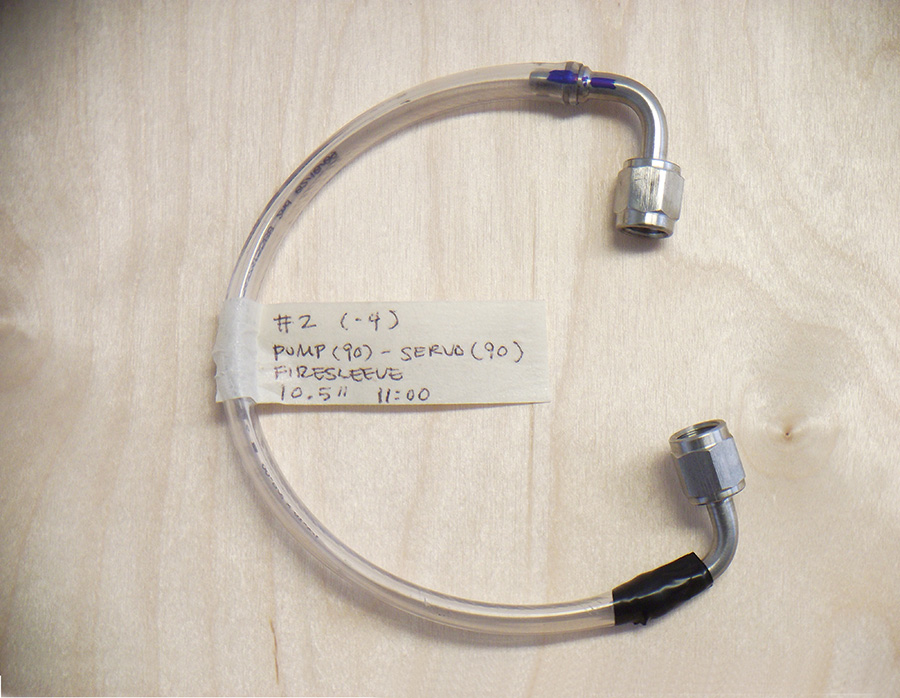
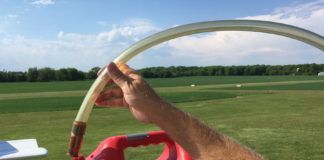
To clock a line, hold one end in front of you with the elbow pointing up at 12:00. Note the position of the other elbow—this is its clocking. In this picture, the line is clocked to 4:00. It doesn’t matter which end you hold toward yourself, the clocking will be the same.
3. Remove and Label: Once you have finished making all your proxy lines, I’d advise making a logbook entry for each line. For example, you could write something like this:
#1/-4/Pump(45)-Servo(straight)/FS/12.5″/4:00
This tells you that Line #1 is ¼-inch ID -4 size, running from the fuel pump (with a 45 degree fitting) to the servo (straight fitting), is firesleeved, 12.5-inches in length, and has a clocking of 4:00.
To clock a line, hold it so that it extends directly away from you. Rotate the hose so that the fitting toward you is oriented vertically—that is, at 12 o’clock. Sight down the hose and note the orientation of the 2nd fitting: pointing right is 3 o’clock, straight down is 6 o’clock, and so on. Obviously, clocking is only used when both fittings are elbows.
These notes serve a couple of purposes: first, if your proxies get lost in shipping, etc., this information alone is usually sufficient for the vendor to make your lines. Second, when you get the worm’s nest of lines back from the vendor, you will know which lines go where. You can also use these notes if you ever need to replace a line in the future.
That’s it! Making proxies is fun and easy, and it ensures that your lines will fit properly, straight from the vendor. For final assembly, hoses should be well supported and clear of exhaust pipes, engine mount tubes, etc. Use heat shields and grommets as necessary. When installing your lines, use a drop of tool oil or Boelube on the threads to prevent galling. Be sure to torque to AC43.13 standards, and always use a backup wrench on the male fitting to avoid transferring torque while you tighten. Consider using a dab of torque lacquer as a reminder that a line has been final torqued. Regardless of who makes lines, proper final assembly is the responsibility of you, the builder.
So should you DIY, or pay someone else to fabricate your hoses? I’d recommend first looking at which pre-manufactured hoses you can buy from your kit manufacturer or a supplier like Summit Racing. Once you’ve taken advantage of that option, consider your remaining hose needs, resources and project goals. For one-off projects, economics suggest custom lines will probably be cheaper than DIY, but if you plan on building more than one airplane, or just like learning a new skill, there’s no reason not to make your own.

