Everyone has a drill in his or her toolbox. Many have the popular DeWalt cordless drill/driver that Home Depot and Lowe’s sell by the carload. I have two myself, but as handy as that drill is, it is not the best tool for many drilling jobs. While many maintenance jobs can be done well enough with this drill, many more, mainly if they include installing new equipment or working in tight places, may require something more specialized. In this article, we will take a look at a range of drills and accessories that you may want to add to your toolbox.
Drill Motors
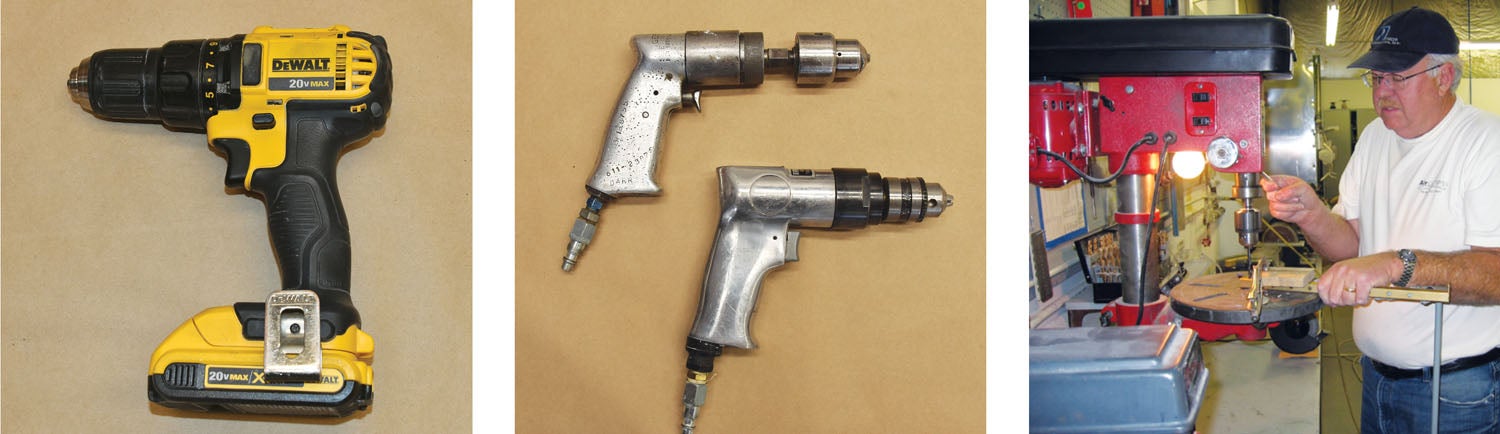
If you work on the structure of a metal airplane, such as any of the RV series that involves more than a few rivets, you will want a good air drill that will turn 5–6000 rpm to do a good job drilling holes for rivets. Most inexpensive air drills will only turn about half that speed, and they will work, but a good high-speed drill by Sioux or a similar quality manufacturer will do a much better job, producing a rounder, cleaner hole. If you have many holes to drill, this is probably someplace where you should spend a little money and get a really good drill. As you can see from the table (next page), you will also need a drill that will turn considerably slower for steel and larger diameter holes in aluminum. A second air drill is nice to have, but a cordless drill with a ½-inch chuck, which you will need anyway, will cover a broad spectrum of needs and let you save the cost of a second air drill.
A drill press will often come in handy while building a plane but probably less so when just maintaining one. The ability to work at varying rpm and to get holes perfectly straight contributes greatly to producing good work. A drill press can also be beneficial to start a tap into a hole by keeping it perfectly perpendicular to the work. Turn the chuck by hand to start, and only use power if you have practiced—and then only if you can set your drill press to a very slow rpm. Powering a tap is best done with a milling machine. Remember to secure your work whenever you use a drill press. You do not want the work to start spinning or flying across the room. Be sure to wear eye protection whenever using a drill or drill press.
Keyless chucks do not make drills work better, but they sure come in handy when changing drill bits. Chuck keys have a terrible habit of disappearing just when you need them, so why not just do away with them altogether.
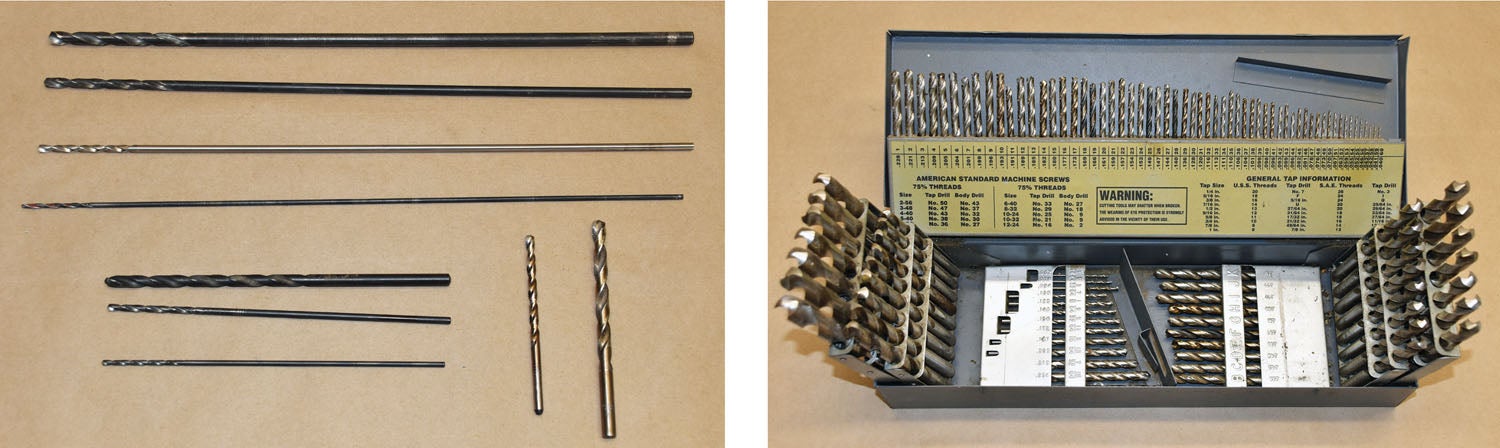
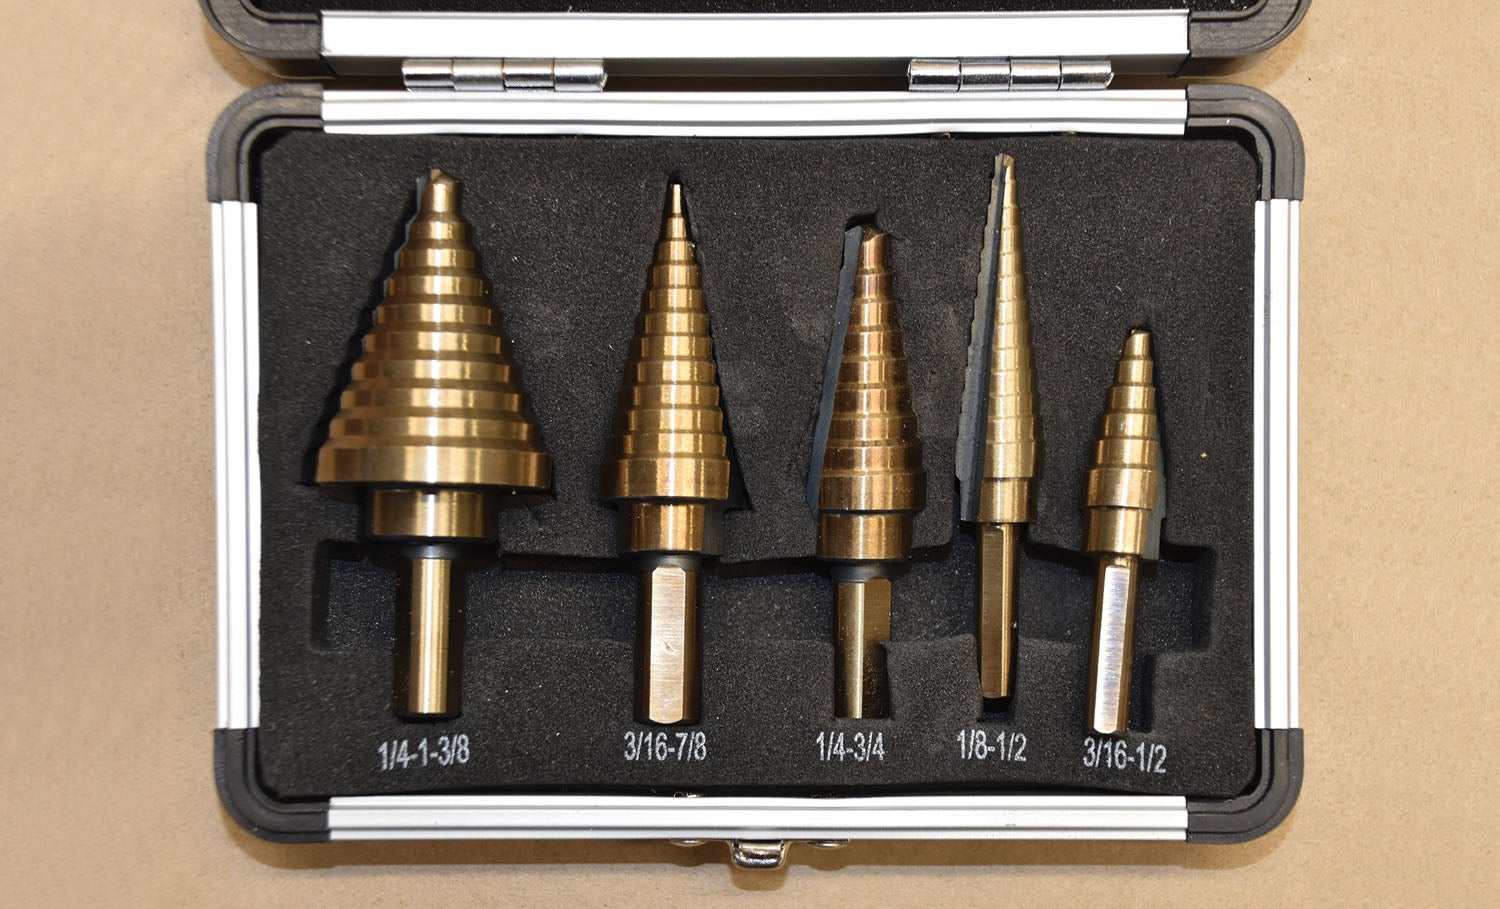
Be sure always to use sharp bits when drilling. Buy several of each common size and sharpen or replace them often. Dull bits do a poor job of drilling clean holes. For holes over 3/8 inch in sheet metal, use a step drill to enlarge the hole to its final size. This is safer and makes a better hole.
Recommended Drill Speed Settings
Per Minute
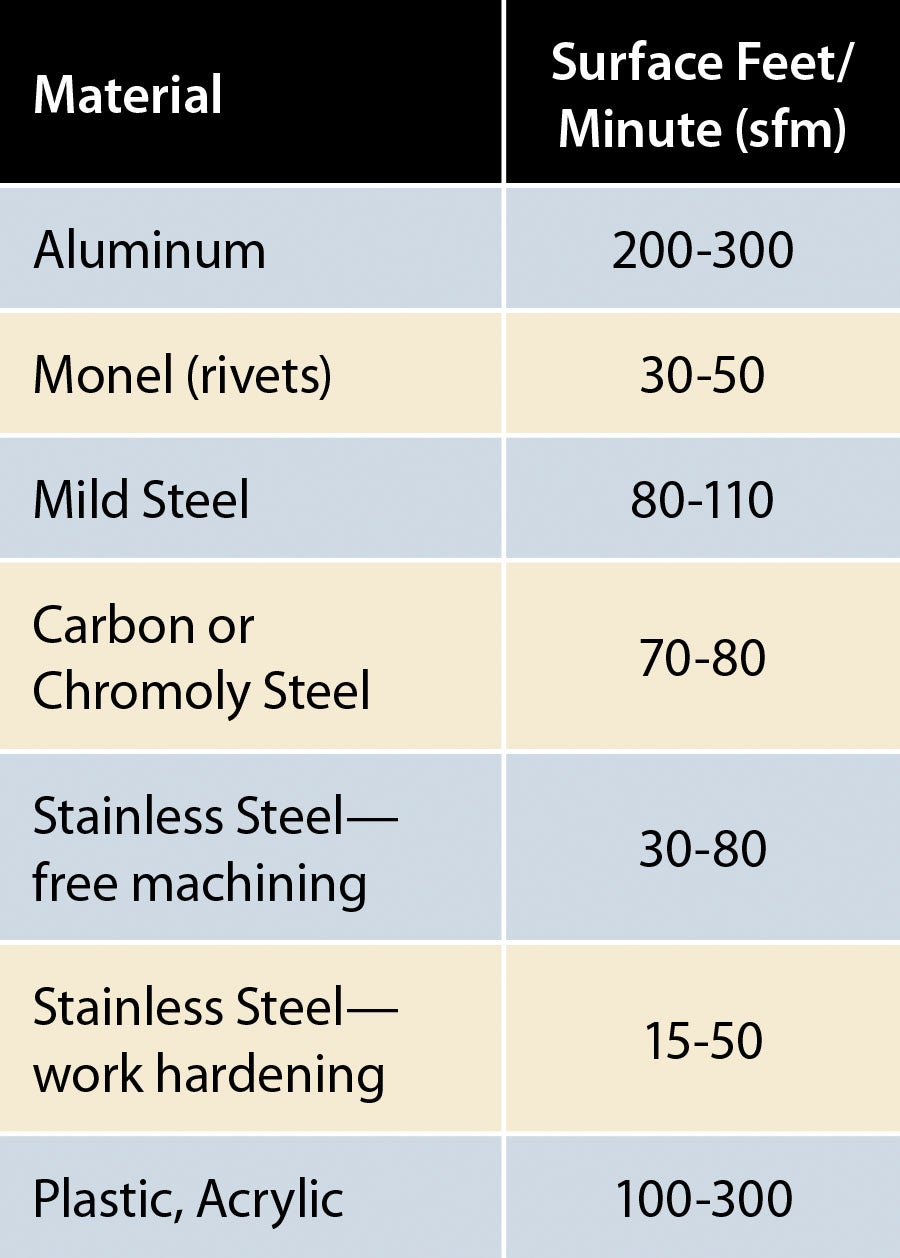
The cleanest and quickest holes come from using a sharp bit turning at the proper rpm. The ideal drill speed is determined by drill diameter and material to be drilled. From rpm and diameter, we can calculate cutting speed, which is really what we are after. Different materials will demand different cutting speeds. This table shows the preferred cutting speeds for a number of common materials.
Drill speed is then based on cutting speed in surface feet per minute (sfm). Here is the formula, if you would rather not use the table. Formula: rpm = (sfm x 3.82) / drill diameter in inches. The results for some common materials and drill sizes are shown above.
Threaded and Through-Hole Sizes
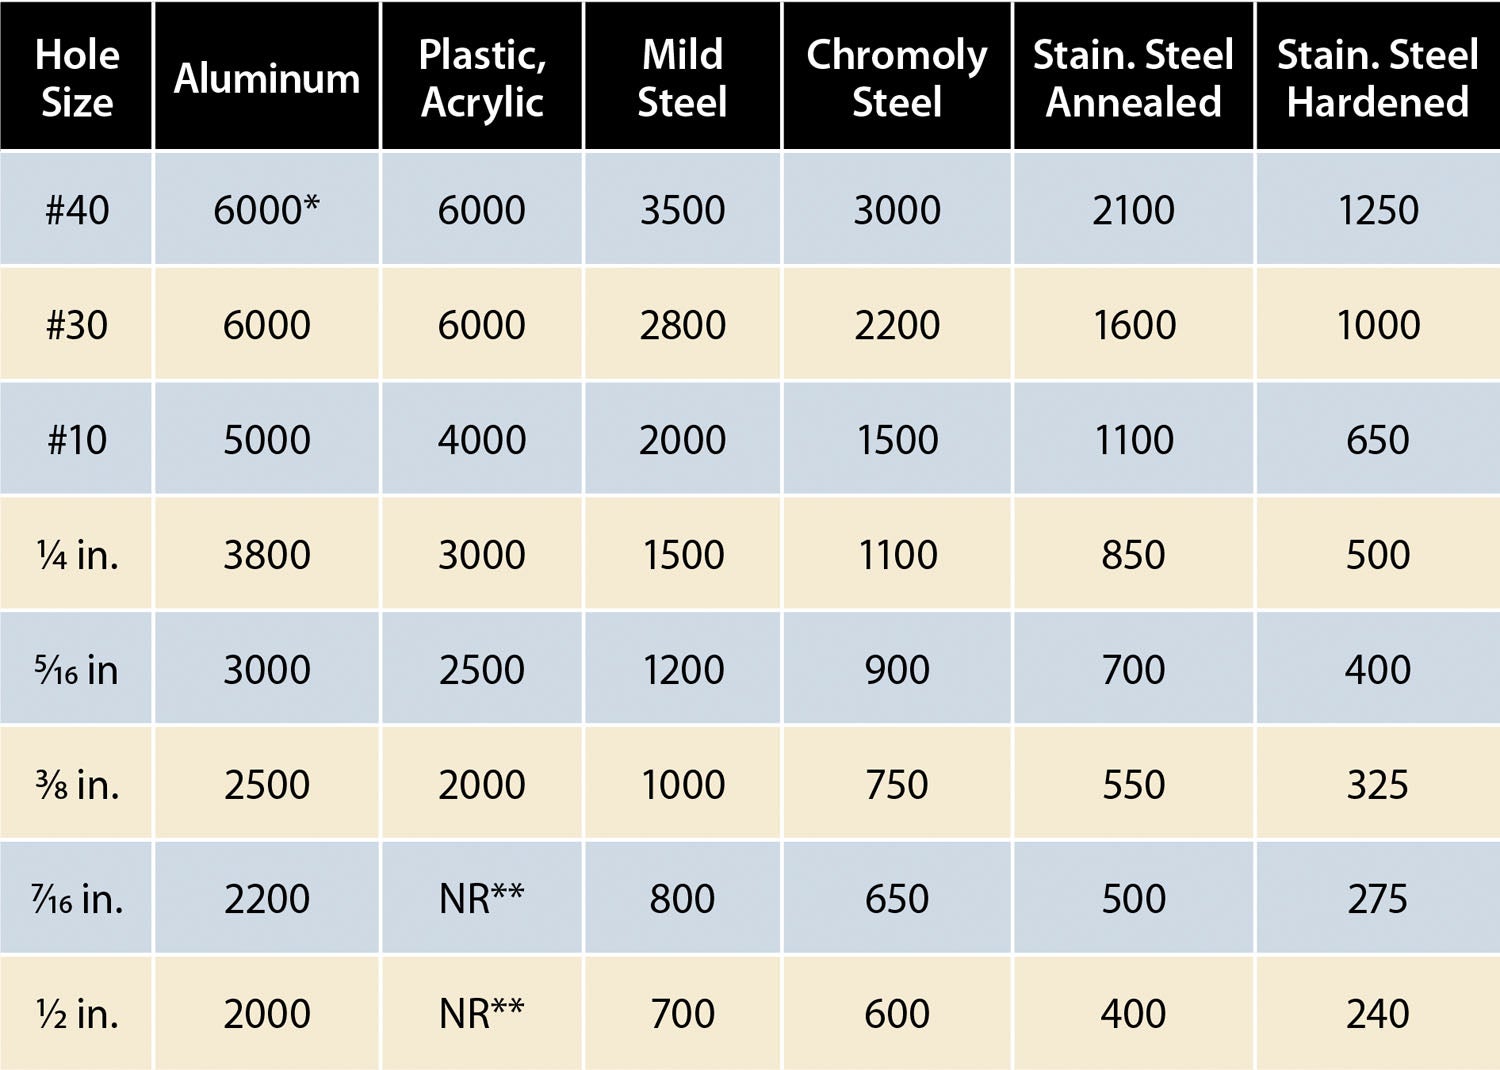
*6000 rpm used because few drills are available that will turn faster
** Not recommended, use a step drill
When drilling holes for various bolts and screws, be sure to make the hole the correct size. The table below shows the correct size hole for the common bolt and screw sizes you are likely to encounter. The tap size is the size you would need to buy to make a threaded hole for the bolt or screw on the table. The “through-hole” drill size is for a bolt that simply passes through the material without threading into it. This is by far the most common type of hole you will need to drill. The drill size for a threaded hole is the undersized hole that should be drilled before tapping a thread into it.
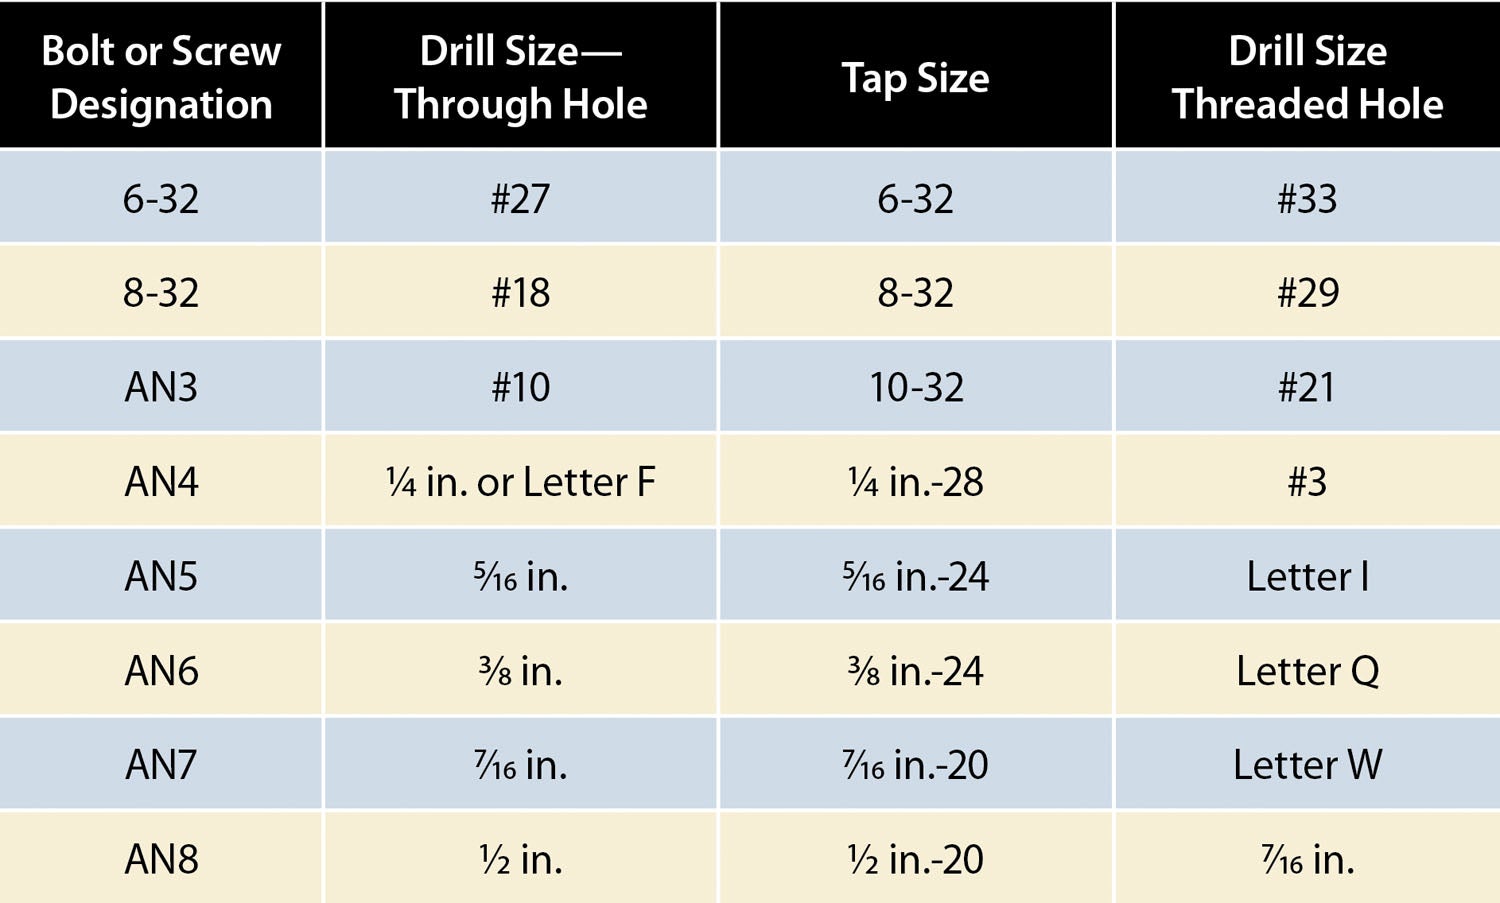
Note that for close tolerance NAS bolts, you will want to drill the hole undersized and ream it to the exact dimension required, typically .001-inch less than the nominal dimension. For example, a NAS6606 bolt should be placed in a hole with a finished dimension of 0.374 inches. First, drill the hole to 23/64 inches and then ream it to .374 inches. These reams are available from any vendor that caters to machinists.
Specialty Drills and Attachments
Besides the standard “hole shooter,” there are special drills and/or attachments to make it easier to get into tight places. I have a right-angle drill motor by Makita with a 3/8-inch chuck that can get into places that regular drills can’t. The larger chuck also allows me to use step drills that don’t fit into most right-angle attachments. Right-angle drill motors are available in electric, cordless and air versions. Harbor Freight has an air-powered drill for less than $40, which should suffice for light-duty use. Other air drills come either with adjustable chucks or threaded chucks to accept threaded drill bits.
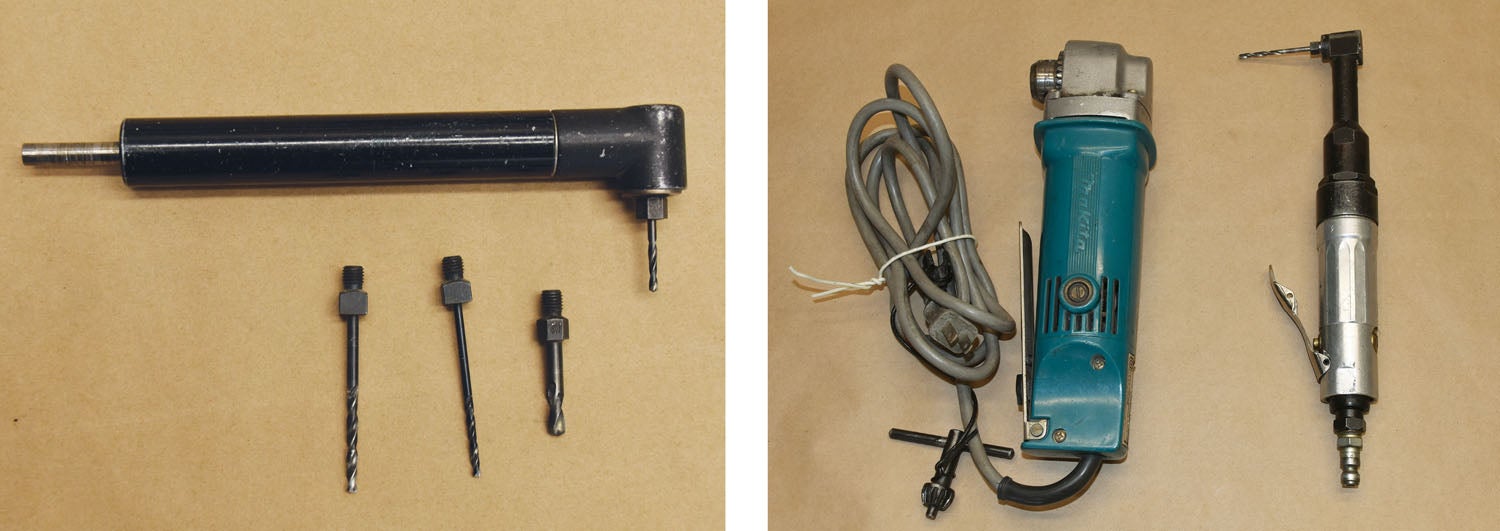
An alternative to the right-angle drill motor is the right-angle or tight fit attachment that typically uses bits in various small sizes and lengths, including #40, #30, #21, #20 and #10, that thread into the head of the device. They are relatively inexpensive compared to the cost of many right-angle drill motors but are limited to these small sizes. They utilize the power of an ordinary drill motor. On the plus side, they can fit into much tighter places than most right-angle drill motors.
It would be wrong to think that drill bits only come in a standard length. There are long and very long lengths (typically 6 and 12 inches) available from specialty hardware stores or online. Aircraft Spruce also sells many of these. Of course, if you need an in-between length, you can always cut off a longer bit to suit your task.
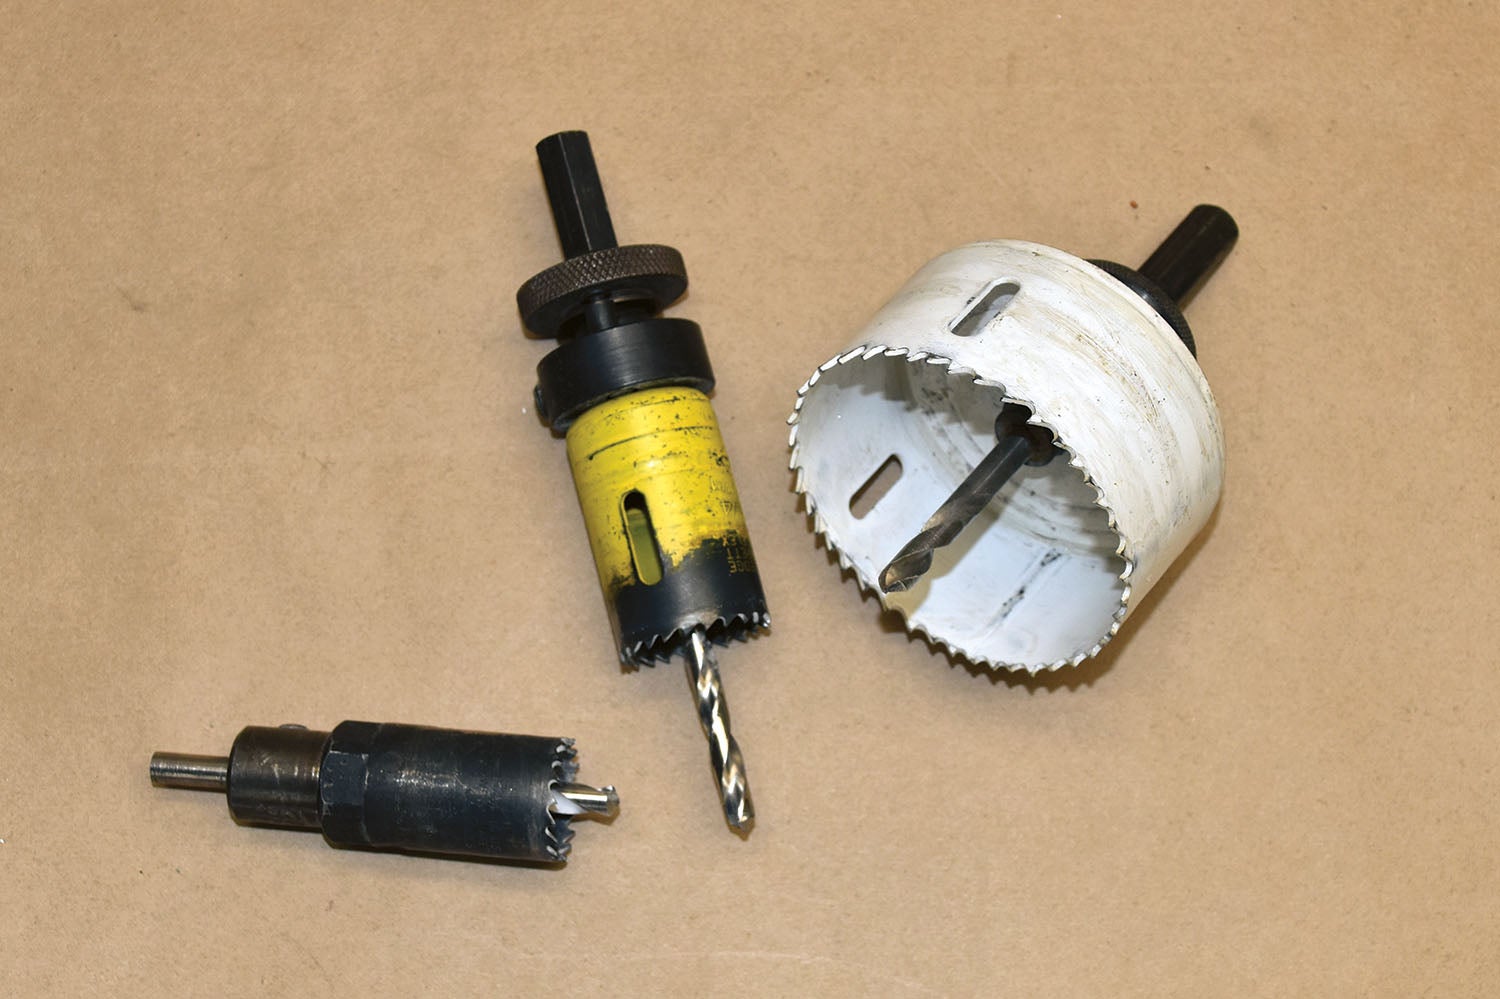
Another set of specialized drills is the hole saw. Hole saws are especially well-suited for large holes in thin material. They do not make as clean a hole as a chassis punch, but they are much cheaper and will suffice for such tasks as cutting a 2-inch hole through a firewall for a cabin heat valve. However, when doing so it is very important to reduce rpm to avoid burning out the cutting portion of the hole saw as it goes through stainless steel. Most hole saws will require a drill motor with a 1/2-inch chuck.
Drilling Process
Since drill bits like to wander as you try to start your hole, it is always a good idea to begin with a center punch to secure the tip of the drill. Either the clicking type or a punch and hammer will do the job. Next, you want to be sure to keep the drill bit perpendicular to the work surface. An easy way to do this is to align the reflection of the bit with the actual bit. If the image seems to bend at the point where the bit meets the surface of the material, you are not straight. Adjust accordingly. If the surface is not reflective, a small machinist’s square could lend a point of reference until you develop the knack to holding the bit in proper alignment. Larger holes should be drilled in steps because the tip of a larger bit will not start very easily without the relief of a starter hole.
An alternative to holding the drill correctly may be a drill press if the part lends itself to that. A drill press should be in every airplane builder’s shop already and is great for doing precise drilling. Just be sure to secure your work before drilling. Parts can spin or go flying across the shop if you are just holding them in place with your hand. And while we are on the subject, eye protection is a must when drilling. Eyes are incredibly important to flying and deserve careful protection.
Photos: Dave Prizio.


