Safety wire and cotter pins appear in many places as you build or maintain your airplane. It is not too hard to become proficient with these important items, but as with most things, there are better and worse ways to go about employing them. This overview of the subject, along with AC 43.13-1B, should get you well on your way to being a proficient safety wirer. By the way, AC 43.13-1B is that book put out by the FAA that contains what they consider to be acceptable methods of repairing and maintaining aircraft. This book can be found online or in paper form from aviation vendors such as Aircraft Spruce. Everyone who builds or maintains an airplane should have this book for reference. Chapter 7, Section 7 has a good description of safety wiring including many helpful diagrams.

Propellers need to be safety wired. Use the size called out in your propeller manual, or .041 inch if nothing is specified. Due to tight access, it may be necessary to loosen and re-torque some bolts to get safety wire into the proper position.
Safety Wire
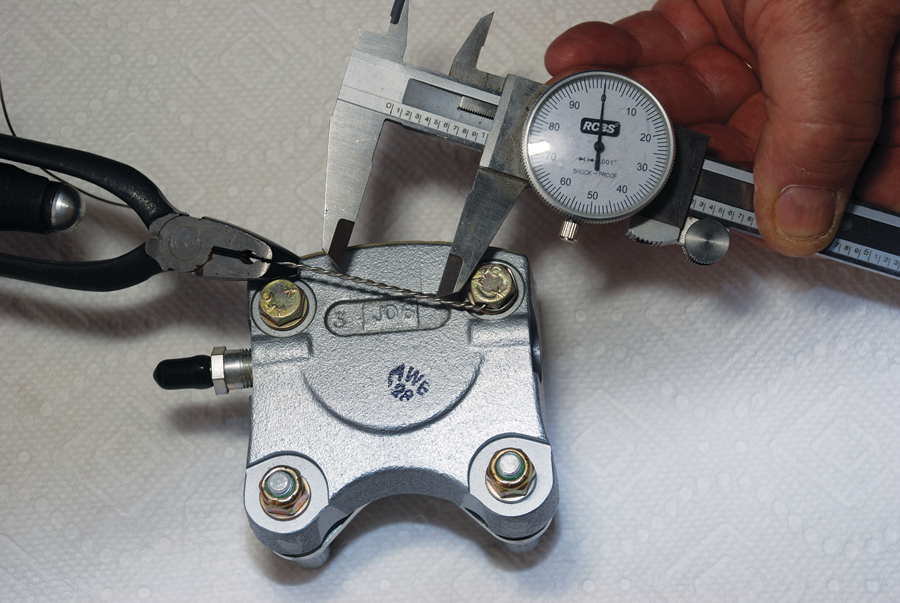
Safety wire comes in a number of types—stainless steel, Monel, brass, copper and aluminum—and in different diameters—.020-inches, .032-inches, and .041-inches. But by far the most common is .032 stainless steel, with .041 stainless steel running a rather distant second. That said, do not assume that every safety wire job can be done properly with one size of stainless steel wire. Some safety wire applications are designed to break away under emergency conditions, and thus need to be of weaker material such as .020-inch brass. In all cases do not substitute one type or size for another.
Something that should go without saying is that safety wire and cotter pins are single-use items. Do not attempt to reuse these because they work harden and become brittle after being installed the first time. Their failure after an attempt to reuse them is almost guaranteed.
Cotter Pins
Cotter pins are used on airplanes primarily to secure castle nuts on bolts that are subject to rotation, but also on bolts subject to heavy vibration. These are most commonly found on control linkages for throttles, propeller controls, and similar applications. Cotter pins also secure axle nuts on most airplanes. Cotter pins are covered by the designation of AN380-X-X, with suffixes appropriate to their length and diameter. The first digit in the suffix is for the diameter of the pin in 32nd of an inch ranging from 1 to 6. The second digit in the suffix is for the length measured in quarters of an inch, ranging from 2 to 10. For example an AN380-2-4 would be a 1/16-inch diameter pin with a length of one inch.
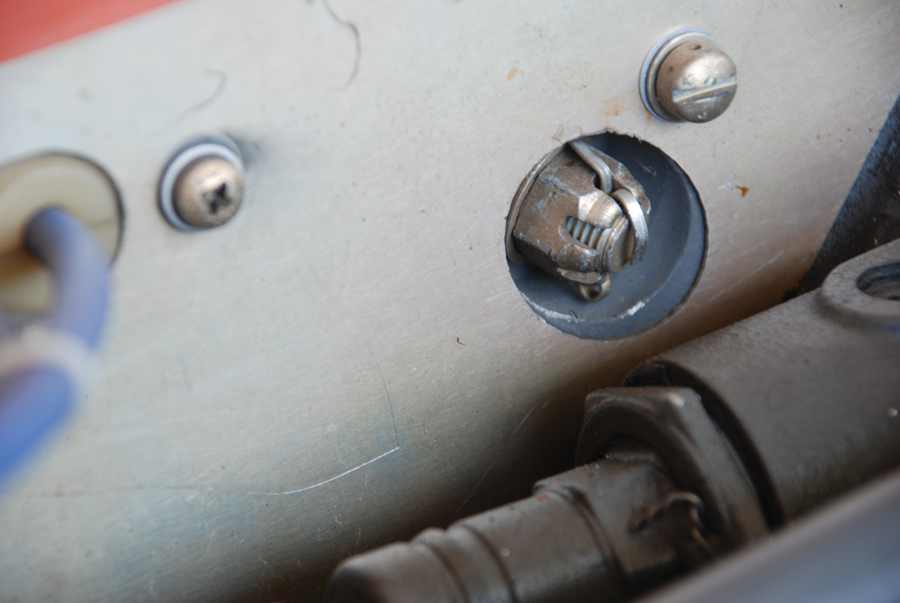
Bolts exposed to extreme vibration such as this engine mount bolt are better secured with castle nuts and cotter pins than ordinary lock nuts.
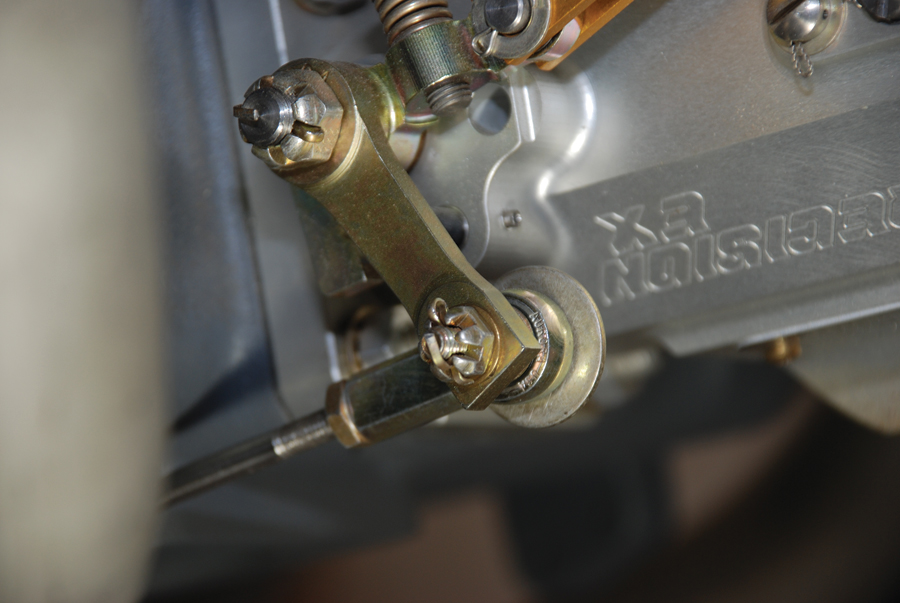
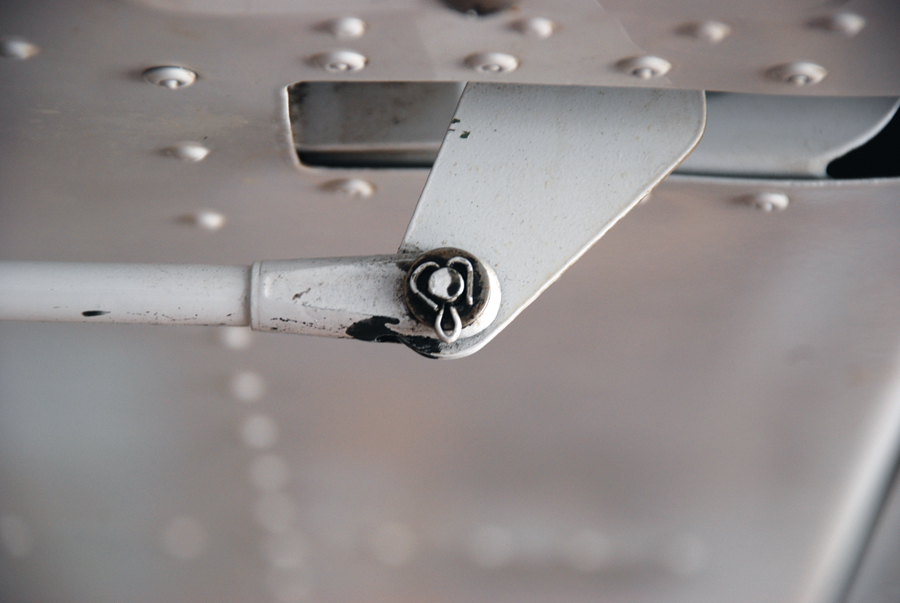
This throttle linkage is secured with cotter pins and castle nuts because of the rotation that it will experience. Cotter pin tails should extend to at least the midpoint of the bolt they are securing, but not past the full diameter. The other tail should be cut so that it does not interfere with the rotation of the bolt.
There is also a MS designation for cotter pins, but the suffixes do not easily lead one to the size of the pins. Aircraft Spruce lists them in sizes ranging from MS24665-5, a 1/32-inch by 1/2-inch long pin, to MS24665-500, a 3/16-inch pin with a length of 2.5 inches. In all cases the length does not include the loop at the closed end of the cotter pin.
Cotter pins are available in cadmium- plated steel or stainless steel. Under the older AN system, stainless steel cotter pins were designated as AN381 and cadmium-plated pins were AN380. In the newer MS system all pins use the MS24665 designation.
Cotter pins may be installed so that one leg laps over the top of the bolt being secured and the other is turned down and cut off so as to not interfere with the rotation of the bolt. Alternatively they may be installed in the flat position with the legs wrapped around the sides of the nut or pin being secured. The flat position is preferred for clevis pins.
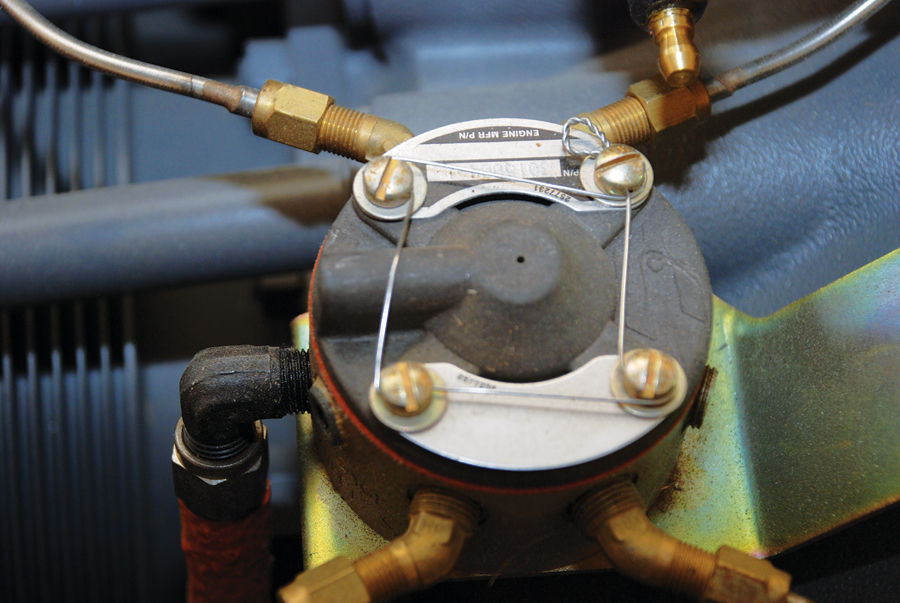
Small bolts and screws that are close together can often be secured with this type of safety wire arrangement. This arrangement uses the small .020-inch safety wire.
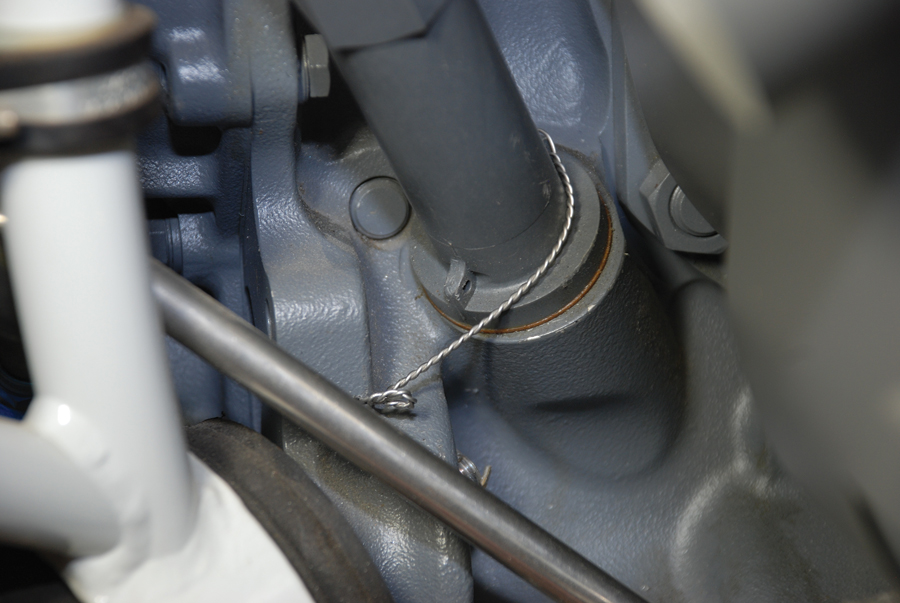
The dipstick tube needs to have the safety wire extend from the far side. Securing it to the near-side hole will not impart any positive pull in the direction of tightening and thus will not prevent it from loosening and leaking.
Wiring Made Easy
The key to proper safety wiring is to remember that the wire should always act against the loosening of the bolt. You may wish to think of it as trying to tighten the bolt, although it isn’t actually doing anything more than holding it in place. In the vast majority of cases, tightening means turning clockwise as viewed from the top of the bolt. Here are the steps to a good safety wiring job:
1. Pull a length of the proper size and type of wire through the hole in the bolt or other item you wish to secure and bring that wire, along with the wire not yet pulled through the hole, back to the termination point so that you have two wires that will reach about two inches past the hole where they will be secured. Then cut the wire off there, always allowing enough to grip with the pliers and still have enough for a pigtail.
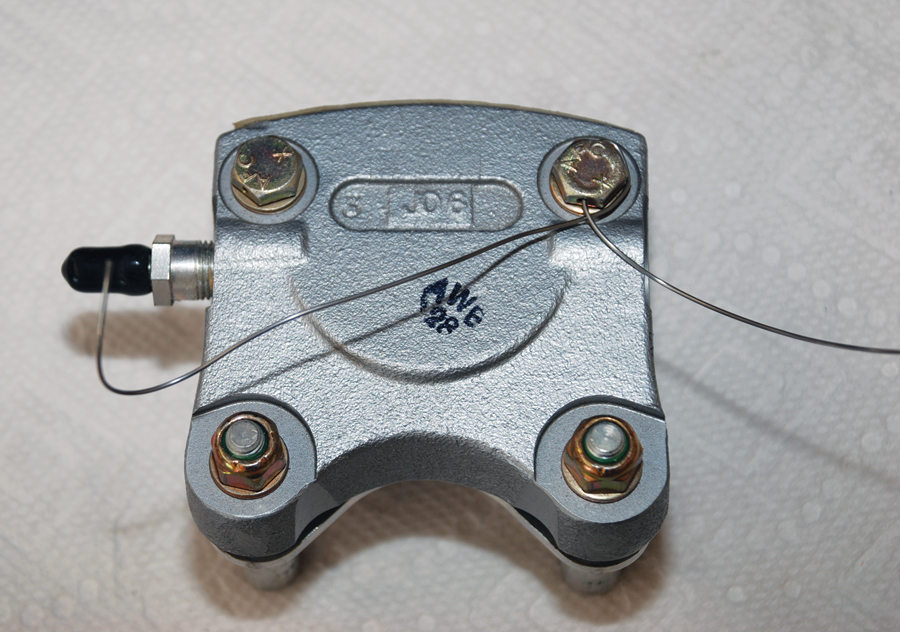
Wrap safety wire around bolt so that it will act to tighten the bolt. Pull wrap-around wire tight and place it underneath the other wire as shown.
2. Loop the safety wire around the head of the bolt so that the wire is wrapped around the far side—the side away from the direction in which you plan to pull. Pull the wire tight around the head of the bolt and draw the wrap-around wire down inside the wire coming straight out of the bolt hole.
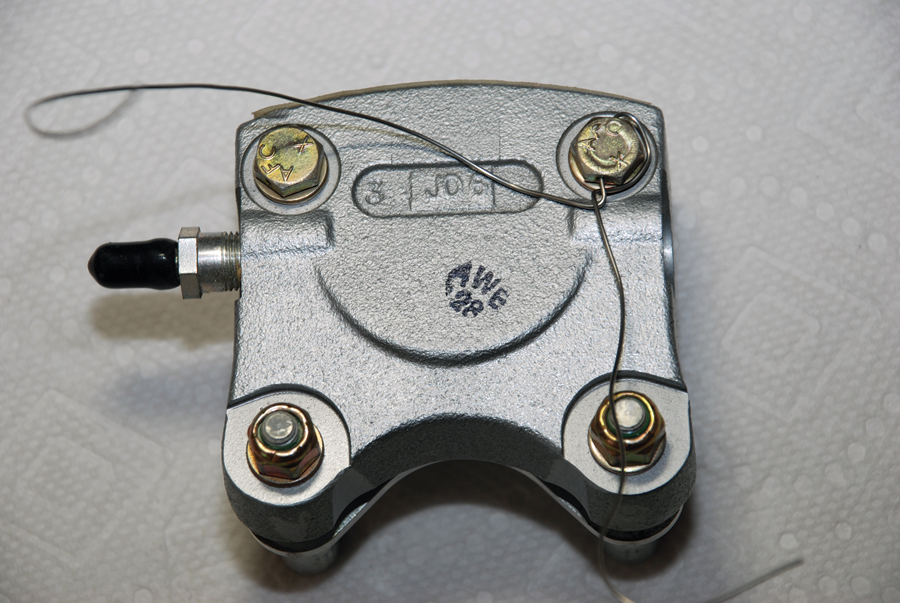
Grab one wire in each hand and twist them together in a clockwise direction to secure them tightly against the head of the bolt.
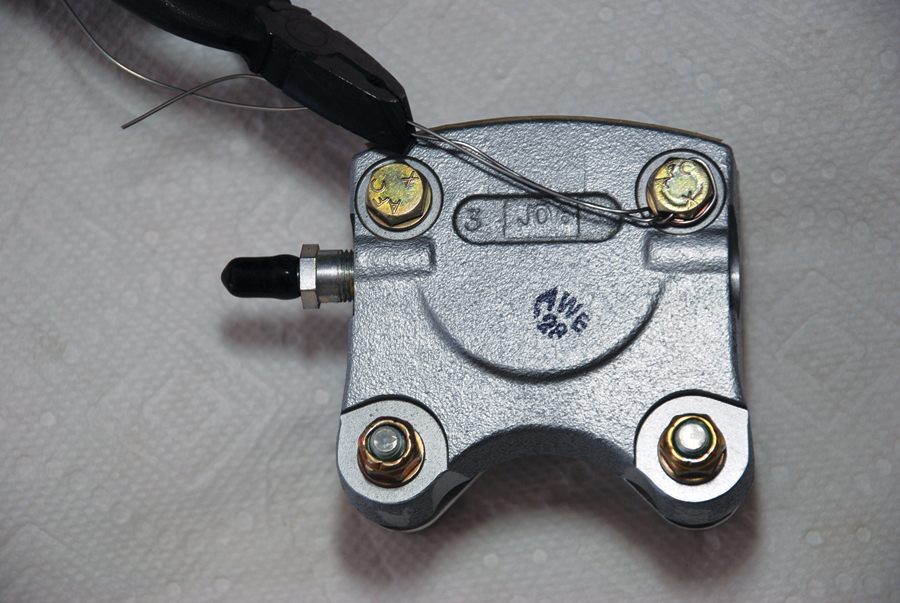
Grab both wires together with the tip of the safety wire pliers at a point just past the hole you plan to use on the second bolt.
3. Give both wires a tug to set them in place and remove any slack. Then twist the wires together for a half turn clockwise to secure them in place. This setting procedure makes for a much tighter and neater looking safety wire job.
4. Next pull both wires to the termination point (hole in other bolt) to gauge the length of the twist. You should set the pliers at a point just beyond the termination point to allow for the twisting to shorten the wires a bit. The rule of thumb is to grip the straight wires about 15% longer than they need to be when twisted together. I find this often makes the twisted wires a bit too long, so I like to use a gripping point much closer to the termination point and then add a few more twists if I need them. Untwisting the wire if it is too long is not acceptable.
5. With both wires securely gripped, clamp down and set the catch on the pliers. Then pull out the knob at the back end of the pliers and allow them to rotate, twisting the wires as it goes. Several pulls of the knob may be necessary to fully twist the wires. The end result should be a twisted pair of wires with six to eight twists per inch. Adjust your final length as needed. Remember, do not untwist the wires to get the correct length. If you have too long a wire, you must start over.
6. Take the wire that lies on top of the twisted pair and insert it into the hole at the termination point, looping the underneath wire around the far side of the bolt or other anchor point, as the case may be. Pull the wires tight as at the beginning, pulling the wrap-around wire inside the other wire and securing both with a half twist counterclockwise.
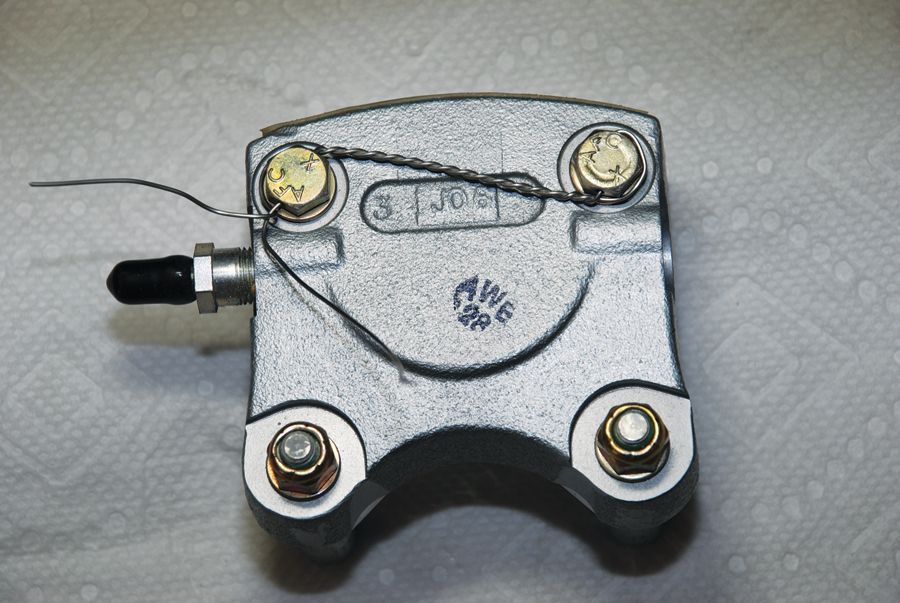
Pull the top wire through the bolt hole and pull it tight. Secure it by twisting the wires together in a counterclockwise direction.

Twist these wires together as before with your pliers, except in a counterclockwise direction to form a pigtail. Cut the tail off about -inch from the bolt hole and twist it back into itself to prevent the cutoff end from cutting or scratching anyone.
7. Now grip the wires about one inch away from the twist you just made and twist the two wires together to make a pigtail. This twisting will be in the opposite direction of the first twist (counterclockwise). If you have reversing pliers, it is a simple matter to change the direction of the twist. If not, just twirl the pliers in your hand to make the short pigtail.
8. To finish up just snip off the pigtail to a length of a half to three-quarters of an inch, and then fold it back on itself to keep the sharp end of the wires from sticking out.
Safety Wiring Turnbuckles

Turnbuckles secured with clips. Only newer turnbuckles will come slotted for these clips. Order MS21252-4LL for 1/8-inch cable with -28 threads.
Hopefully you have new-style turnbuckles that use clips instead of safety wire. If not, get out your copy of AC43.13-1B and look at the diagrams of how to safety wire turnbuckles. Look at Chapter 7, Section 10. The double-wrap method is preferred, but the single-wrap method is acceptable. As a rule you will be using .041-inch safety wire for this.
For a single wrap pass a wire through the hole in the middle of the turnbuckle body and bend one end toward the left and the other toward the right. Pass each end of the wire through the respective fork or cable eye—one at each end—and then wrap the end of the wire around the turnbuckle at least four times. For a double wrap you will essentially do this twice, using two pieces of wire. No more than three threads should be exposed when you finish safety-wiring the turnbuckle, and each termination needs to include at least four wraps around the turnbuckle.
To use safety clips simply line up the grooves in the turnbuckle body with the grooves in the cable eye or fork on each end. The longer tail of the clip goes into the slot formed at each outer end, and the short-hooked tail goes into the center hole of the turnbuckle body. Install two clips per turnbuckle. MS21256-1 clips will work for MS21251-2S, -3S, -4S and -5S turnbuckle bodies. MS21251-3L and -4L bodies require MS21256-2 clips. Clips should not be reused.
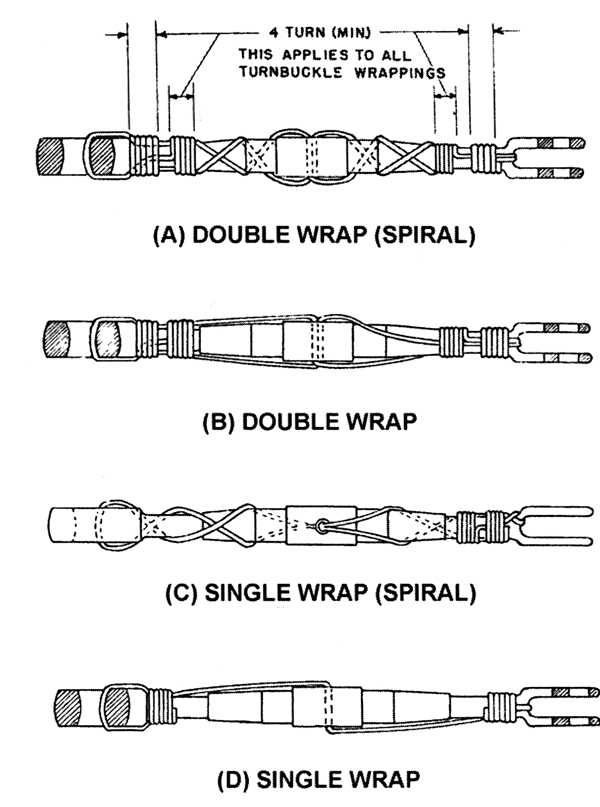
This drawing from AC43.13-1B shows various ways a turnbuckle can be safety wired if it doesn’t come slotted for MS21252 clips.
Tight Quarters Safety Wiring
Sometimes you will run into a safety wiring problem where there isn’t enough room to get a pair of pliers into position, or if in position it simply won’t turn. There is a tool just for this. It is a wand with two holes in the end into which you can slip your safety wire and twirl it to get the required twists. Aircraft Spruce simply calls it a safety wire tool (part #12-01072). The aileron hinge bolts on a GlaStar are best safety wired with this tool, but there are no doubt other places where it would also come in handy.
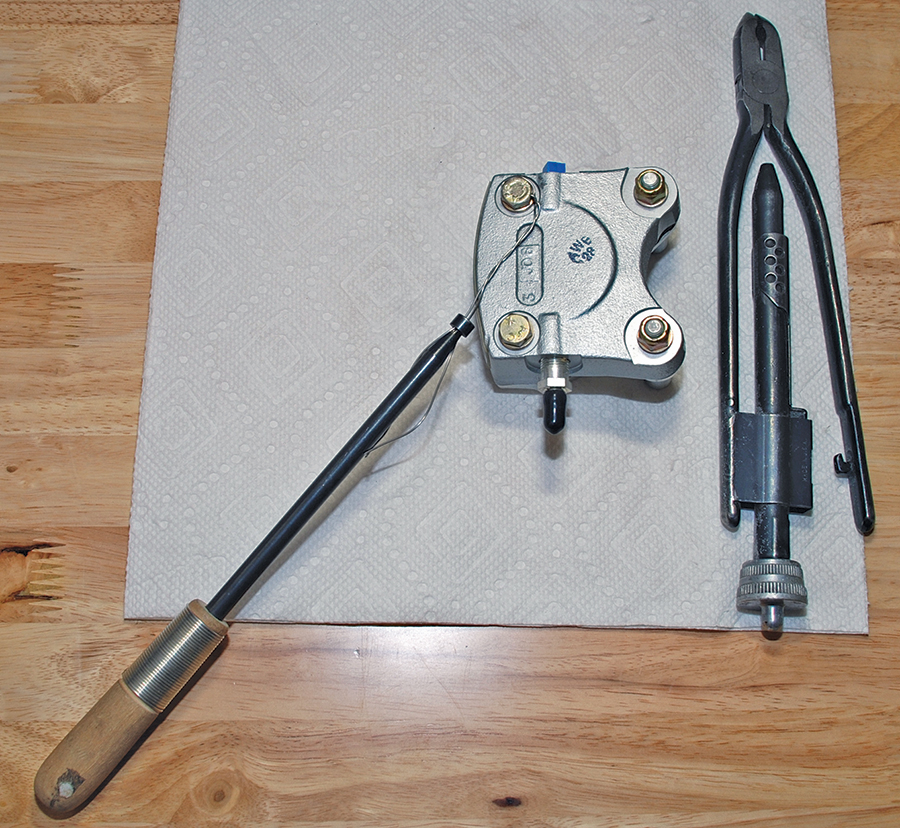
Sometimes a special wand with two holes in the end will work better in tight places than a pair of pliers. These are available for about $20 from Aircraft Spruce and other aviation tool vendors.
Another tight-quarters tool that might come in handy is the short 6-inch version of the standard (9-inch) safety wire pliers. These are also nice to include in a compact tool kit where space and weight are at a premium.

![]()
Dave Prizio is a Southern California native who has been plying the skies of the L.A. basin and beyond since 1973. Born into a family of builders, it was only natural that he would make his living as a contractor and spend his leisure time building airplanes. He has so far completed three—a GlaStar, a Glasair Sportsman, and a Texas Sport Cub—and he is helping a friend build a fourth, an RV-8. When he isn’t building something, he likes to share his love of aviation with others by flying Young Eagles or volunteering as an EAA Technical Counselor. He is also a member of the EAA Homebuilt Aircraft Council.

