Sooner or later every mechanic or machinist is faced with a stripped thread. The preferred solution is to replace the whole part, but often that isn’t practical. One solution is to drill out the damaged thread and re-tap it the next size up. This assumes that whatever you’re attaching to the new hole can be safely resized. Another alternative is to repair the problem using an insert thread. Insert threads are sometimes called helical inserts or Heli-Coil threads after the original trademarked product.
Heli-Coil inserts evolved in the late 1930s as a way to reinforce spark plug threads in new aircraft engines. Their obvious value for in-field repair quickly emerged and they have been a standard toolbox item for mechanics ever since. Here’s an excerpt from a Heli-Coil service letter number L162B to FAA Repair Stations from more than 30 years ago (emphasis added):
“The repair of threaded holes is a problem often encountered in aircraft engine maintenance. Corrosion, tight fits between dissimilar metals, and the effects of repeated heating and cooling are the usual contributing causes for damaged threads or loose fits between threaded parts. Conventional methods of repair to threaded parts include re-tapping and use of oversize threaded parts, installation of bushings, and re-drilling and tapping to accommodate step-threaded parts. Except for the use of oversized threaded parts supplied by Avco Lycoming, none of these methods of repair are generally acceptable because of structural weakness introduced by enlarging the tapped hole. The Heli-Coil thread insert is an ideal method for repair of many types of thread damage. It requires very little enlargement of the tapped hole, and being made of stainless steel provides a better thread than the original. Consequently, Heli-Coil inserts are not only recommended for repair of thread damage but are used extensively in new Avco Lycoming aircraft engines at locations where threaded parts are subject to frequent removal and where corrosion may be a factor…
CAUTION: Do not install Heli-Coil inserts in any through-hole on an assembled engine because of the possibility of metal particles entering the engine.”
Heli-Coils are particularly useful for reinforcing threads in softer materials like aluminum castings or extrusions. For years VW engine builders have been changing the stock 10mm cylinder head studs with 8mm studs threaded into “case-saver” helical insert threads. My neighbor/builder Phil Hooper put Heli-Coil inserts in the aluminum door hinges of his Velocity RG to reinforce the thread engagement.
You can purchase insert kits from any number of hardware suppliers, including Amazon. There are several brands and types, the most common form being stainless steel with a tang at one end to interface with an installation tool. Other types include tangless, a screw-lock, and with pre-lubricated (dry lube) threads. For special applications (and bigger budgets), Heli-Coil offers inserts in various materials, such as titanium, phosphor bronze, Inconel, etc. Check their web site for more information.
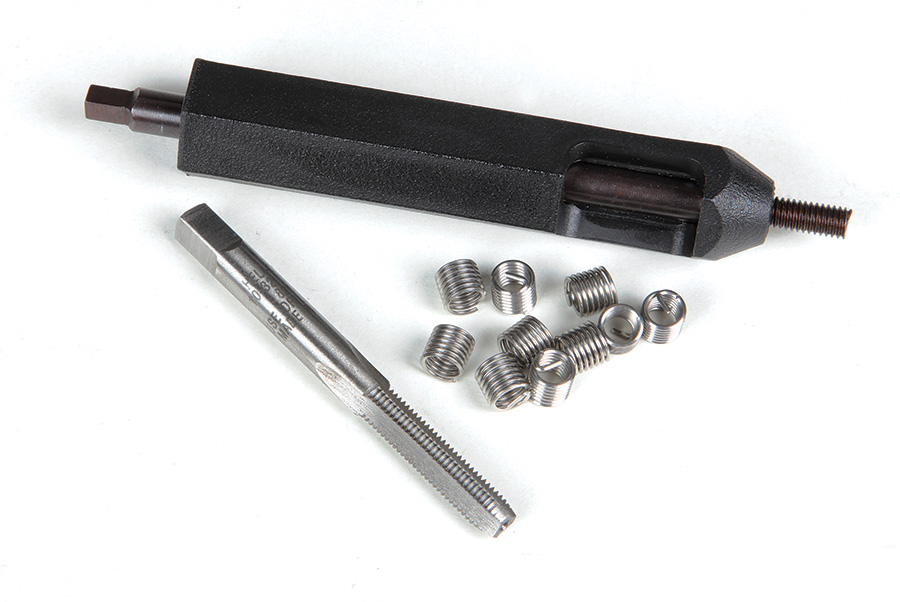
A typical thread repair kit will include some number of insert threads, an installation tool, and a tap. It may or may not include a drill bit, so be sure to verify that you have the correct size drill if the kit doesn’t come with one. Good quality kits are not cheap. I paid $40 for the 10-32 kit shown. It came with a dozen 10-32 inserts, a tap, and an installation tool. The coils themselves are $1 to $2 each when purchased by the dozen.
Installing an insert thread could not be simpler:
1. Drill out the stripped or damaged thread using the specified drill size.
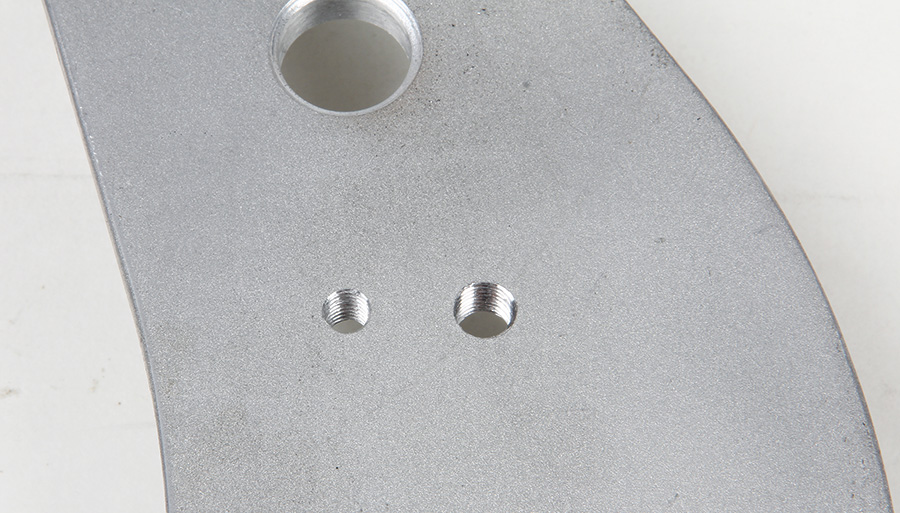
Our insert is to be threaded into this 1/4-inch thick aluminum plate. The hole on the right was drilled then threaded with the tap supplied with the 10-32 kit. For comparison, the hole on the left is a standard 10-32 thread.
2. Tap the new hole.

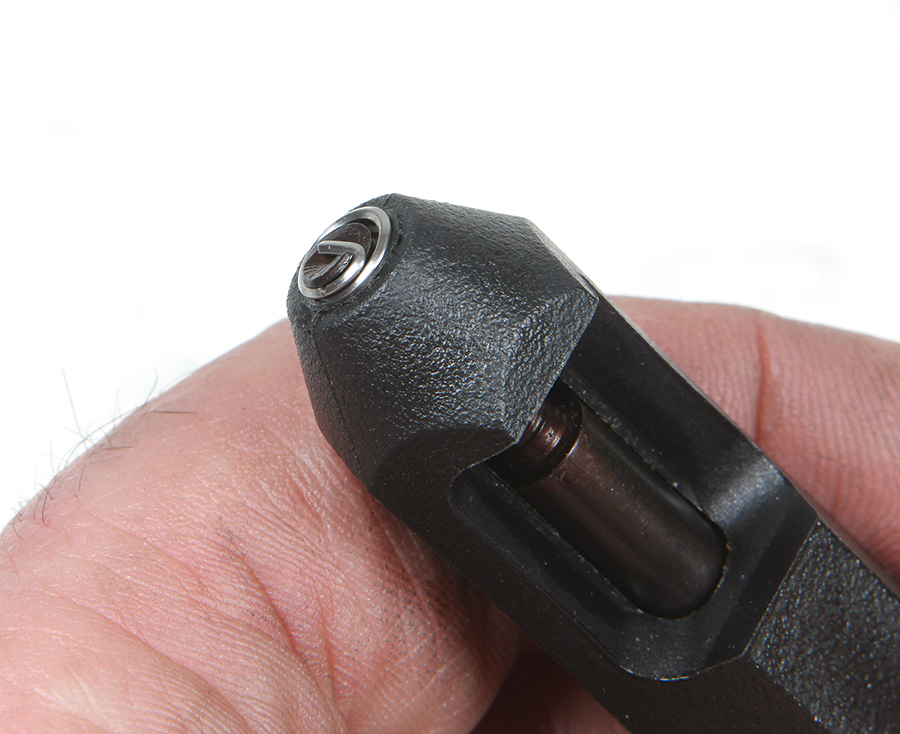
To install our sample 10-32 insert thread, the first task is to queue up an insert in the installation tool. The center post engages the tang and internal thread to drive the insert. The insert for this demonstration is -inch long. Longer and shorter coils are available. The deeper the hole, the longer the insert.
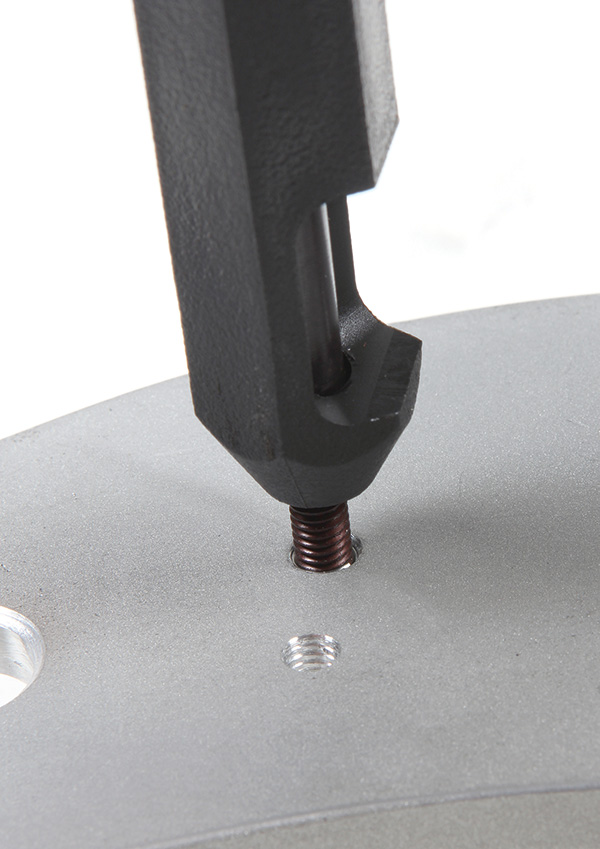
3. Use the installation tool to feed the insert into the tapped hole.
4. With the insert installed to the correct depth (just below the surface), retract the installation tool.
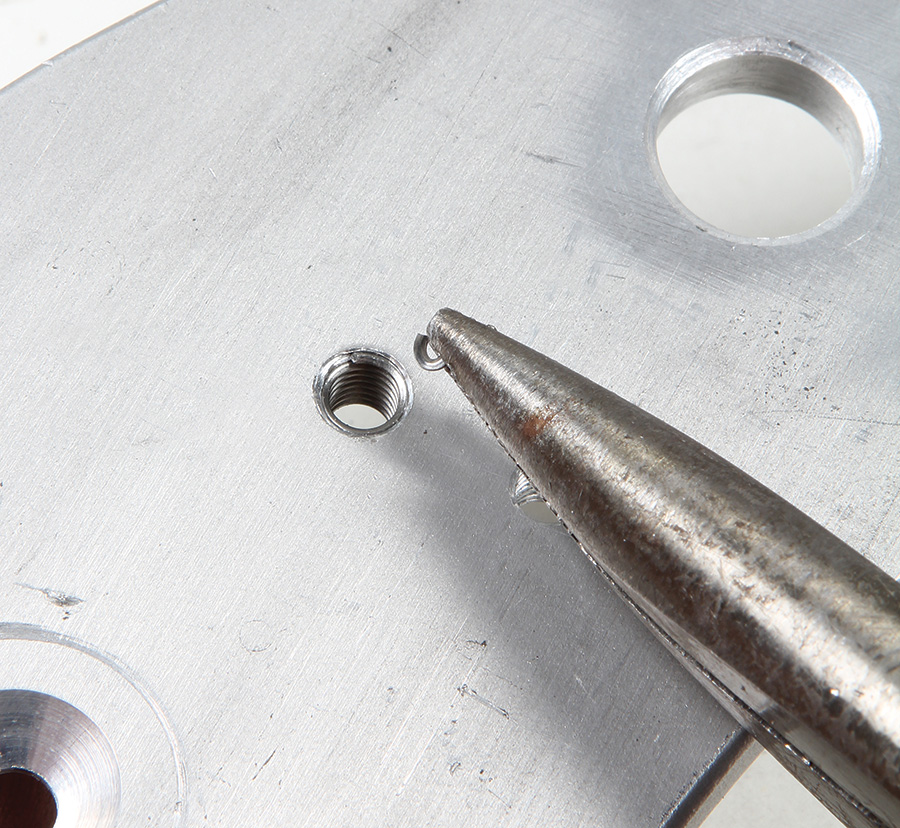
5. Break off the tang.
Some people use thread locker—such as Loctite—when installing insert threads, but Heli-Coil literature suggests this is not necessary. The coil is compressed when threaded into the tapped hole and held in place by outward tension.
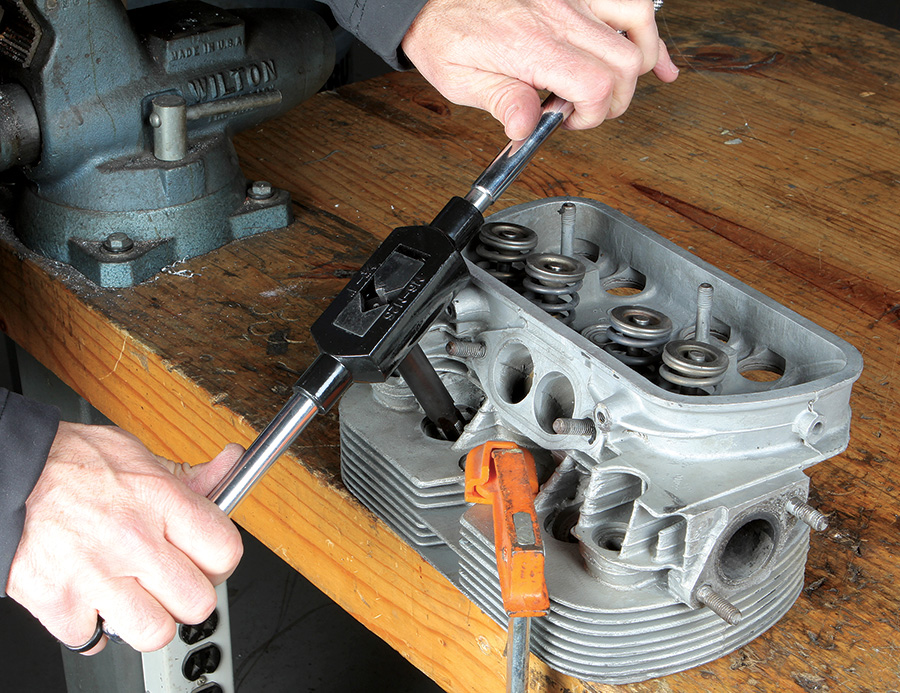
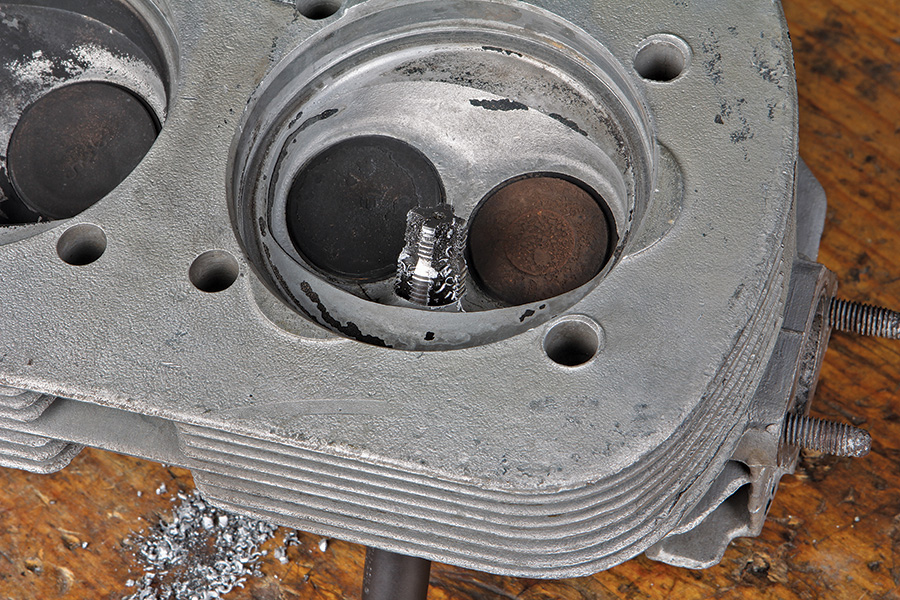
The tap for spark plug repair is a special design that eliminates the need to drill out the old threads. It uses the original thread to self-feed a reamer/rethreading combo. This assures the new thread is centered and square to the original hole. The tap breezed through this VW head.
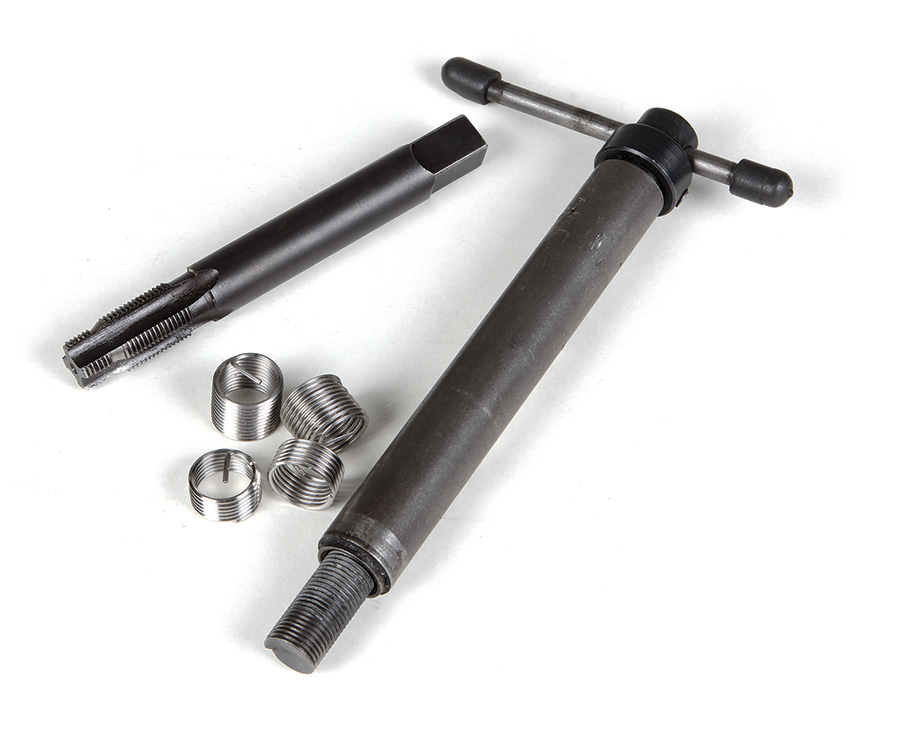
The Heli-Coil spark plug kit works slightly differently. It includes a special step-tap (see photos) and a supply of several of each insert from 3/8 inch to 3/4 inch. This covers the various standard-length spark plugs that have a 14mm thread.
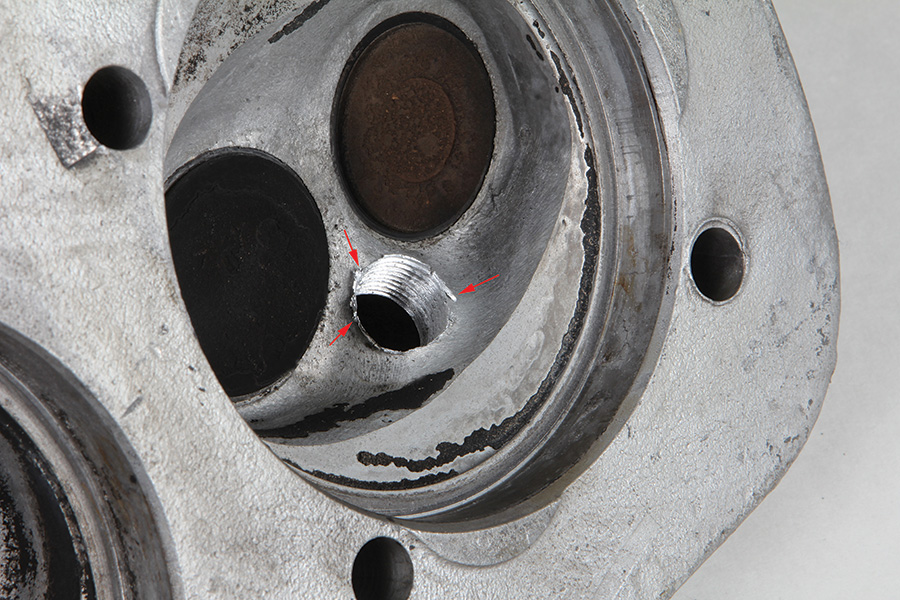
Re-tapping produced burrs (red arrows) that must be removed. A hook tool is perfect to this job. (See Home Shop Machinist, KITPLANES, June 2015.)
Insert threads have a long history of success repairing and reinforcing threads. Whether or not they are appropriate for any particular repair depends. In the case of spark plug threads, for example, they have a proven track record. Would I use an insert thread on a stripped connecting rod? Probably not. When in doubt, seek the advice of an A&P mechanic or talk to the folks who built your engine or designed the kit.
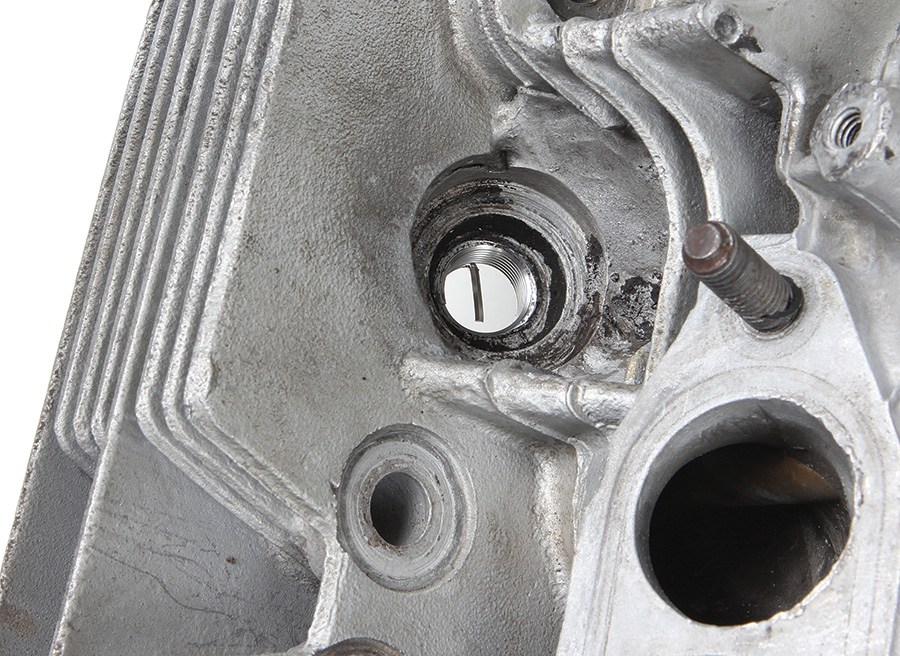
The final step is to snap off the breakaway installation tang. According to Heli-Coil, when properly installed, insert threads are equal to or better than original threading.
Special thanks to Donny Karraker for loaning the VW head and 14mm Heli-Coil kit.

![]()
Bob Hadley is the R&D manager for a California-based consumer products company. He holds a Sport Pilot certificate and owns the VW-powered Victory Stanley Fun-Kist.





Thank you for the article. Don’t forget to used oil or grease to catch the metal shavings. Cheers!