Have you ever been deeply immersed in a shop task and mumbled to yourself, “There must be a better way”? You’re not alone. The truth is that aircraft fabrication professionals have the same thought almost every day. For the homebuilder, finding a better way is usually just a matter of convenience. Even a slow, labor-intensive method will get the job done eventually. For the pro, time, labor, and accuracy all equate to money.
This month we’re visiting Maule Air, at Spence Field in Moultrie, Georgia. The Maule family has been building aircraft parts since the founder, B.D. Maule, taught himself to fly (in his own homebuilt design) back in the early 1930s. In the beginning, products included the Hummer aircraft engine starter, the Maule tailwheel, and the Maule fabric tester. By 1957 B.D. was showing his prototype high-wing bush plane at the EAA convention and received an FAA type certificate in 1961.
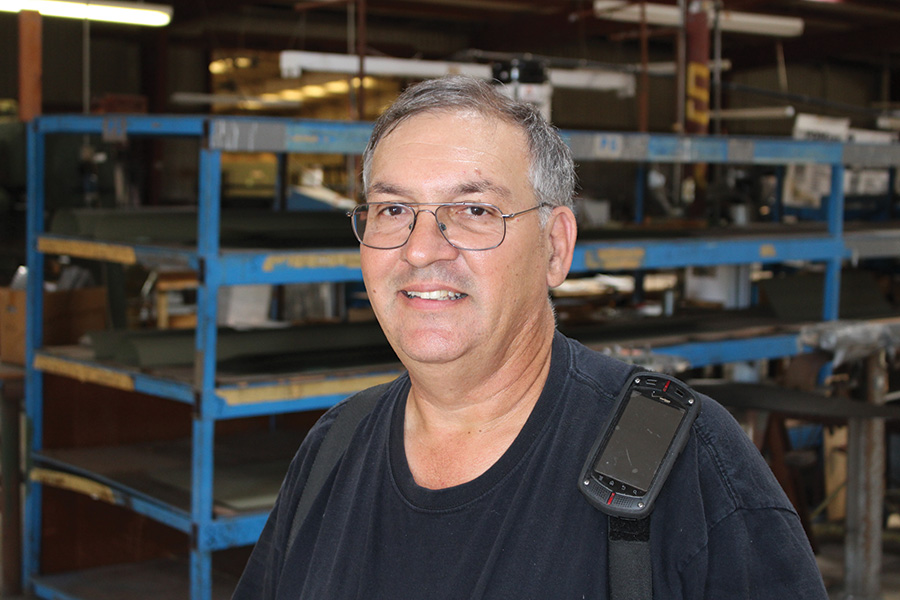
Meet your host. This is David Maule, one of several family members active at Maule Air. David is the company shop guy, responsible for many of the tools and techniques used to build better airplanes in less time. He is also a very nice fellow.
All Maule production models combine a welded steel tube fuselage with a riveted aluminum wing. The fuselage and tail surfaces are fabric covered. The Moultrie plant is fascinating because of the old-school approach to manufacturing. Everything possible is made in-house, using methods appropriate for inexpensive, small-scale manufacturing. It is, in essence, a giant homebuilders shop. Let’s go look around.
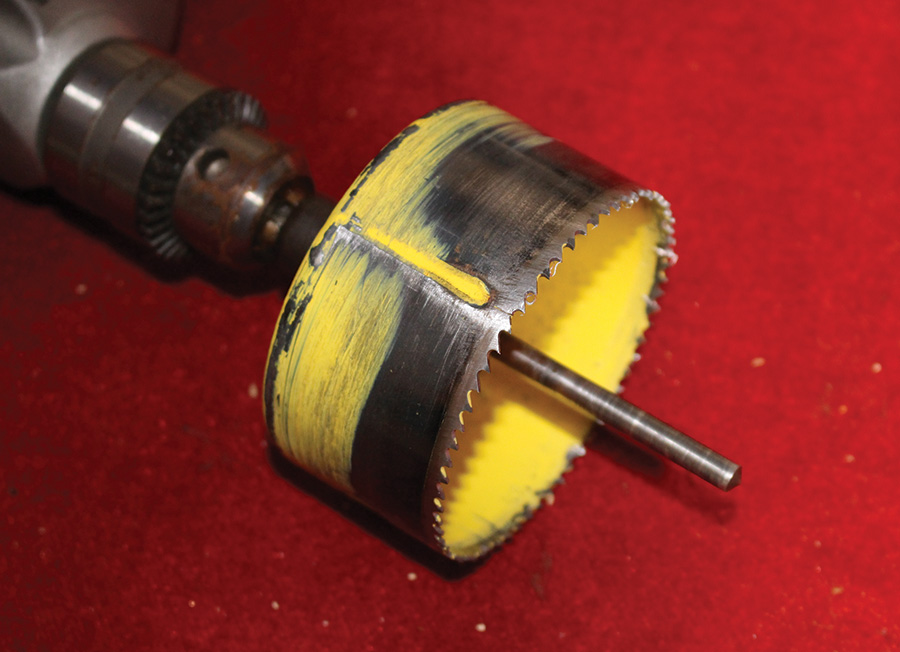
Need a Large Diameter Hole?
You can make up punch dies and buy a big machine (expensive), or use a fly cutter (with increased physical risk), or you can use a hole saw. The trouble with hole saws is that they tend to walk around while entering the material, leaving scars just outside the perimeter of the finished hole. Scars and scratches are stress risers, unacceptable in aluminum structures. The solution is to chuck the saw in a lathe and grind off the tooth set on the outside of the saw. The inner tooth set is enough to maintain kerf clearance in metal, and the saw starts cleanly.
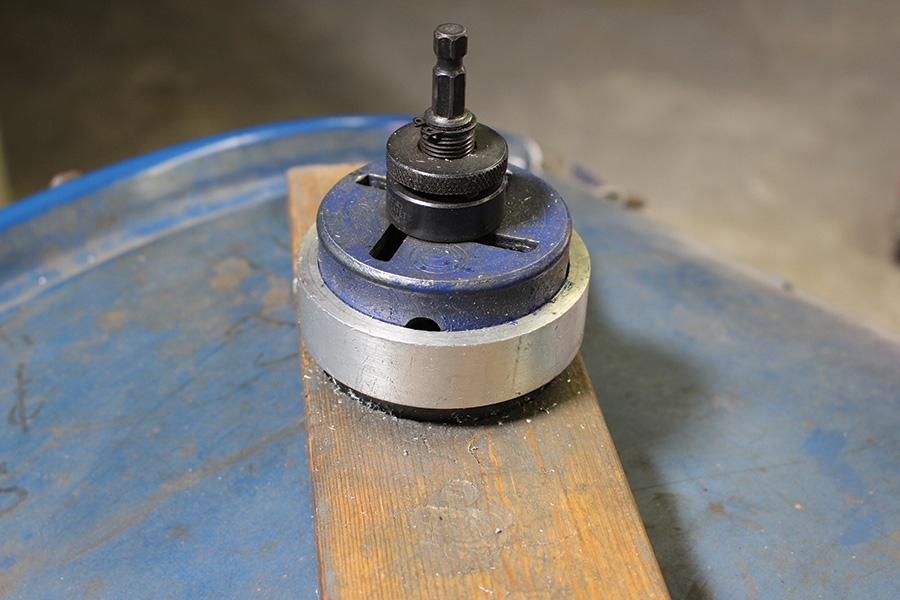
Trued Hole Saw
Sometimes a new hole saw isn’t perfectly round. The resulting wobble may again cause an ugly start to a cut. Don’t throw it away. Simply machine a backup ring and press it onto the saw.
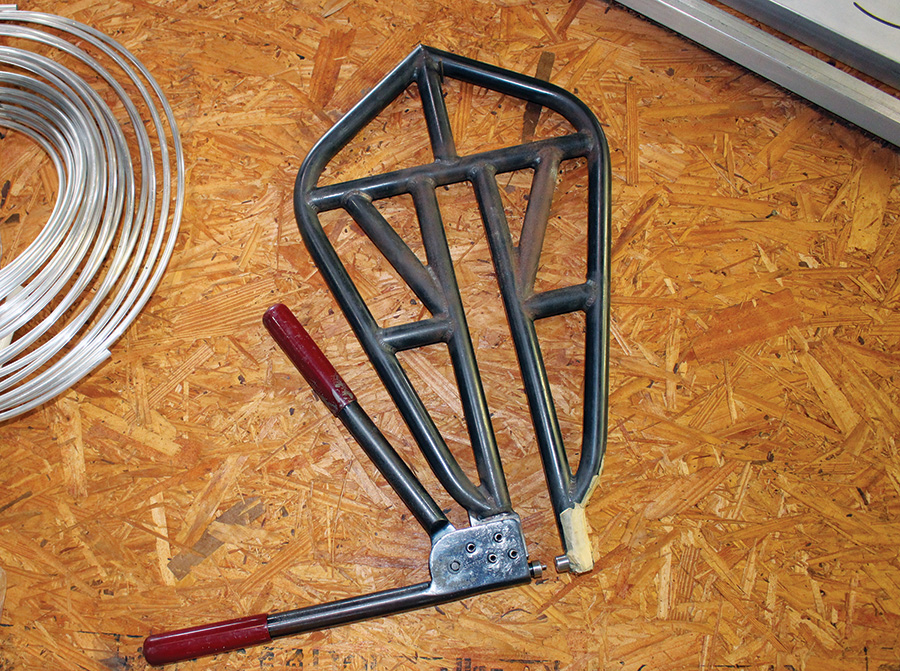
Long Reach Squeezer
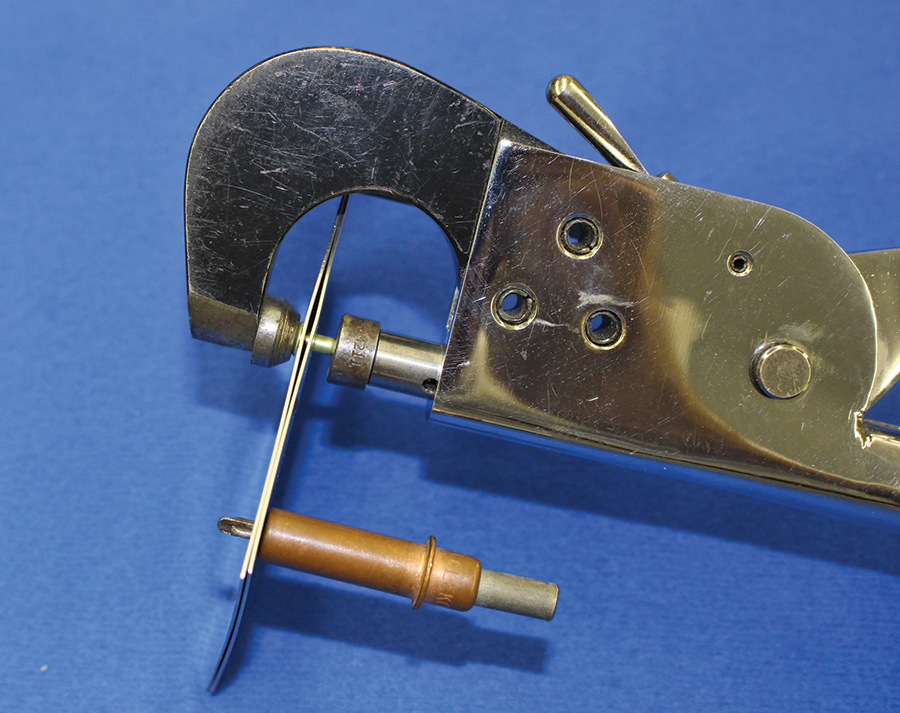
The maximum commercially-available yoke depth for long-reach rivet squeezers is around 5 inches. The reason is simple; conventional yokes are cut from solid steel plate and are thus quite heavy. A yoke with a reach of 12 inches would have been much too heavy for the ladies in the Maule wing assembly department. The solution? Weld up a yoke from thinwall 4130 tube.
Deburring
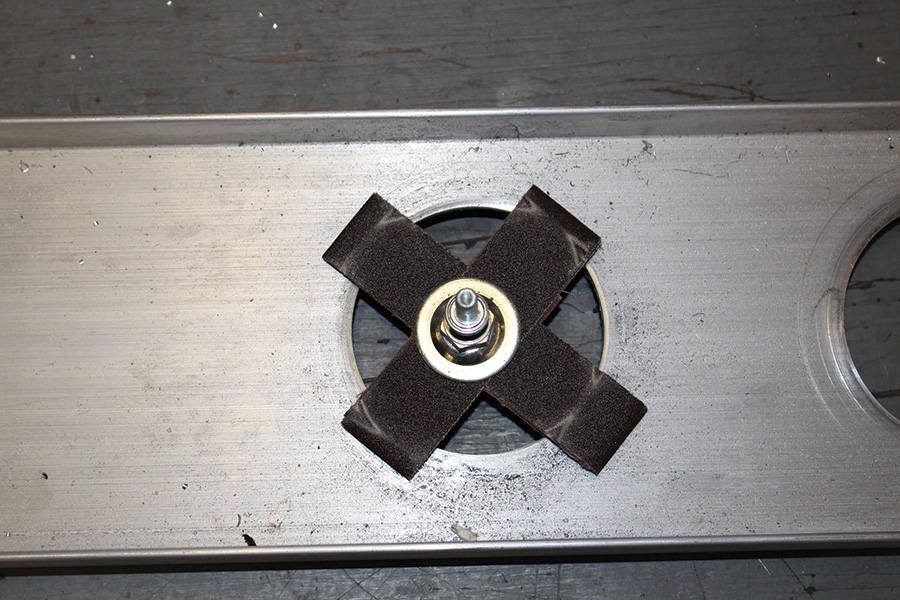
Deburring the edges of large holes in spars and ribs can be very time-consuming. At the Maule plant it’s done quickly with a standard abrasives catalog item called a “cross pad”. It’s chucked in a die grinder or drill motor and simply pushed into the hole, which nicely deburrs and rounds the edge. 3M and Norton are perhaps the best-known brand names, but there are dozens more. Cross pads are available at all the usual industrial supply sources.
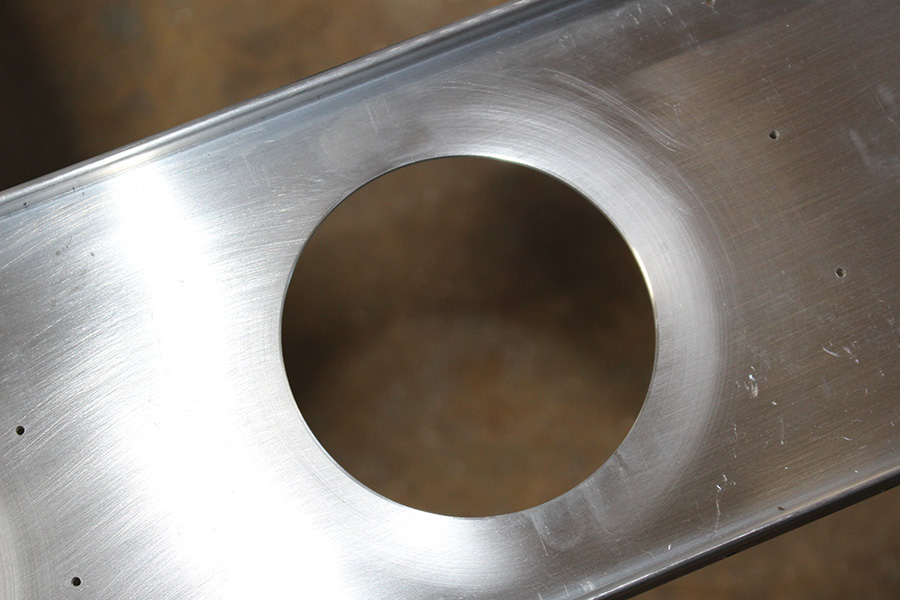
Cross pads are also available in 3M Scotch-Brite and similar material. Following a sandpaper-type cross pad with a fine-grit, non-woven mesh cross pad results in a near-polished edge. This is the web of an extruded 6061 aluminum Maule wingspar.
Eliminate Gaps While Riveting
Speaking of squeezers, here’s a neat trick from Nancy Plant in the Maule wing shop. Sometimes two sheets of aluminum refuse to lie tightly together for riveting, even with Clecoes in adjacent holes. Squeezing the rivet may result in a permanent gap between the parts, which is unacceptable.
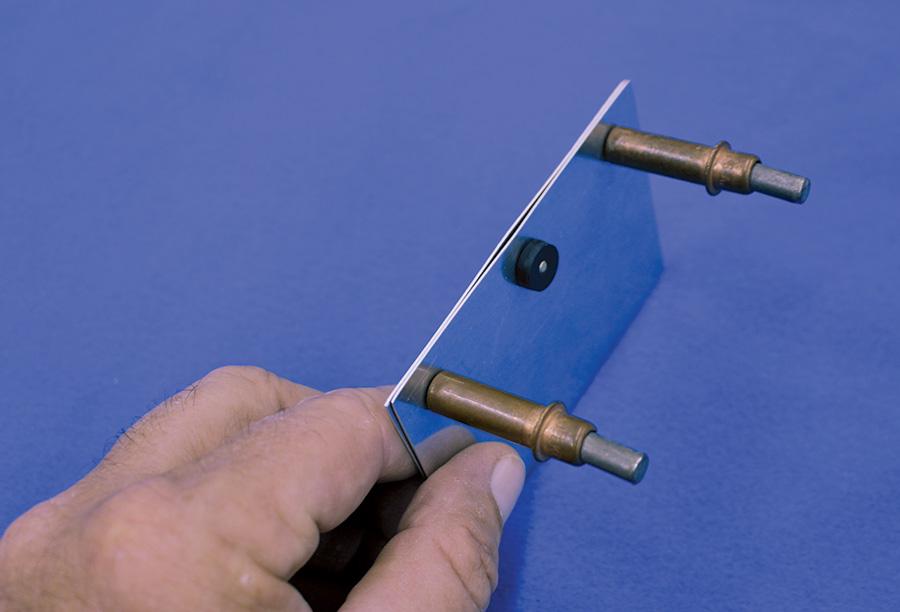
Try this; slip an ordinary flat faucet washer (or any little bit of scrap rubber sheet) over the rivet shank.
Position the squeezer and partially set the rivet. The rubber is trapped between the squeezer anvil and the sheet metal, forcing the sheets together as the rivet is compressed. Release the squeezer, remove the rubber, and finish setting the rivet.
90 Degree Flanger
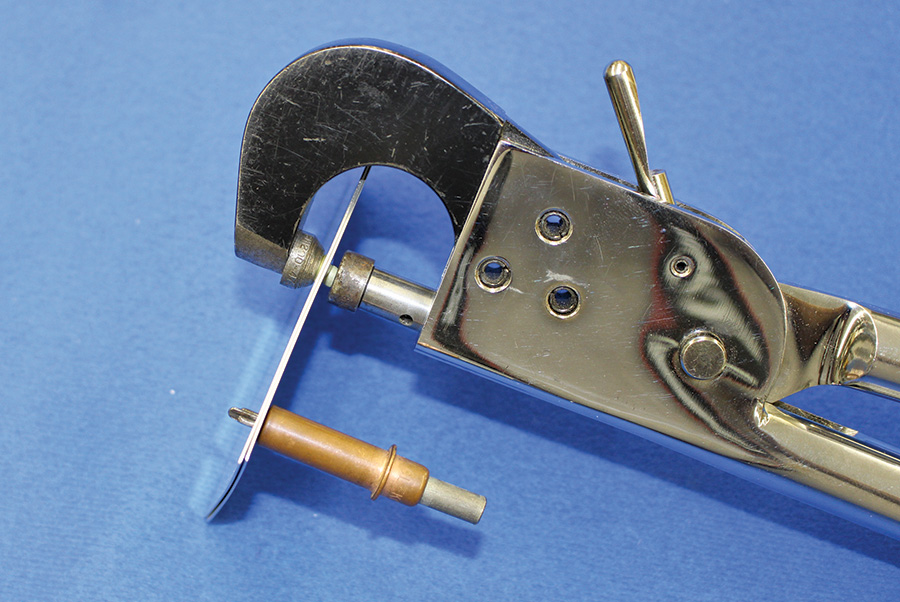
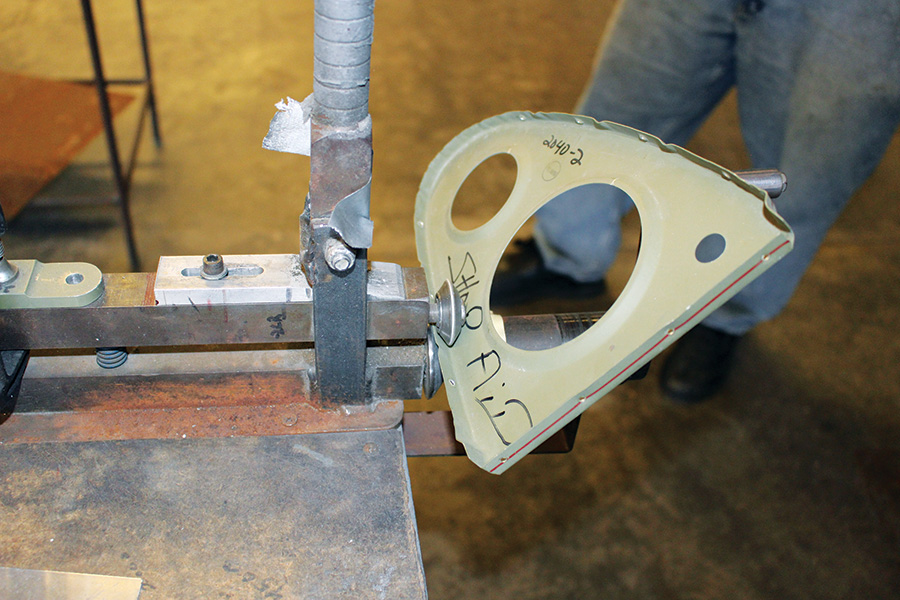
Stamped or hydroformed ribs don’t always get delivered with flanges at exactly 90 degrees to the web. They’re usually a bit under-bent, and it’s left to the builder to adjust them as necessary. Failure to do so means they don’t fit flat against the wingskin. The usual tools bend a little bit of flange at a time, with a lot of eyeballing to judge 90 degrees.
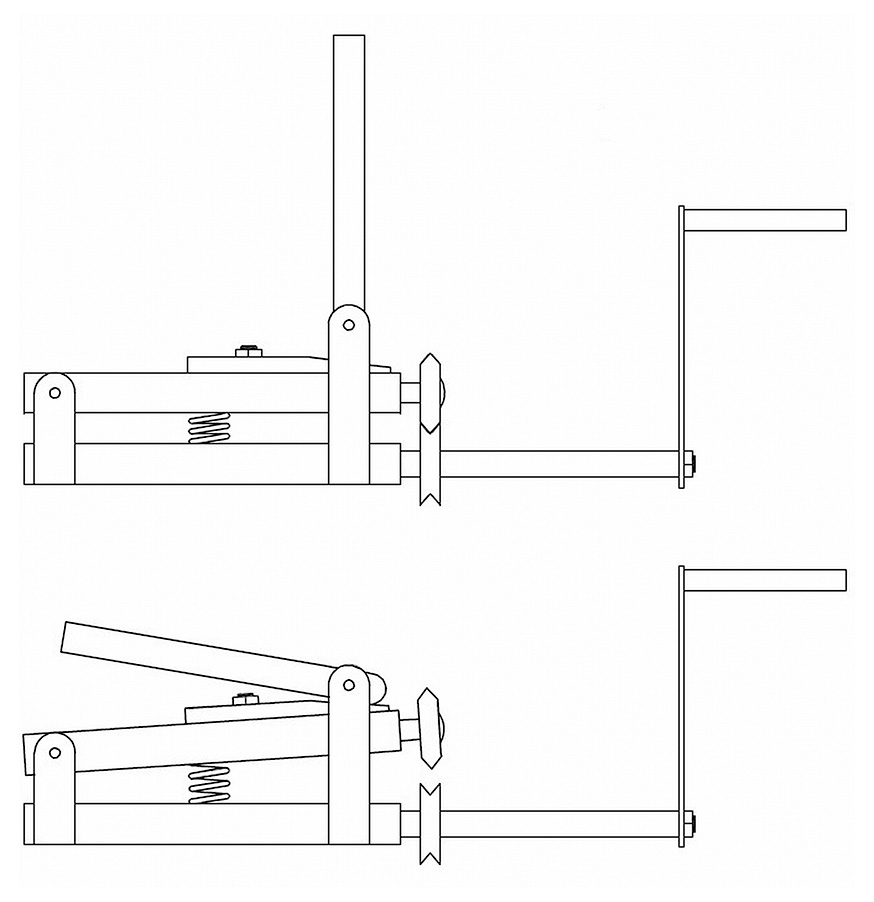
Here’s a tool which has probably been in the plant since B.D. opened the place. The basic operating principle is along the lines of a classic Pexto beader-crimper. Here’s a sketch:
Both forming dies are on axles with bearings. The crank rotates the lower, female die. Moving the upper handle to a vertical position pinches the dies together, capturing the flange of the workpiece. The spring between the arms moves the dies apart when the handle is released. The flat bar with a ramped surface clamped to the upper arm allows adjustment for material thickness. It is simple, accurate, and very fast to operate. Building one would be a nice little Saturday project.
Jigged Bucking Bar
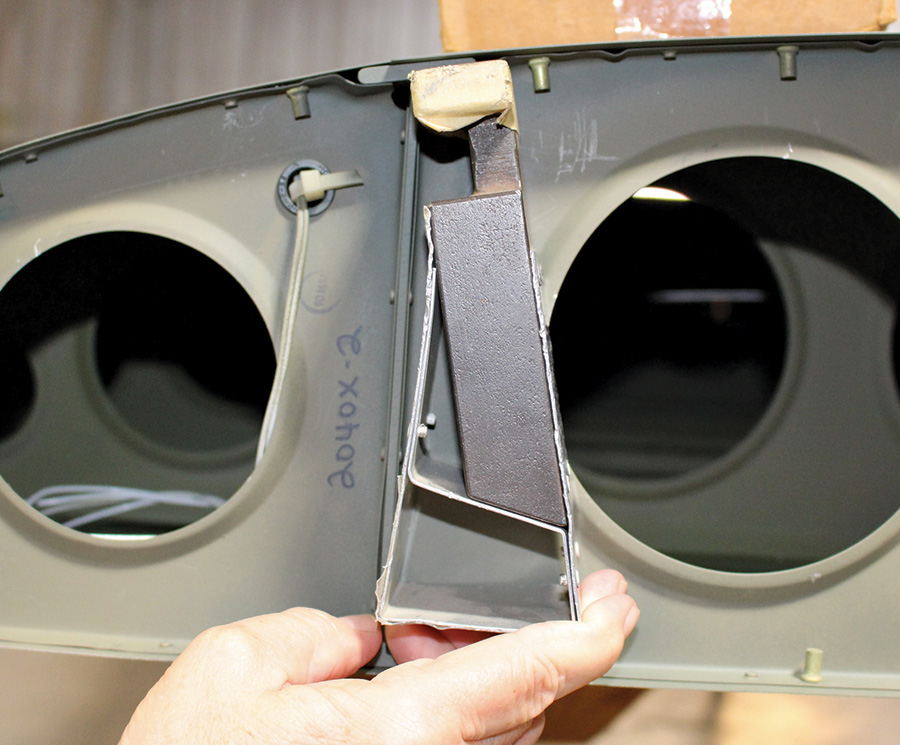
Reaching into an enclosed space and holding a bucking bar in correct alignment is not always easy. If the face of the bar isn’t held perpendicular to the rivet axis the result may be a bent rivet or tipped shop head. Much time can be wasted drilling out and replacing a bad rivet, only to have it happen again with the next in the row. The solution? Make simple jigs which are attached to the bucking bar used in each location. The example in this photo is for the rivet line at the top of the front wing spar. The jig is made from scrap aluminum strip, bent to an appropriate shape, and attached to the bar with duct tape or adhesive. Perfect alignment every time!
Hinge Tweaker
By their nature, welded assemblies are rarely in perfect alignment; the heating and cooling process tends to induce some warpage, however small. Sometimes the welded steel control surface hinge points on a new Maule wing require adjustment in order to guarantee low wear and smooth operation. No problem; the ladies just bring out The Tweaker and bend as necessary.
Plexi Oven
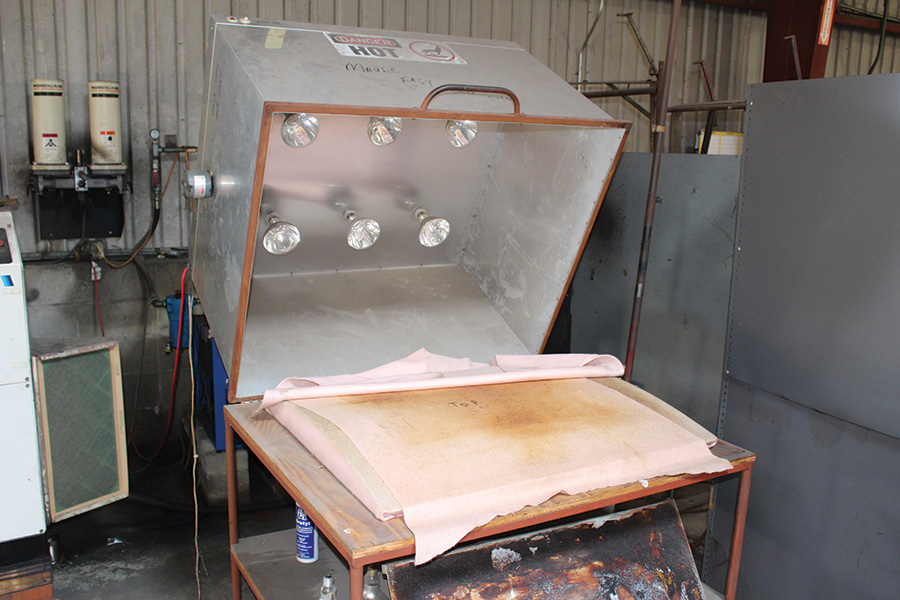
Want to form moderate curves in Plexiglas? This simple oven does a reliable job. It’s an insulated metal box with six heat lamps and a small fan for air circulation. A Plexiglas sheet is laid on the cloth-covered form, the box is closed, and the sheet is gently warmed until it settles on the form. Open the box, allow the Plexiglas to cool, and trim to shape.
Vacuum Form
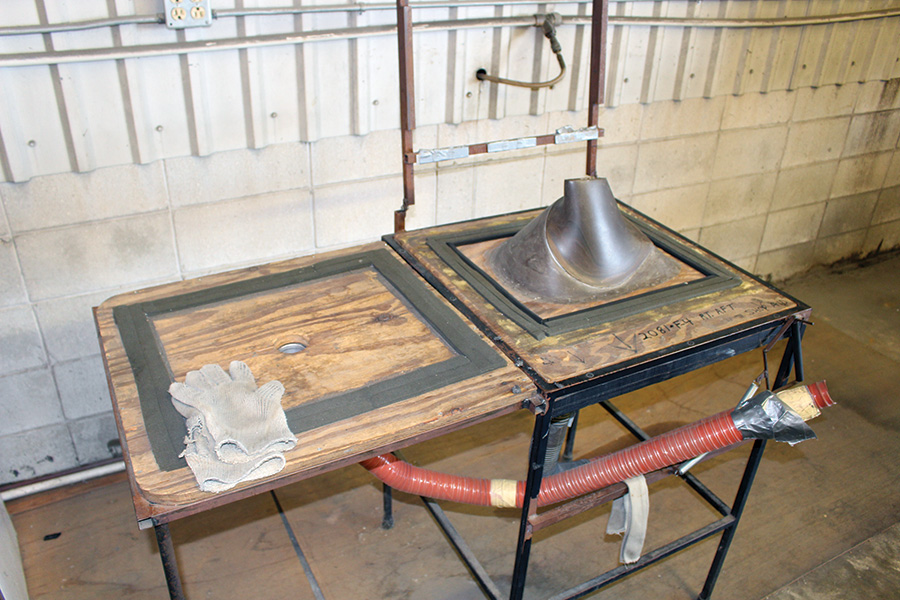
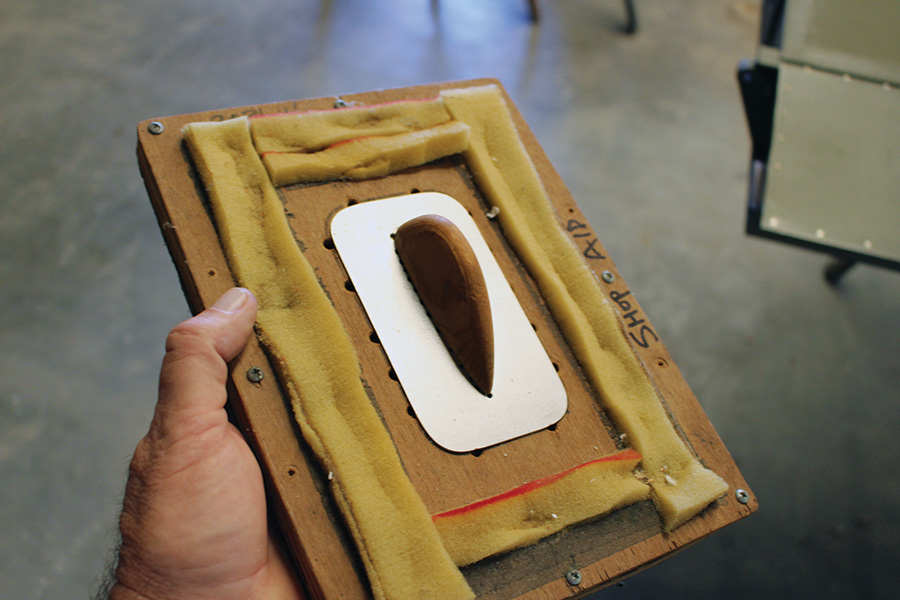
These are simple vacuum-forming tables. They’re used to turn out batches of intersection fairings for wing struts and landing gear legs, plus a variety of smaller fairings. The fairing material is Kydex 100 thermoplastic sheet. The Kydex is placed in a “window frame” edge support, and warmed in an ordinary electric oven. When hot the sheet is placed on the first table, and air is blown under it from beneath, which inflates it into a moderate bubble shape. It is then quickly transferred to the adjoining table, where it is placed over the fairing form. Vacuum is applied from under the table, and atmospheric pressure forces the warm plastic down over the form. After cooling the part is trimmed, fitted, and painted with no further labor.
Vacuum forming offers a great many possibilities for the homebuilder. For example, a form like this one would make hinge fairings for go-fast airplanes. Want to know more? Visit the Kydex web site at www.kydex.com, and go to “Technical Briefs”.
Lens Forming
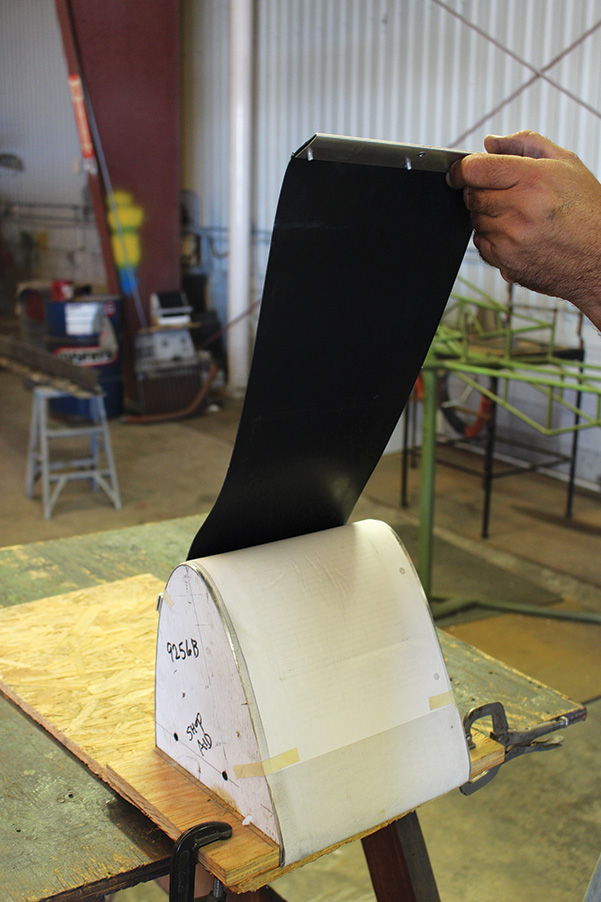
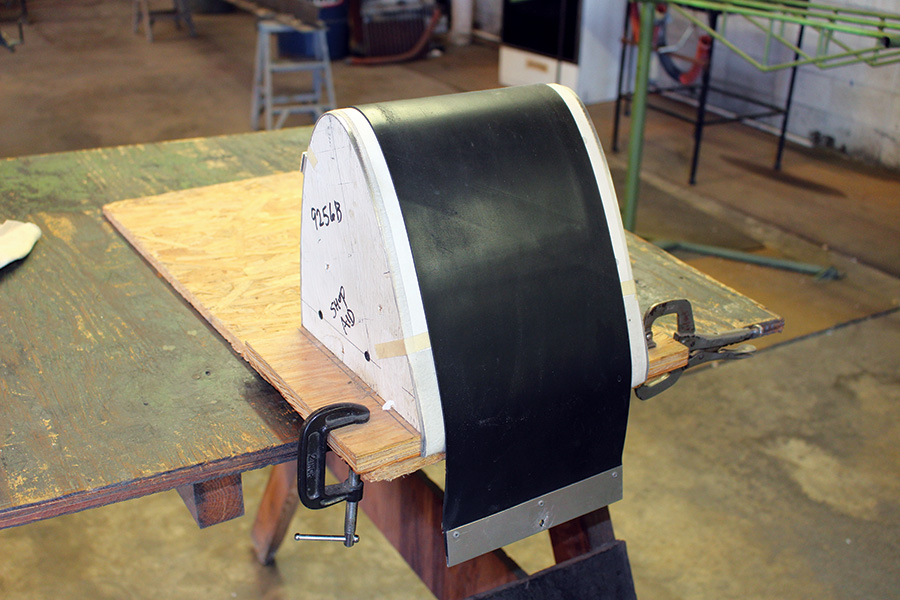
Need a leading edge light lens? A sheet of rubber has been added to this cloth-covered form. A warmed Plexiglas panel is slipped in between the rubber sheet and the form, then the rubber is pulled down and around the form, bending the plastic. A weight is hung from the end of the sheet to maintain even pressure, and the assembly is left to cool.
That’s it for this month’s tour—next month we’ll look at some clever design ideas and how the Maule factory covers control surfaces.

