After attempting wire-feed and TIG welding in the first two installments of this series, it was time to try the old standard: gas welding. Even in the age of sophisticated electric welding techniques, gas welding-or oxyacetylene welding-has its strong points and its proponents. One such proponent is my neighbor Philip Groelz, who was kind enough to wheel his gas welding equipment down the street to my shop and show me the basics.
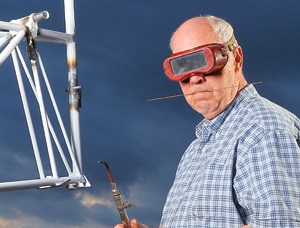
Getting ready to weld doesn’t require a grim expression and a bit of welding rod clasped in clenched teeth as builder Philip Groelz demonstrates here.
Gas welding is accomplished by melting and joining metal with a very high temperature flame, formed by burning the extremely flammable gas, acetylene. Normally, when we think of burning, we think of combining some fuel with air. But really, we’re combining the fuel with oxygen, which makes up only about 20% of air. To completely burn acetylene and get the hottest flame possible, it is combined with pure oxygen. That is why you almost always see gas welding setups with two tanks: one contains acetylene, the other pure oxygen. These are packed into the tanks and stored at high pressure. The gasses are released through a regulator on each tank and travel down hoses to a pair of thumbscrew valves. The valves are mounted on the torch-a brass colored tube several inches long with an almost right-angle bend to a tip. In the tip is an orifice; tips and orifices are interchangeable and sized to provide the correct amount of heat for the job at hand. Welding thicker metal naturally requires more gas and oxygen.
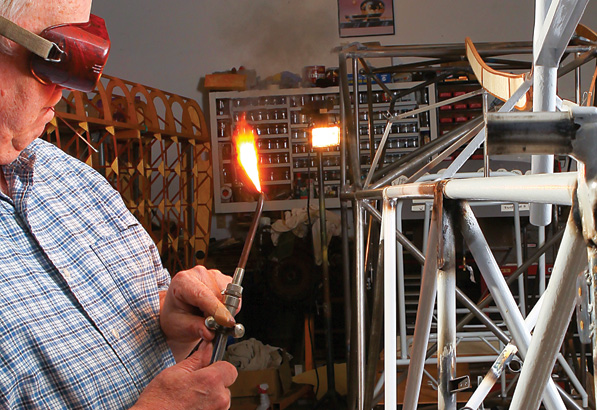
When the torch is first lit on acetylene alone, it generates a soft yellow flame.
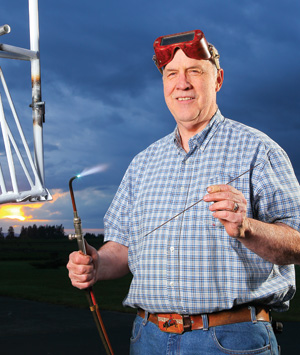
When the oxygen valve on the torch is opened (slowly) the flame turns into a lovely blue cone.
So We Begin
Open the regulator and the acetylene thumbscrew valve slightly, and gas flows into the torch and out of the orifice. Strike a spark with a flint igniter and poof!-a soft yellow flame springs to life. Slowly opening the other thumbscrew valve introduces oxygen. The gasses combine inside the torch, and the soft yellow flame turns bright blue and burns with a steady whisper. A blue conical flame with just a touch of “feather” at the pointy end seems to work best.
Although it’s too bright to look at with a naked eye, the flame is nowhere near as bright as the electric arc formed by wire-feed and TIG welders. A simple set of dark goggles is enough to provide protection. Because the flame is not throwing off intense ultraviolet rays, there’s no need for a full face mask, long sleeves and the other protective clothing electric welding requires.
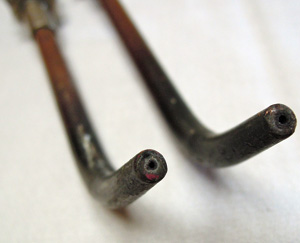
Torches come with different orifice sizes. Thicker metal requires more heat and more fuel to create the weld.
The Melting Point
Bringing the flame to the work quickly raises the temperature of the metal. Steel moves rapidly through red to orange and then to bright yellow as a puddle forms near the end of the blue cone of flame. In a TIG welder, you can vary the amount of power and heat applied to the weld by modulating it with the foot pedal. In gas welding, the flame burns at a steady intensity. The amount of heat applied to any one spot is adjusted by moving the flame either closer or farther from the work, and by the duration the flame is held to any one spot.
Once a puddle forms, you can move the bead along by moving the torch in a small circular motion, advancing along the edges you want to join. Just like wire-feed or TIG welding, the puddle’s the thing. You must learn to really see that puddle and keep it moving. Stay too long in one place and you risk burning a hole right through your work. Move too fast, and the puddle either cools and won’t flow, or it never really forms. The result is intermittent globs perched on top of the metal, rather than a bead that blends the work pieces. (I found that my bifocals made it almost impossible to really see the puddle well enough, so I ended up taking them off altogether and moving my face closer to the work. Without the big helmet, I could find a place where my aging eyes could focus and see the details in the molten puddle.)
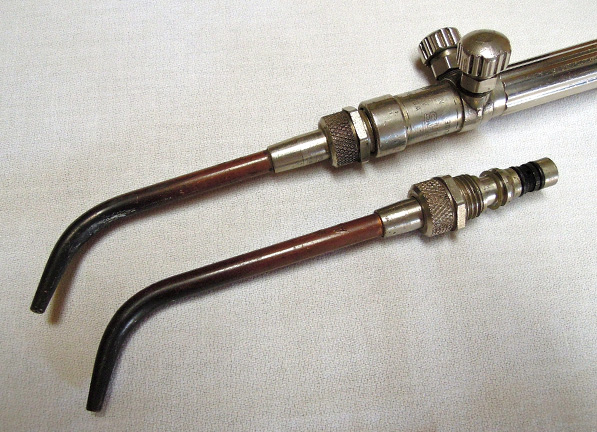
Interchangeable torches mix the oxygen and acetylene and fit comfortably in hand.
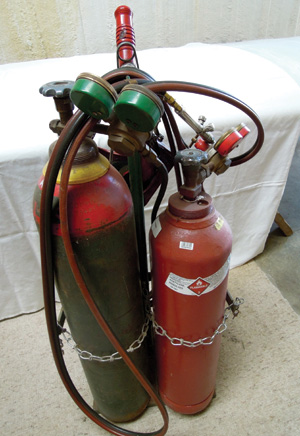
One of the beauties of gas welding is that it’s self-contained. Everything you need-gas, goggles, igniter, torch-is on one wheeled caddy.
Material Evidence
While you could join two pieces of metal by simply welding their edges together, gas welding usually requires adding new metal to the puddle. This is accomplished by dipping a thin rod of metal, held in your other hand, into the puddle. Of course, when you dip a cold metal rod into a puddle of molten metal, it extracts heat and cools the puddle, which means you must bring the torch slightly closer to add heat and keep the puddle molten.
I found that holding the torch at an angle of about 40 to the work and letting the puddle form slightly to one side worked best. I’m right-handed, so I’d cant the torch to the left and work from right to left, letting the puddle form in front of the tip. This let me hold the rod in my left hand and dip it into the puddle without interfering with the torch or the flame.
After three or four hours of practice, spread over several 20-minute sessions, my hands and eyes were finally learning to work with one another in a little rhythmic dance. Get the puddle started, and then simultaneously move the torch and rod in a bit closer. As the rod melts into the puddle, pull it back ever so slightly while making a tiny advancing circle motion with the torch, then back in with the rod until the puddle widens, and repeat. At first, I could only get one or two iterations before I stuck the rod too deep into the puddle and froze it there, or I advanced too quickly and let the puddle get away. After many attempts I could eventually get the bead going and continue it for minutes at a time. The hands move in, the hands move out, the puddle expands, recedes and moves on. As the dance acquires fluidity, muscles relax, breathing stays steady, and the bead starts to form the little series of overlapping puddles that are the mark of a good weld. You know you’re getting it when your muscles remember what to do without help from the conscious part of your brain.
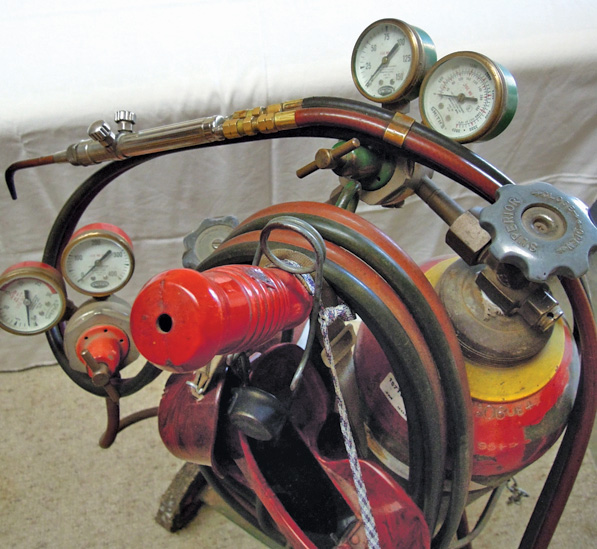
A pair of regulators with gauges controls the flow of gasses to the torch. Red is acetylene, green is oxygen.
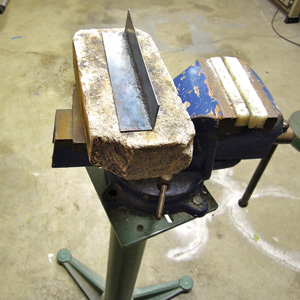
It doesn’t take much to practice gas welding: a vise, a firebrick and a couple of scraps of steel.
Keepin’ At It
At this point, many people bring up the old bromide about practice making perfect. Maybe, but it’s important to define the terms. Practice and repetition are two very different things. Practice involves constant mental involvement and altering each repetition to improve and gain the desired result. Repetition makes for consistency, but it also can reinforce consistently wrong habits that are hard to overcome.
In my hangar, you can literally hear the difference. My wife is a professional violinist whose teaching studio is directly above my airplane building (currently welding experiment) workshop. When young students are practicing, they’ll hit a difficult bit, stumble and then start over at some easier part. You can hear them getting tenser and more tentative as they approach the hard measures.
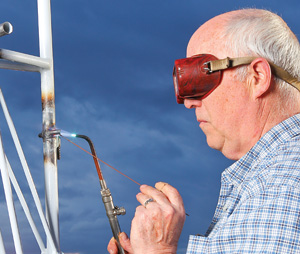
Groelz adds a tab to the tailpost of his Christavia fuselage.
That’s not what you would hear when The Violinist is practicing. She’ll hit a hard part, stumble, then play only the hard part over again, slowly and deliberately, teaching her hands and ear the right movements and sound. This will happen several times, usually speeding up slightly, but always with the correct rhythm and pitch. She never goes back and starts at the easy part. She knows how to play that, so time spent there doesn’t accomplish anything useful. Repetition is just a tool used during practice-it’s the constant self-monitoring and correction with each iteration that achieve the result.
Old But Perfected
Although many think of gas welding as old-fashioned, it has several positive aspects. One is that you can gas weld anywhere you can drag a set of tanks and a torch. Of course, that dragging requires a bit of muscle as the standard tanks can be pretty heavy, but tanks are available in sizes comparable to a propane canister. That makes it pretty easy to bring welding power to a job where electric power isn’t available.
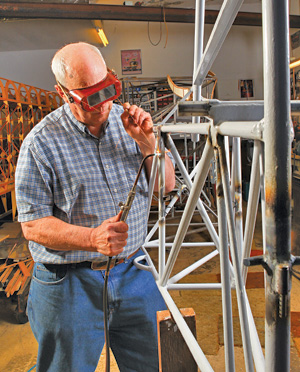
The fuselage was gas-welded from plans.
Another thing I appreciate about gas welding is the better visibility. Without the need for a really dark helmet, you can better see what’s going on, though I suspect that once you become completely comfortable with whatever welding method you’re using, this wouldn’t be a big factor.
My favorite thing about gas, strangely enough, is aesthetic. There is something satisfying about the whisper of the torch and the soft splash of flame, as opposed to the hard crackle of wire-feed and TIG welders, that just made gas welding more fun.
So, after several months of on/off instruction, practice, and trial and error (lots of error) with three different methods of welding, I’ve managed to remove the welding monkey from my back. I’m not a real welder (every professionally welded piece I see reminds me of this), but I’ve found that, though welding is a real skill, it’s a skill that the average person in a home shop can eventually acquire. It will take a modest investment in money and a more significant investment in time, but if you make it, you will have acquired a useful and enjoyable technique.
I’m shopping for an affordable TIG outfit for my home shop, and with some more practice, that Bearhawk might prove doable yet!
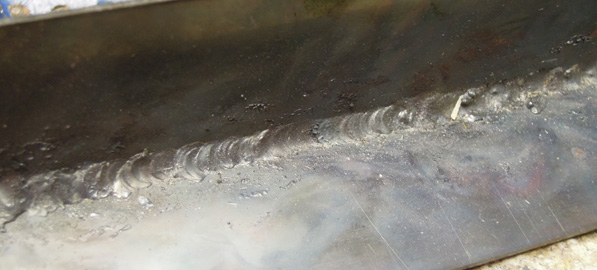
Eventually, the eye and the hand will cooperate, and something resembling a bead will appear.
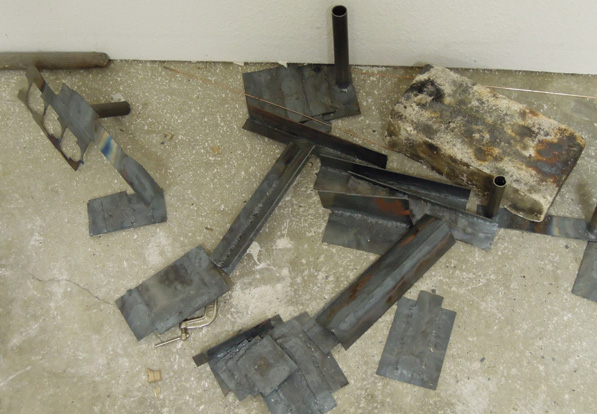
That bead doesn’t happen right away; there will be quite a scrap pile in the corner of your workshop before it does.


