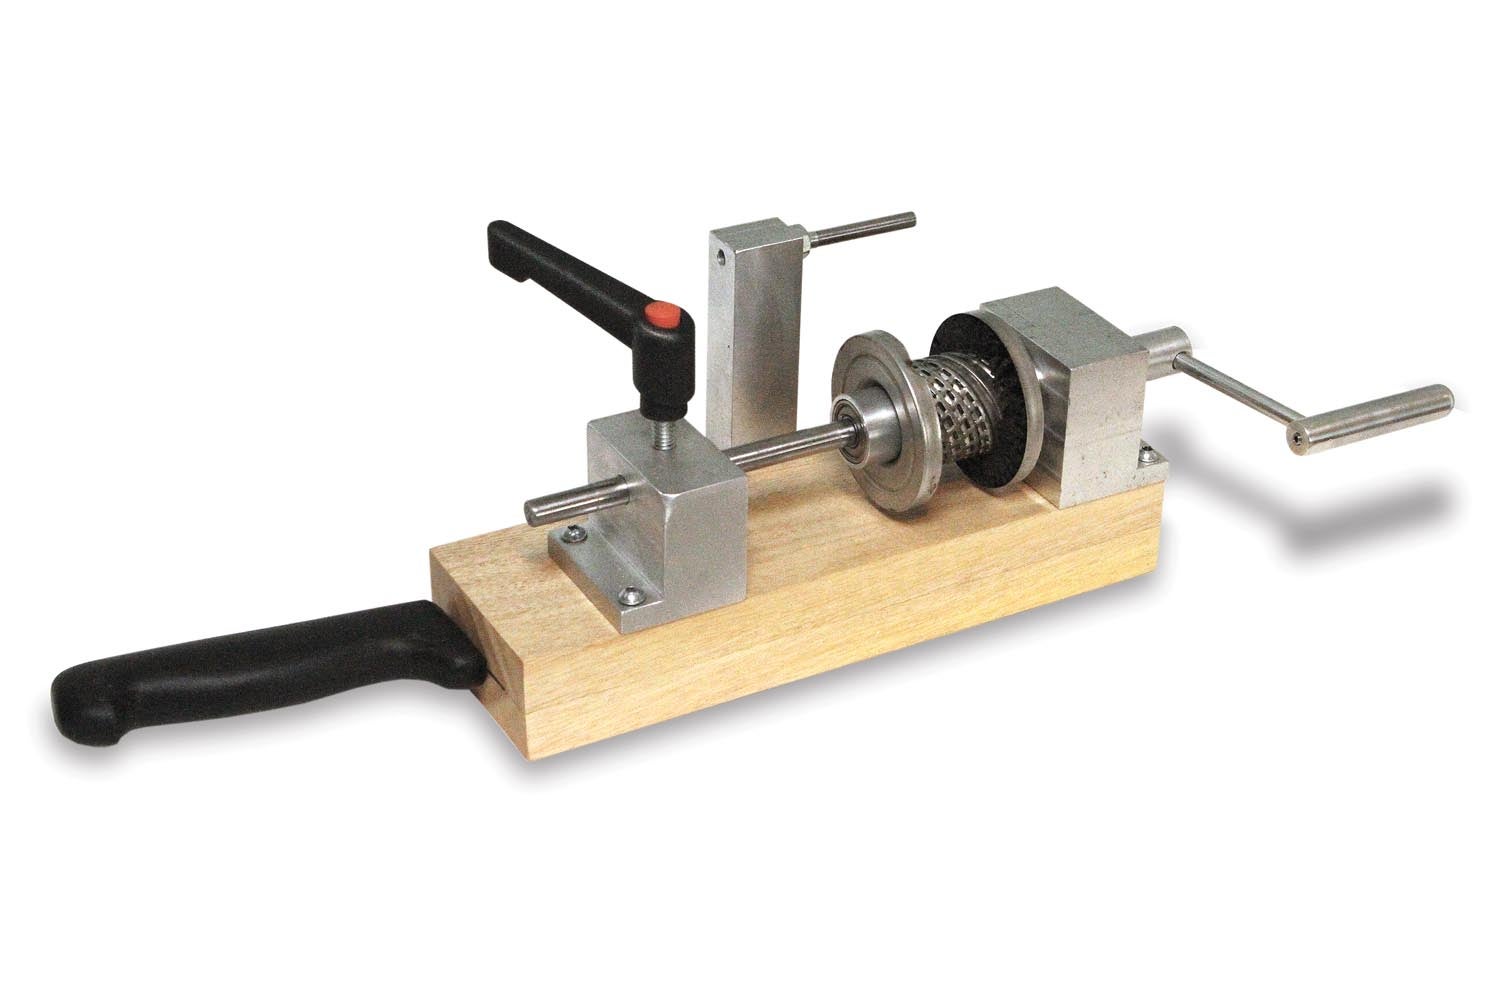
It may look like a small hand-cranked lathe, but it’s a dedicated filter slicer-off-er. Note the base also doubles as a knife storage block.
The process of inspecting an oil filter is not complicated. Slice the top off using a filter cutting tool. Extract the cartridge that holds the pleated filter element. Cut the element free of the cartridge. Wash it in solvent and strain the swarf through a coffee filter to catch any sediment (see sidebar below).
For whatever reason, I am a bit clumsy around knives. Every so often, I manage to cut myself. Nothing major, but annoying and preventable. It always happens when I’m in a hurry or get distracted. So, back in 2018, when Brian Carpenter demonstrated to our Light Sport Repairman class how to cut, wash and inspect an oil filter, the first thing I thought was, “Oh no! A slippery thing in one hand and a knife in the other…I’ll probably cut myself doing that.”
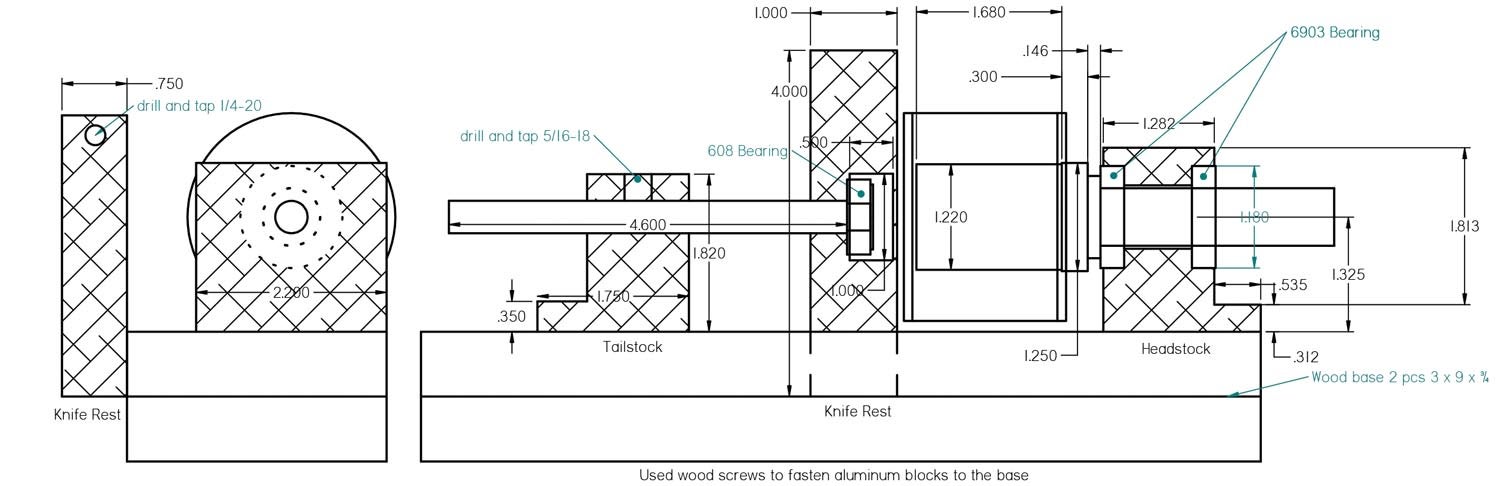
Download a high-resolution version of this sketch.
It took five years and I don’t know how many oil filters later, but sure enough, I had brain fade and an oily cartridge slipped out of my hand. In my other hand, the box cutter knife I was using made a graceful sweeping, slashing arc downward…into nothing. It was a close one, but it got me thinking that I should, for the sake of limb preservation, come up with a better way to hold and slice apart slippery filter cartridges.
I thought about making an arbor to hold the cartridge in my lathe and use a knife like a parting tool. But since I sometimes work away from my shop, it would be nice to have a portable device that I could take on the road.
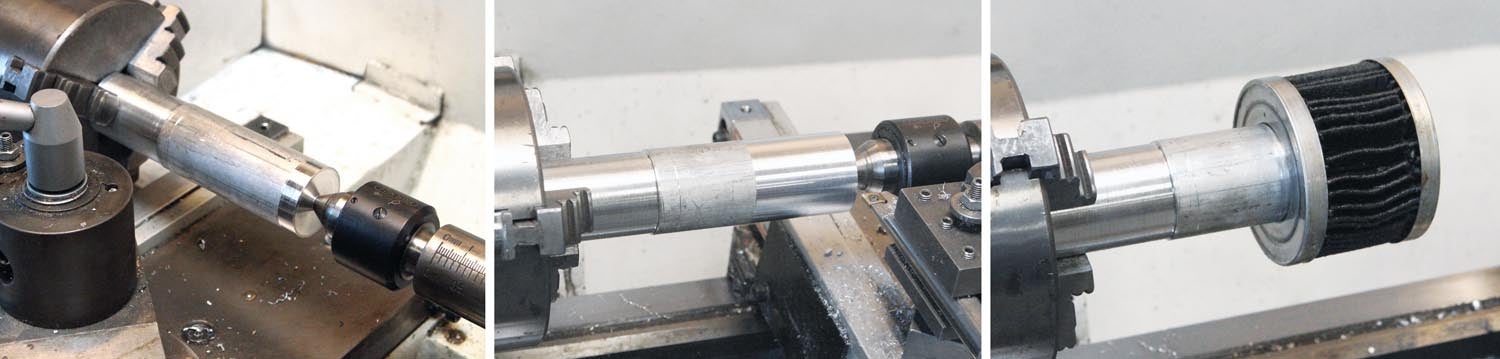
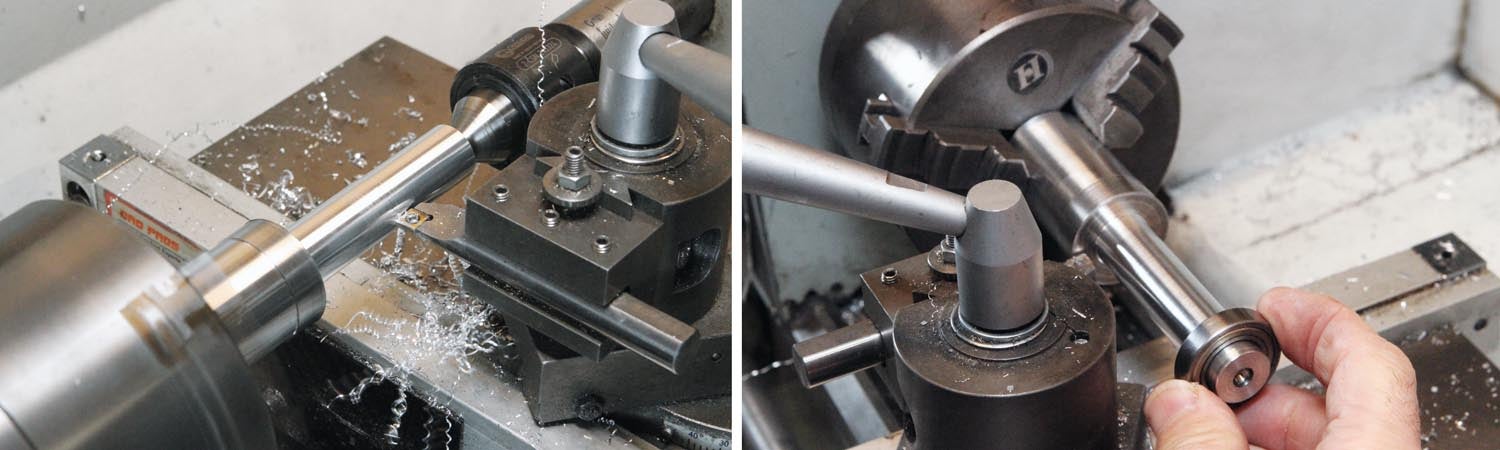
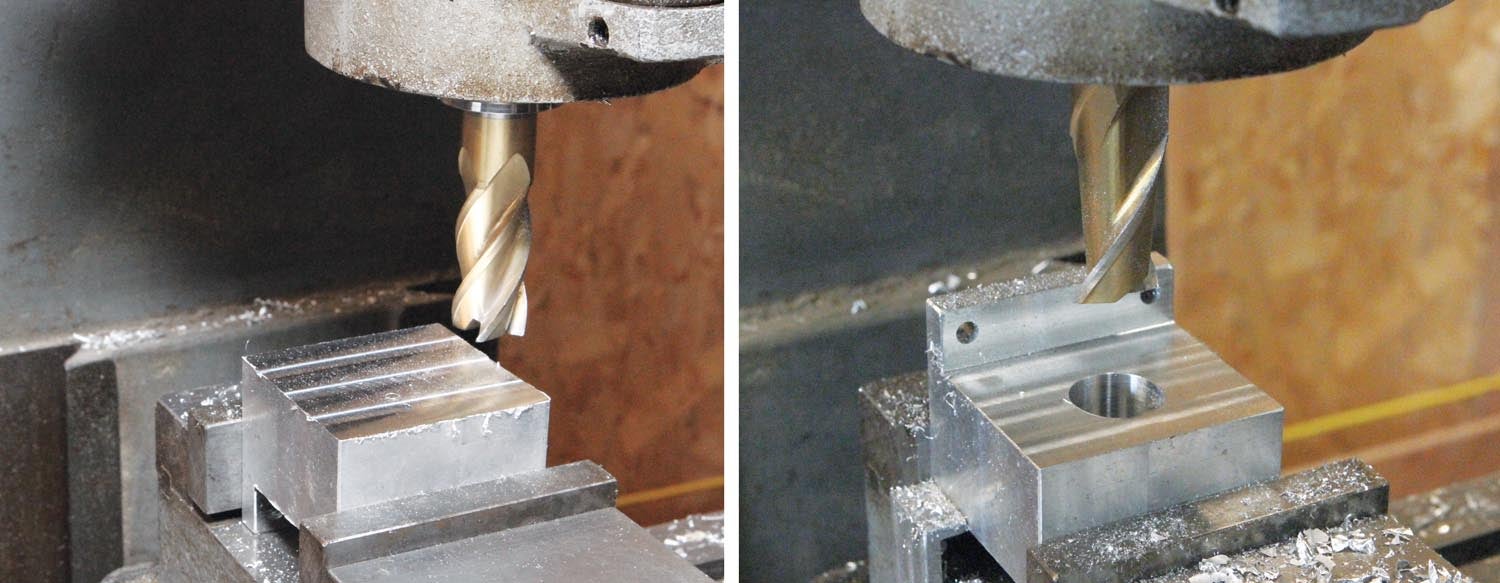
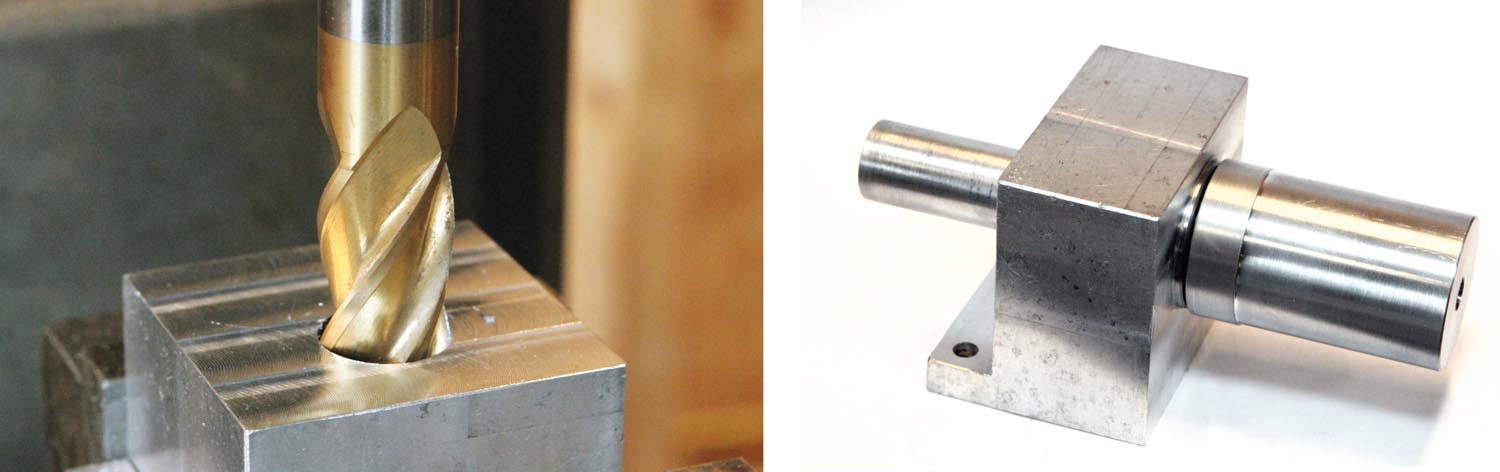
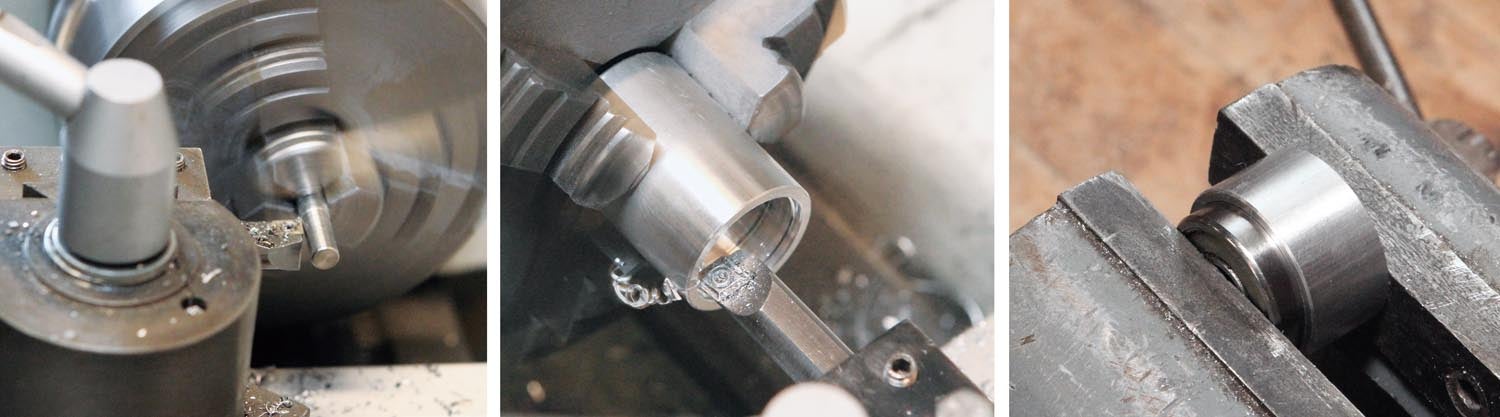
A rotating tail center (left) was necessary for turning on the end of the long spindle (center). Checking the fit of a filter cartridge (right).With the spindle flipped end for end and the rotating tail center reengaged (left), repeated passes were made until a close sliding fit to the headstock bearing was achieved (right).The headstock body was squared up and dimensioned on the milling machine in preparation for the bearing pockets (left). A small pilot hole was drilled and then the spindle clearance hole was sized by plunge cutting with a ¾-inch end mill (right).The pockets for the bearings required several steps to “creep up” on the dimension (left). Confirming the fit of the bearing (right).
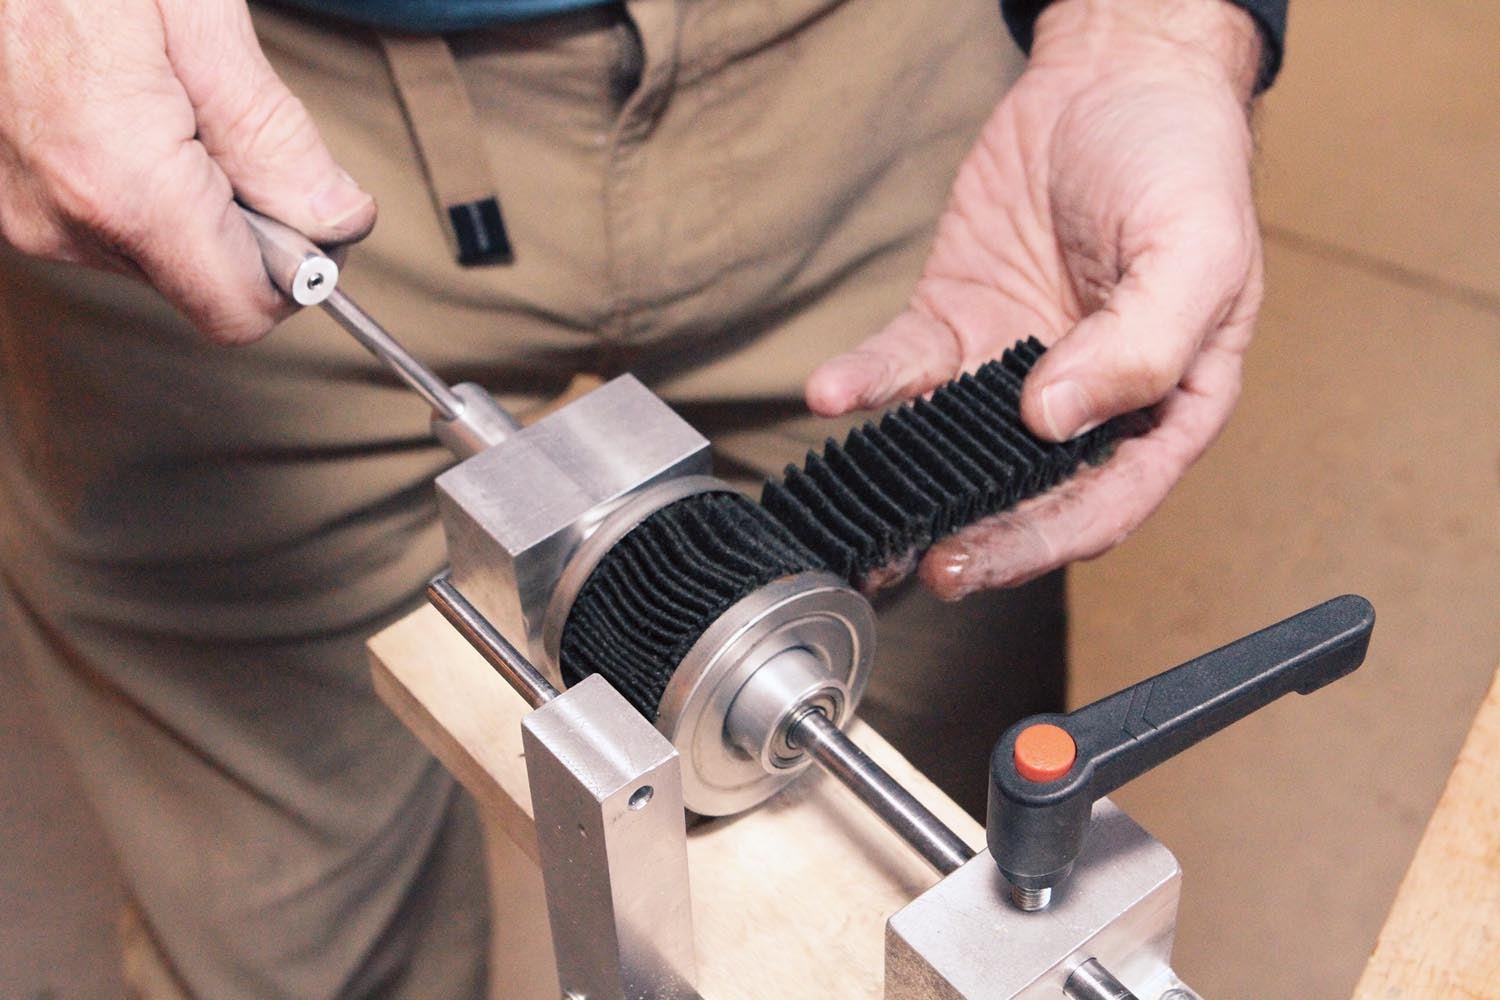
What I came up with was, for lack of a better description, a miniature hand-cranked lathe for slicing pleated filters from cartridge housings. The dimensions are specific to oil filters used on Jabiru engines (NAPA 1394), but there’s no reason the design couldn’t be adapted for just about any single-use, throwaway oil filter. The choice of bearings for the headstock (two 6903 metric bearings) and live center (one 608 metric bearing) was what I had on hand. The headstock bearings are certainly overkill for the application, but using them provided a good opportunity to demonstrate the basics of lining up and boring concentric bearing pockets for spindle applications.
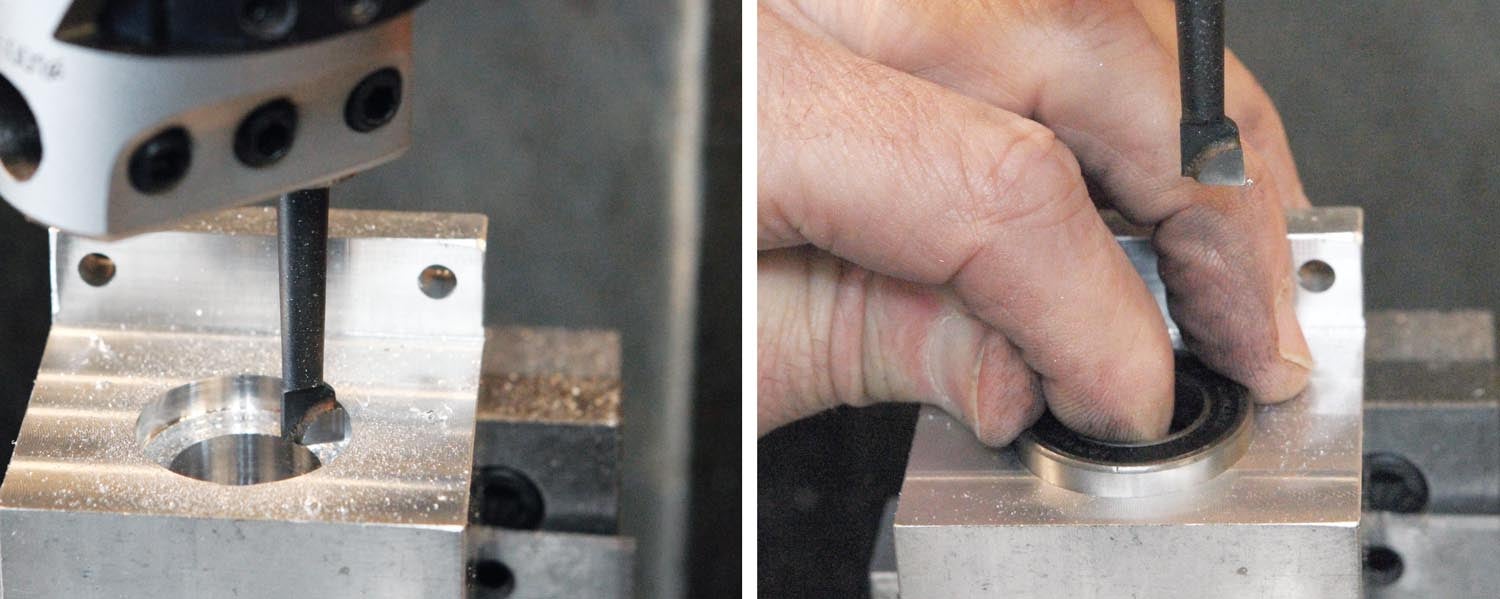
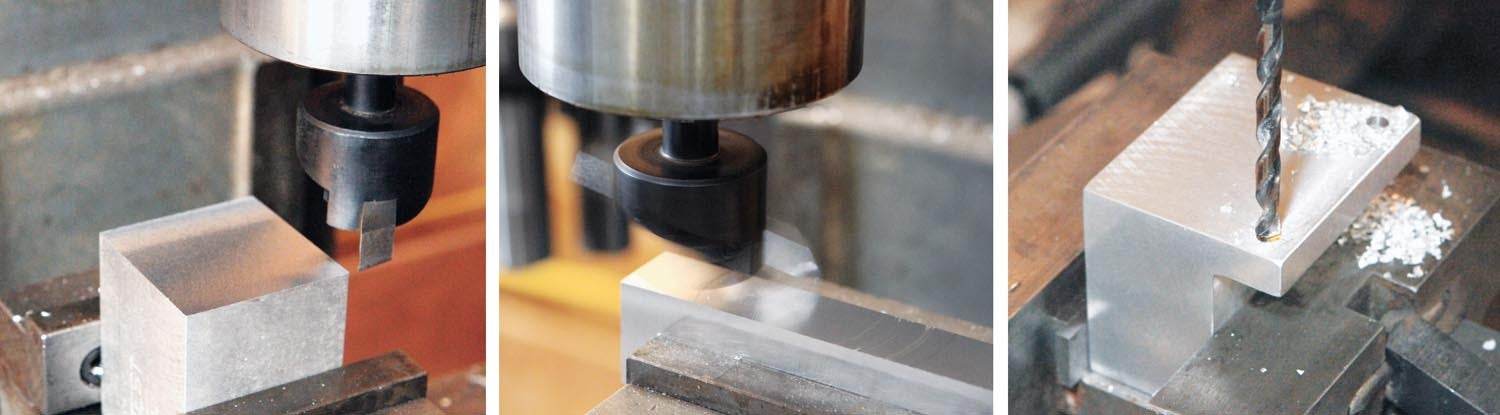
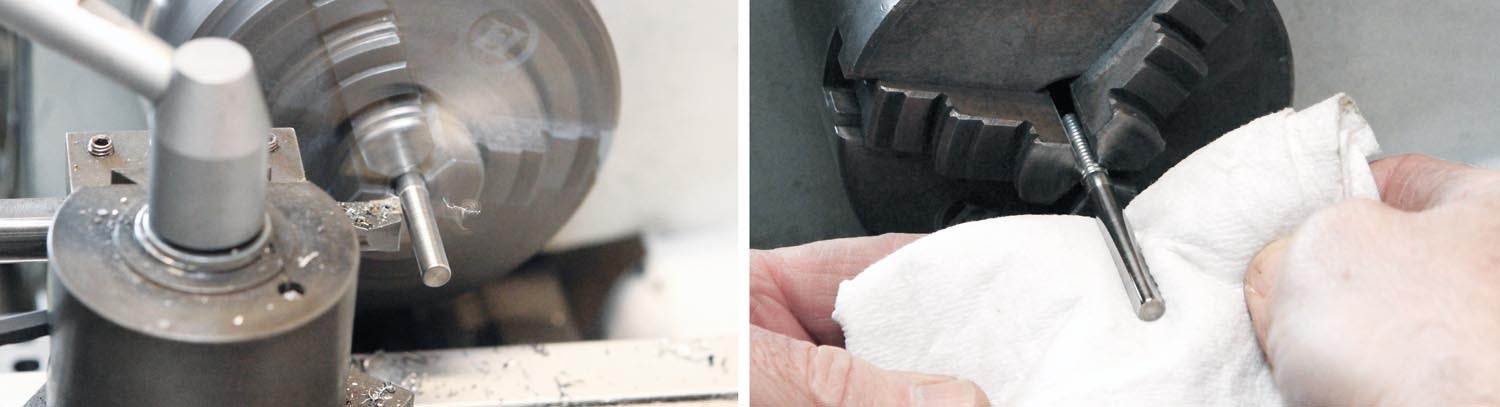
Before boring the second pocket, the centerline must be confirmed (left). A quick way to do that is to use a cutter the same dimension as the center bore (in this case a 3/4-inch end mill) and adjust the table position until the cutter slides freely in and out of the hole. Once alignment is confirmed, reinstall the boring head and machine the bearing pocket. Test fitting the headstock, bearings and spindle assembly (right).The tailstock block (left) and the knife “rest” (center) were pre-sized on the mill using a fly cutter. Drilling clearance holes for the mounting screws (right).The tailstock ram was turned to fit the 608 metric bearing from 3/8-inch steel bar stock (left). 608 bearings are probably the most common bearing in the world: Every skateboard and scooter uses them for wheel bearings. The rotating tail stock cap was bored to a light press fit using the lathe (center). A small vise was used to press the 608 bearing into the tail stock cap (right).The support bar for the knife rest was turned (left) from a long ¼-20 bolt and polished (right). The ¼-inch shank had to be reduced to 6mm to fit the holes in the kitchen knife.
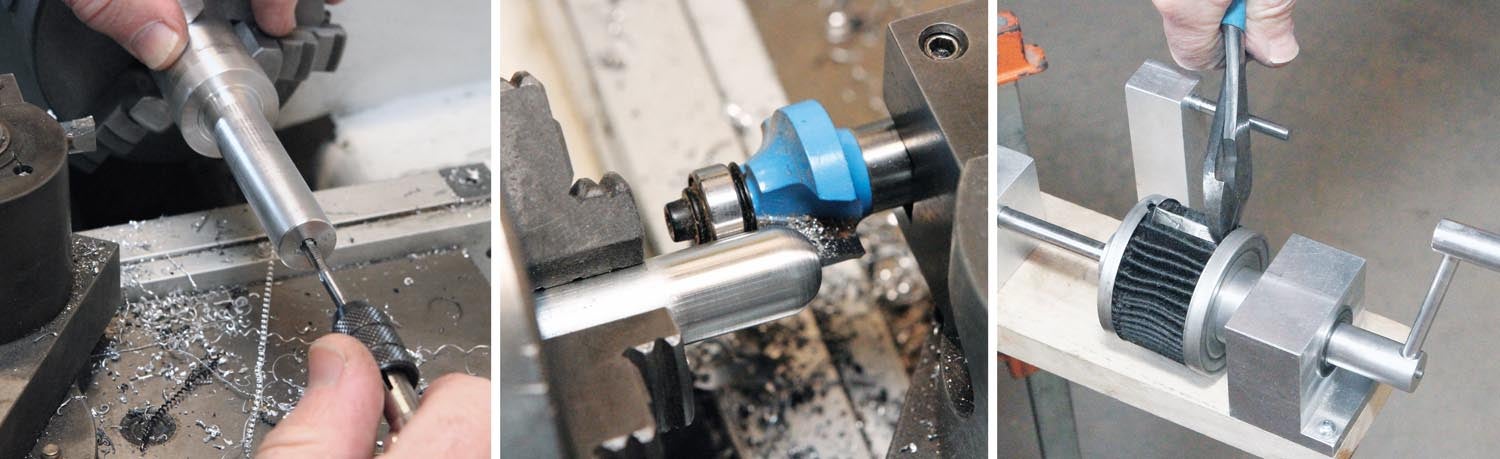
A key component to the design is the 13-inch Kitchen+Home brand knife purchased for $12 from Amazon. The knife features a series of 6mm holes punched in the blade. Whatever purpose these holes serve for cooking, they’re perfectly spaced pivot points for my filter slicer. The idea being, as the blade dulls, you can move the pivot and have a fresh edge. This will allow several filters to be cut before resharpening is necessary.
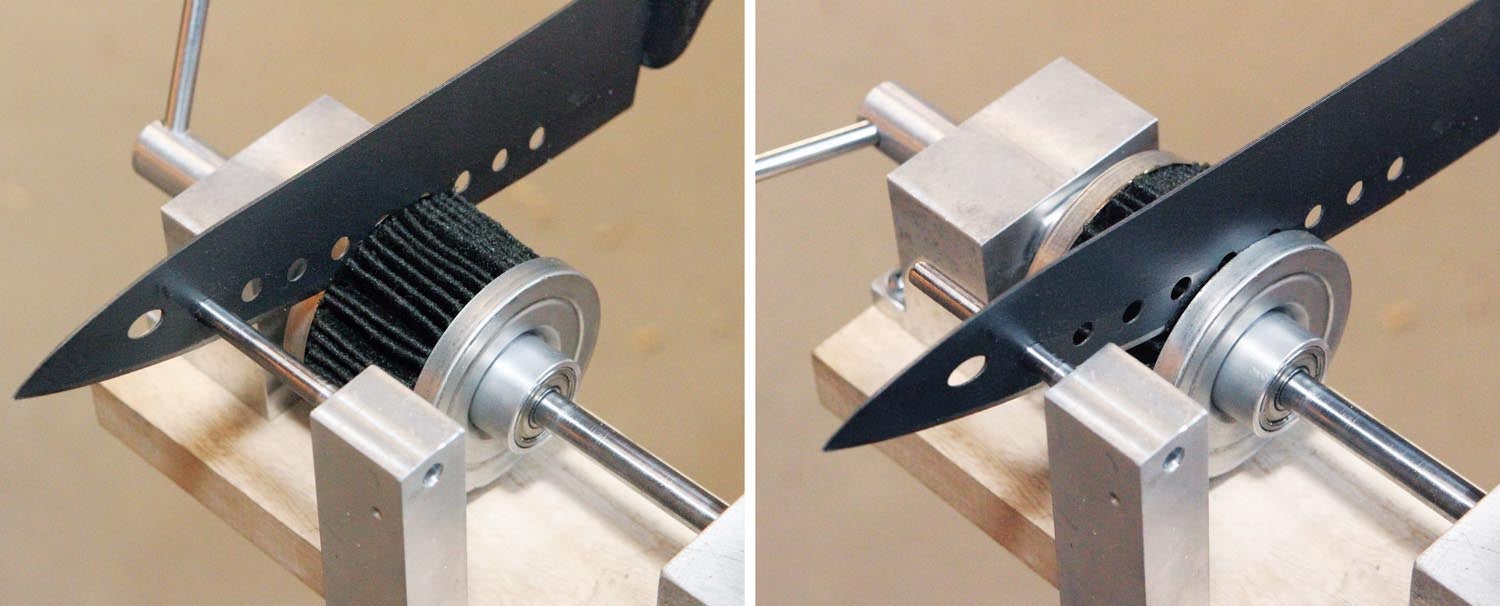
The end of the spindle was tapped 8-32 for a setscrew to secure the handle extension (left). The handle was rounded over using a router bit (center). See the December 2022 issue for more details on using a router bit for rounding over on the lathe. The metal staple that holds the ends of the pleat filter together has to be cut free from the housing with wire cutters before slicing (right).A test run with the components screwed down to a wood base and the base clamped to a bench. With the knife aligned to the edge of the cartridge and sufficient pressure applied to the tailstock—which is locked in place with the hand screw—the pleated filter element can be safely and cleanly sliced away from both sides of the cartridge.Unfurling the pleats for washing and straining for debris to inspect.
One of my hobbies is cooking. The holes in the knife blade help things not stick to the blade while slicing. It helps keep you from making funky cuts in a zucchini.
Because few new products get announced at Sun ’n Fun, there’s often a dead zone between April and the big intros at AirVenture in July. But that doesn’t mean it’s total dullsville. A couple of new bits have caught my eye recently.


One of my hobbies is cooking. The holes in the knife blade help things not stick to the blade while slicing. It helps keep you from making funky cuts in a zucchini.
Comments are closed.