
I live in a pretty cool neighborhood, which happens to include a couple of locals who are building airplane projects in their garages. In the April 2016 issue of KITPLANES®, I introduced Phil Hooper. The subject of that column was a custom drill guide for Phil’s Velocity RG. This month’s subject is a quick-release system for the copilot’s control stick on Mark Beattie’s RV-6.
While the two airplanes couldn’t be more different—the Velocity is a retractable-gear, canard-wing, composite pusher, and the RV-6 is a fixed-gear, aluminum, low-wing monoplane—both Phil and Mark have the same detail-oriented mindset when it comes to the plans and instructions.
Mark’s particular affliction for detail is he sometimes wakes up at night with “builder thoughts” in his head. Such was the other night when he was fretting about running wires through the wings for strobes. Then he remembered: No problem! When he assembled the wings, he put in nylon cords so he could fish the wires through when the time came.
Both Phil and Mark started their projects before CAD, match-drilling, or quickbuild options became the norm. “Vintage” kits, while quite good, often leave many less-than-critical aspects of the assembly up to the builder. That’s part of the fun: It not only gives the builder a chance to learn and be inventive, it helps personalize the project.
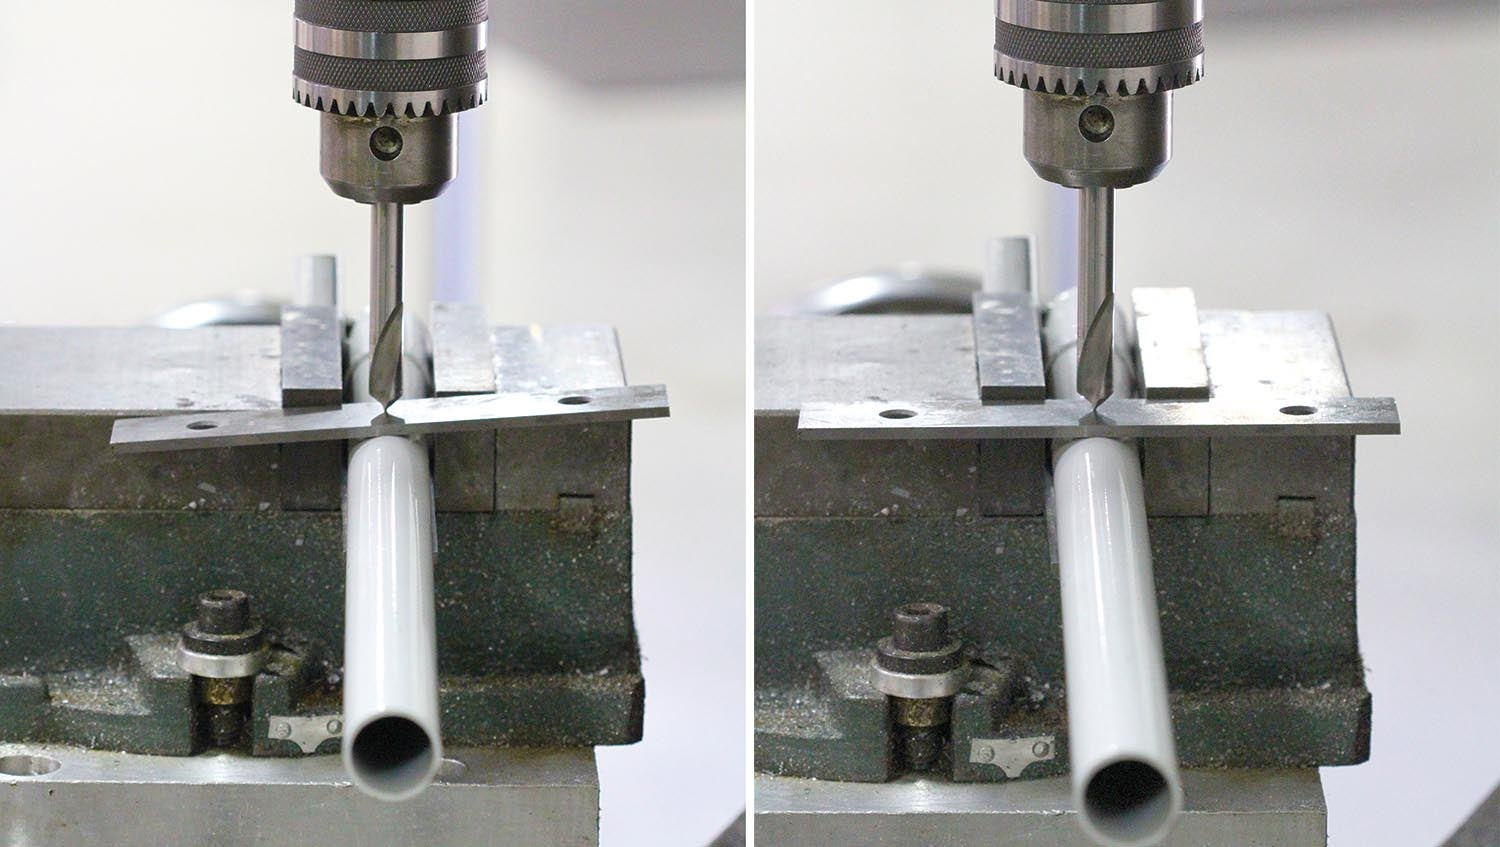
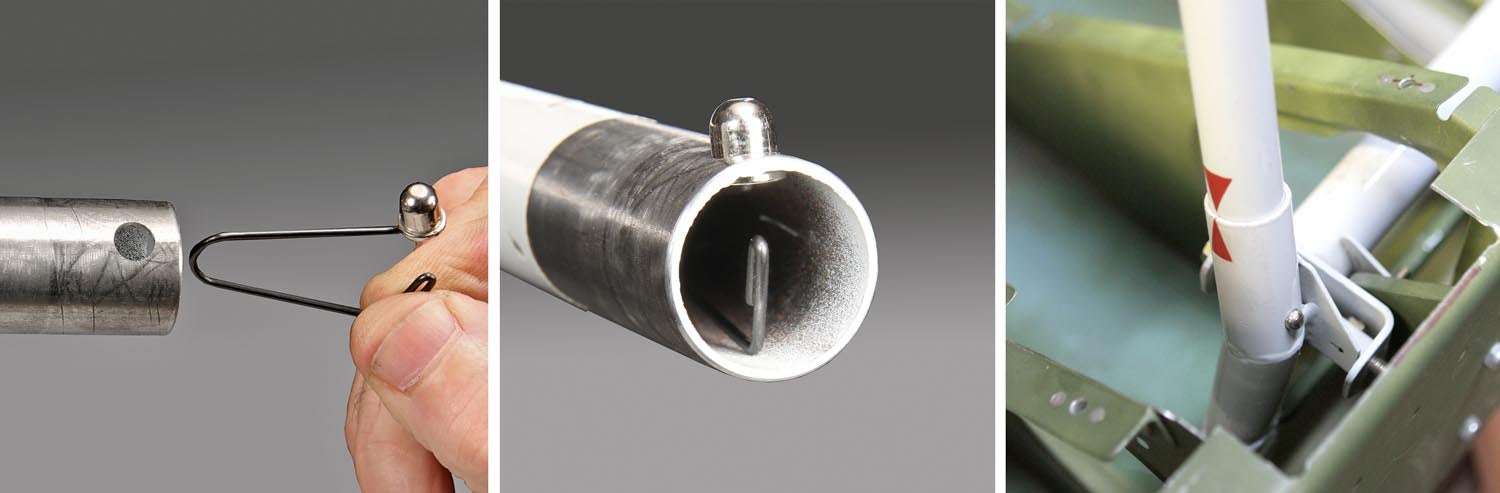
Which brings us to the copilot’s control stick on Mark’s RV-6. Unlike the pilot-side stick, which is non-detachable, the copilot’s stick slides into a coupling sleeve at the base of the control mechanism. How to fix the stick to the coupling is up to the builder. Some bolt it together, others use a cotter or a cross pin with a ring grip. Mark wanted a solution that, above all, would be safe and reliable, and, if possible, provide quick release with no loose parts that might get dropped under the floorboard or misplaced.
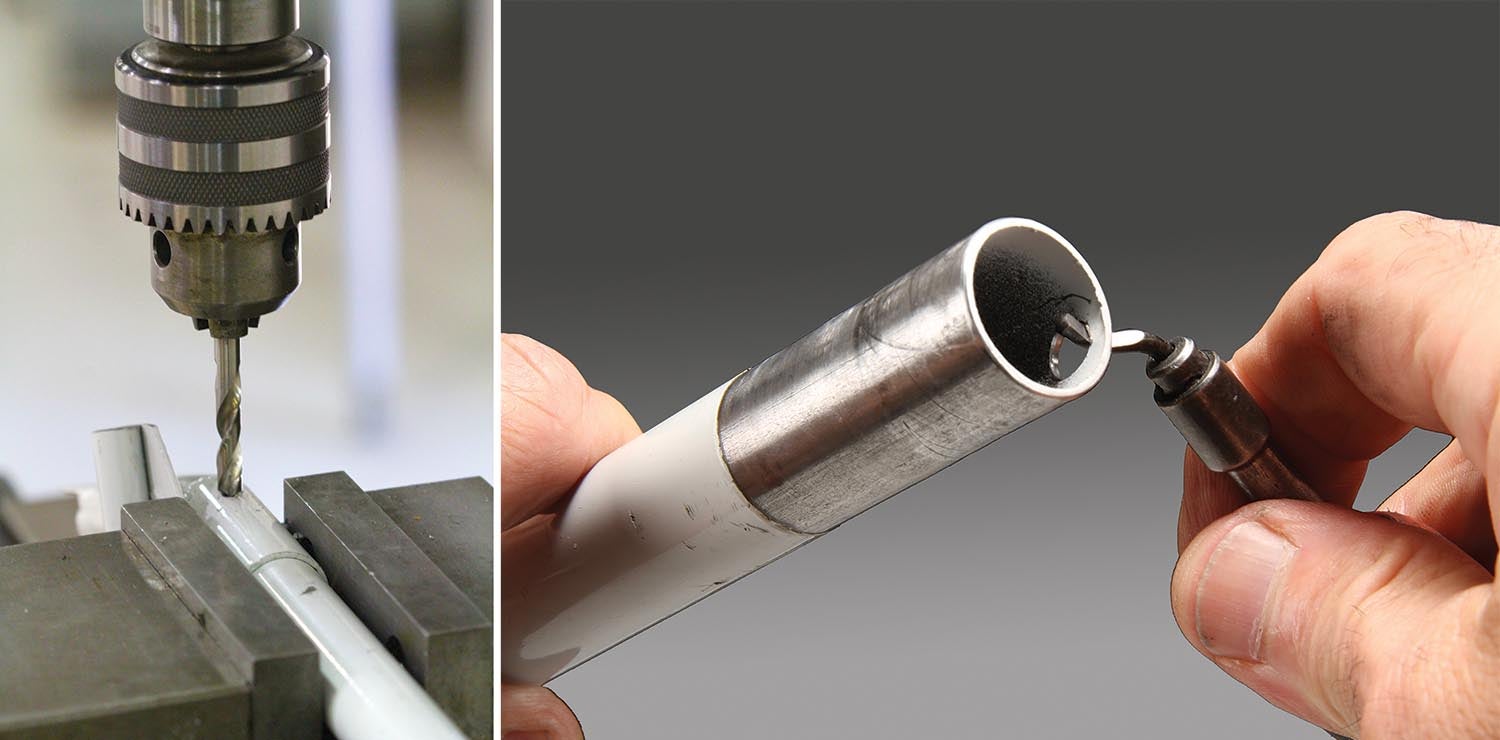
What we came up with is simple and easy to install: a spring-loaded “button pin” or “spring button.” Spring buttons have been around for decades to engage telescoping mechanisms. Most people are familiar with typical carry-on roller-bags with telescoping handles, which usually have spring buttons made from stamped steel, or the ubiquitous Razor kick scooter, which has solid brass or steel buttons to engage the handlebars. It turns out that scooter handlebars are the same diameter (0.875 inch) as the Van’s control stick, so we repurposed a spring button from a Razor and made it the key component of the quick-release system for the copilot stick.


