Fly Baby builder Jim Katz has been at it again, this time designing and building his own version of an aircraft engine dehumidifier to vanquish the insidious villain he found lurking within his Continental A-65-8. Moisture is the bane of aircraft engines. Moisture leads to condensation, which leads to rust and corrosion, which in turn leads aircraft owners down a winding, woebegone pathway of engine maintenance, repair and sometimes even overhaul.
This level of destructive condensation occurs more often inside engines that are not operated frequently or long enough for engine heat to dispel moisture. In Jim’s case, since his Fly Baby’s engine has “eyebrows” instead of a pressure cowling, his Continental habitually runs cool. “The oil temperature never really gets hot when I go flying,” commented Jim. “The engine just runs cool during short flights. That’s part of the problem; it never gets hot enough to dry the moisture out of it.”
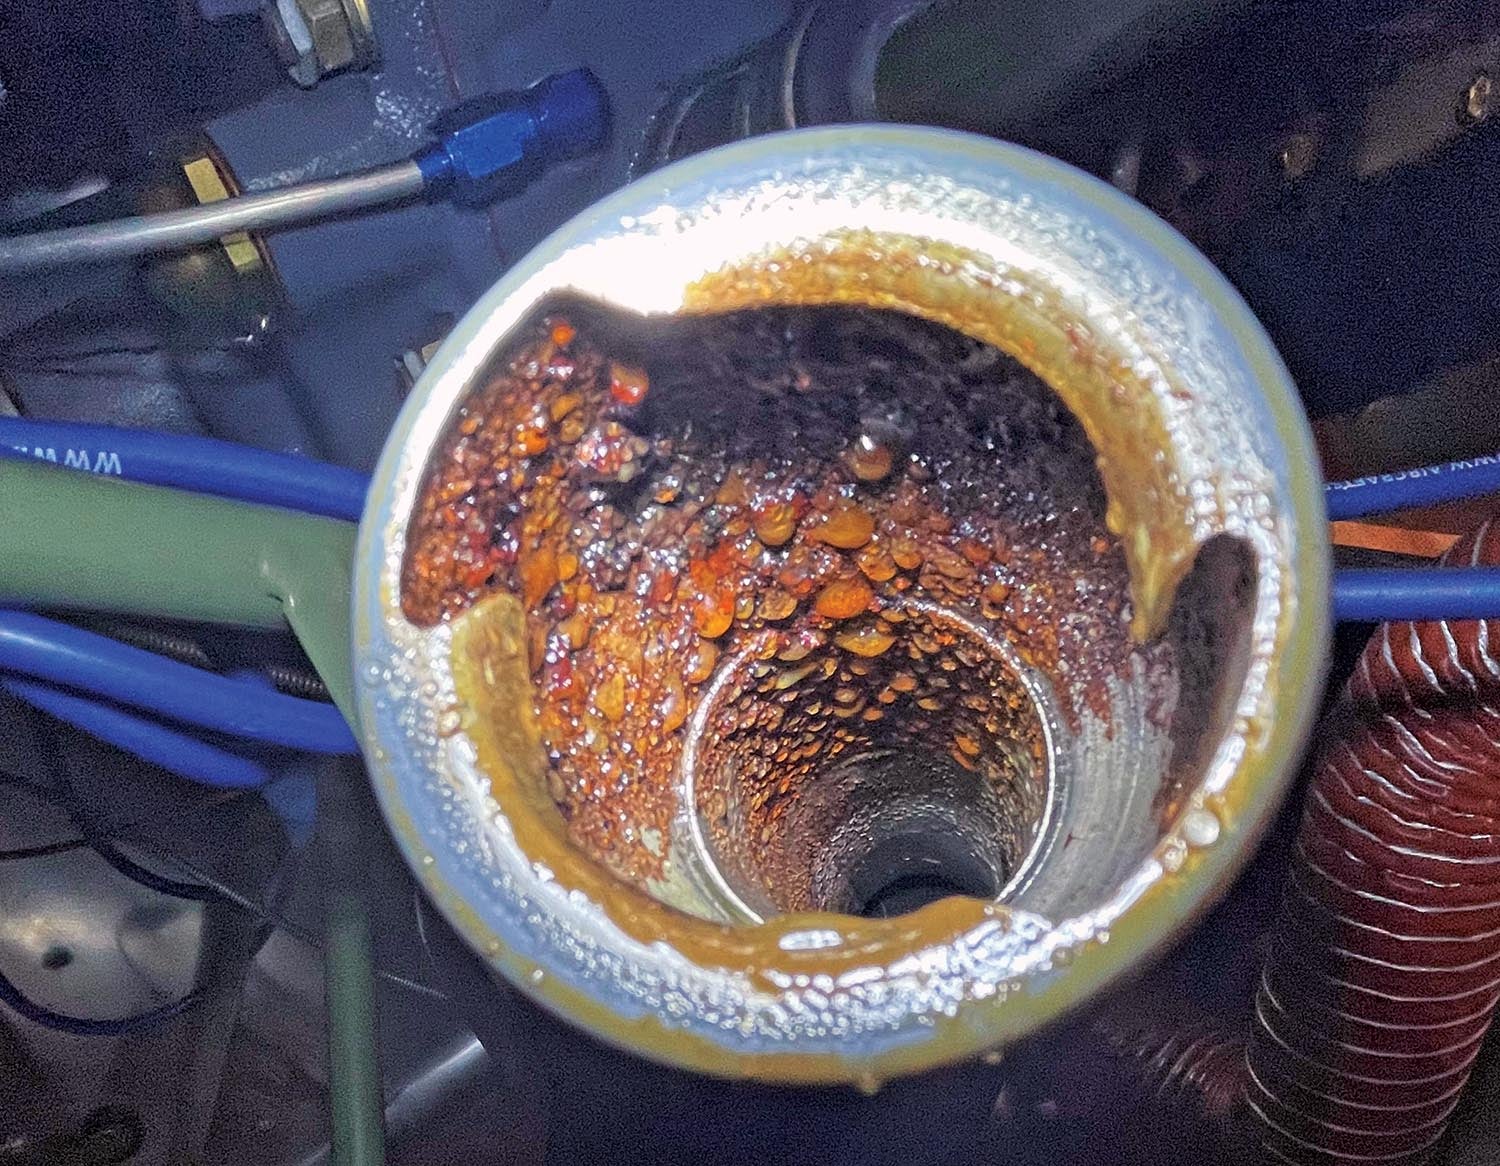
Condensation can form when an engine starts cooling down after running at operating temperature. After flights that were long enough in duration to get the oil temperature up, Jim started noticing beads of moisture under the oil cap and corrosion down inside the filler neck when he removed the oil cap/dipstick. “That would be after flying an hour, so I knew I wasn’t getting rid of all the moisture in the engine,” said Jim. “I tried to help that situation by leaving the oil cap/dipstick off and putting a sock over the filler neck just to let the engine breathe. But that didn’t address the problem.”
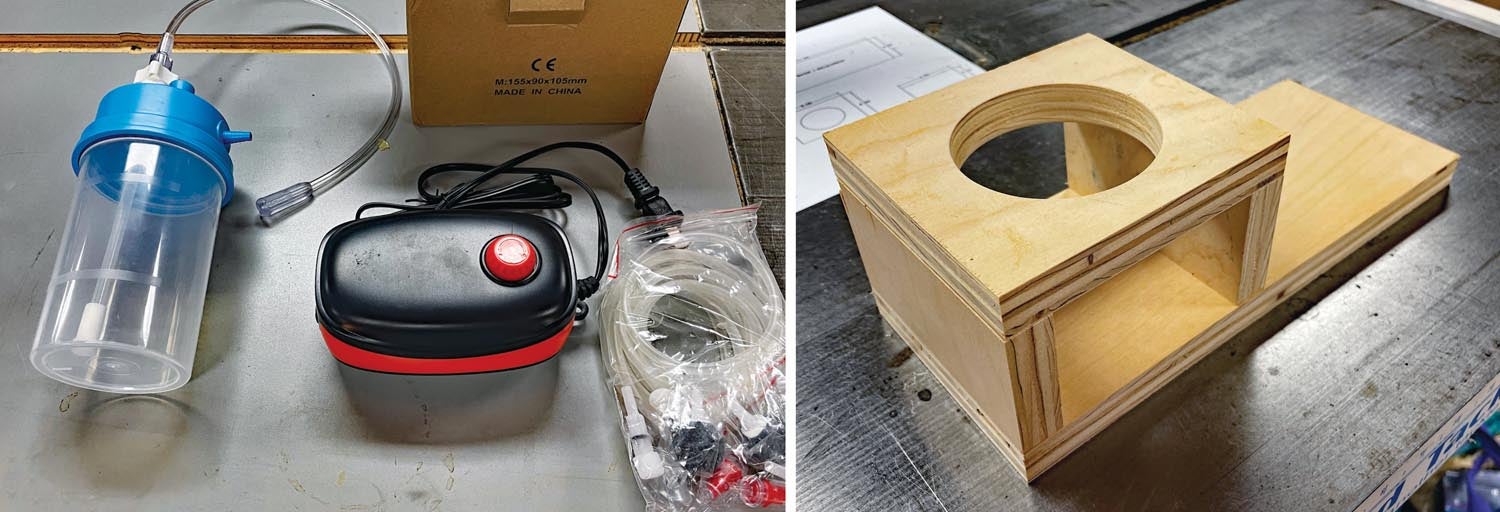
Jim started doing some research and discovered there are a variety of aircraft engine dehumidifiers available commercially, ranging in cost from around $200 to more than $600. “After looking at them I thought, man, I think I can make one and save a couple of bucks! I knew I needed to move air through the engine, and I knew it didn’t need to be a very large volume of air. It just needed to be dry air, so that was where I came up with the idea of using the fish tank pump. I think the pump is moving 5 or 6 cubic feet of air an hour through the engine, if you run it all the time.”
Other folks have devised their own inexpensive and effective units to address the problem of moisture, and many are comprised of somewhat similar components. Some are quite simple to build, while others require a little more attention to detail. Jim was naturally drawn to the latter. He enjoys working in his shop so much that his mind is continually dreaming up new projects.
Herein, Jim shares his version of an engine dehumidifier, which took him approximately 3 hours to build (not counting time for glue and varnish to dry) and cost him about $75 for materials. He’s been using his dehumidifier on his Continental for a year with beneficial results.
Closed Loop
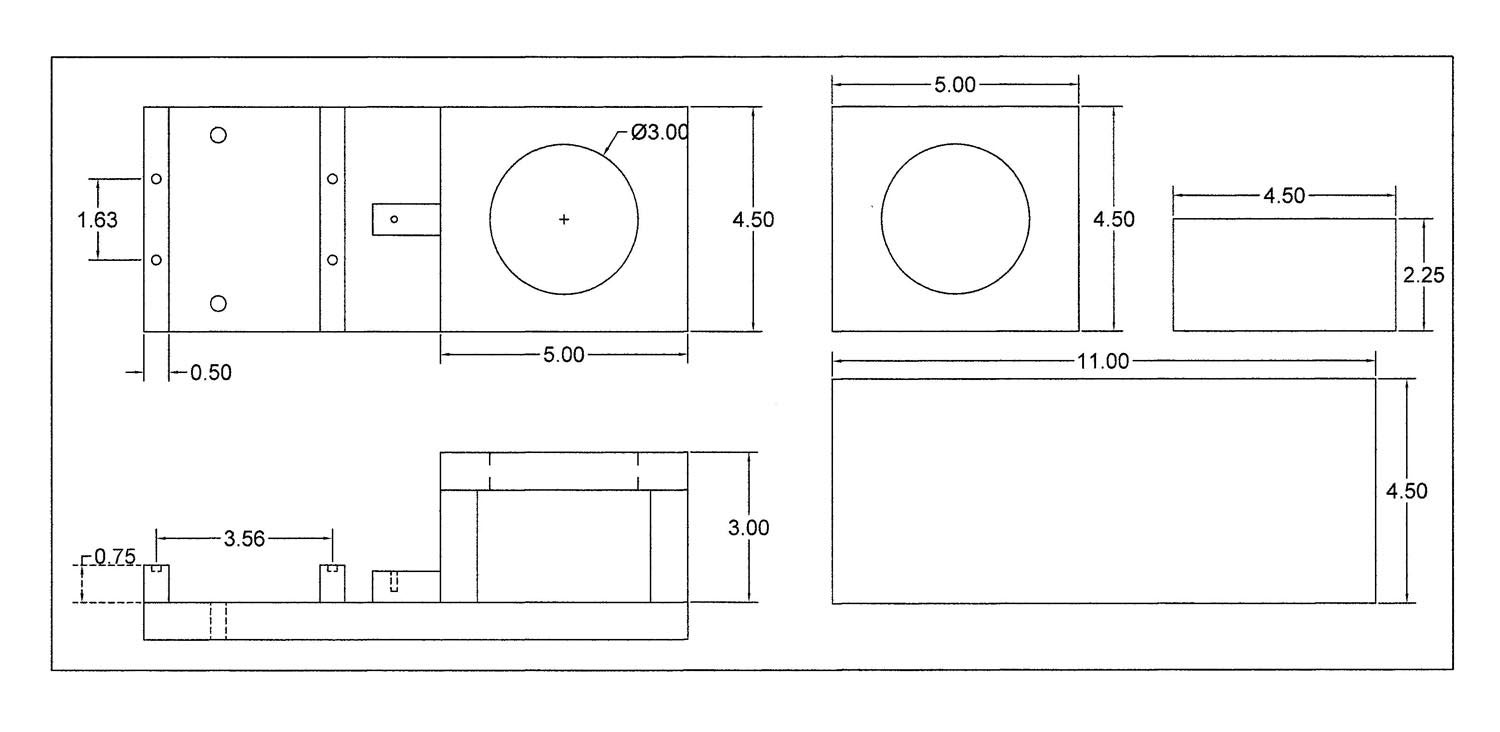
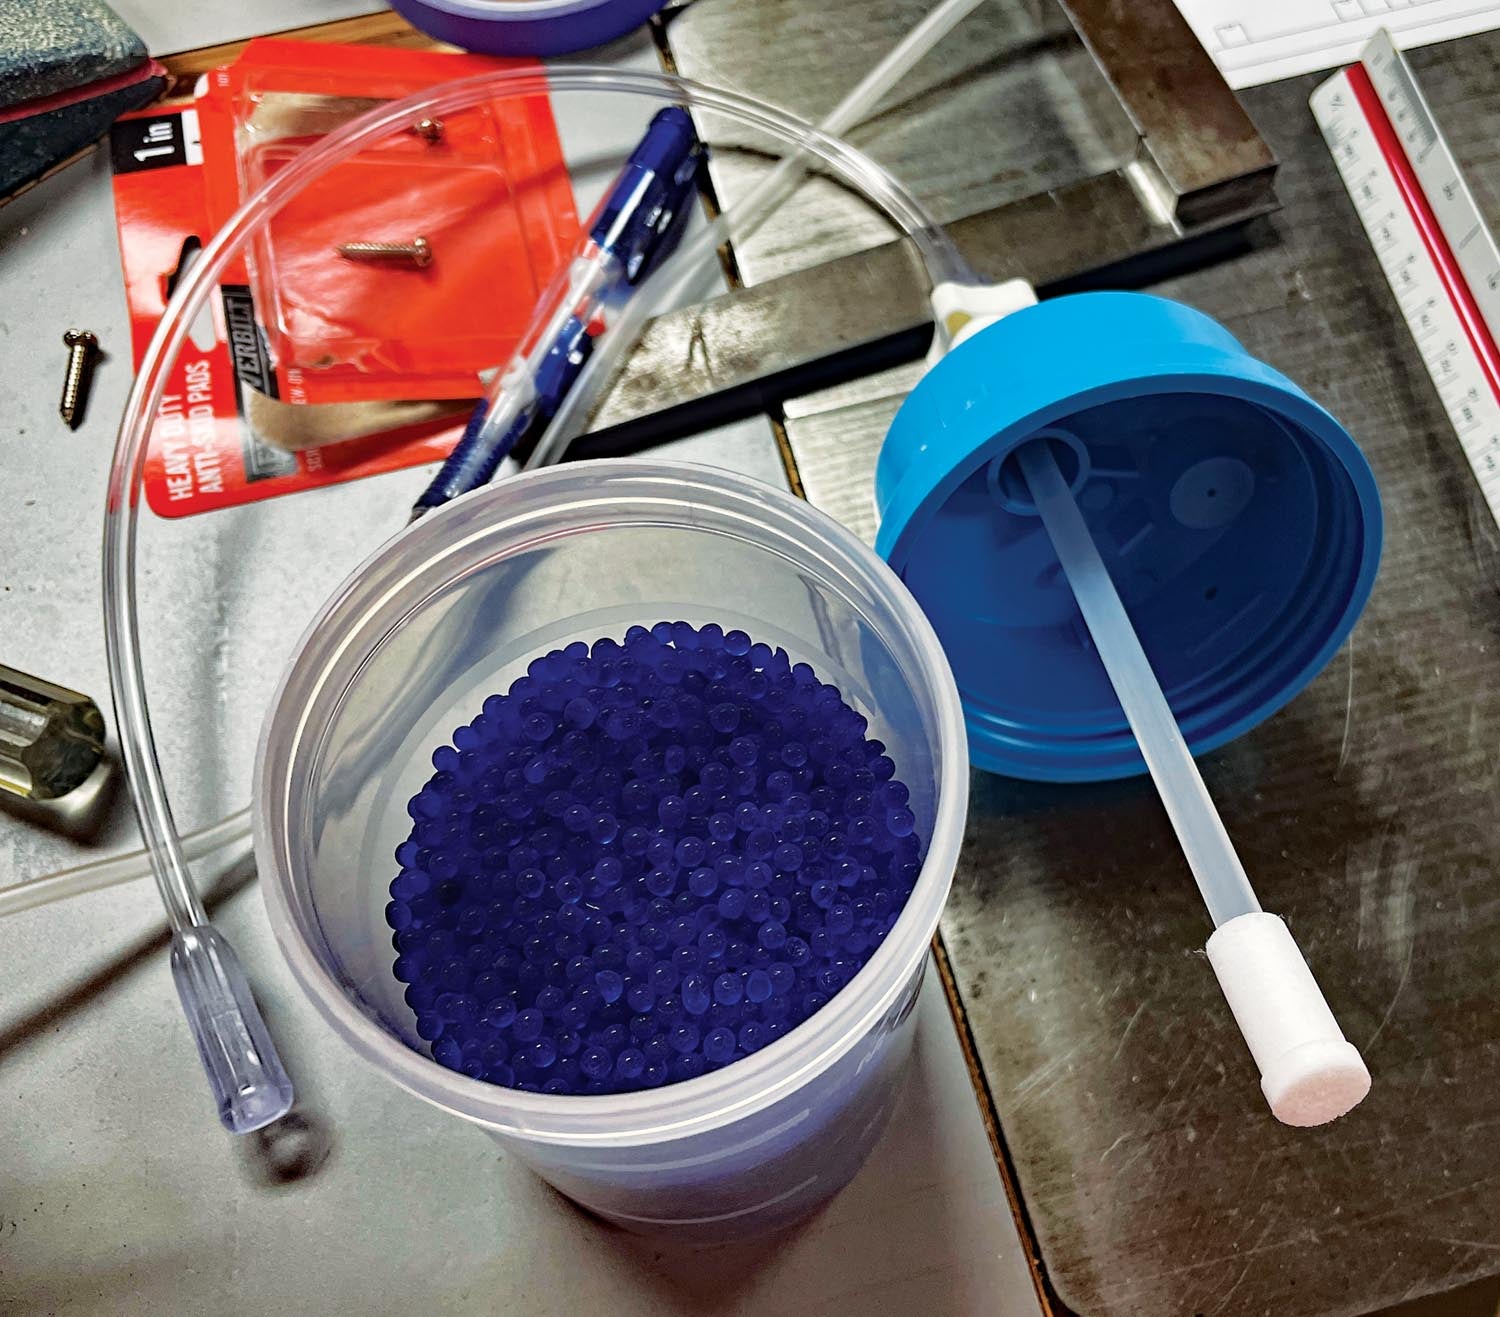
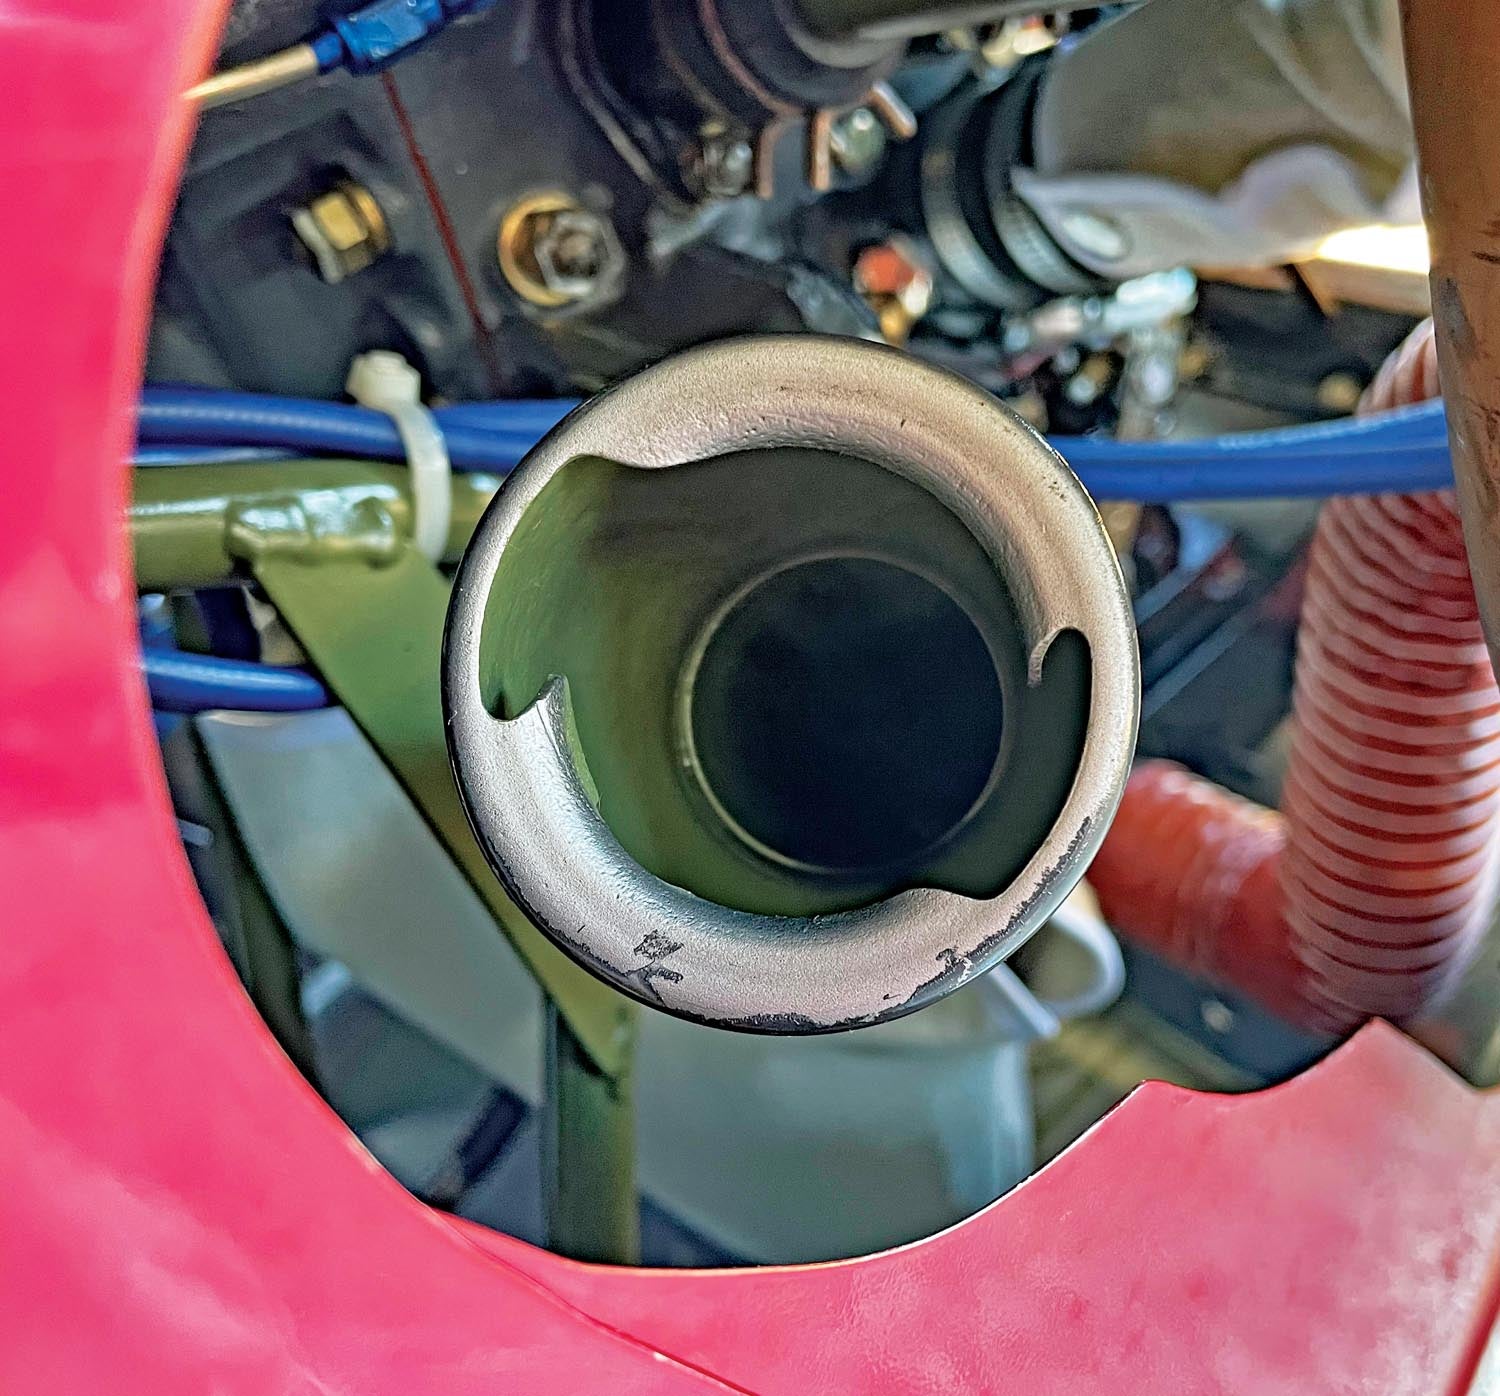
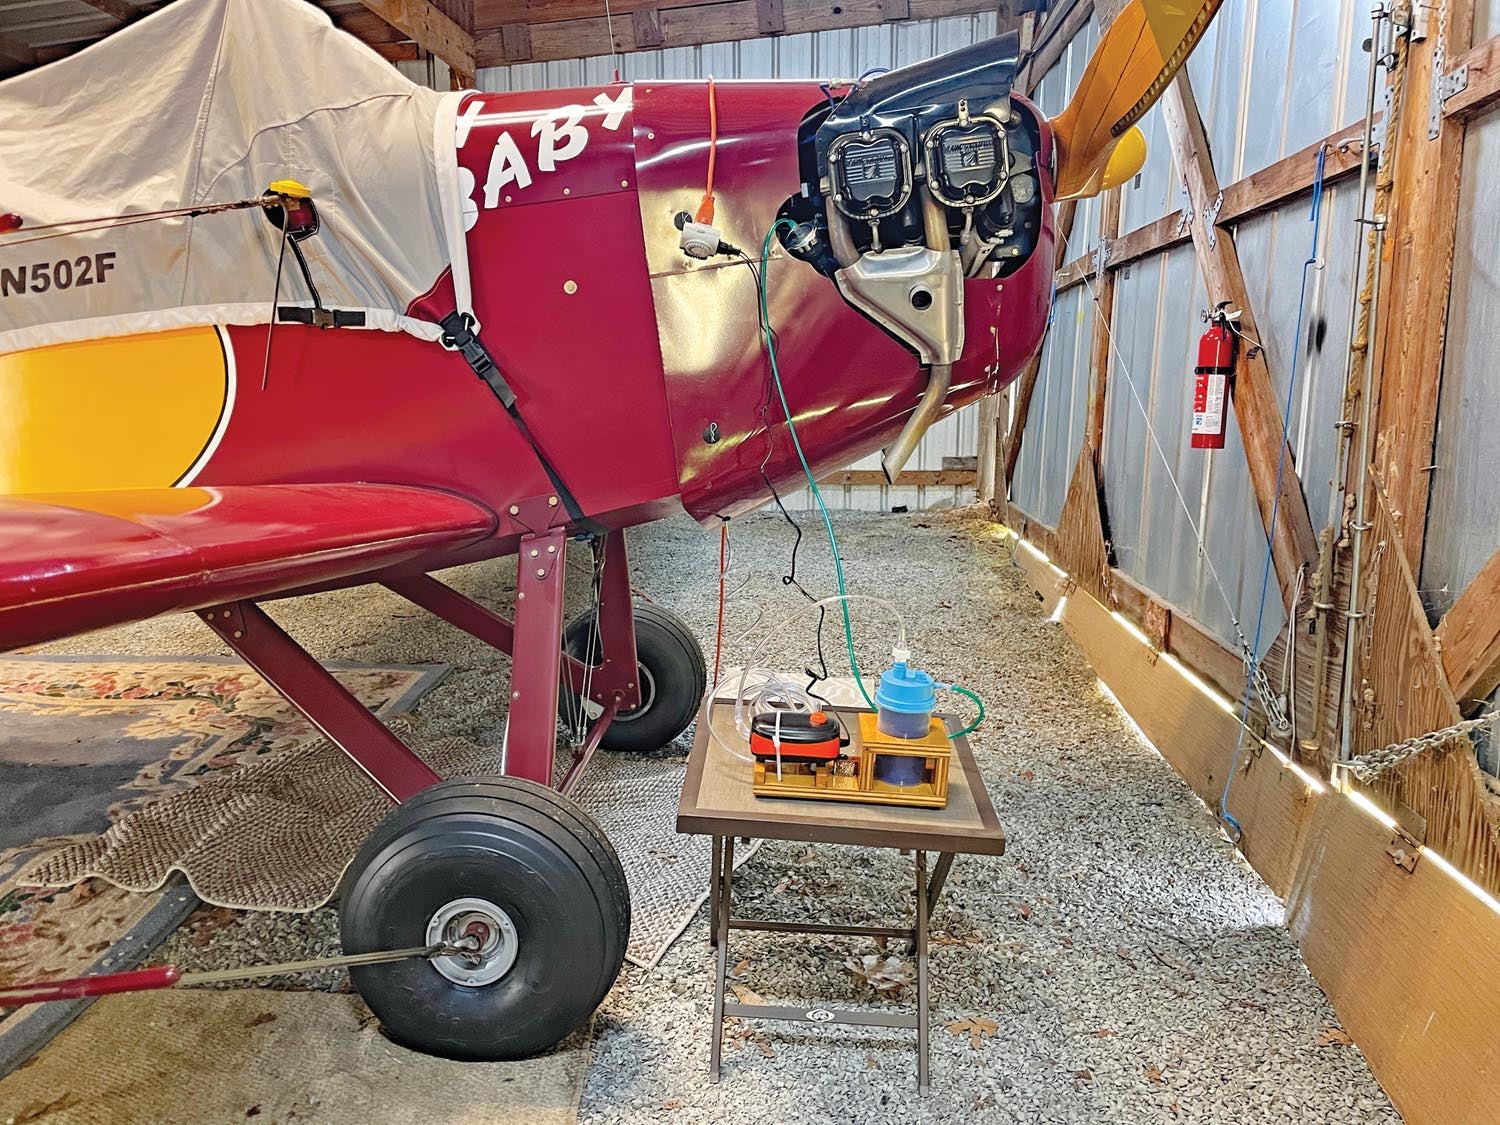
After rolling the concept around in his mind, Jim drew his design in AutoCAD. Then he purchased his materials (see sidebar below) and began constructing a small wooden framework to house his dehumidifier unit. He ran a tube from the output on the aquarium air pump into a bottle, which holds desiccant blue silica gel beads. (The blue beads turn pink as they absorb moisture.) Then he ran a tube from the desiccant bottle to a modified oil filler cap.
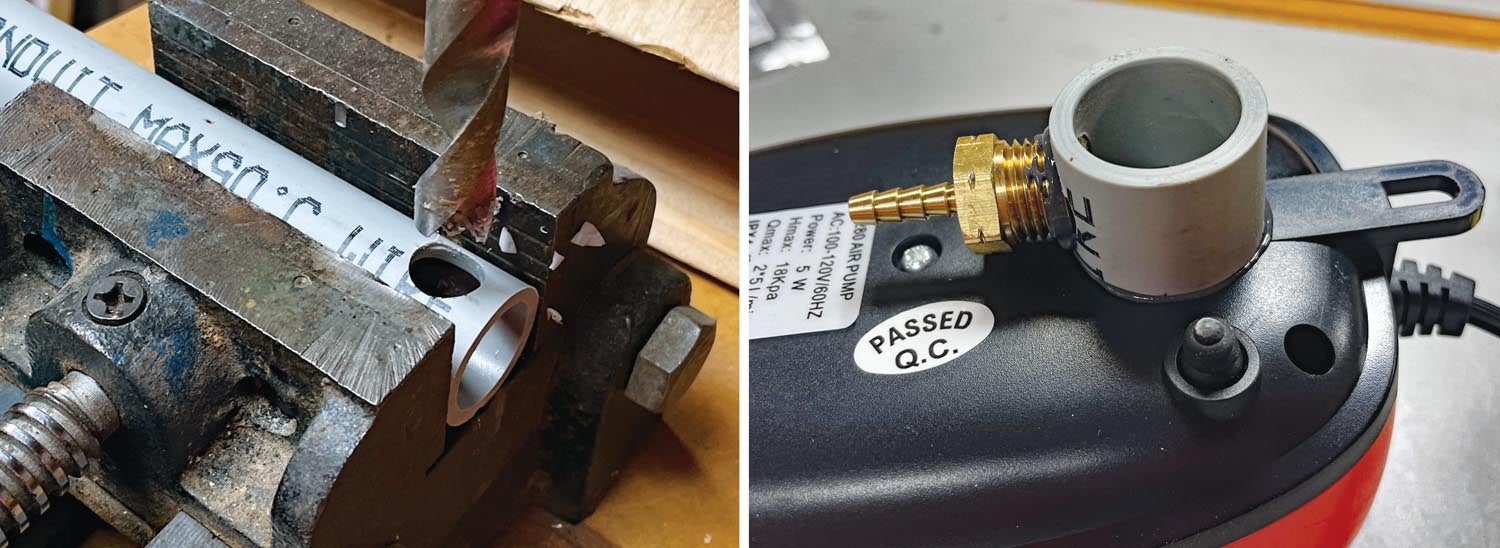
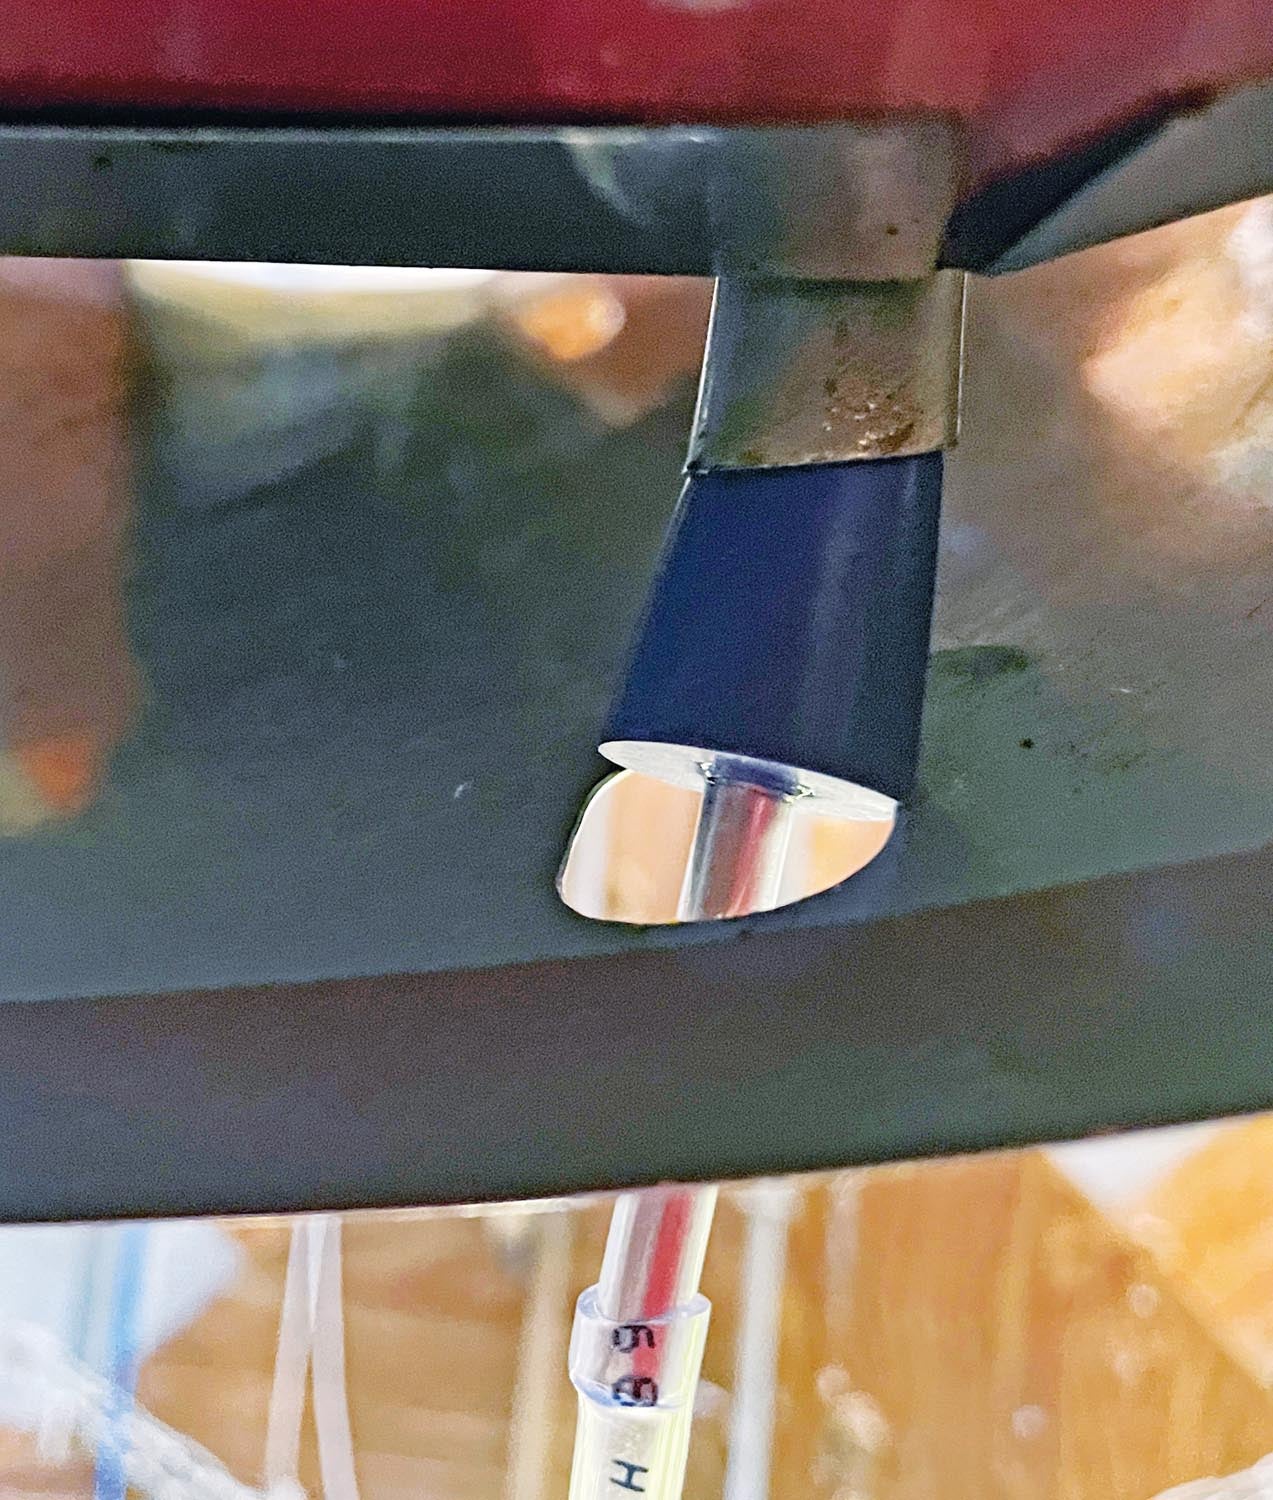
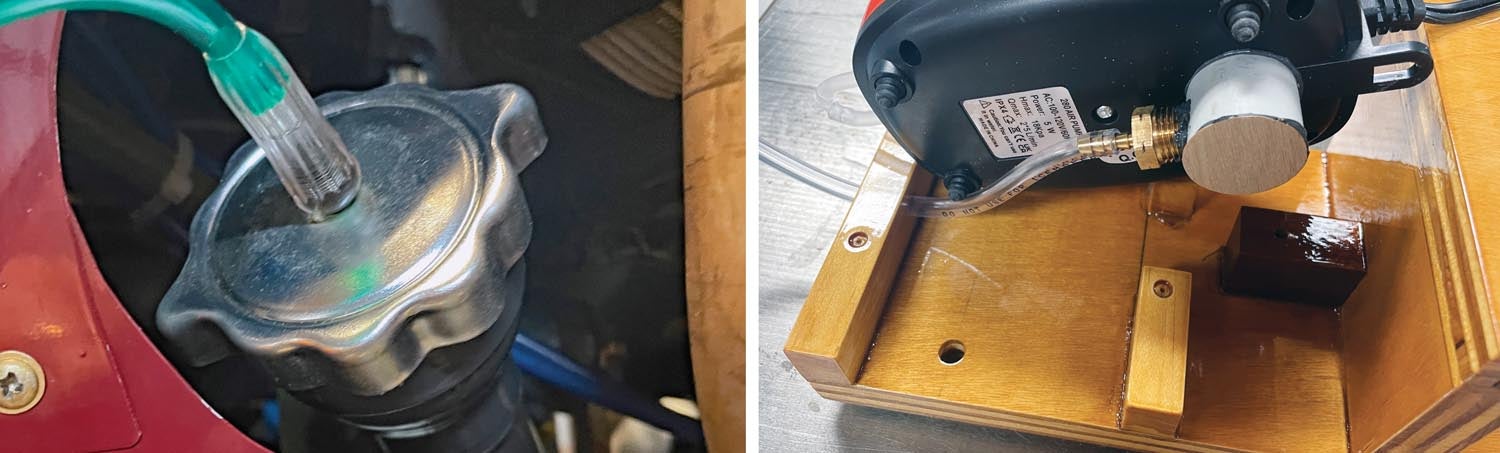
“I just drilled a hole in an extra oil cap and put a nylon bolt—with a hole drilled lengthwise through it—into the cap. Then I connected the tube up to that, so the pump can push air down through the filler neck into the engine,” said Jim. “The air exits the crankcase breather tube, which has a stopper on the end of it, and another tube goes from a hole in the stopper to a hose barb that I glued onto the bottom of the fish tank pump to finish out the closed-loop system. Air just circulates through the engine, out through the breather tube, and then goes back through the fish tank pump, which in turn pumps the air back through the desiccant.”
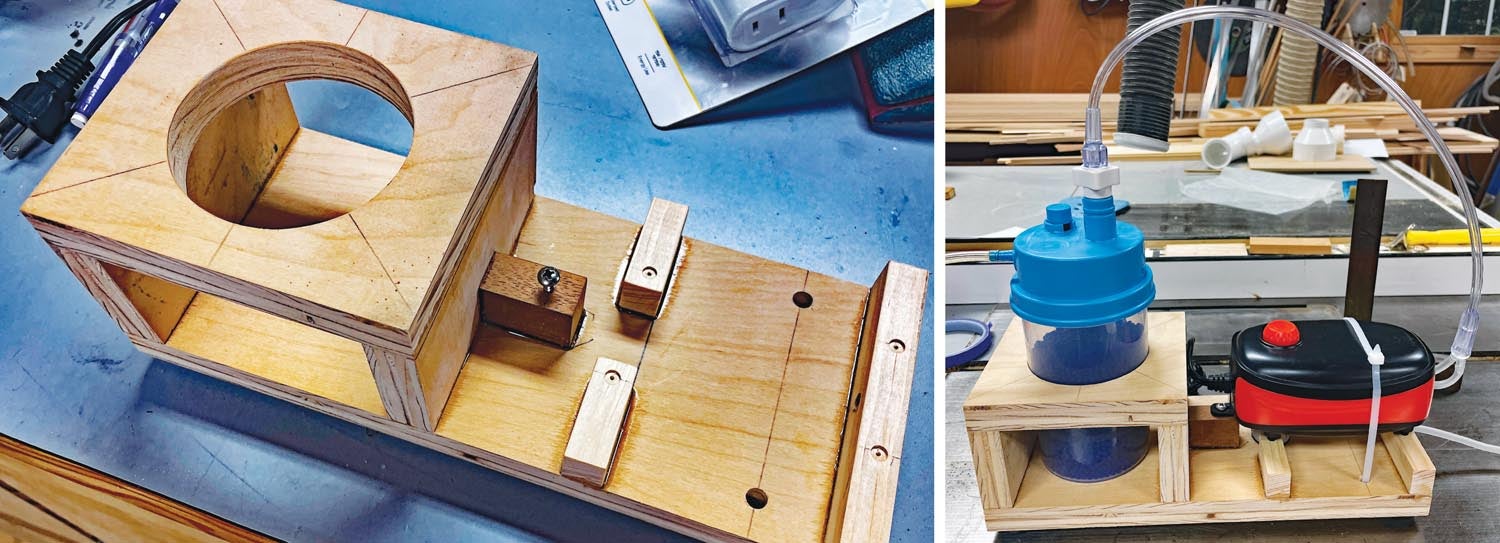
Jim uses an electric light timer to program the pump to run 30 minutes on, then off for 30 minutes. “I hook the dehumidifier up to the airplane as soon as I push the airplane back into the hangar after flying. The system sits on a little table that I just slide over to the airplane, so it’s real handy,” said Jim. “I plug the unit in, put the modified oil cap on and insert the stopper in the breather tube. Then I just turn it on and leave it running until I get ready to fly again. The pump uses about the same electricity as a 25-watt light bulb, so it’s real economical.”
Repurpose and Recycle
Some people doodle on notepads—Jim does the mental equivalent, his neurons and synapses firing and frequently producing the proverbial light bulb of creative ideas, the catalyst for which can arise rather surprisingly. When Jim’s father was in hospice care, Jim noted with interest the portable oxygen humidifier bottle that was being used with the oxygen his father was receiving. “I had been thinking of something to make the dehumidifier out of, and when I was filling my father’s oxygen humidifier up with water, I thought that would be the perfect container! It’s only about $8 on Amazon, and I’m just using it to do the opposite of what it was designed to do.”
Jim recycles the desiccant when it turns pink. He pours the silica gel beads into an old, clean mayonnaise jar and then he puts fresh desiccant in the dehumidifier unit to keep the system functioning while he takes the used desiccant home. He recycles it by spreading the beads out into an aluminum pan and drying them in a 250° oven for about an hour, until they turn blue again. “It’s easy to do, and that way you can use the desiccant many times over,” said Jim. “I bought 2 pounds of desiccant gel beads from Amazon, and it only takes about a cup and a half to fill the unit. So I have plenty on hand to keep the dehumidifier running.”
Fun and Functional
Jim admits that at first, he wasn’t certain if it was going to solve the condensation issue, but after using it for a year, he’s quite satisfied. When he first started using the system, he noticed that the desiccant turned pink after about four days. Now the desiccant lasts two or three weeks before turning pink.
In fact, he’s pleased as punch with not only the fun he had designing and building his own engine dehumidifier, but also with the functional end product. “It gave me something to do to entertain myself and keep me out of trouble,” he laughed. “For being simple, inexpensive and something that works, it’s a pretty good solution. When I take the dipstick out now, even the edge of the filler neck looks brand new. There’s no evidence of corrosion or rust. Everybody’s engine will be a little bit different, and some people may doubt this system’s effectiveness, but I feel 99.98% sure that it’s helping and has corrected the problem of moisture in my little Continental.”
Photos: Jim Katz
![[Credit: Lisa Turner]](https://www.kitplanes.com/wp-content/uploads/2026/02/Fuel-Selector.jpg?w=218&h=150&crop=1 "Fuel Follies")


Any engine humidifier is worth its weight in gold. For those that have a fridge in the hangar, buying a $30 aqaurium pump and tossing it in the fridge, or better yet the freezer area, yields a bottomless pit of 10-15%RH air to bath your engine the 98% of the time your airplane is in your hangar.
That’s a good idea in the winter but I the summer that cold air will condense the water in the ambient temp air creating an issue.
I am an engine dryer believer since when I had my XP-360 waiting to be installed in my RV-7A and the blue stuff in the clear plastic spark plug holes turned pink. I purchased and installed an engine dryer and they turned blue (good) again.
BUT an important source of water in the crankcase is condensation. The byproduct of burning gasoline is carbon dioxide and water vapor. The relative humidity inside the crankcase once you have warmed the engine is very high because the rings allow gasses to blow down past them. Flying the engine simply produces that water vapor. As the engine cools the RH goes to 100% and condensation must happen. There are certainly other sources but this one is going to happen every time the engine is operated and to believe that getting it hot will solve the problem is simply a misunderstanding of the physics. Every time you get it hot you re-create the problem.
Some of my friends also built their own. I use commercial models. What is important is to immediately vent the crankcase and then begin pumping dry air into it as soon as possible and until the next flight.
Comments are closed.