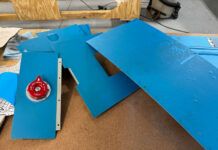
So far in using the lathe we’ve turned only cylindrical objects. But what do we do when presented with something that is not round? You cant easily put it in a three-jaw chuck unless its number of sides is a multiple of three. A good example might be a brake rotor. Assume you have to chuck up the square section and turn the disk sides to get it true. Thats where the four-jaw chuck enters the picture.
How to Use the Four-Jaw Chuck
First and foremost, clean and wipe down the entire lathe. The long chips will get stuck in the vacuum hose, so carefully toss them into the trash. The short chips vacuum up easily, but so can some of your smaller tools.
Lock the headstock with the brake and look for, at least on my machine, three bolts on the back of the headstock. I had to resort to, ugh, an adjustable open-end wrench (Crescent is a trade name) because the bolts were neither metric nor SAE. I gave my Whitworth stuff to a buddy with an old Land Rover, so that option was out.
If you go scanning all over and cant find the bolts, look for a series of notches in which the wrench will fit. I hope you have the wrench and resist the temptation to use a punch and hammer, because this ring has to be rotated, and a hammer is the one tool to leave in the toolbox when working around bearings. The ring usually rotates the top toward you to loosen it, meaning its a right-hand thread. Check your manual or call the dealer to make sure, though. The chuck is heavy, so put a small piece of plywood or fiberboard on the ways, and keep your hands out from under it. It also makes a good spot for tools while doing the changeover.
Resist the temptation to blow it with the air gun until you’ve at least cleaned off all the rest of the crud with some Simple Green-Aircraft and a clean rag. I like to use disposable paper towels for the really messy jobs and save the cloth ones for plastic windshields.
The two mating surfaces of special importance are obvious, at least on my machine: They are matching rings. However, on my machine the four-jaw chuck is mounted to a lathe-dog plate. No, thats not the dinner dish of my shop mascot; its that flat, larger-diameter plate with the slots in it. Ill cover its use later when we talk about live centers, dead centers and turning tapers. For now, be aware that your system may be, and probably is, different. This is somewhat akin to giving instructions on engine overhaul to an audience of Ford, Chrysler, Toyota and Honda owners. Pick one car, explain the principles, and know that the owner is sharp enough to translate. For instance, you can see that it all needs to be clean and that you’ll hold it up there with one hand while installing the first bolt.
Role Reversal
With everything snugged down, you’ll clear away the tools and fiberboard and notice…four jaws. Hmmm. So what? Take a closer look and you’ll realize that the jaws on this four-jaw chuck are apparently reversed from their position on the three-jaw chuck. This is one of those cases where what appears to be a mistake is actually an advantage.
Set aside for a moment that on the three-jaw chuck you turn the T handle and all three jaws move, while on the four-jaw chuck they move independently. Well delve into that adjustment in a moment. Instead, note that in the accompanying photos, the three-jaw chuck jaws are gripping the inside diameter of the black tube, while on the four-jaw chuck they could easily grab the outside diameter. Thats the reason for the steps in the jaw; they allow you to grab onto diameters that might otherwise be beyond the range of the chuck.
There’s another wrinkle here. The jaws are reversible on most chucks, so if one configuration doesn’t fit, another might. How one goes about implementing this opportunity comes in two flavors: Some chucks have a special thread-form on the jaws that allows you to crank the jaw completely out of the housing, reverse it and crank it back in. On other chucks there are a couple of SHCSs that allow you to simply unbolt the jaw, reverse it and bolt it back on.
SHCS stands for “socket head cap screw.” You might see it on drawings, and its the technical name for what is commonly called an Allen bolt, which is, you’ve guessed, a trademarked name. I don’t have that style, but its preferable to the crank-out type because its a lot faster to reverse.
To get the material centered in the chuck, start by using the concentric rings on the chuck as an eye-reference. Youll find that its quite easy to get within 0.100 inch with this method. Right about now I hear a cacophony of voices saying, “Hey, hold on there! He could have done this in the three-jaw chuck!” And you’re right. Im going to show you the procedure using a cylinder for a couple of reasons: 1) A cylinder is tougher to get centered than a square; 2) the four-jaw is more accurate than the three-jaw for extremely precise work, and hence its also occasionally used for cylindrical work.
Now set up a long-stroke dial indicator with its axis either vertical or horizontal and pointing to the center of the chucks rotation. Move it back to as close to the jaws as you can, as this will minimize any off-axis rotation of the material. Youll need a magnetic stand for this and you can find the whole setup at www.buyenco.com
for about $30.Remain Calm
Now comes the part that can be frustrating. Well, its frustrating if you just have a go without thinking it through. Rotate the chuck to find the lowest point, put a bit of tape on the part to mark it, and then rotate the dial of the gauge to set it at zero. Now rotate the chuck 180 to confirm that you’ve got the axis.
Had we been working with square material, the off-center axis would have been in alignment with the jaws. But with a cylinder thats unlikely, and here is where the second part of the trick comes in. The goal here is to first move the central axis of the material onto one of the two axes of the jaws, and then move the material along that jaw-axis until the axis of the material is coincident with the axis of rotation. In other words, don’t try to adjust the position in the X and Y planes at the same time.
Step two, then, is to loosen the minimum-reading jaws a half turn or so, and then rotate the chuck to get at the opposite jaw. If the total deflection was 0.080 inch, crank the maximum jaw in half of that and then rotate the jaws to see if you get the same reading on opposite sides. At this point don’t obsess on getting it exact, just get it close to being the same; well fine-tune it in step three.
In my case I got it within 0.072 inch by eye. The jaw nearest the maximum deflection read 0.068, and the opposite jaw read 0.004 inch. So I backed off a turn on the 0.004-inch jaw, rotated the chuck to the 0.068-inch jaw and turned the screw to take up half of the difference (0.068 + 0.004) / 2 = 0.036 inch. I then reset the dial to zero and rotated the chuck. I missed by 0.002 inch, which is close enough for the moment.
Now rotate 90 and repeat the process. Here I was off by 0.000. Lucky me!
Step one got you into the ballpark; step two put it within a couple of thousandths; now were going for the final tune-up to get it dead on.
The long-stroke dial indicator is OK for most work if you were starting with raw stock and didn’t care if the round portion was centered on the square section. But if you are cutting an O-ring groove into an existing shaft, you’ll want to get really close. Thats where we shift to a different dial indicator.
Its commonly known as a criterion indicator and is a lot more sensitive; where the long-stroke fellow has a couple of inches of travel, the criterion has only 0.045 inch. And it usually goes plus-minus through a zero point. Add to that the dial being marked off in 0.0005-inch increments, and you can see that this is a fine-tune instrument.
Youll use it in generally the same way as the long-stroke indicator in that it should be positioned such that any adjustment of the material should move the contact tip as much as possible. By that I mean that the finger should be perpendicular to the desired direction of travel. To do that you’ll find that the little finger/contact probe can be rotated to point straight up or any other convenient angle. Again, this is not an expensive tool, and you need one if you’re going to make parts as accurate as your drawings. So make chips, and have fun.
The Adjustable Open-End Wrench
I earlier cast aspersions upon that most humble of wrenches; that tool that is but a short step removed from those locking pliers most commonly known as Vise Grips when it comes to removing recalcitrant bolts. As aspersions go, casting them in the direction of this tool seems justified, because why is it that even a mediocre open-end wrench works fine where an adjustable wrench is, at best, a lousy hammer?
First of all “Crescent” like “Vise Grip” is a trade name. Adjustable open-end wrench is the generic nom de guerre of this fellow, and ubiquitous though it may be, not one person in a hundred uses it to full advantage, which might have led to its lowly status in the tool box. However, your status within the intelligentsia and your satisfaction with the tool can be changed with one small understanding. Heres a clue: Whats the primary cause of dissatisfaction with this tool? If you answered “The nut on the end of the handle,” you may be right in the bigger scheme of things, but in this case were speaking of its tendency to round off the corners of the bolt.
The next question is: “What causes that?” And the answer is in two parts. Either the jaws may not be tight enough, or the moving jaw is a sloppy fit within the handle. As it turns out, both of these problems can be minimized by turning over the wrench from the way it is usually employed. Don’t believe it? Take a look at where the point of contact is between the wrench and the bolt head; if you use the wrench in the standard fashion, the point of contact between the moving jaw and the bolt is as far as possible from the handle. That extra leverage on the moving jaw tends to open it. With that in mind, where would you want to put the least strain? If you answered, “As close to the base of the movable jaw as possible,” you’re moving toward that elite crowd. To do that, just turn the wrench over.
The problem can be further minimized by looking closely at the slop in the fit of the moving jaw when you buy a new wrench. If it moves all over, put it down and go spend a few bucks for one thats got a precision feel to it. Good birthday present, too.
Got a tool thats a winner? Write to me about it and let us all in on the good stuff. Next month Ill tell you about the free, full-blown CAD program that I used to draw those illustrations of the wrench. Youll need it to do the drawings now that you’re using dial indicators for your setup.
Editors note: If you have specific questions for author Bob Fritz, or if you have certain projects youd like us to cover, email us at [email protected] with “Home Machinist” in the subject line.


