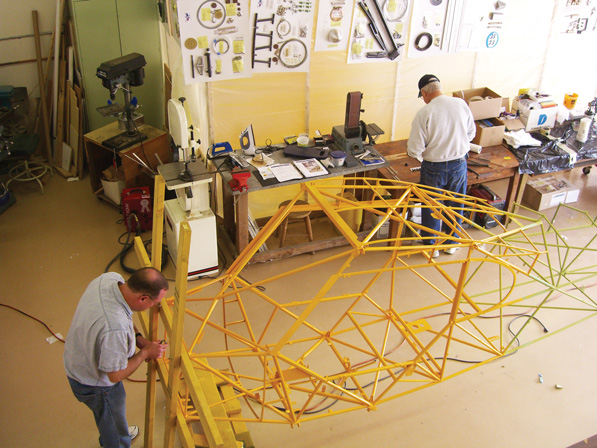
Jim Ritter helps put 2x4s on the nose of the fuselage frame to make rolling the cage on its side easier—also helpful for painting the cage.

Pop rivets in nutplates are for screws that will secure the boot cowl, which wraps around the forward portion of the cabin just behind the cowling.
I feel like I am making real progress when I get to bolt on parts. Previously, we looked at the kit-selection process and getting started. I did my inventory, put things away, built a spray booth, and painted the fuselage cage, but none of that really felt like airplane building. Now I am slicing up vacuum packs, pulling out parts, turning wrenches and getting the pages of the assembly manual greasy. That’s more like it!
In the Texas Sport Cub kit, the floorboards go in first. The epoxy varnish we used kept giving us fits, but we finally just wore it out, and the floorboards ended up really nice. Texas Sport precuts these for you, so the installation is a snap. The floorboards make the mounting points for the rudder pedals and the heel brakes, and these items took some fitting to get them to work smoothly. They seem a bit primitive compared to the GlaStar and Sportsman parts I am used to, but they are true to the 70-year-old design of the original Cub. To save weight and remain like the original, only the rear-seat heel pedals have master cylinders directly attached. Cables run back from the front pedals to give the front seater brake control.
The Controls
After the brakes and rudder pedals, the control sticks go in next. These parts look to be exact duplicates of the original Cub parts right out of the Univair catalog. That means they work, but they aren’t exactly 21st century technology. Some “put it in, take it out, tweak it a bit, and try it again” was required to get it all working smoothly. With all of the cockpit hardware in place, I ran the rudder and aileron cables back and tied them off for later. Newer versions of this kit feature improved control-stick hardware out of aluminum that works better and is a bit lighter.
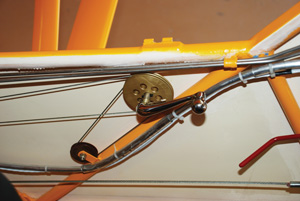
Trim is adjusted with a 1950s style window crank that moves a continuous cable connected to a jackscrew at the horizontal stabilizer.
The trim system comes next. The leading edge of the elevator moves up and down to trim the airplane. The system works through a window crank up front and a continuous cable that turns a jackscrew in the back, with a few extra pulleys and springs along the way. It took a few minutes to figure everything out, but once it’s in place it seems to work well enough. The electric trim systems we put in the GlaStar and the Sportsman were easier to install but probably less reliable. The Cub trim indicator consists of a pointer mounted up in the left wingroot that is moved by a cable attached to the jackscrew. Manual indicators and 1950s-style window crank actuators seem a bit old fashioned, but they are tried and true, and no electrons are required.
Fueling Up
Fuel lines come next. Each of the two wing tanks has two fuel outlets—one forward and one aft. That way fuel is available in long climbs or descents even with minimal fuel in the tanks. The GlaStar and Sportsman use aft pickups and header tanks to deal with this problem. These are just two different ways to deal with the issue, and each has its advantages and disadvantages. All fuel lines are 3⁄8-inch aluminum and run to a single drain behind the back seat and through a simple on/off valve in the cockpit. Rubber hoses make the link to the tanks, which feature simple sight gauges—nothing fancy, just the basics. But at least it’s not a bent wire bobbing on a cork, like the original Cubs.
To get the fuselage fabric covering to take its proper shape, stringers must be added along the sides and top of the fuselage frame. Texas Sport provides some nice aluminum extrusions for this that go on with some tiny 4-40 screws and lock nuts. Many of them ended up on the floor before finally assuming their proper place in the airplane. In one place the mounting tab was a bit out of position, so I had to fabricate a standoff to keep the stringer straight. Luckily, I had the tools and material in the shop to make the part I needed.
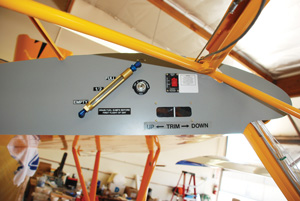
The fuel quantity instrument is a sight gauge. Trim indicator, ignition switch and ELT control are also located in the left wingroot.
Wings & Things
Texas Sport does much of the wing work for you as part of the kit, but not everything. The wingtip bows must be installed, and 11 internal braces must go in each wing. Another larger brace slips into a tube through each wing tank, and it has to be fitted and secured in place, plus several fuel line and fuel gauge fittings must be installed. Once I secured each tank in its respective wing, I made an aluminum cover to go over the top, which allows access to the tank for future servicing without removing the fabric covering of the wing.
Conduits for the wingtip strobes need to go in at this time, as do the various lines for the Dynon pitot-tube system. This includes the pitot line, the angle-of-attack line and wires for the temperature probe. The Dynon also needs to have the remote compass mounted in one wing, so this is the time to put that in, too.
I was waffling on the Dynon versus traditional instruments decision, but it became clear that there was no way to go back and retrofit the Dynon system in the wing later. I decided to go with the fancy new display right then and there. In its favor, the Dynon FlightDEK-D180 includes all of the basic flight instruments and engine instruments in one neat, lightweight package. In addition, you also get a remote compass, angle of attack indicator, six-probe EGT and CHT, and things I wasn’t even going to install such as artificial horizon and directional gyro.
The real argument against using the Dynon is that it isn’t very Cub-like. I really choked on the thought of a glass-panel Cub for a while, but logically the Dynon was the only way to go—it weighs less and has more features. Still, I have the feeling Cub purists will never let me hear the end of it, but then again, they probably won’t think much of the Jabiru engine either.
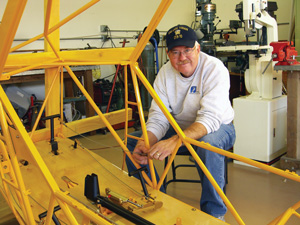
The rudder cable, brakes and control tube are installed. Yep, those are heel brakes.
Pulleys and cables finish up the wing assembly process, leaving us ready for the fabric covering and paint. I did the wing work at the factory for a number of reasons. Because I wanted the new lightened wingspars, I had delayed delivery of the wings. Earlier kits came with heavier spars that allowed for a gross weight of 1600 pounds, but I was aiming at a Light Sport gross of 1320 pounds, so there was no need for the extra strength or the extra 15 pounds added to the empty weight that would come with it. To save delivery charges, the wings ended up sitting in Texas waiting for the Jabiru engine to arrive, along with some additional parts. Combining all of this in one load was the only sensible thing to do. So because the wings were sitting there anyway, I thought I might as well go to the factory and get some work done. This also gave me the opportunity to look at a Jabiru engine installation and take some pictures and notes—to sort of create my own instructions. At that time, the factory had not yet finished the Jabiru firewall-forward portion of the builder’s manual.
Minor Misstep
In my impatience I installed the firewall and the boot cowl out of sequence. It seemed to make perfect sense to me at the time, but when I went back to the factory to cover the wings, the staff told me I shouldn’t have taken that step without the instrument panel in place. Hmmm, I thought, wondering why the assembly manual hadn’t pointed that out. (Actually, that is not exactly what I thought, but this is a family-friendly magazine.) While I was there I talked them into lending me a dummy instrument panel so I could refit the boot cowl when I got home. The good news is that it is really hard to do something to fiberglass that can’t be fixed with some cloth and resin and filler and sandpaper and elbow grease.
With all of this done, nothing stands in the way of covering the wings, but we’ll save that for next time. So far I have bolted together about everything I can except for the engine, the instrument panel and the interior. These things will come soon, but there is a sequence to be heeded. I already caused myself some trouble by trying to fit the boot cowl before the instrument panel, so I don’t want to jump ahead again. Fabric work will be a totally new experience for me. I am looking forward to it, but I really don’t know what to expect. I’ll soon see.
For more information, call 866/746-6159 or visit www.txsport.aero.


