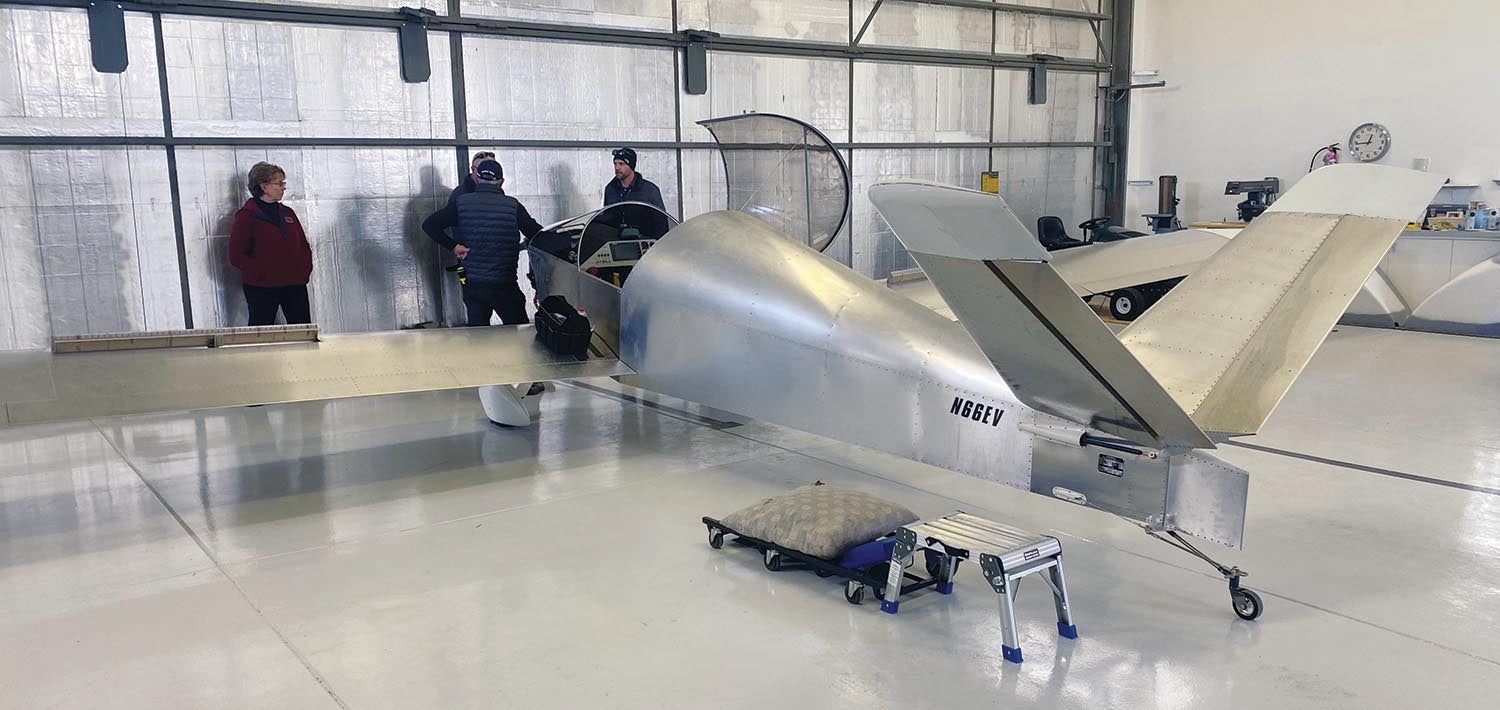
 After years of on-again, off-again building, we have finally reached the point where there are no parts left in the box and it’s time to enter the flight phase of this project. Building any homebuilt involves logistical challenges, but building a motorglider (or any glider for that matter) poses one that most sport-plane builders don’t face—finding a hangar big enough to accommodate a 46-foot wingspan. While traditional gliders are usually designed to have easily removable wings, the Xenos is not quite so simple to disassemble, so you can’t simply pull the wings off after every build session and store them away. It is probably a 2- or 3-hour process to remove the wings and involves several people. Putting them back on is similar. So before we could commit to the final stages of assembly and rigging, we needed to find a hangar big enough to do the work then store the machine through Phase I.
The right hangar became available at our airpark just as the massive winter of 2022–23 arrived, so while we were able to get the components in and assembled, it became a several-months-long waiting game before enough snow had melted to allow the hangar doors to be opened, motor testing to commence and the final stages of flight preparation begun. But with clearing weather, we put the wheels in motion to get the project inspected, licensed and ready to go. First, of course, we had to determine if the eXenos was going to be an “aircraft” or a “glider.” (See “The Ins and Outs of Licensing a Glider,” below.)
Opportunities Present Themselves
One more slight bump in the road to our inspection presented itself—in a good way—just before our scheduled visit from the local FSDO. That was the release of an updated Advisory Circular 90-89, the Amateur-Built Aircraft and Ultralight Flight Testing Handbook, which incorporated the long-awaited task-based Phase I option. Phase I has traditionally been based on a specific number of flight hours, usually 40. A task-based Phase I allows a pilot to complete a structured flight test program instead—when the test program is complete (and documented), the airplane is released into Phase II regardless of the number of hours flown. In the interest of full disclosure, I have been involved with EAA in the development of the EAA Test Program and have flown the program a couple of times with different aircraft. Done properly, it still takes more than 30 hours (more like 35) for most light aircraft. Even so, that does shave a couple of hours off of the previous arbitrary time and, much more importantly, it tests and documents the actual airplane thoroughly.
The important point for our purposes here is that the new AC was released just 10 days before our scheduled inspection for the eXenos—and having been part of the process, we really wanted to have it approved for use as part of our operating limitations. Since the guidance on how to use it had not yet been disseminated to the field (from FAA headquarters), we had to get help from our friends in high places to smooth the way and make sure that all the I’s are dotted and T’s crossed.
Fortunately, our friends at the Reno FSDO were excited to help out in being the first to issue this new operating limitation and, equally important, the epic winter weather had not yet ended in our area—so a delay for paperwork did not impact the process. We went ahead with the inspection and let the paperwork machine turn over at its own pace.

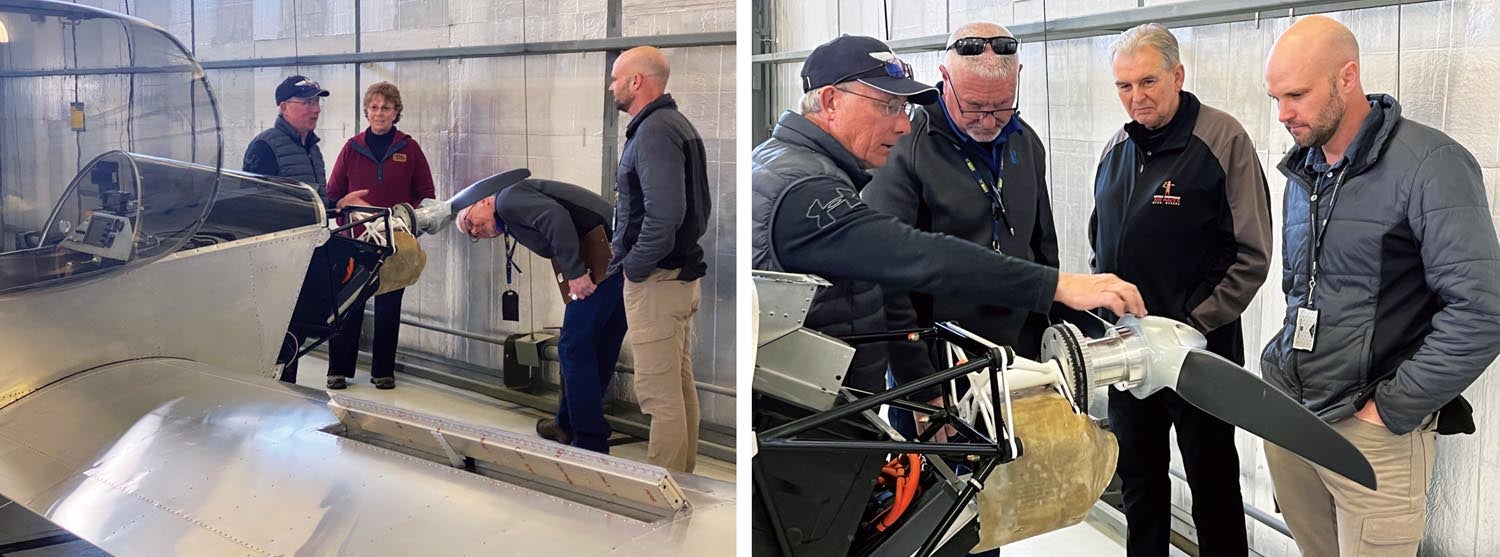
“Turn Your Head and Cough…”
We’ve been through numerous homebuilt AWC inspections before so knew the drill well—have the airplane opened up and all the paperwork nicely organized and be ready to answer the inspector’s questions honestly and fully. In the case of the eXenos, this meant not only being ready to show that the airframe was built well and that all connections and controls were properly safetied and rigged, but we had to explain just how that funny-looking power system worked!
The airframe is, aside from the hangar-filling wingspan, conventional and very simple. The long wings meant that there were some extra pushrods and idlers in the aileron linkages to look at and, of course, since it is a glider, it has a spoiler system to inspect. The V-tail is somewhat unconventional, so there is a mixer to look at. But in the end, it’s just control connections, rod-end bearings and jam nuts to check.
Our inspector found just three things that had eluded all previous sets of eyes that have looked at the plane—one missing rivet in a row (of 100) on a wing skin, a mandrel that hadn’t broken off stuck in a rivet inside the fuselage and a bushing on the control mixer that was installed backward. All three took about 7 minutes to fix—and the airframe was ready to go.
An interesting anecdote about the wing attach hardware: The wings are held on by two big 1/2-inch bolts through the forward spar and fuselage structure, plus two smaller bolts fastening the rear spar to the fuselage. The rear spar bolts are simple AN5 bolts with castle nuts and cotter pins. The forward big bolts have to be inserted from the rear (backward from normal convention) because of the fuselage taper. This same fuselage taper makes it essentially impossible to get a nut on the threads of the bolts once they are installed. I agonized over this after we had installed the wings, wondering how we had screwed up so badly in drilling those attach holes that we’d not allowed room for the nut installation.
After about a month of worrying, I finally called Sonex and confessed my sins—to which I got a laugh and the comment that “none of our factory airplanes have nuts on those bolts—we just put a hitch pin through the cotter pin hole!” The bolts aren’t really being used as bolts, they are being used as pins, loaded in shear, and just have to be kept from falling out. This gave our inspectors a good laugh after we told the story and they were satisfied with the factory explanation.
The power package presents a wonderful conundrum for anyone who inspects it. Basically, there isn’t much to inspect! Aside from checking that all the connections are secure and the cables are adequately restrained (there isn’t any vibration to worry about), there isn’t much else to look at. The motor drives a pulley that drives the prop hub—three moving parts. With the tension and motor mount properly adjusted so that the belt doesn’t “walk” on the pulley, you’ve done all the mechanical inspection you can. There is nothing to lubricate. All nuts and bolts forward of the firewall are safetied with nylon nuts, marked with torque strips and easy to check. The only reason we took the cowl off for the inspection was because we knew the inspector would be curious about how this new system worked!

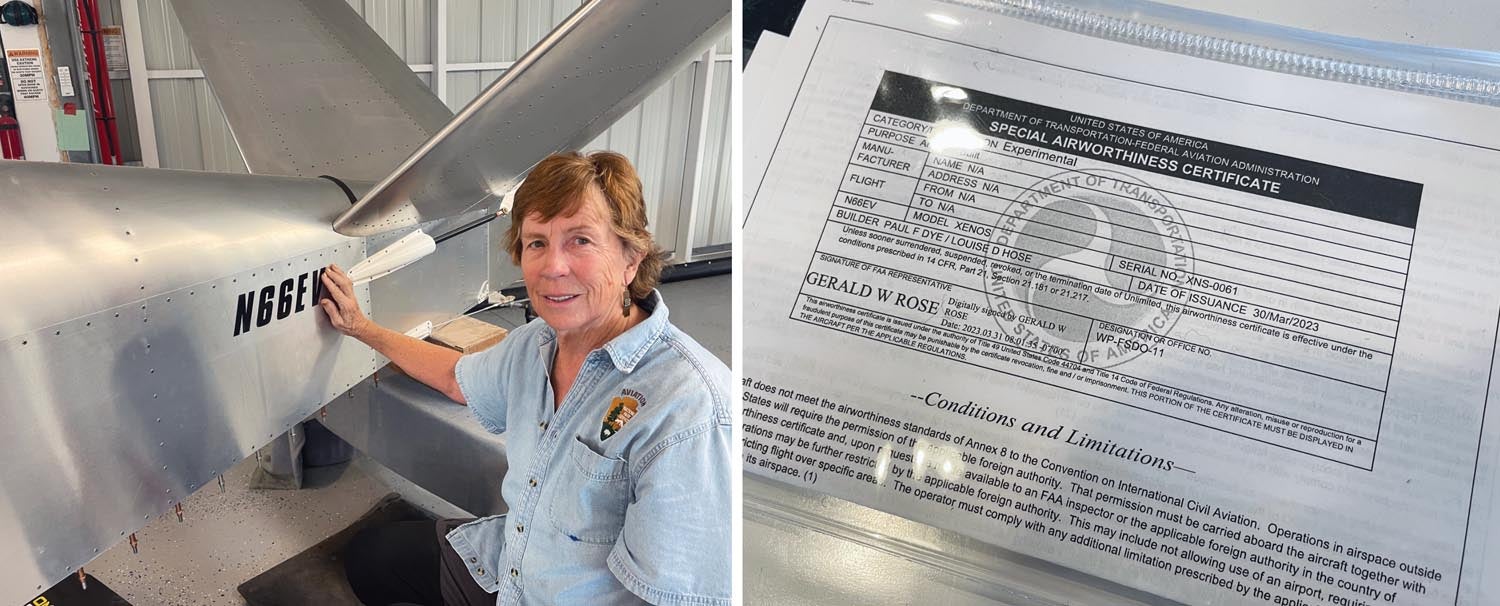
Paperwork is, of course, one of the important things an inspector has to look at. As with any E/A-B inspection, the data plate has to match the registration exactly—right down to punctuation and spacing. In addition, this all has to line up with the forms you submit for the airworthiness application and affidavit that attests to the fact that the airplane was built for “education and recreation.” We laid this all out on the workbench and showed the inspectors our method of tracking the build. Instead of keeping a narrative or spreadsheet building log, we simply kept notes on the Sonex drawings, signing (and dating) each one as it was completed, tracking the entire project on the master flowchart drawing.
In our case, this was superfluous, since the inspector had licensed previous planes for us and has been following the Xenos project over the years in KITPLANES® articles—he knew we’d built it and didn’t have any questions.
Equally important to getting the AWC, we needed to prove during the inspection that Louise qualified for the repairman’s certificate for the airplane. Since I already have my A&P certificate, I had no need for the repairman’s ticket, and since we had built the airplane together it made sense that she have it. So we dragged out a computer with pictures from the past eight years of building to prove that she had been an integral part of the work. We also had her prepare the condition inspection checklist for the airplane, which is fairly unique once you get to the firewall-forward portion. Basically, she erased almost everything.
Ground Testing
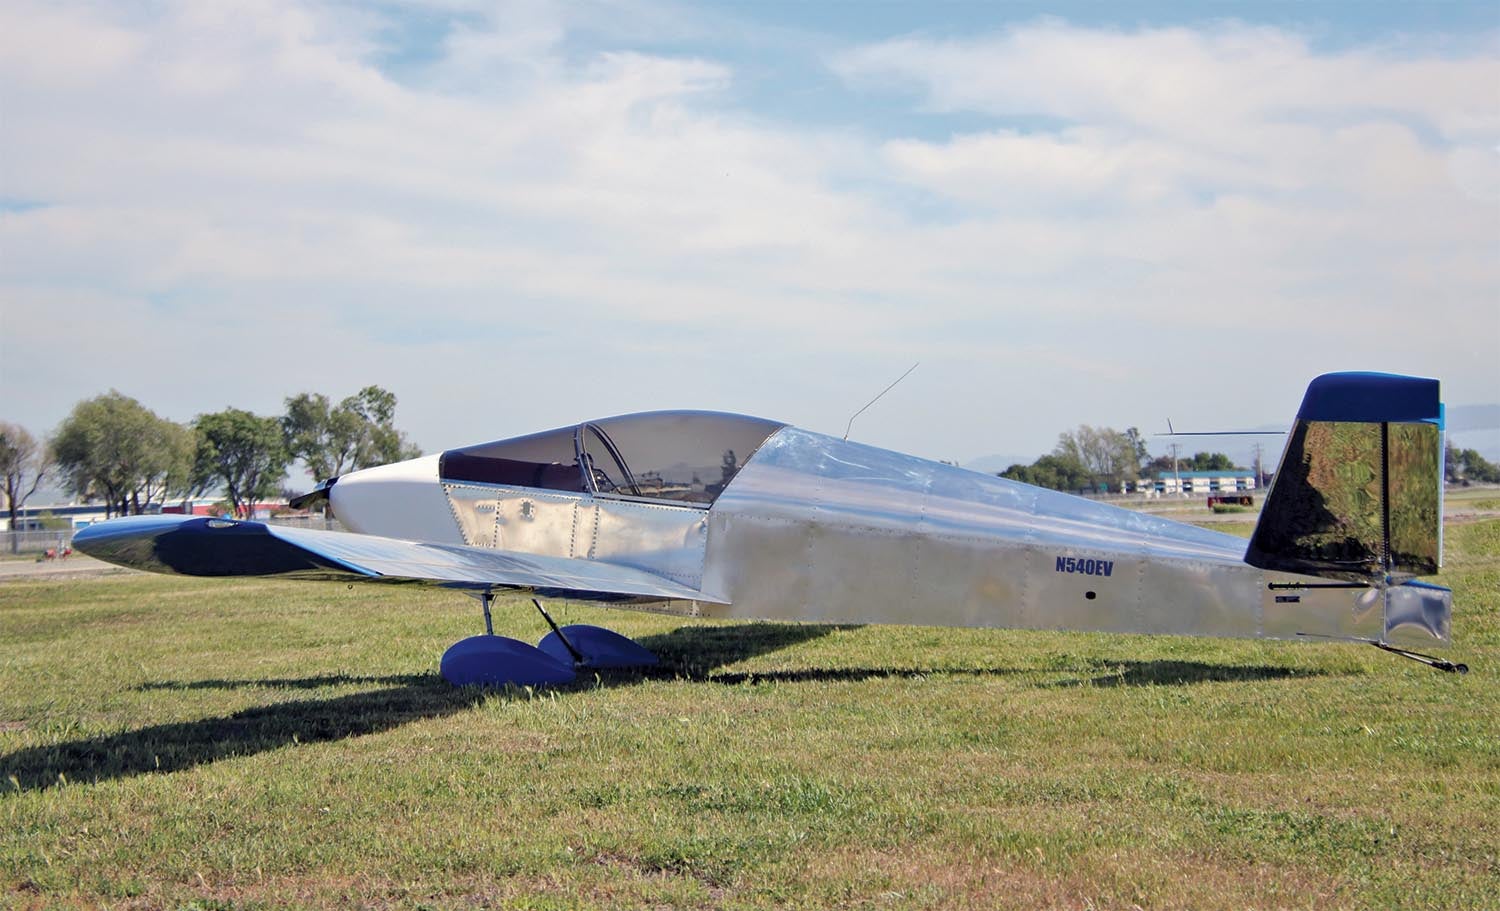
While we had taxied the fuselage (without wings) and accumulated about an hour of runtime on the power system over the year of final integration, we had left true preflight testing of the power system until we got closer to first flight. Once our winter snows had melted enough to open the hangar door, it was time to roll the machine out and taxi it around with those huge wings sticking out on either side. Flying gliders doesn‘t really prepare you for taxiing when the wingtips are overhanging the vegetation on both sides—you have to be very careful to plan ahead and see where those tips are going to go before committing to a turn. And you also have to be ready to just stop, get out and reassess the situation, which could include backing up and spinning the plane around to take a different path.
We had modified the original Xenos ground handling from the single brake lever and non-swiveling tailwheel because of the taxiway configuration at our house. We knew that in order to get to the runway, we were going to have to be able to pivot tightly on either main gear, so we changed the tailwheel to a full-swiveling type and added individual toe brakes for each main gear. This gives us the same maneuvering capability as most taildragger airplanes. Our first taxiing with the full airframe proved this to have been a wise decision; the airplane actually handles better with the wings on than when we were zipping the fuselage around by itself—probably because the extra mass of the wings adds some stability.
The creator of the power system, Gabe DeVault, recommends doing full-battery runs with the airplane tied down to verify that the battery will support the planned flight duration, that cooling is adequate for all power system components (motor, controller and battery) and that you can generate the required power and rpm for flight. Doing these runs also allows you to characterize the relationships between displayed motor and prop rpm, as well as seeing the power values generated for specific motor-speed conditions.
Because our entire “engine monitoring” system was taken directly from the motorcycle in the form of the instrument cluster, we can only see certain parameters, several of which have to be interpreted from highway numbers to flight values. The dash display shows battery state of charge (how much power you have left in the battery, in percent of full), motor temperature, motor rpm and “speed.” The speed is computed directly from motor rpm because the motorcycle has no gearbox. So when you see “speed” on the dashboard, this is really an indication of rpm—just scaled in a funny fashion.

What we did during these runs was to record motor rpm versus highway speed and build a cue card that correlates the two. We also computed prop rpm (from the known gear ratio in the reduction drive) and included that on the cue card to be mounted on the panel. The prop rpm for the short Sensenich prop turns out to be about 3000 rpm when the motor is turning a few hundred rpm below redline, and that is about as fast as I generally am used to turning a prop anyway (I am not a Reno racer…) so it all works out.
During these runs, we emptied the battery in a continuous run at essentially “cruise” power with occasional bursts to full takeoff power. It took about 50 minutes to draw the battery down from 95% to 15%. We then charged the battery back up (this took about an hour and a half), then ran it up again—this time tickling the motor’s maximum continuous temperature of 250° F. Redline is 300° and we didn’t want to get anywhere near that. This run also lasted about 50 minutes and, when we ended, the battery had about 12% left. Hooking up the charge cable, the system complained that the battery was too warm (there is an indicator on the dash for this), so we had to let it cool down (blowing air into the cooling inlet with a simple office desk fan) for about an hour. At that point, the battery was happy accepting another charge, so we topped it off and called it a day.
So with two full battery runs, we determined that we had more than adequate cooling while sitting still (we expect better cooling in flight) for maximum-power runs, and durations that are consistent with what we expected. That essentially “certifies” the power system to our expectations. We have called it ready for flight. Neighbors who watched the process were surprised at just how much noise this “quiet” electric airplane makes—indicating that when you turn a prop at 3000 rpm, the tips (even on a short prop) generate quite a bit of acoustic energy! Electric flight is not necessarily silent flight.


Thanks Paul for the ins and outs of licensing it as a glider. I’ve looked into it before and it’s hard info to find. Always great to read articles by you. It’s a small world. Congratulations on yet another build.
Comments are closed.