Gauge blocks are the foundation for pretty much everything. At least everything that has to do with precision measuring and manufacturing. I use parallels, rounds and all sorts of other homemade “gauge blocks” when setting up jobs. Gauge blocks can be used to set accurate and consistent travel limits, to transfer witness marks and to create “story sticks” for quick reference work.
About now, all the rocket scientists and metrology lab techs who are reading this are thinking, “You don’t use gauge blocks for that!”
It’s true. So, before I get to the crux of using gauge blocks in the home shop, a little background is in order.
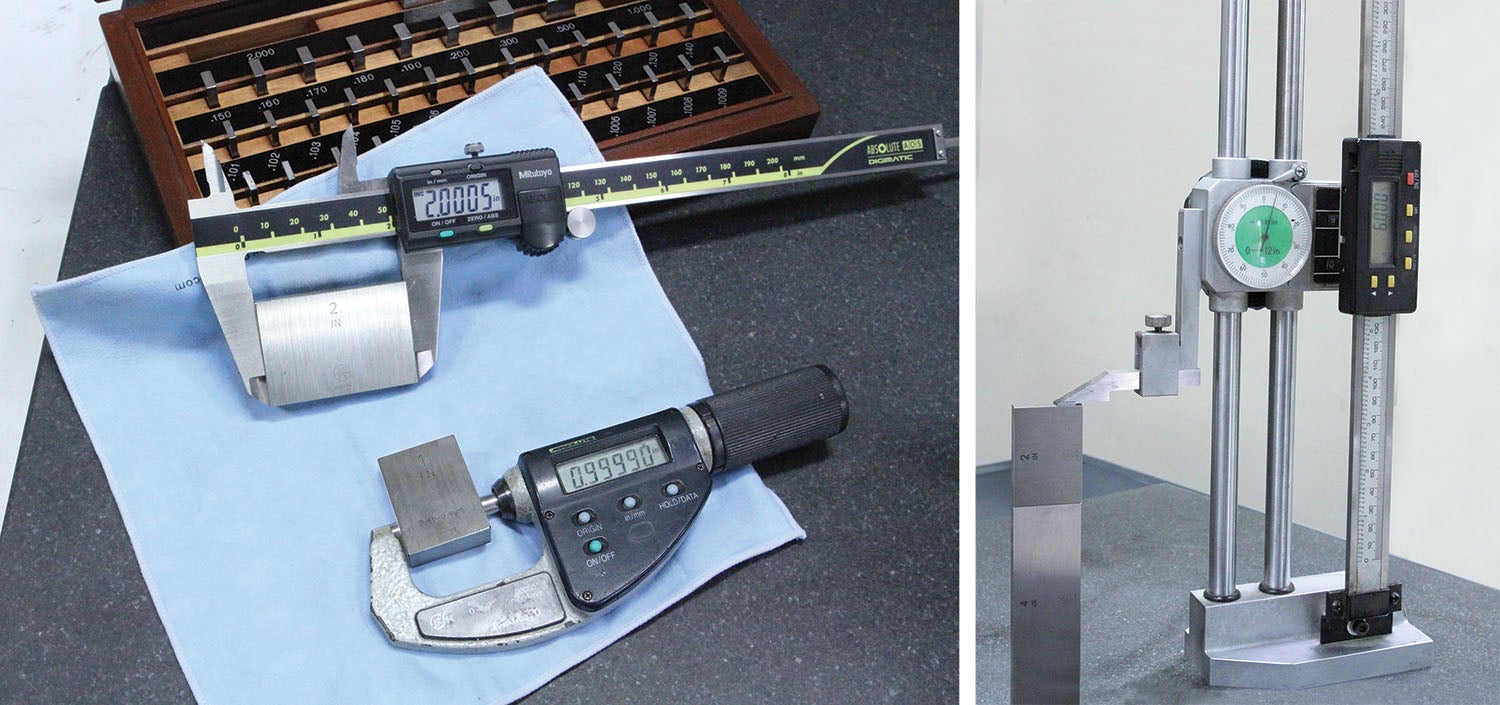
Precision gauge blocks are the standard method for checking (the official word is calibrating) the accuracy of measuring tools. By comparing the readout of the tool, be it a vernier scale, mechanical dial or digital display, with the dimension of a gauge block or blocks, you can verify the accuracy of a tool.
Gauge blocks for calibration are 1) super precision, 2) are handled with extreme care by people in white lab coats and 3) are never used outside a temperature-controlled room. Gauge blocks themselves are also subject to regular calibration and are therefore known as secondary or transfer standards.
I vividly remember back in the 1960s watching my dad wringing (a special technique for sliding them together) gauge blocks into a gigantically high stack to calibrate manometers for Navy and Air Force avionics labs. These machines were beasts of complex plumbing, gears and electronics that stood over 12 feet tall and had to be maintained in a temperature-controlled room. The fact that the military needed a machine that could generate pressure up to 110 inches of mercury (with accuracy as precise as 0.0003 of an inch) tells you something about the Mach capabilities of the aircraft: e.g., 1000 knots airspeed is calibrated to 73.5454 inches of mercury pressure.
Certified repair stations are required to calibrate measuring tools on a regular basis. When an overhaul shop checks a crankshaft journal to see if it’s within factory limits, they have to be confident that the measurements are accurate.
Home shop users should check their calipers and micrometers at least once a year. They should also be checked if they have been dropped, loaned out or used anywhere they could have been subject to misuse or abuse.
Since not many of us can justify hundreds of dollars for a set of gauge blocks (even a single, high-quality, 1-inch gauge block costs $30 to $40), what can the average home shop machinist do?
Most machinists own a set of parallels for setting up jobs in the mill vise (see “Parallels, Stops, and Travel Limiters”). Parallels make pretty decent gauge blocks. While they may not be as accurate as lab-certified gauge blocks, even the most affordable set of parallels should be within 0.0003 inch of the nominal size, which is good enough to confirm a micrometer or caliper is accurate within 0.001 inch.
Making and Using Blocks in the Shop
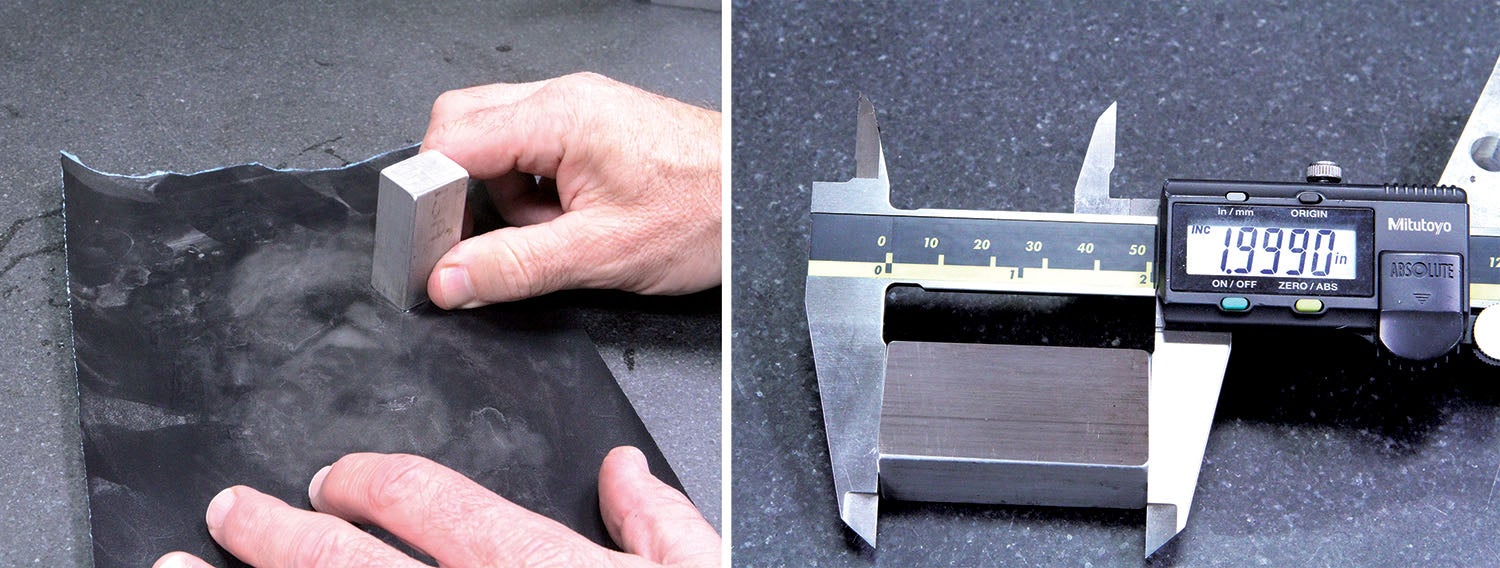
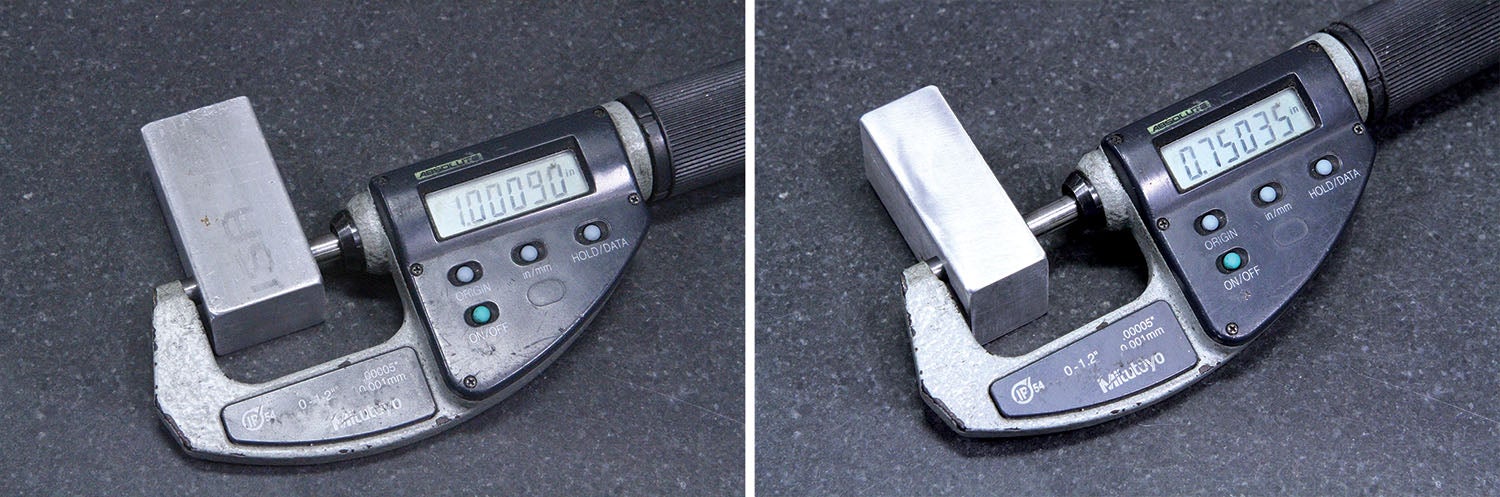
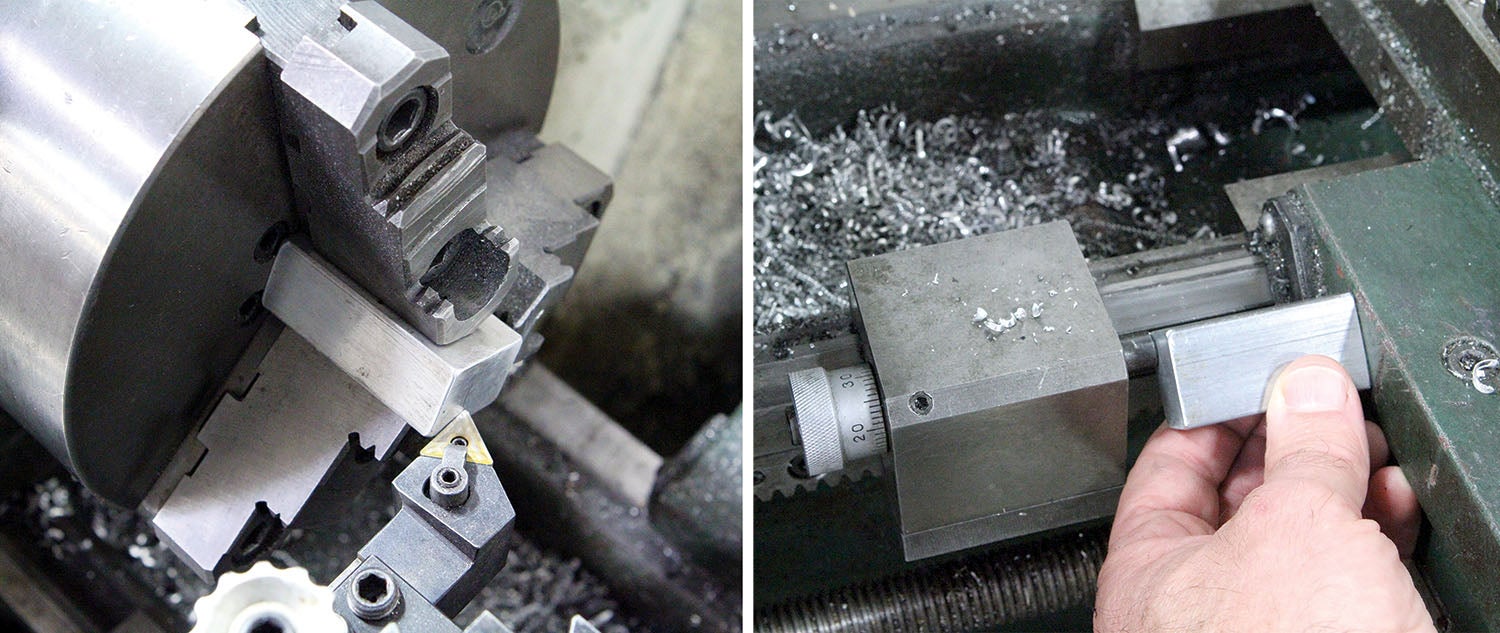
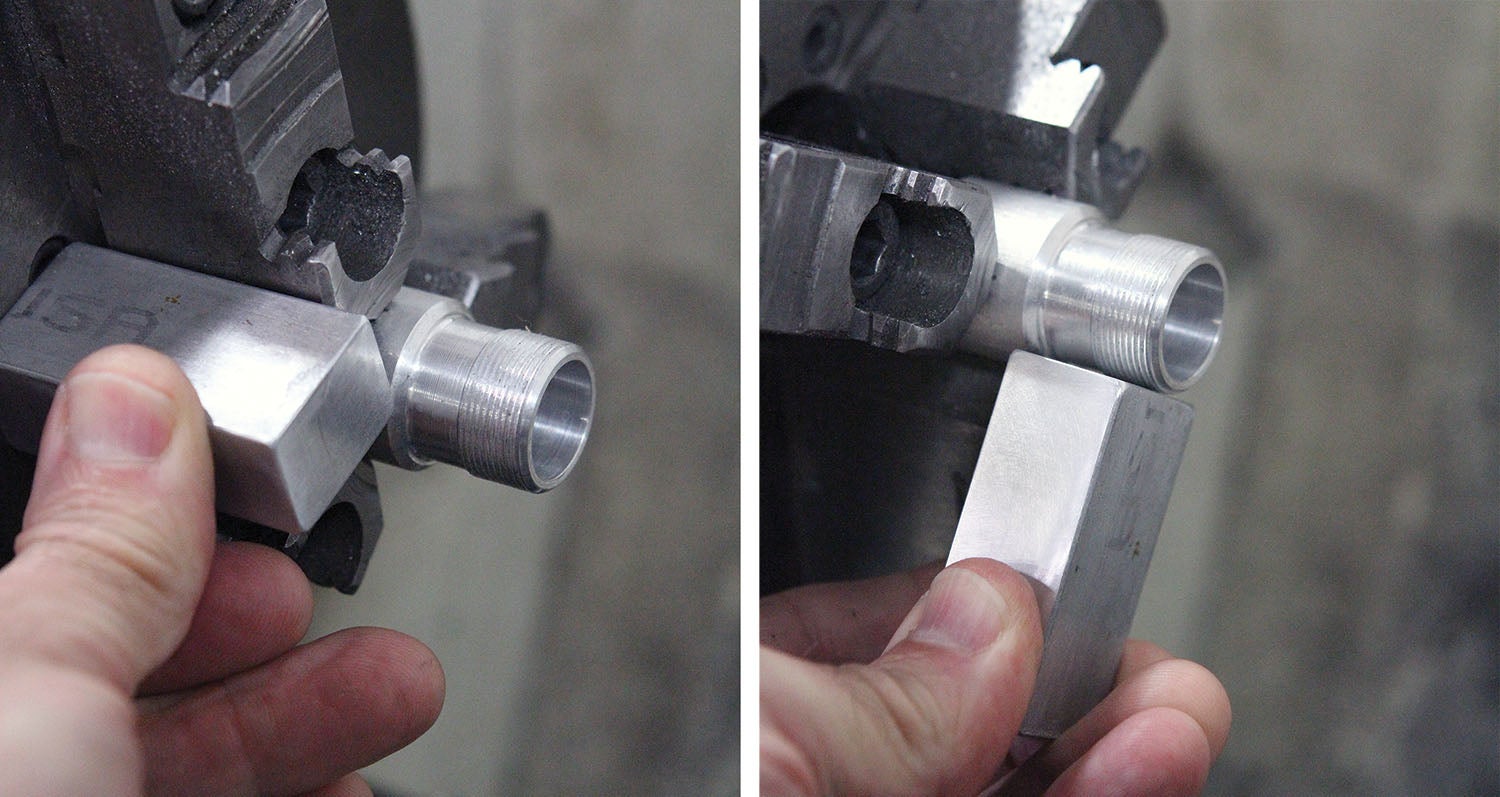
As mentioned earlier, I often use parallels and other homemade gauges to set up lathe and mill work. I recently needed to modify a couple of laser pointers for longer batteries. This involved lathe turning extensions for which there were two critical dimensions: the overall length (2 inches) and the length of the shoulder for the threaded portion (3/4 inch). Rather than fuss with repeatedly measuring and resetting the parts, I used a shop-made gauge block to reference the overall length and to set the shoulder stop.
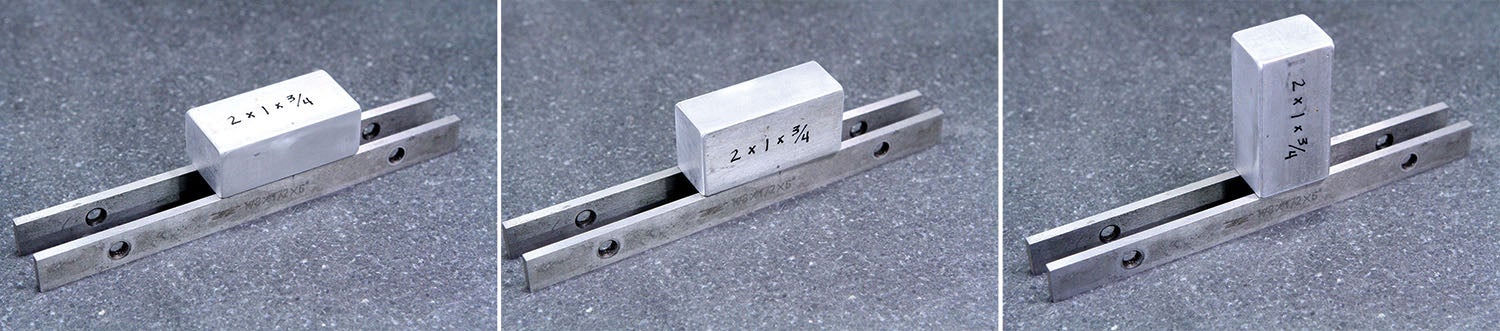
The block was made from a length of 3/4×1-inch 6061 aluminum bar that I cut off and rough-milled to slightly over 2 inches long. After a very light finishing pass on the mill, wet-dry sandpaper was used to lap the ends flat and as close to 2 inches as practical.
Set blocks made for general shop use should be considered expendable. After a few jobs they’ll probably have some battle scars, so they should be checked for dimensional integrity before subsequent use. If dings or dents cannot be sanded down, save them to be resurfaced for some later job. Shop-made gauge blocks don’t have to be made to, or kept at, specific round numbers or exact fractions. Make them to whatever dimension you need, as needed.
Using shop-made blocks for quick and reliable setups is a tried-and-true method limited only by your imagination and is a great reason to get out in the shop and make some chips!


")


As an enthusiasts just getting into at home machining and workpiece holding, I greatly appreciated this information. I’ve not gone to school for these and find any simple help to be most valuable!
Comments are closed.